


How to Make a Silhouette Pumpkin

Materials Needed:
- medium to large pumpkin
- white copy paper
- computer and printer
- stick pins
- black acrylic paint
- small flat-edge craft paintbrush
- small-tipped detail paintbrush
- spool of black lace, beads or other textural fabric trim
- hot glue gun and glue sticks
- scissors
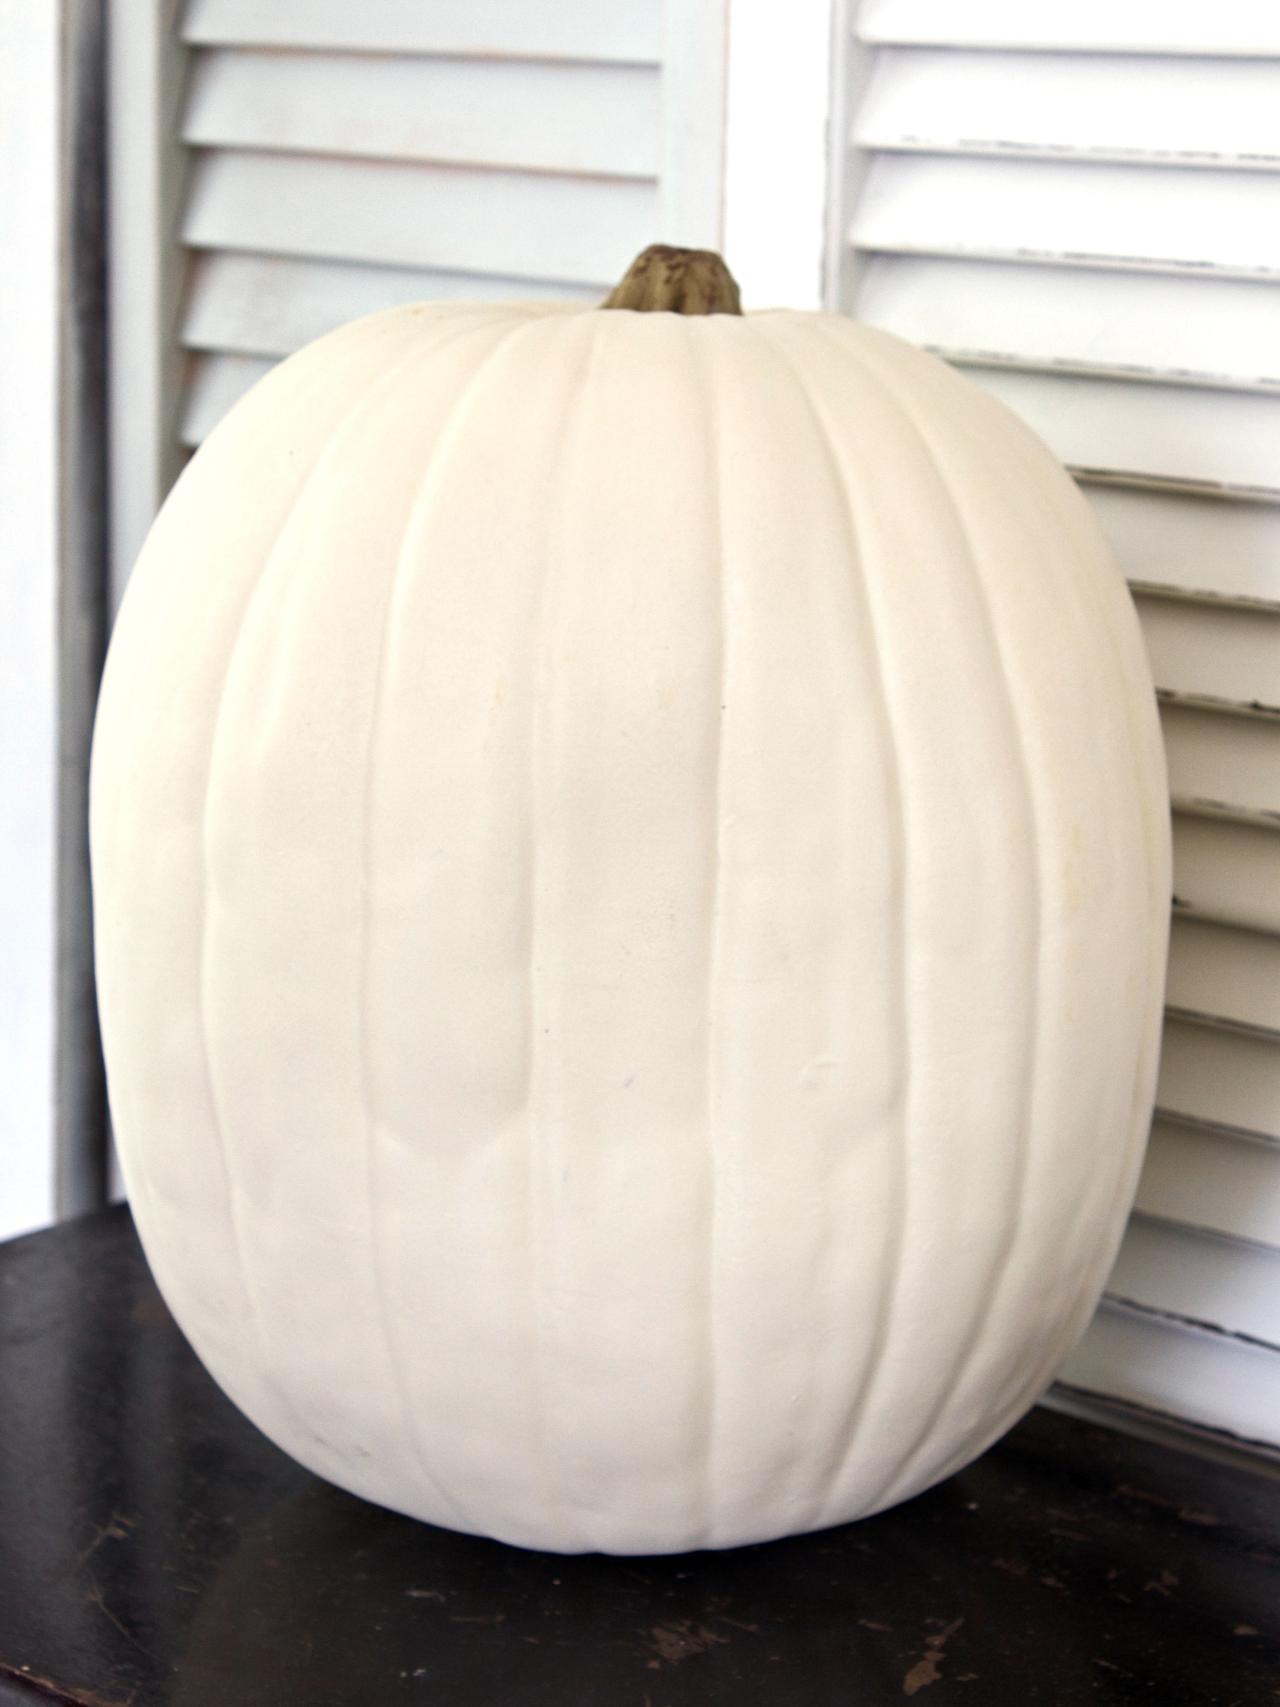
Find the Flat Side
Rotate the pumpkin until you find the flattest side. It will be easier to paint the silhouette on a smooth flat side than a bumpy one.

Print Silhouette
Use a computer and printer to print out a solid black silhouette of someone's face. You can use a family member's profile or simply search for silhouettes online. Tip: Make sure to measure the flat side of the pumpkin before you print so you'll know how large to print the silhouette.

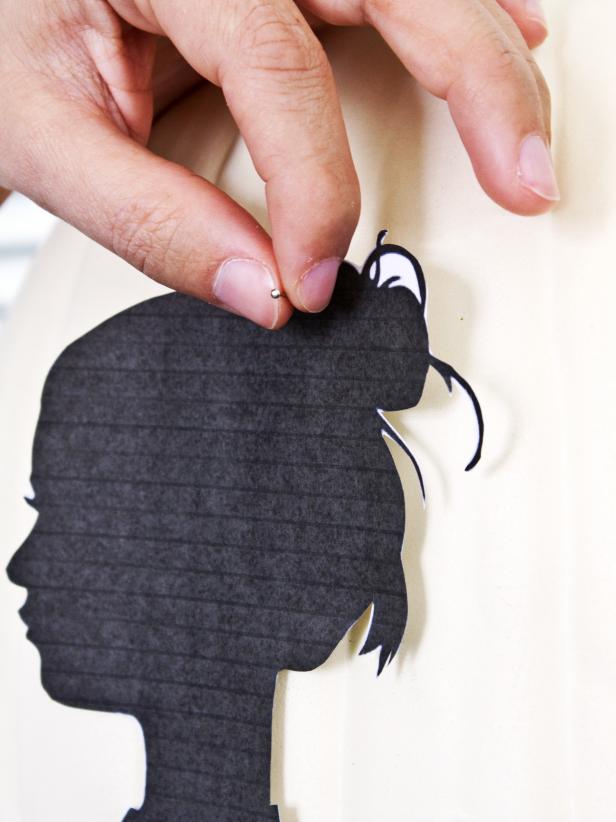
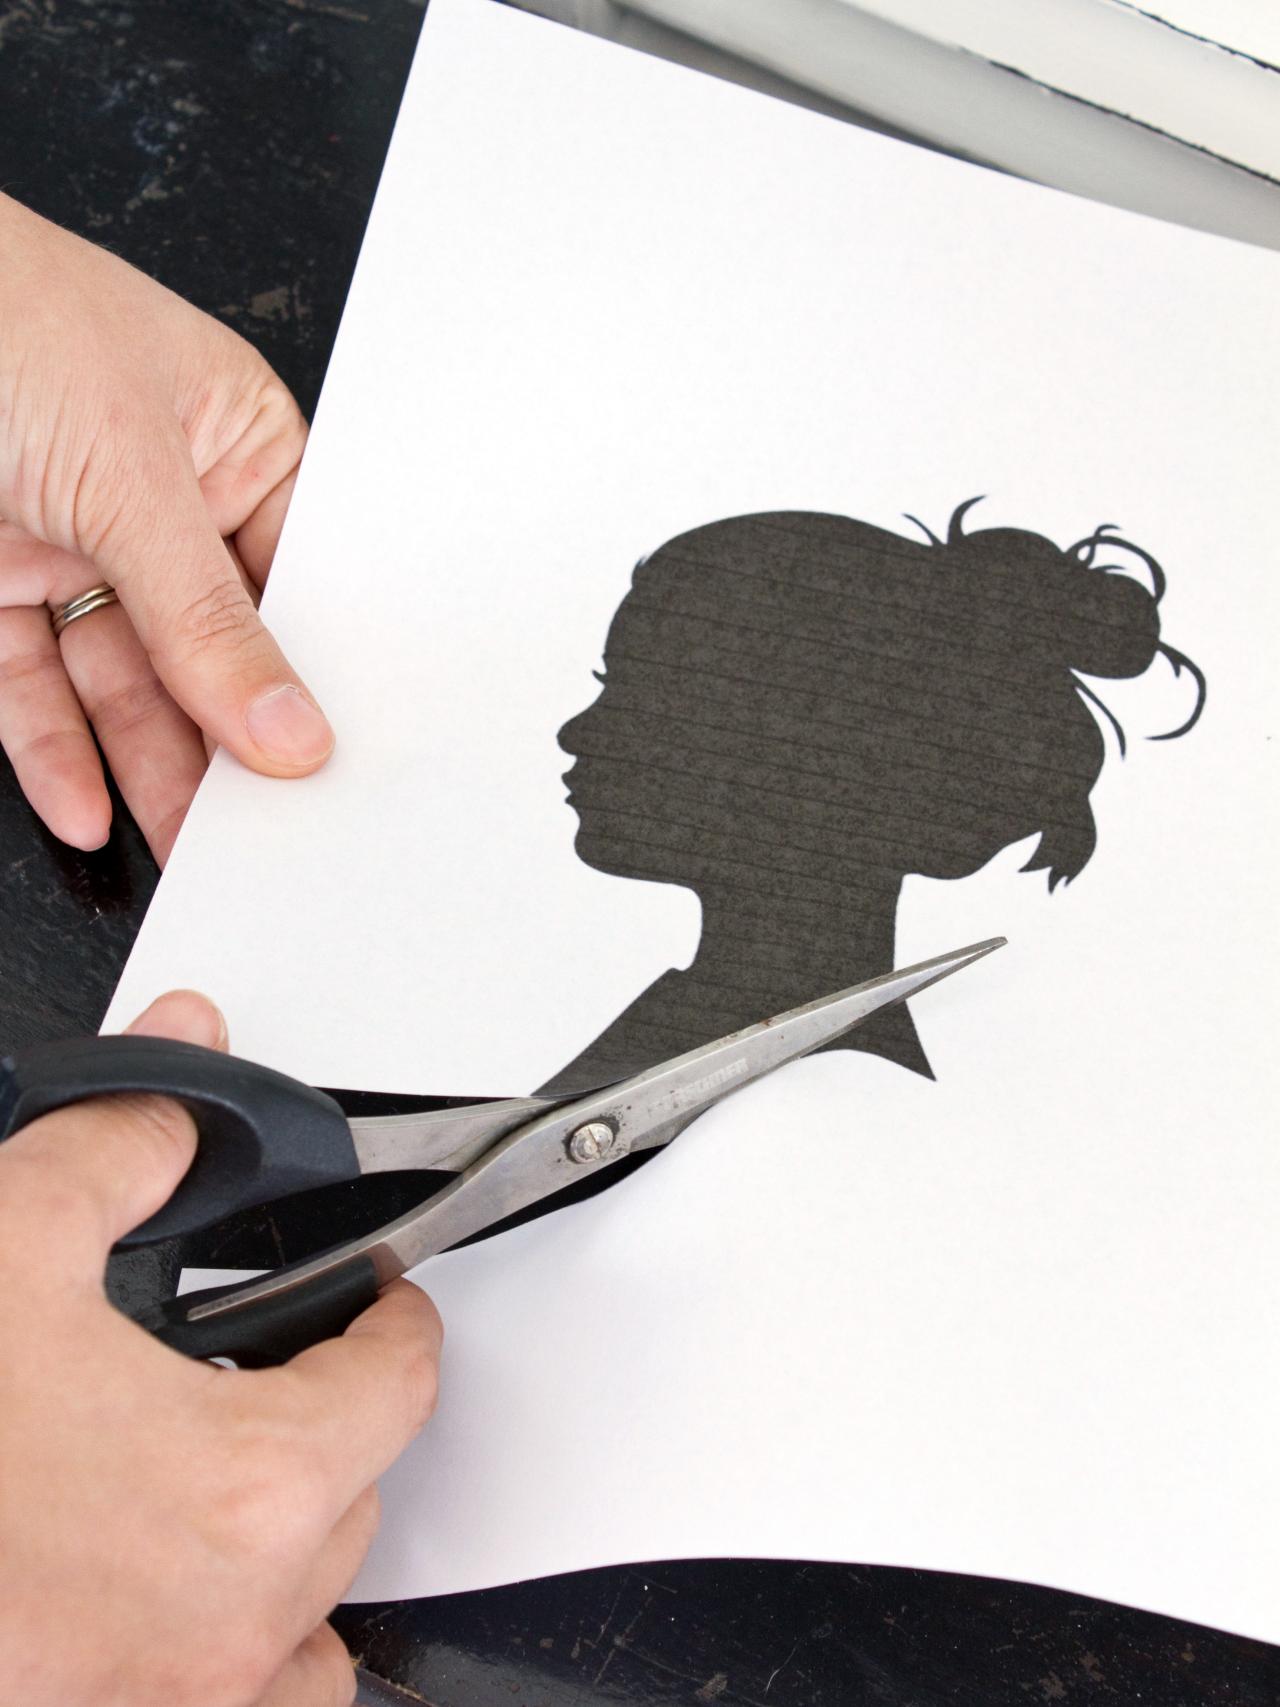
Cut Out Silhouette
Use scissors to cut out the silhouette (Image 1), then temporarily attach it to the pumpkin with stick pins (Image 2).

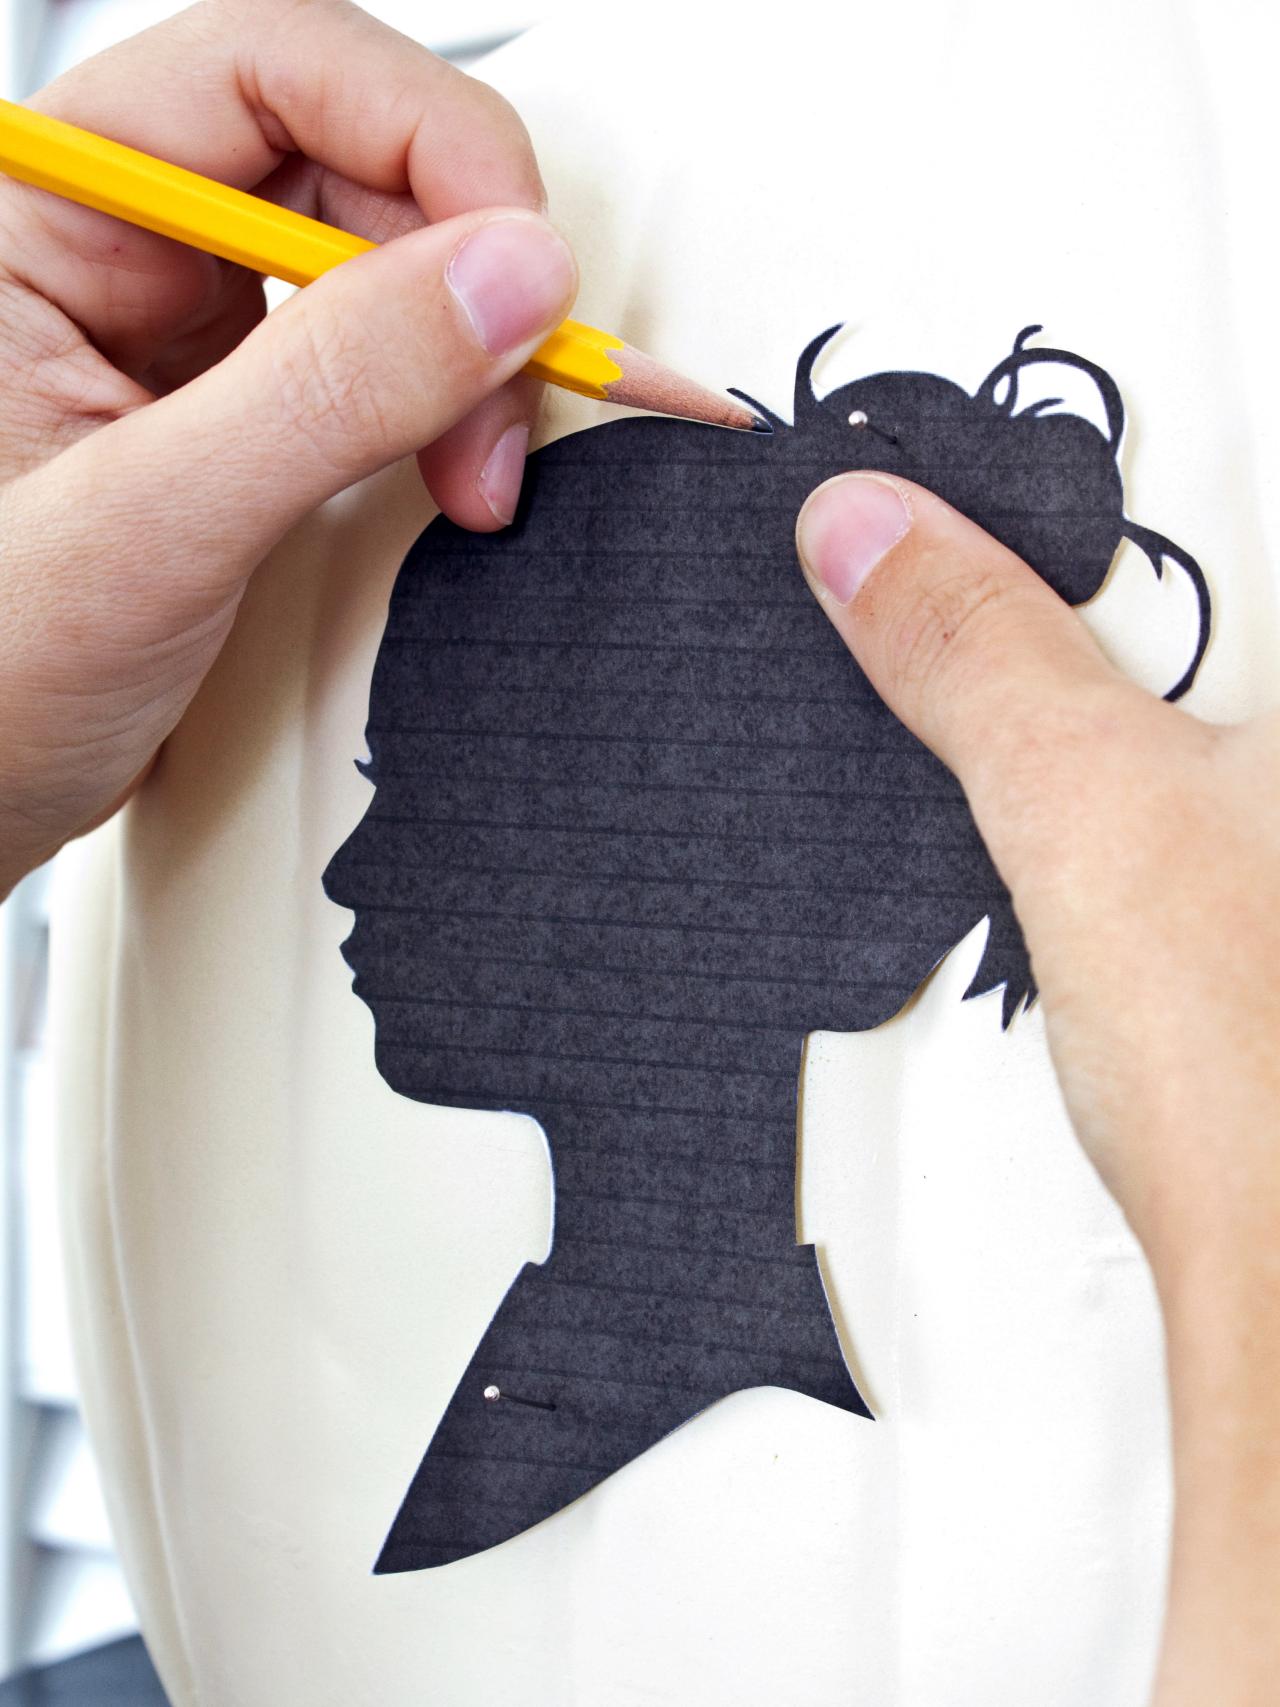
Trace Silhouette
Use a pencil to trace around the entire silhouette.

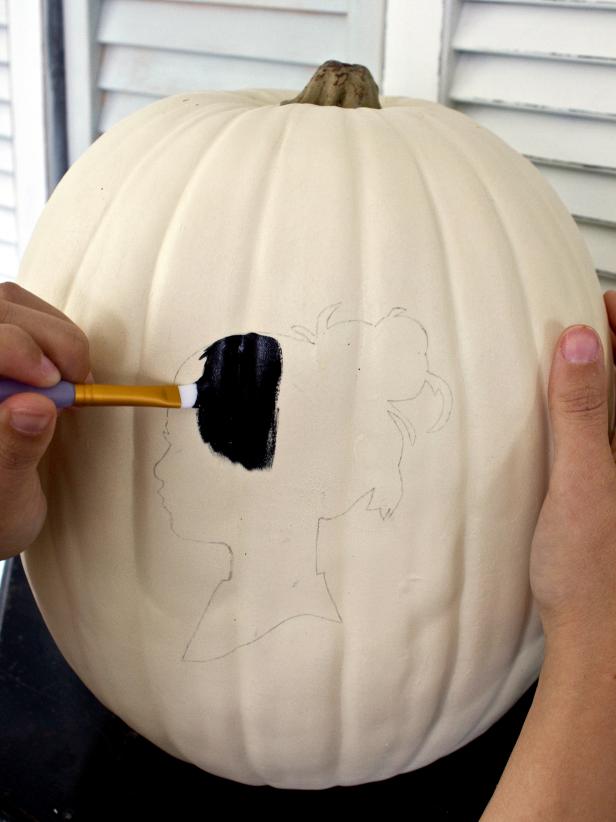
Paint Silhouette
Remove the paper silhouette and stick pins, then use a flat-edged paintbrush to fill in the outline with black acrylic paint (Image 1). Use a small-tipped detail brush around the edges of the silhouette to clean up the design (Image 2).

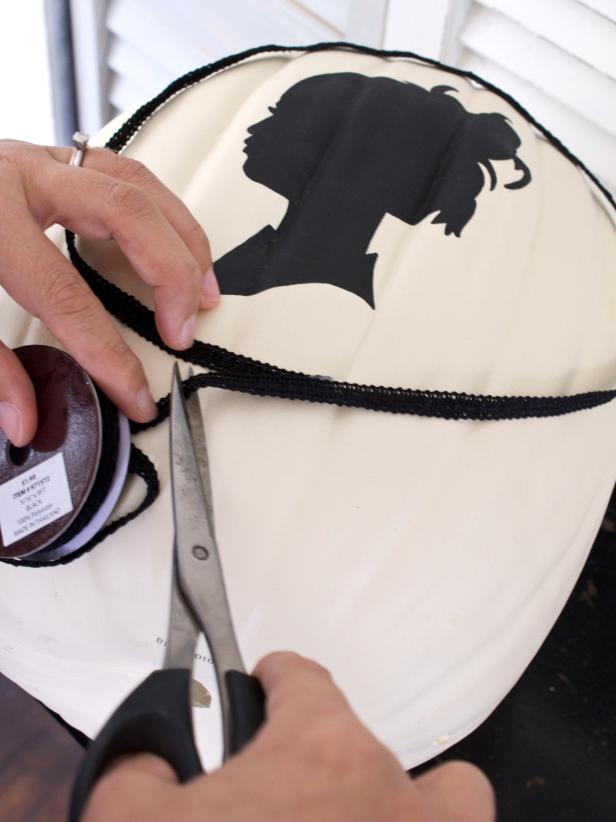
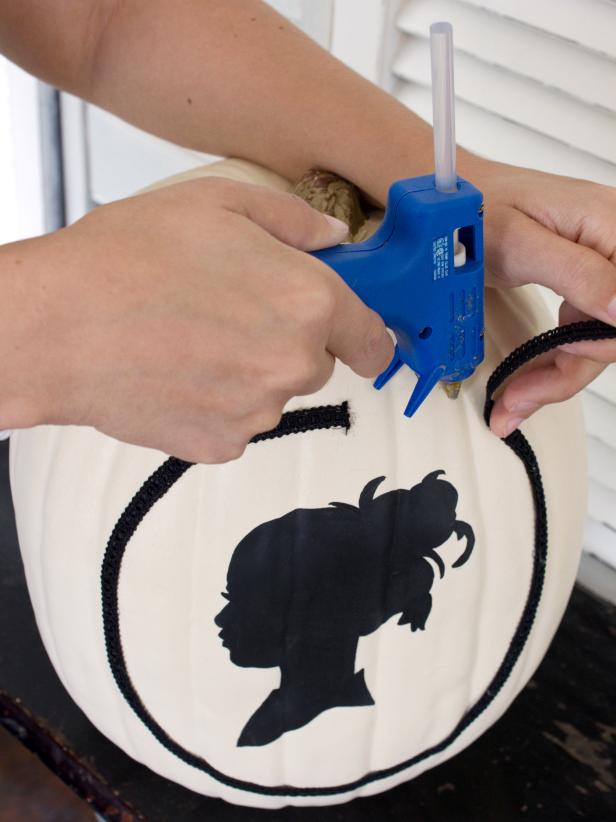
Attach Trim
Cut enough trim to completely encircle the silhouette (Image 1); attach it to the pumpkin with a hot glue gun (Image 2).


