


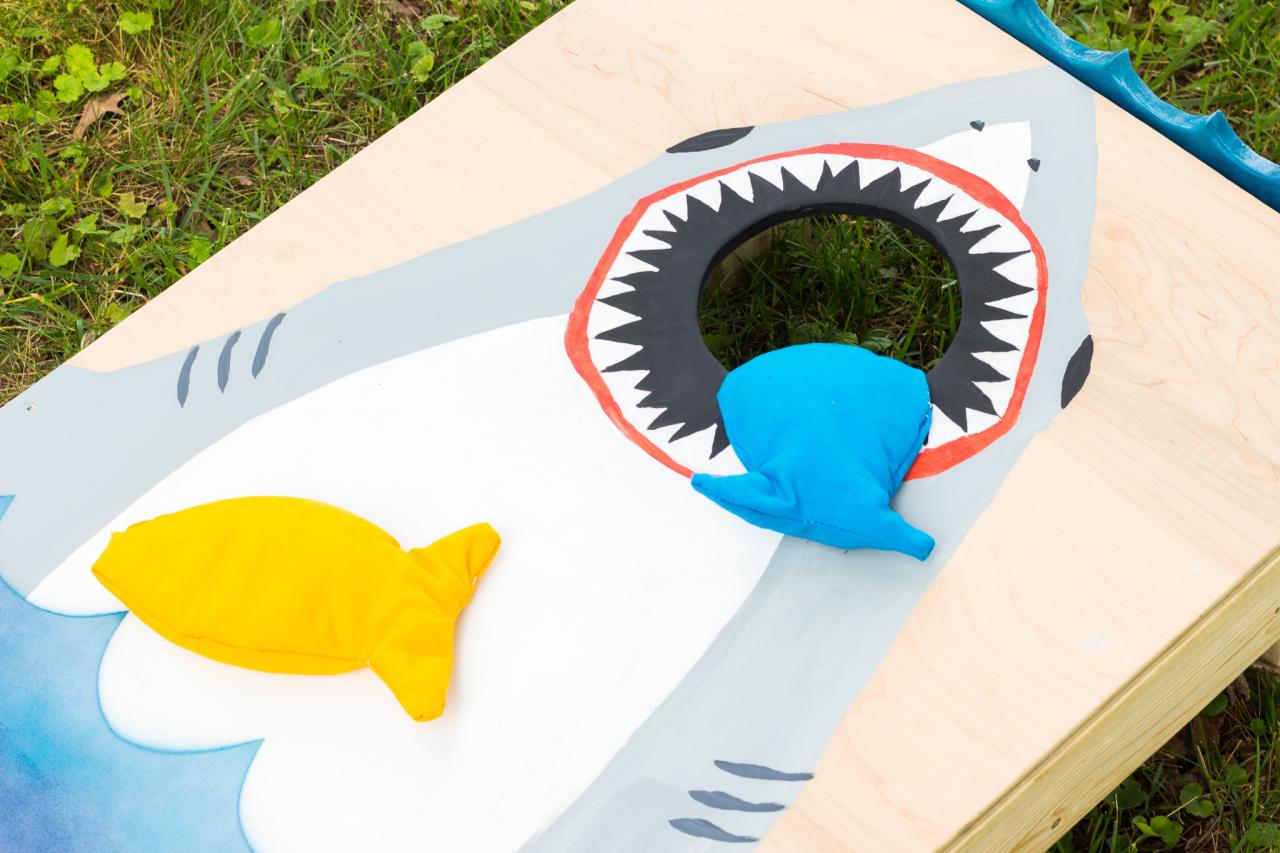
Make This Fin-tastically Kid-Friendly Bean Bag Toss
Take a bite out of the competition with these DIY cornhole boards, perfect for all your shark-themed summer shenanigans.

Kamron Sanders

Create these DIY cornhole boards that feature the fiercest creatures of the ocean. Whether you're celebrating Shark Week or just love those sleek, gray beasts, this project is most certainly for you. Create at your own risk!
Materials + Tools
- tape measure
- pencil
- chalk line
- circular saw
- miter saw
- (2) 2-1/2" screws
- drill + 1/4" drill bit
- jigsaw
- (2) c-clamps
- compass
- orbital sanders
- hammer
- (4) 1/4" carriage bolts with washers + wing nuts
- (1) 4' x 8' sheet of 1/2" plywood
- (4) 2" x 4" x 8' board
- (1) 1" x 4" x 8' board
- acrylic paint + paintbrushes
- spray paint
- poster board
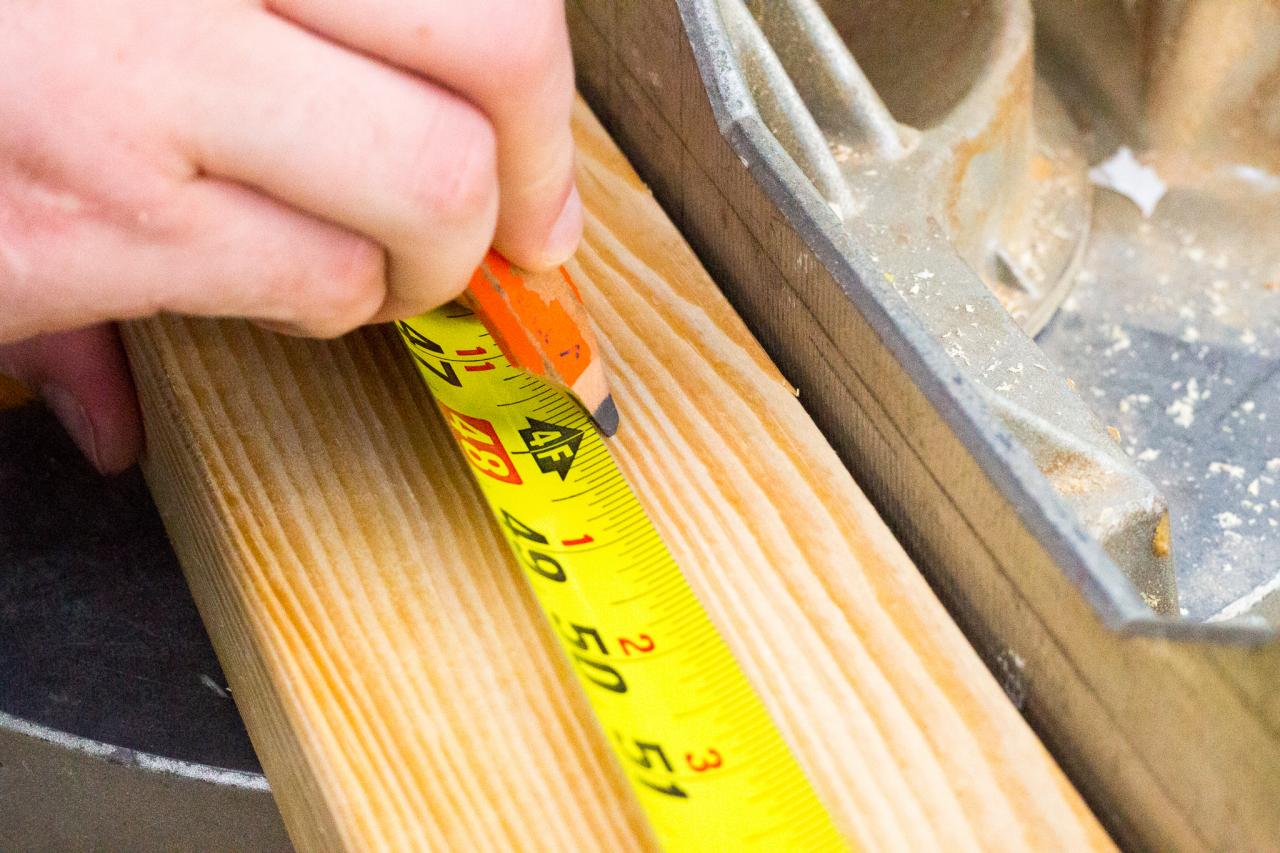
Assemble the Frame

Kamron Sanders

Kamron Sanders

Kamron Sanders
Begin by measuring and cutting 2x4s into four 48-inch and four 21-inch pieces. Each 2x4 board should yield one 48-inch piece, one 21-inch piece and one 15-inch piece. Set the four 15-inch pieces to the side for later use. Mock up the frame by making a rectangle with two 21-inch pieces sitting within the two 48-inch pieces. The total dimensions are 24x48 inches. Drive two 2-1/2-inch screws on each end of the 48-inch boards to secure the frame.
Attach the Tops

Kamron Sanders

Kamron Sanders

Kamron Sanders

Kamron Sanders
Measure, mark and cut two pieces of 1/2-inch plywood to the 24x48-inch dimension of the frames. Because the plywood is already 48 inches wide, the simplest way to ensure a straight cut is to measure 24 inches from each side and use a chalk line to establish a straight cutting edge. Once the line is drawn, use a circular saw to cut the plywood to size. Attach the tops to the frames with screws at two, 24 and 46 inches on each side.
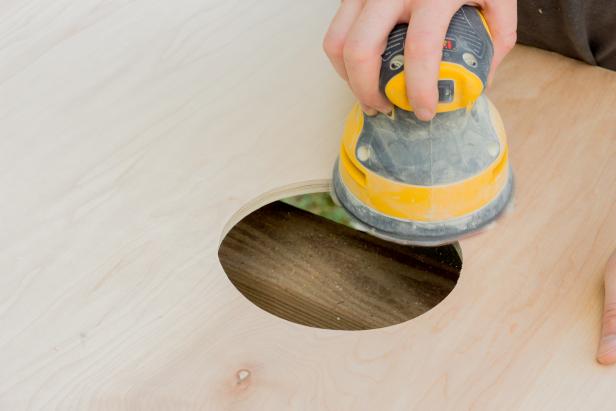
Cut the Hole

Kamron Sanders

Kamron Sanders

Kamron Sanders
Kamron Sanders
The regulation size for a cornhole board's hole is six inches, and the center of the hole must be located nine inches from the top and 12 inches from the sides. The easiest way to mark the hole for cutting is to find that center, then use a compass to draw a six-inch circle. However, if a compass is not at hand, a quick and easy jig can be made from a thin piece of wood, cardboard or even paper. Simply drill two holes in the thin piece of wood three inches apart. Place the piece of wood on your cornhole board and hold one hole at the center of the desired hole and place a pencil in the other. Rotate the pencil around the axis to achieve a perfect circle.
Once the hole has been marked, use a drill bit to create a pilot hole for the jigsaw. Be careful not to drill outside of the marked circle. Use the jigsaw to slowly cut the hole out, then clean the edges up with an orbital sander to get rid of any splintering.
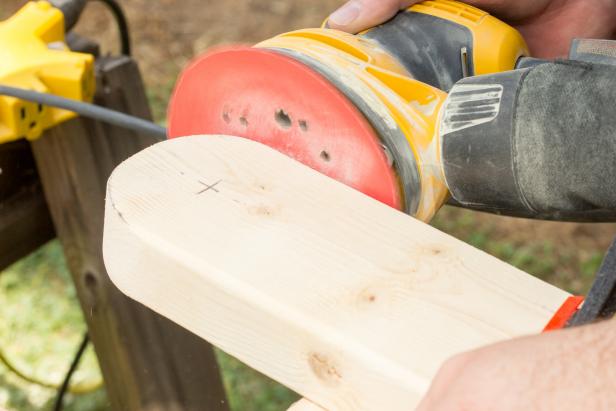
Cut and Attach the Legs

Kamron Sanders

Kamron Sanders

Kamron Sanders
Kamron Sanders
Secure one of the 15-inch pieces of 2x4 to the worktop with two c-clamps, allowing one side to hang off the edge a few inches. On this end of the board, mark a dot 1-3/4" from the end and sides. Modify the previously used circle jig by drilling a new hole on the jig 1-3/4" from the first. Use the jig to outline a half circle on the end of the 15-inch board. If done properly, the circle should perfectly touch the edges and end of the board. Cut around the traced half circle with a jigsaw. Once cut, clean the cut with an orbital sander.

Kamron Sanders

Kamron Sanders

Kamron Sanders
Flip the cornhole board over and place the leg in the closed position. Use c-clamps to hold it in place. Utilizing the dot that was used to create the half circle, drill a 1/4-inch hole through both the leg and the side of the cornhole board. On the outside of the board, place a four-inch carriage bolt in the hole and secure with a hammer. On the inside, place a washer and a wing nut.
Cut the Legs to Size

Kamron Sanders

Kamron Sanders

Kamron Sanders
At this point, the legs are attached but are too long and not cut to the proper angle. Finding the angle is simpler than it seems and can be done with a variety of tools. First, with the cornhole board flipped over and the legs in their most open position, measure and mark 8 inches from the bottom of the cornhole frame. The regulation height is four inches at the front and 12 inches at the back, so eight-inch legs plus the top and frame ensure it's regulation size. Now, using a long straight edge, a level, a chalk line or even just a straight piece of scrap wood, find the proper angle by placing one end on the short side of the cornhole board and the other at the eight-inch mark. Trace the angle created on the leg by the straight edge and cut off the excess with a circular saw.
Paint the Shark

Kamron Sanders

Kamron Sanders
Using a picture as a guide, freehand a great white shark on the top of the cornhole board. This is very flexible according to taste, but the key part is for the mouth and teeth to be around the hole. Once the perfect outline is achieved, bring this shark to life with acrylic paint. Use gray and white to achieve the perfect shark body, while red, white and black will really make the jaws pop.

Kamron Sanders

Kamron Sanders
The great white's signature move is leaping out of the ocean for its prey, so instead of continuing the shark's body beyond the belly, use a poster board to cut out wave outlines and spray paint the ocean on the bottom half of the cornhole top. Navy blue, teal and some light white dusting will produce an effortless ocean look.
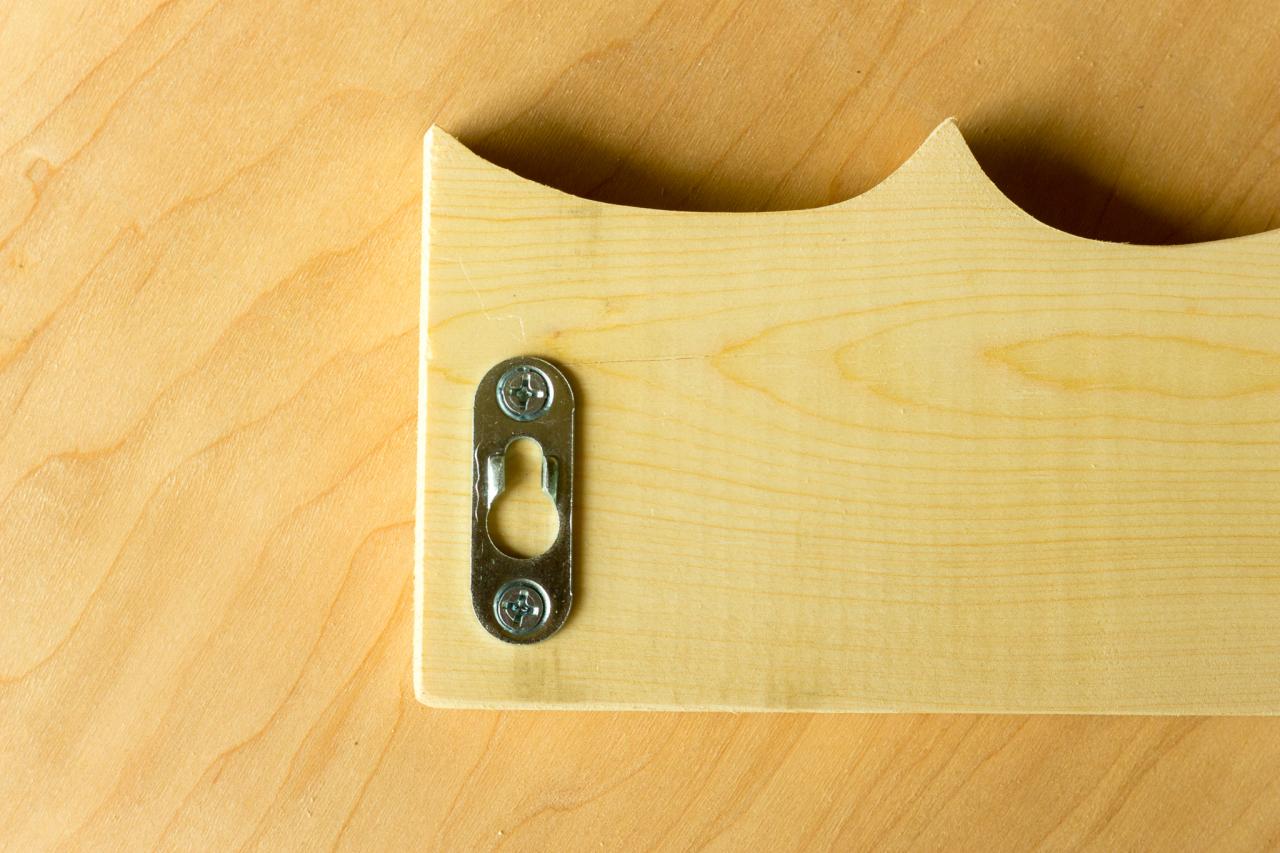
Create the Kid-friendly Features

Kamron Sanders

Kamron Sanders

Kamron Sanders
Cornhole can be challenging even for adults, so to make this board fun for all ages, some quick and easy removable guards are just the ticket. Since this board is shark themed, it only makes sense to continue that theme with waves. Begin by cutting four 24-inch pieces of 1x4 board. On one side of each board, trace a simple wave pattern and cut it out with a jigsaw. To mount on the cornhole board, place two keyhole hangers on each end of the of wave guards and place two corresponding screws both on the front and back of each cornhole board. Paint these waves with the same navy blue, teal and white combo to achieve the perfect ocean look.

Kamron Sanders


