


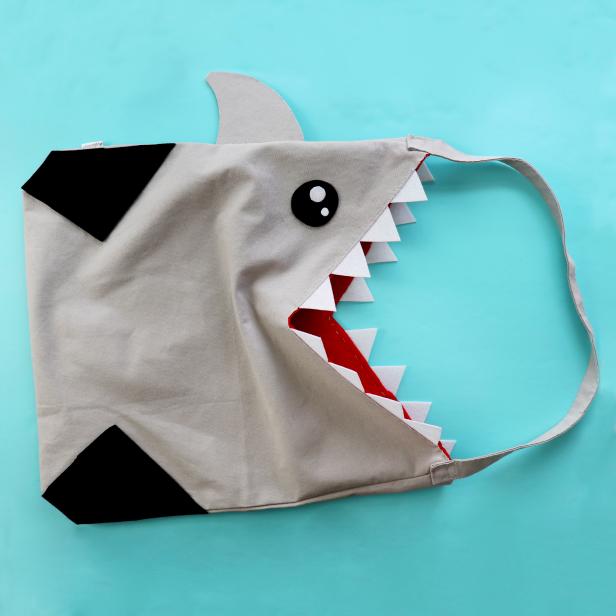
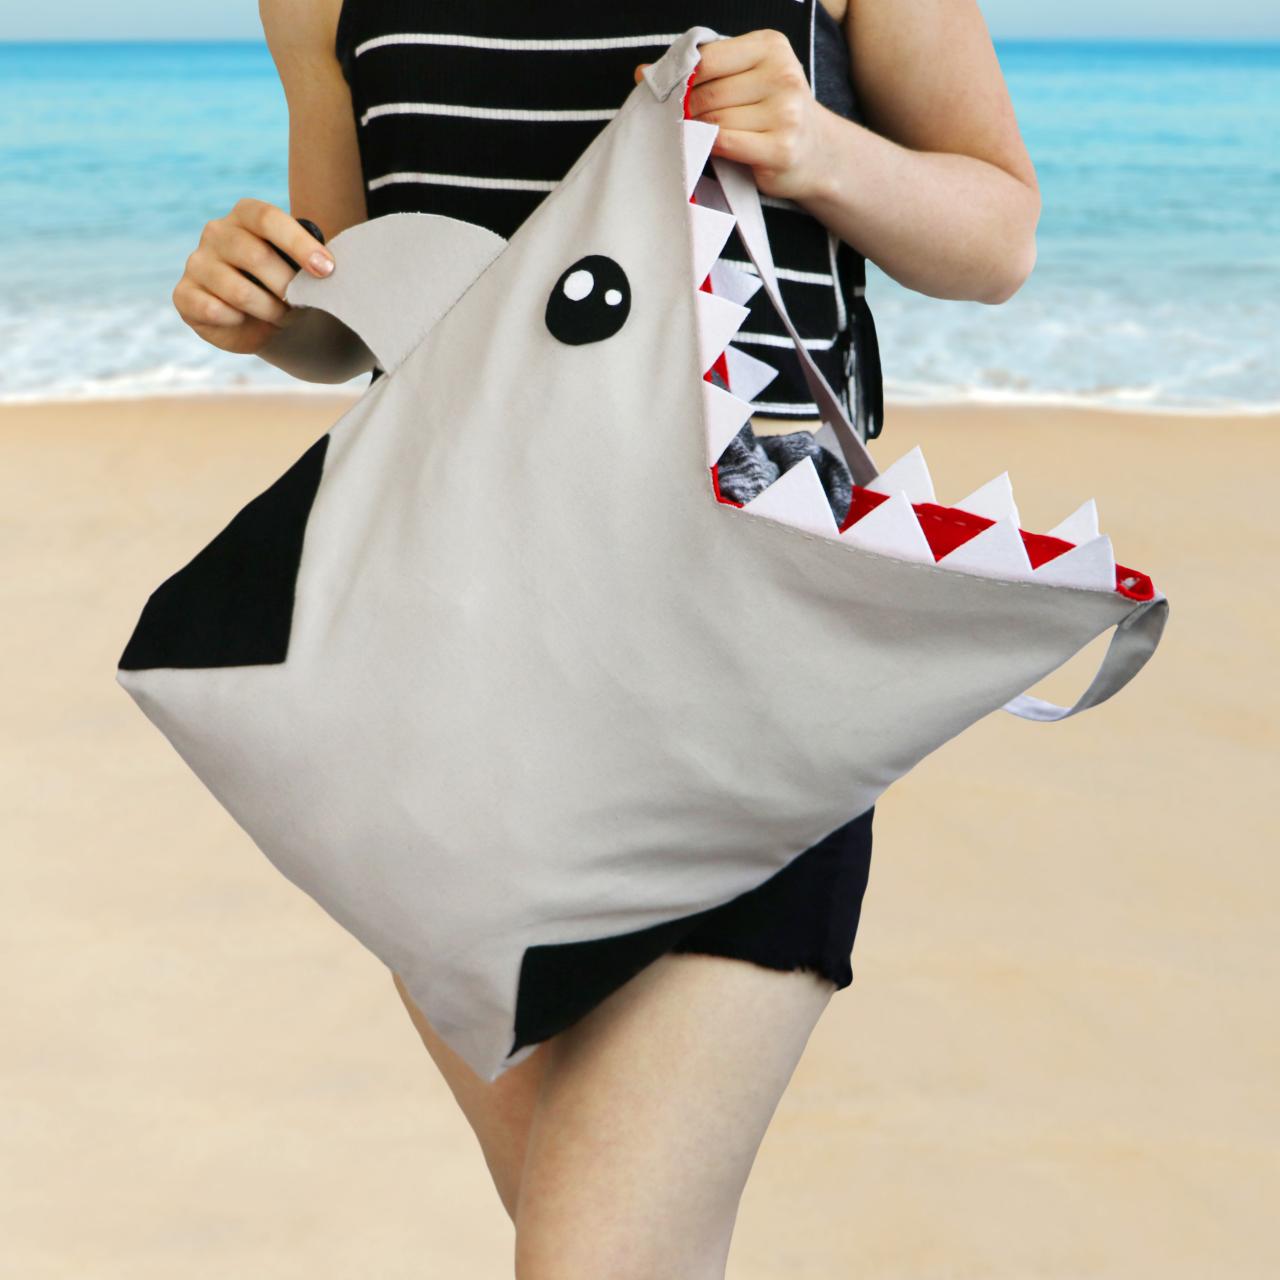
DIY Shark Beach Bag
Personalize a tote bag to use at the beach all summer.

Materials + Tools
- gray tote bag
- scissors
- needle and thread
- stiff white felt
- black felt
- red felt
- fabric glue
- chalk
- ruler

Karen Kavett

Karen Kavett
Karen Kavett

Karen Kavett
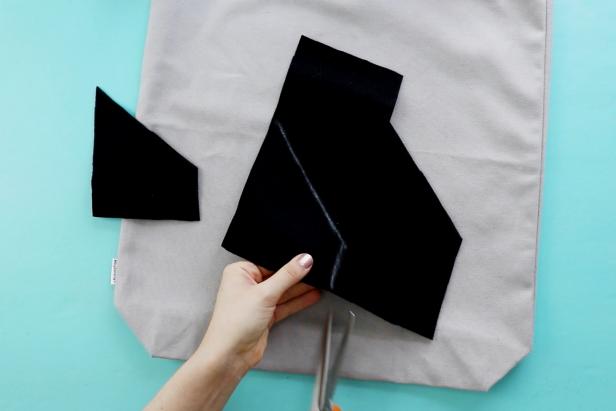
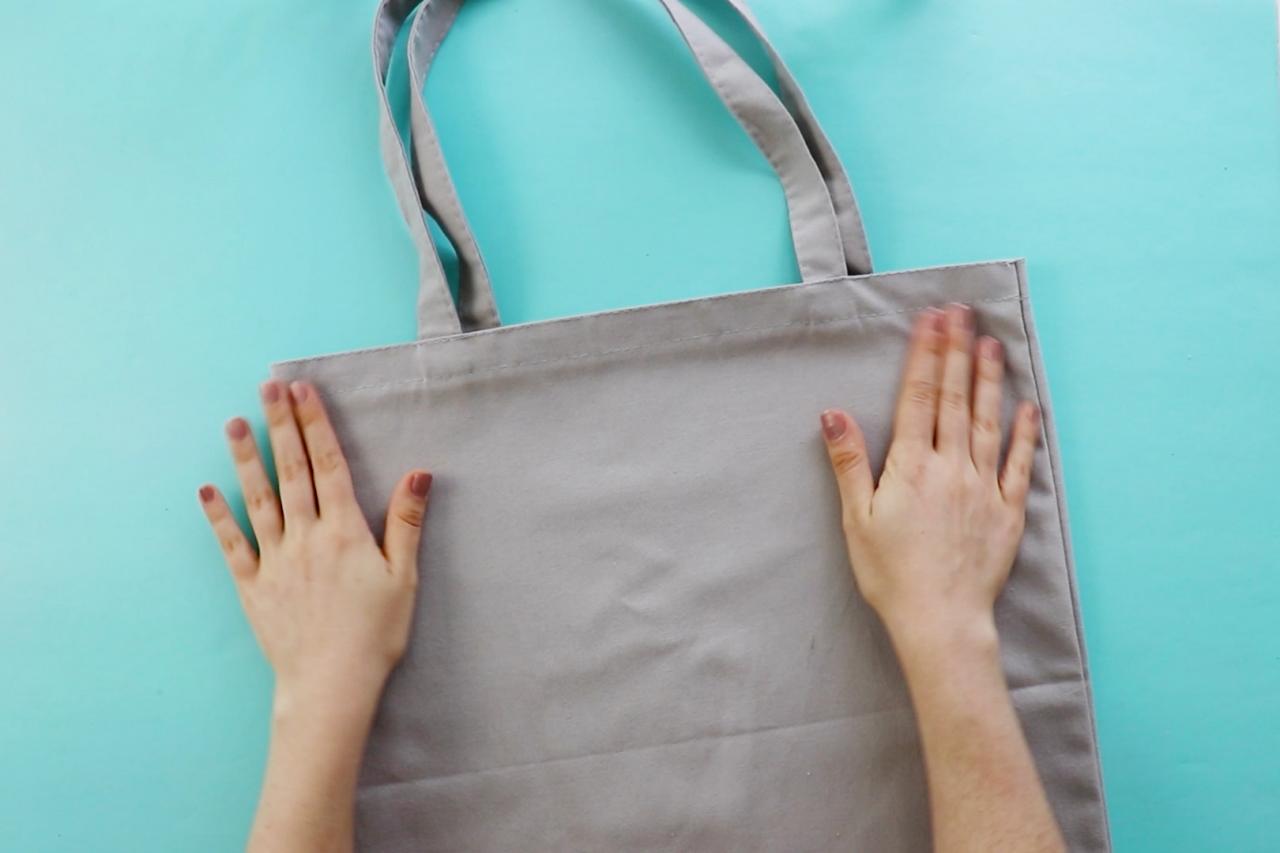
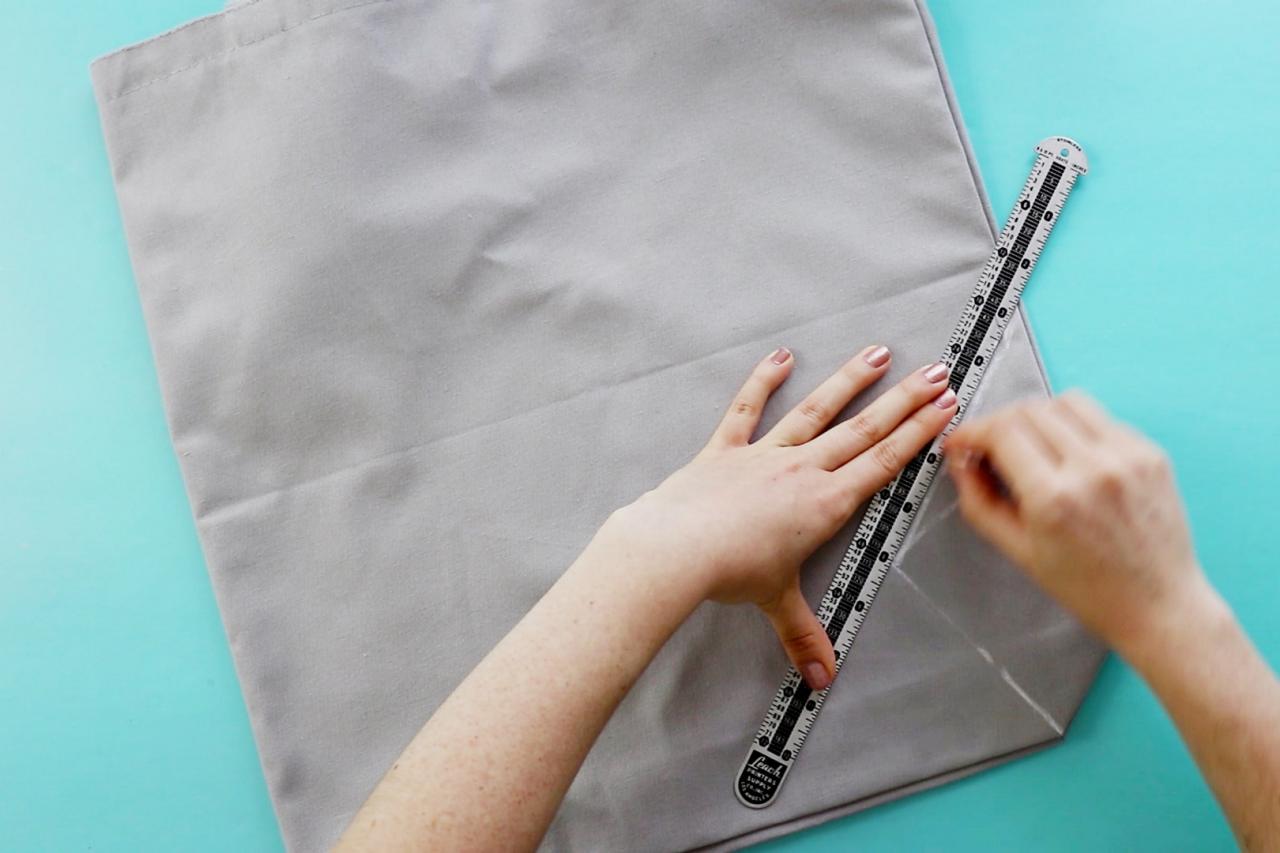
Make the Tail
Use chalk to draw an outline of a shark's tail onto the bottom of a plain gray tote bag. Trace these shapes onto black felt and glue into place.
Karen Kavett

Karen Kavett

Karen Kavett
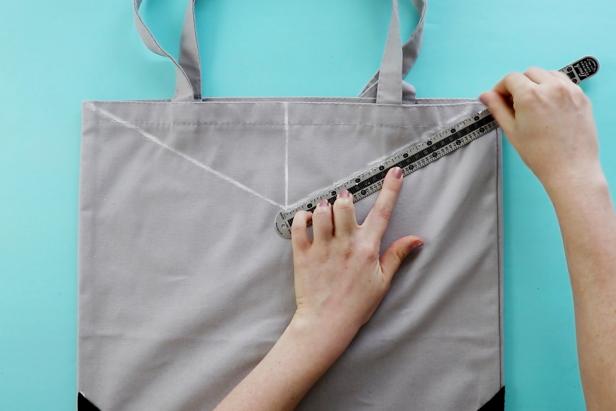
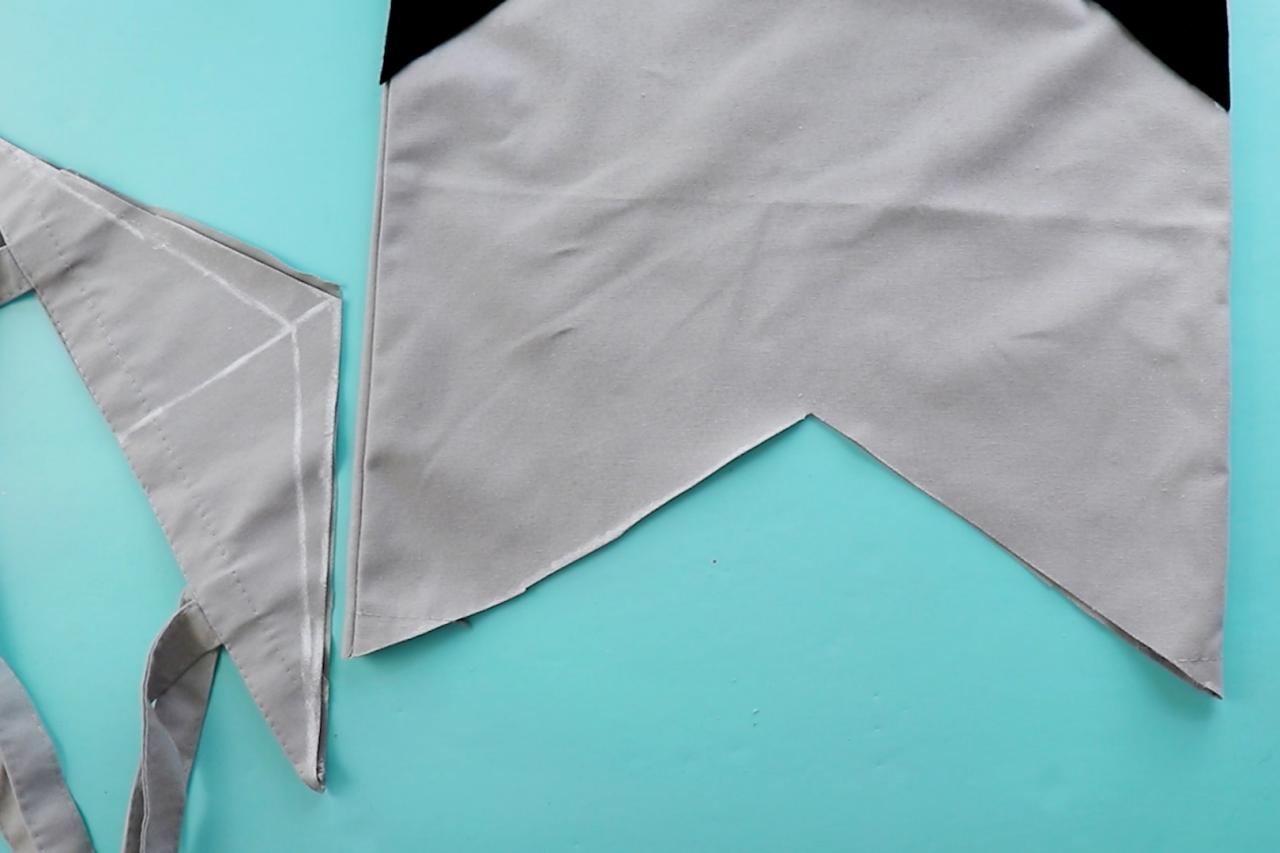
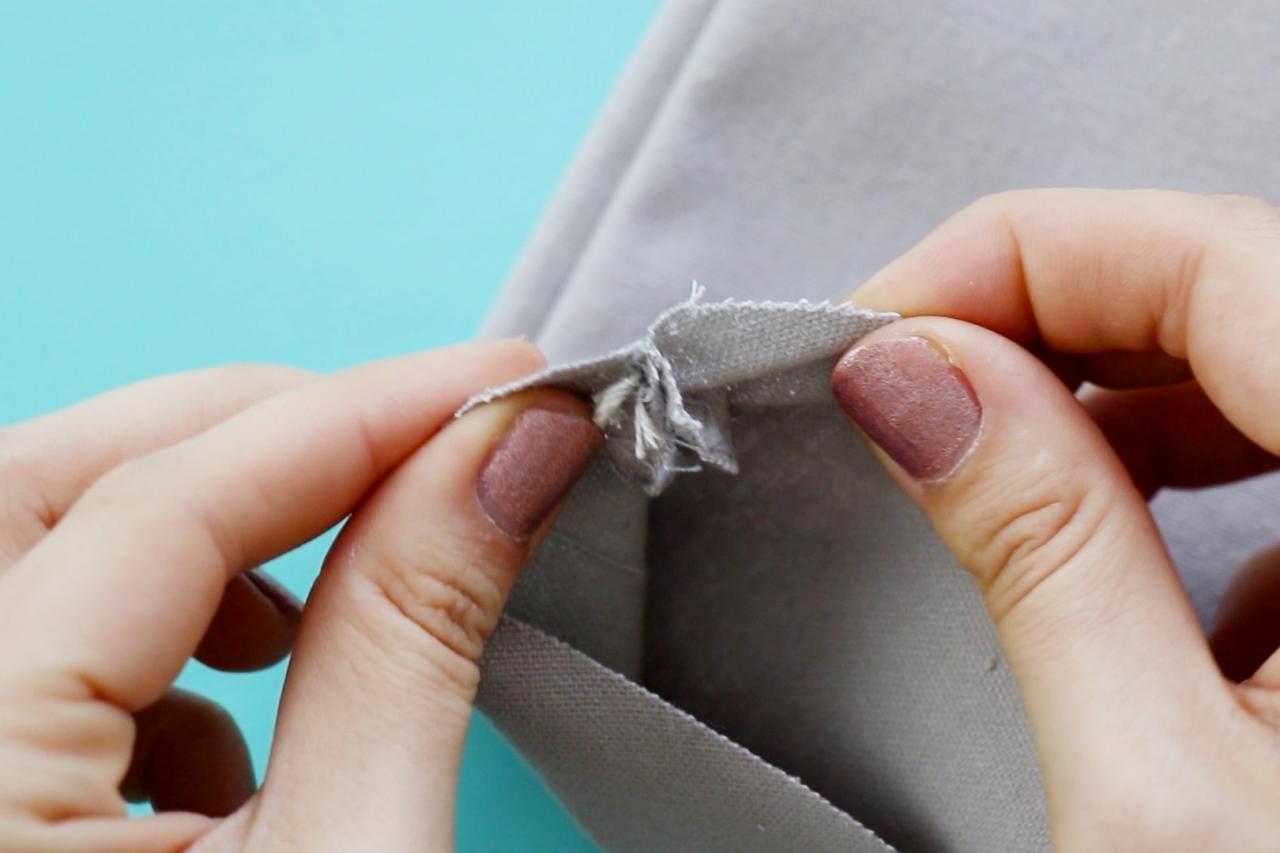
Cut the Shark's Mouth
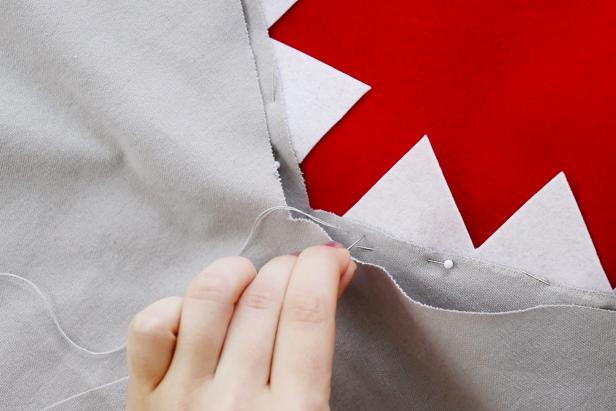
Draw a triangle at the top of both sides of the tote bag, then cut it out. Add a few stitches to the top sides of the tote bag so the seam doesn’t unravel.
Karen Kavett

Karen Kavett

Karen Kavett
Karen Kavett
Karen Kavett
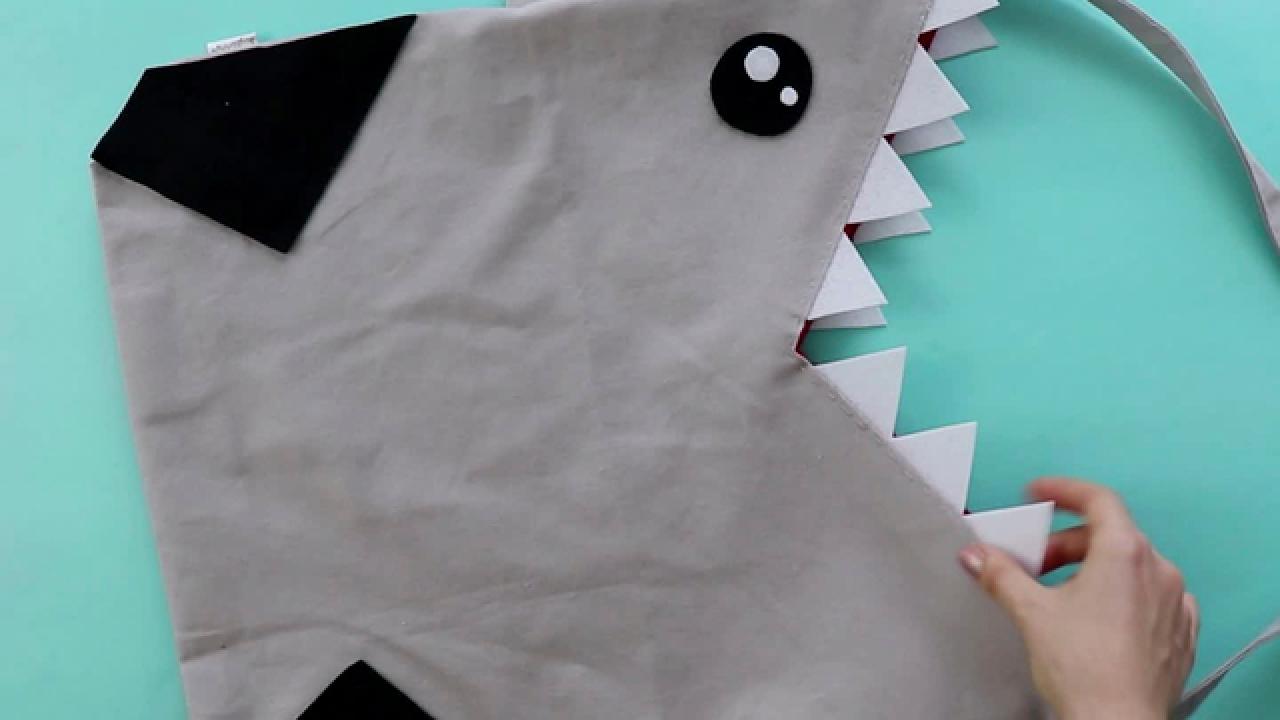
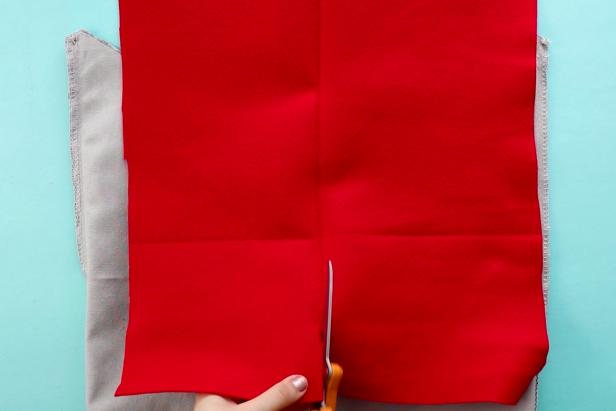
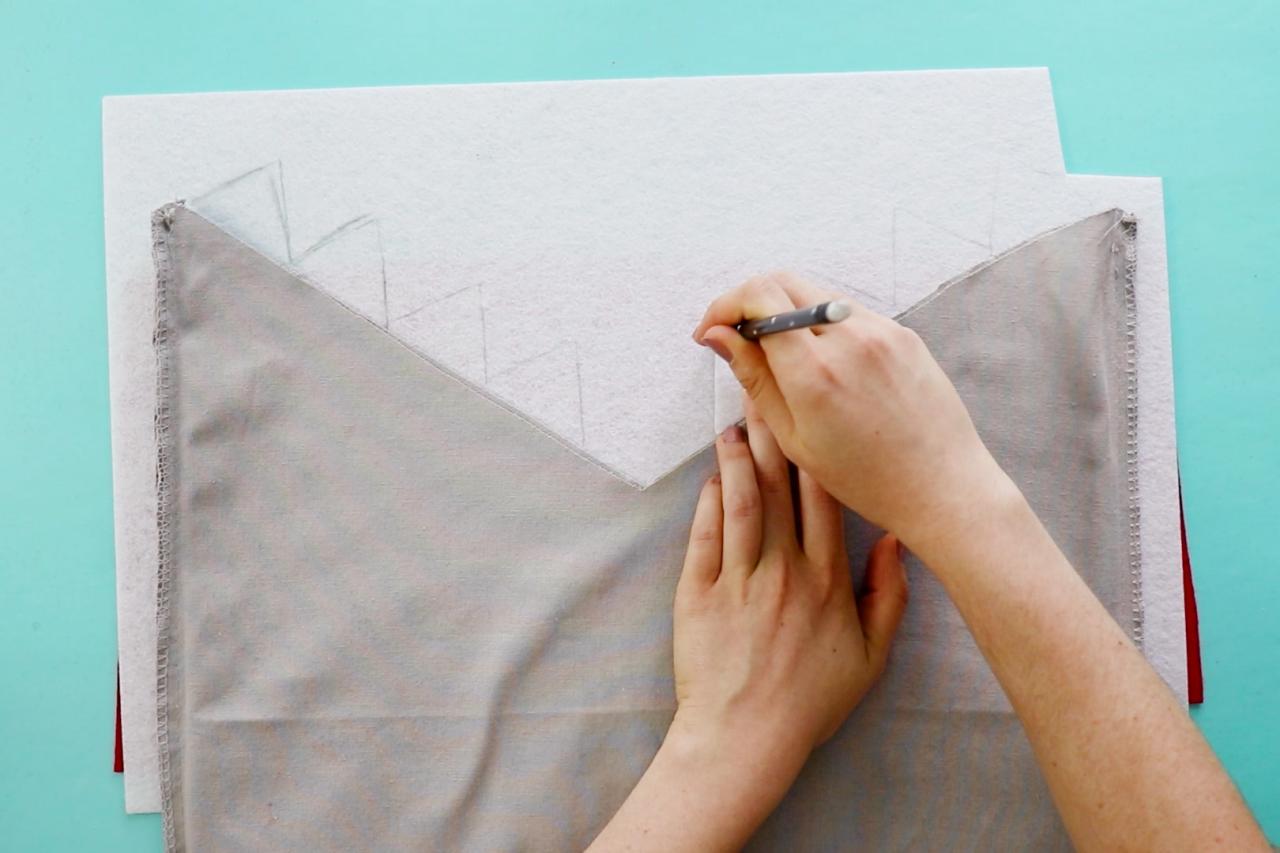
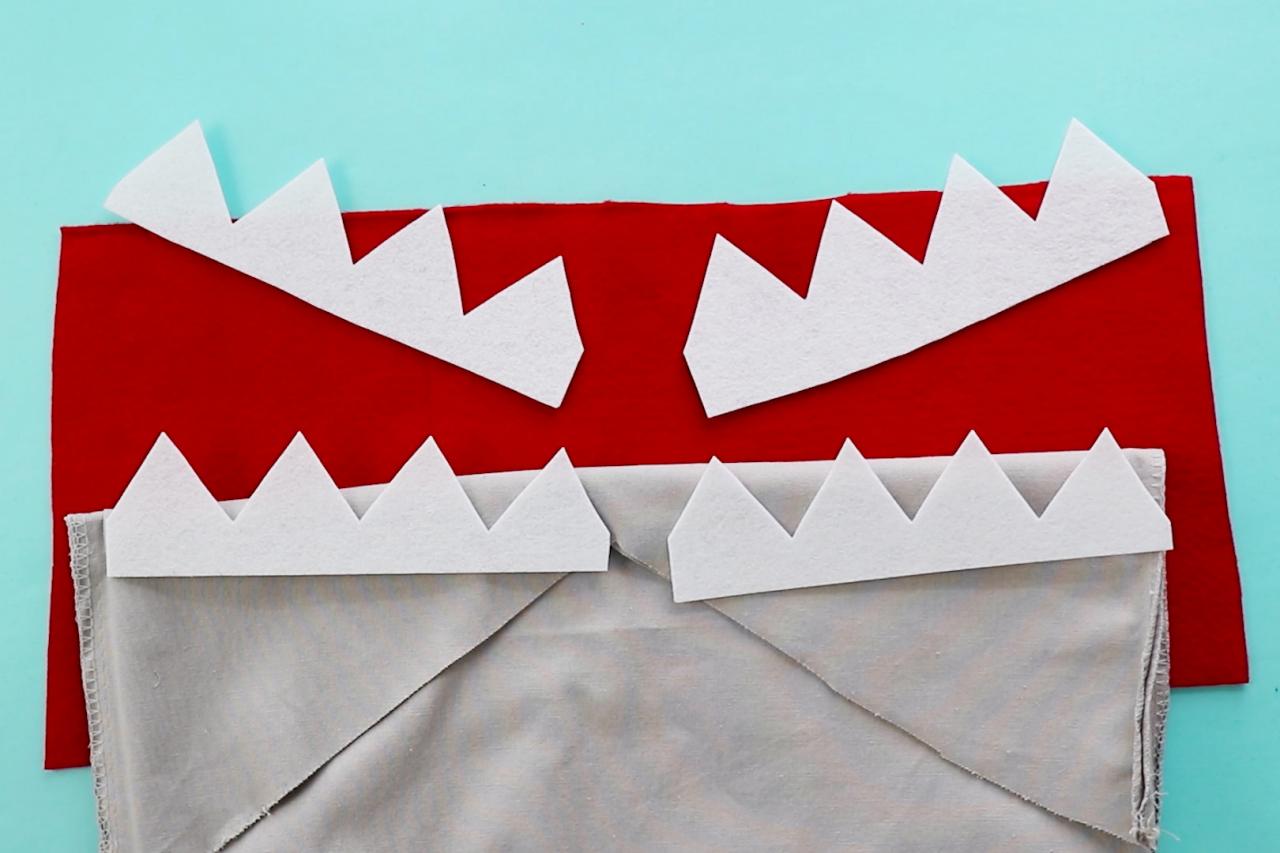
Cut and Sew Teeth
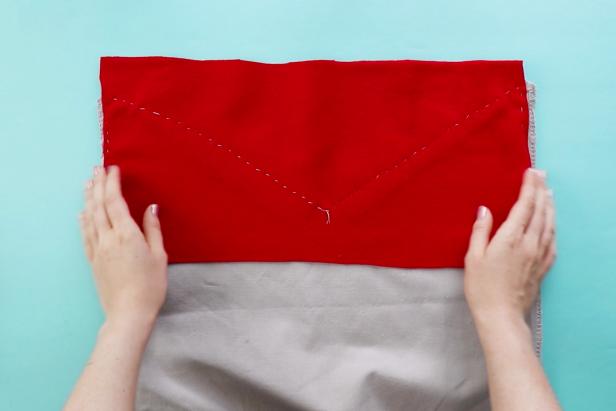
Cut a rectangle of red felt to fit inside the top of the tote bag. Draw four sets of teeth shapes on the stiff white felt and cut them out. Sew the red and white felt to the inside edge of the tote bag. Trim excess red felt.

Karen Kavett

Karen Kavett
Karen Kavett
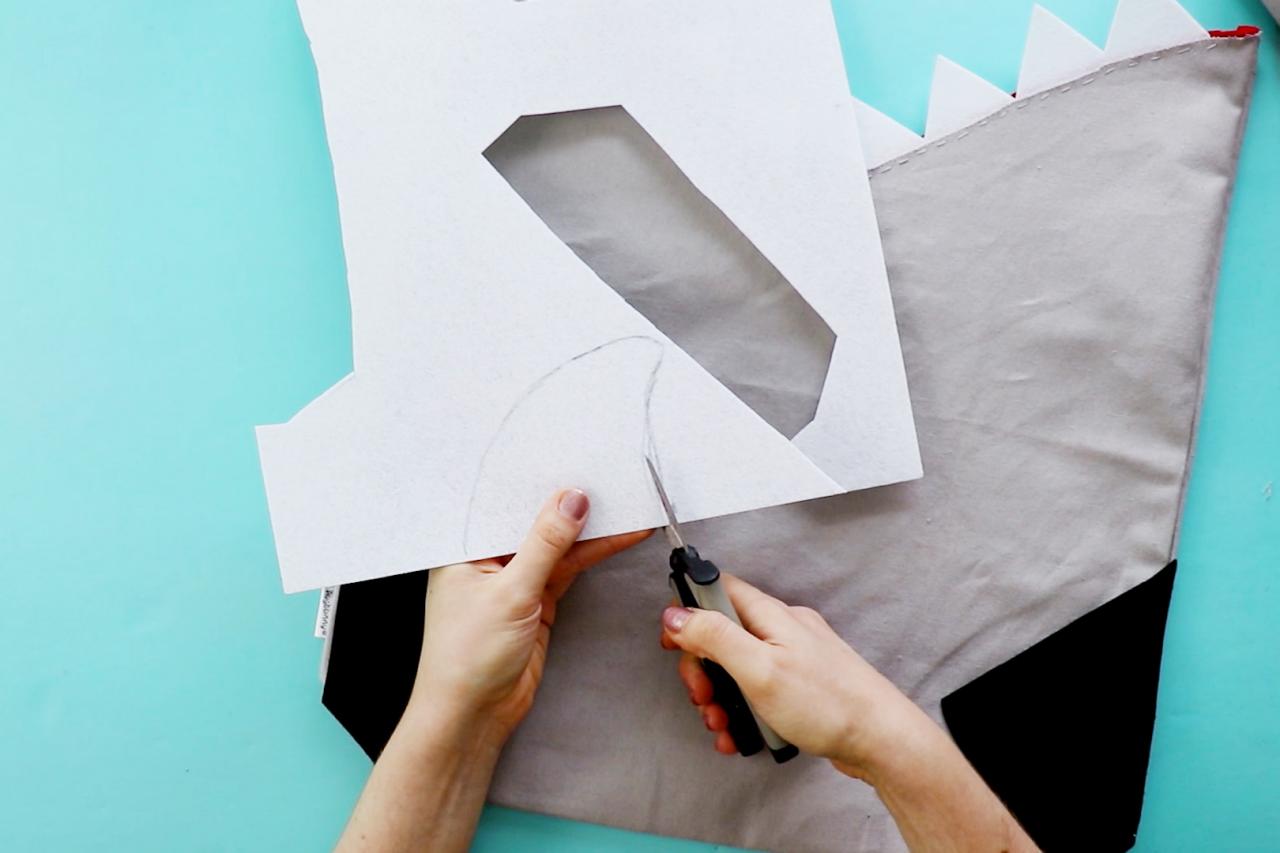
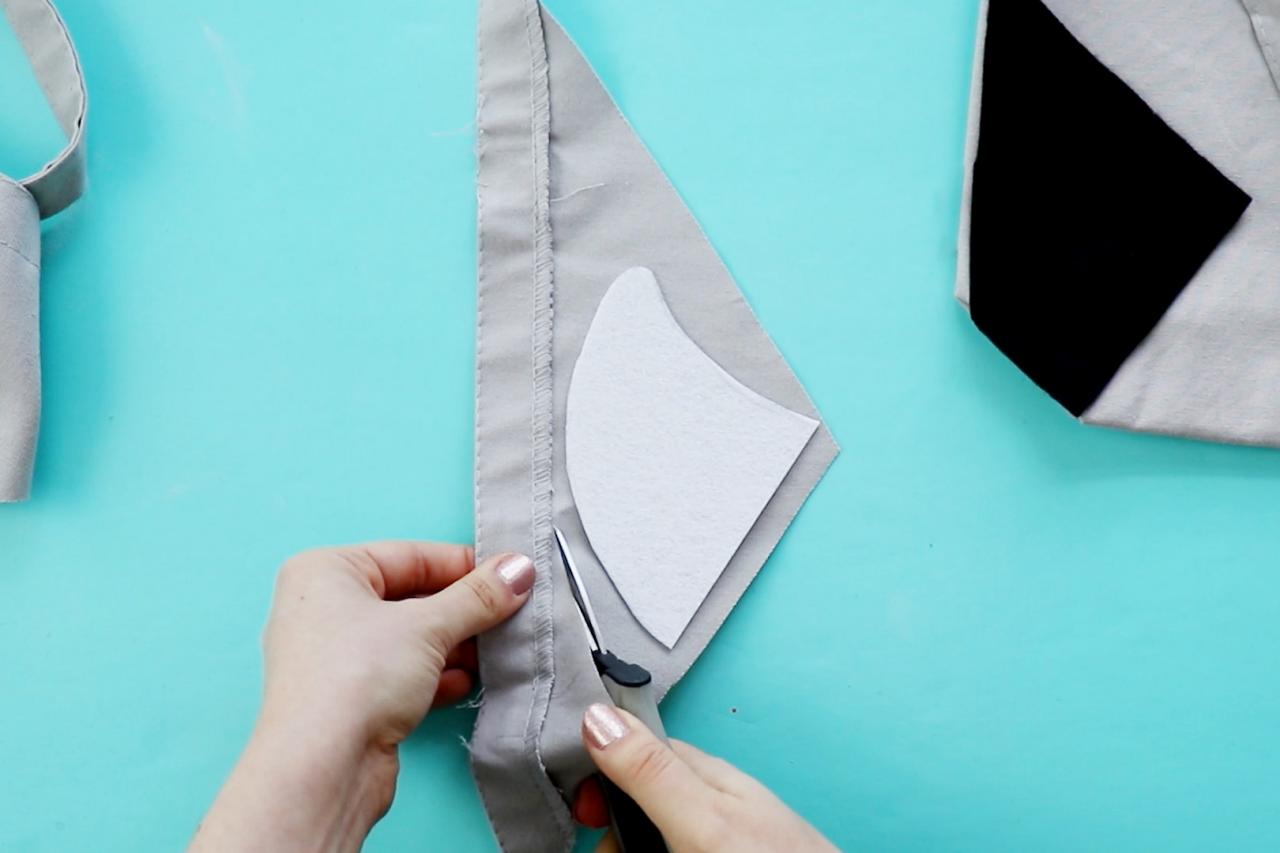
Add the Fin
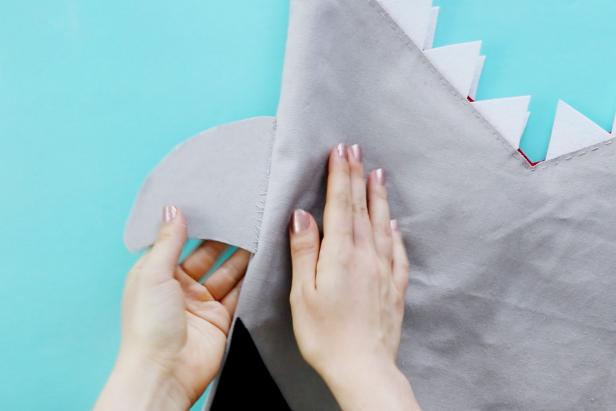
Cut a fin shape from the stiff felt. Use glue to cover it with the extra gray material from the top of the tote bag. Sew to the side of the bag.
Karen Kavett
Make the Eye
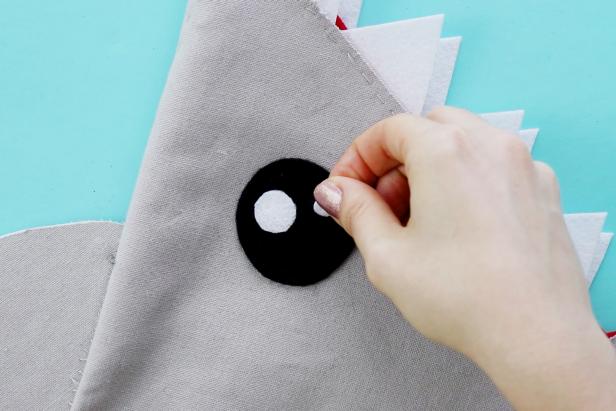
Cut an eye from black and white felt. Glue or sew onto the bag.

Karen Kavett

Karen Kavett
Karen Kavett

Karen Kavett

Karen Kavett
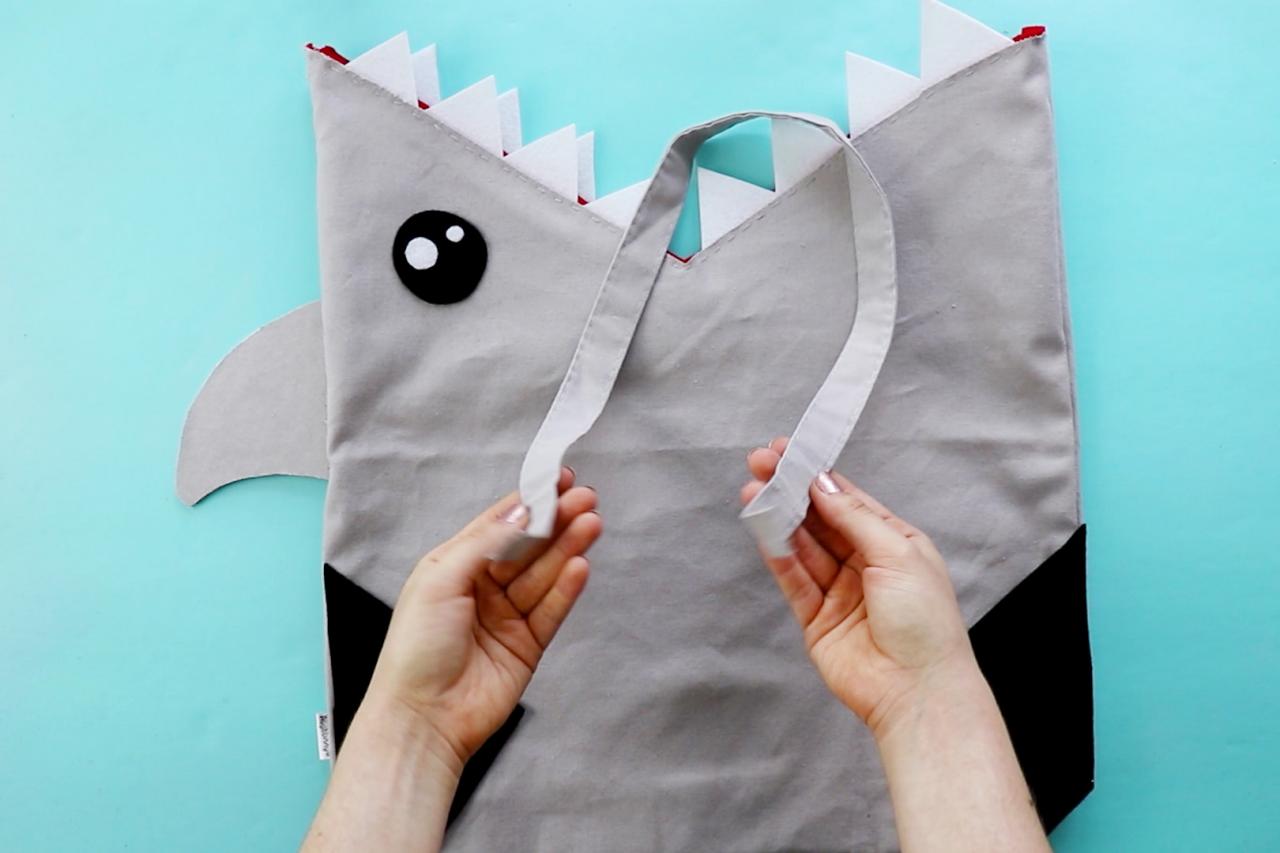
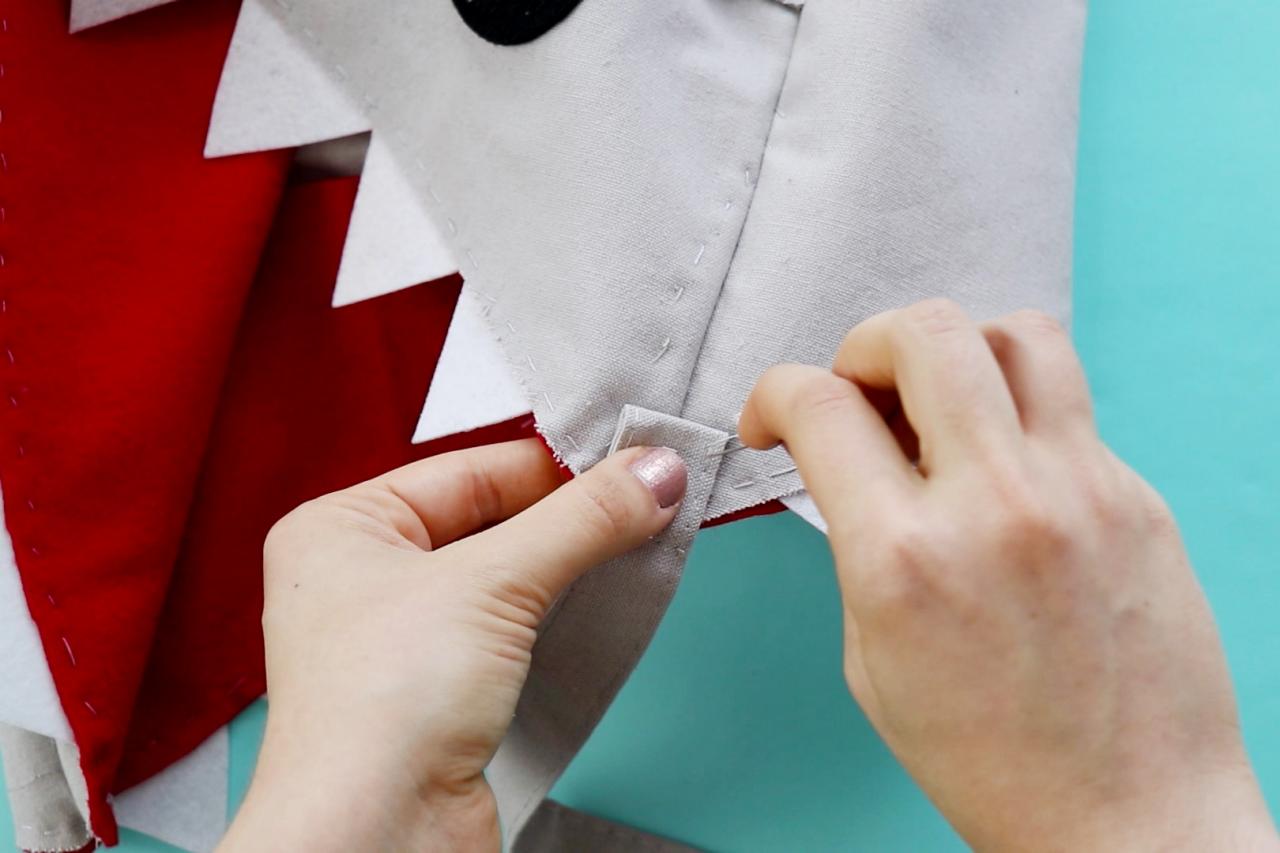
Add Handle and Wear
Sew the handle back onto the sides of the bag. Add multiple rows of stitches so you can carry all of your beach essentials.


