


Back-to-School DIY: Easy Ways to Customize a Kid's Backpack
Let kids create a backpack that's truly unique and representative of who they are.

Flynnside Out Productions

Materials Needed
- plain backpack
- various trims
- leather cord
- zippered pouch
- scarf or bandana
- hot glue gun + glue sticks
- scissors
- measuring tape (optional)
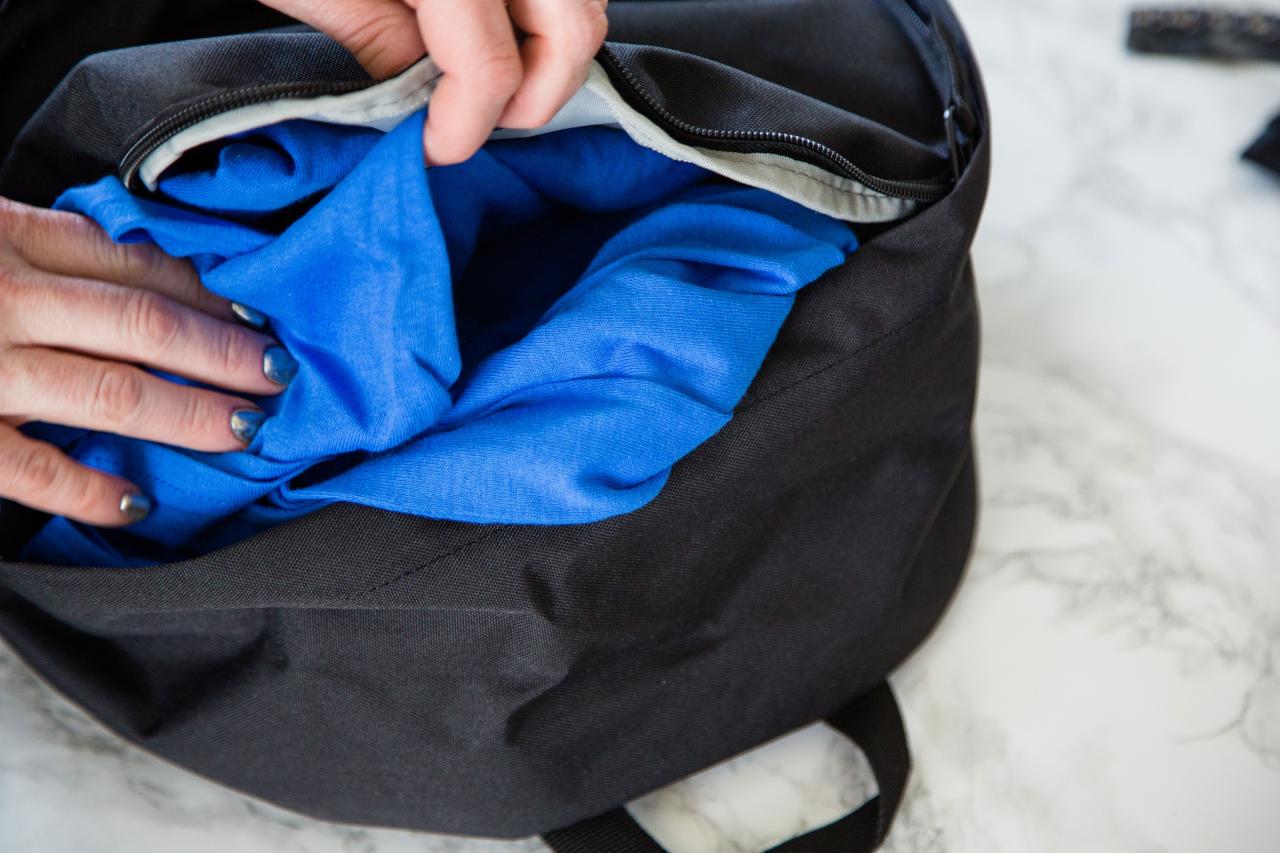
Stuff the Backpack
Stuff the backpack with clothing or paper to temporarily give it shape. This will make it easier to add trim and accessories.

Flynnside Out Productions
Add Front Pocket Trim
Add a bead of hot glue to one inside edge of the trim, then fold it over 1/4 inch and press down (Image A). This will keep the end of the trim from fraying and give it a finished edge. Pull the first piece of trim across the front pocket zipper. Glue down the folded end first, continuing to glue it down until you get to around three inches from the end (Image B). Roll out the trim longer than you need from the end and cut to size. Once again, fold over the trim about 1/4 inch to give a finished edge, and secure the last three inches with hot glue (Image C).
.jpg.rend.hgtvcom.616.411.suffix/1498147210826.jpeg)
Flynnside Out Productions
Image A
.jpg.rend.hgtvcom.616.411.suffix/1498147255489.jpeg)
Flynnside Out Productions
Image B
.jpg.rend.hgtvcom.616.411.suffix/1498147275987.jpeg)
Flynnside Out Productions
Image C
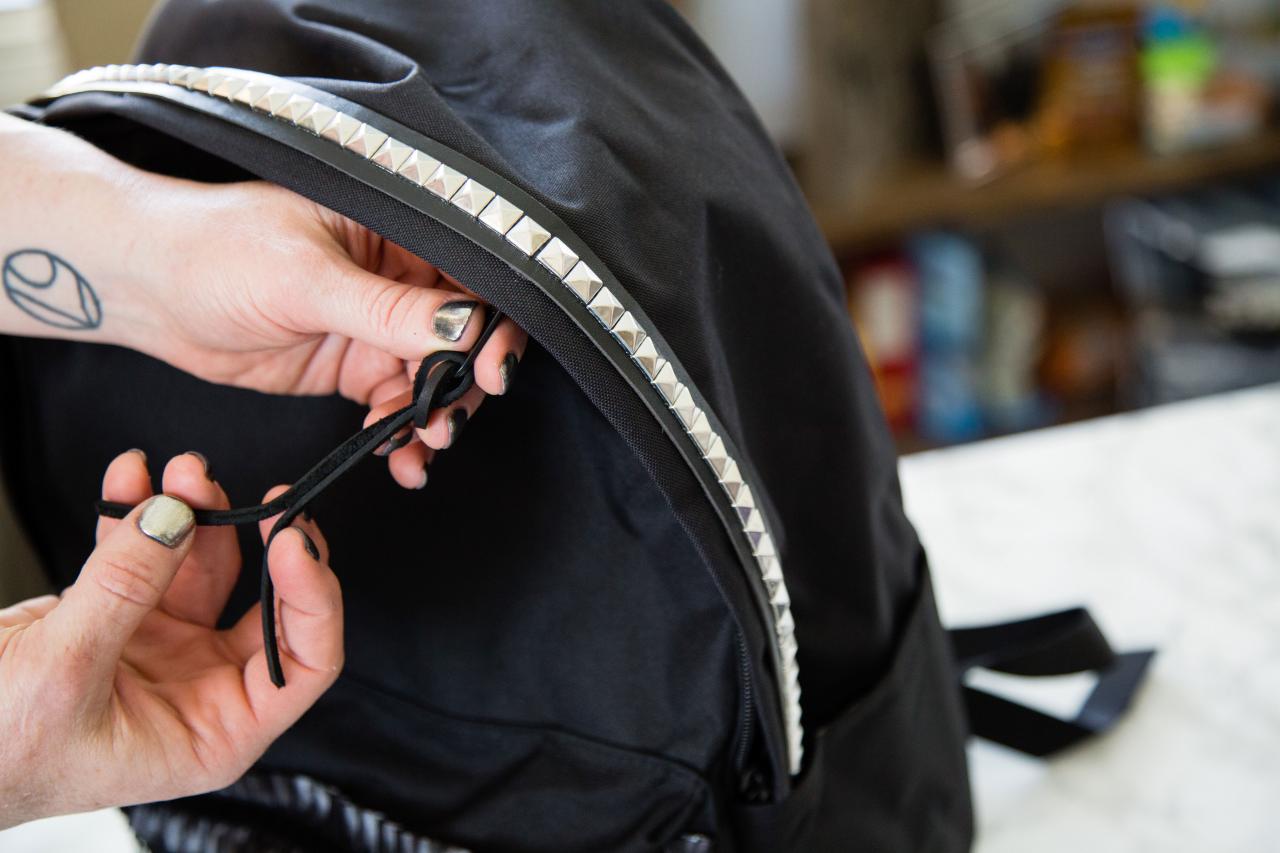
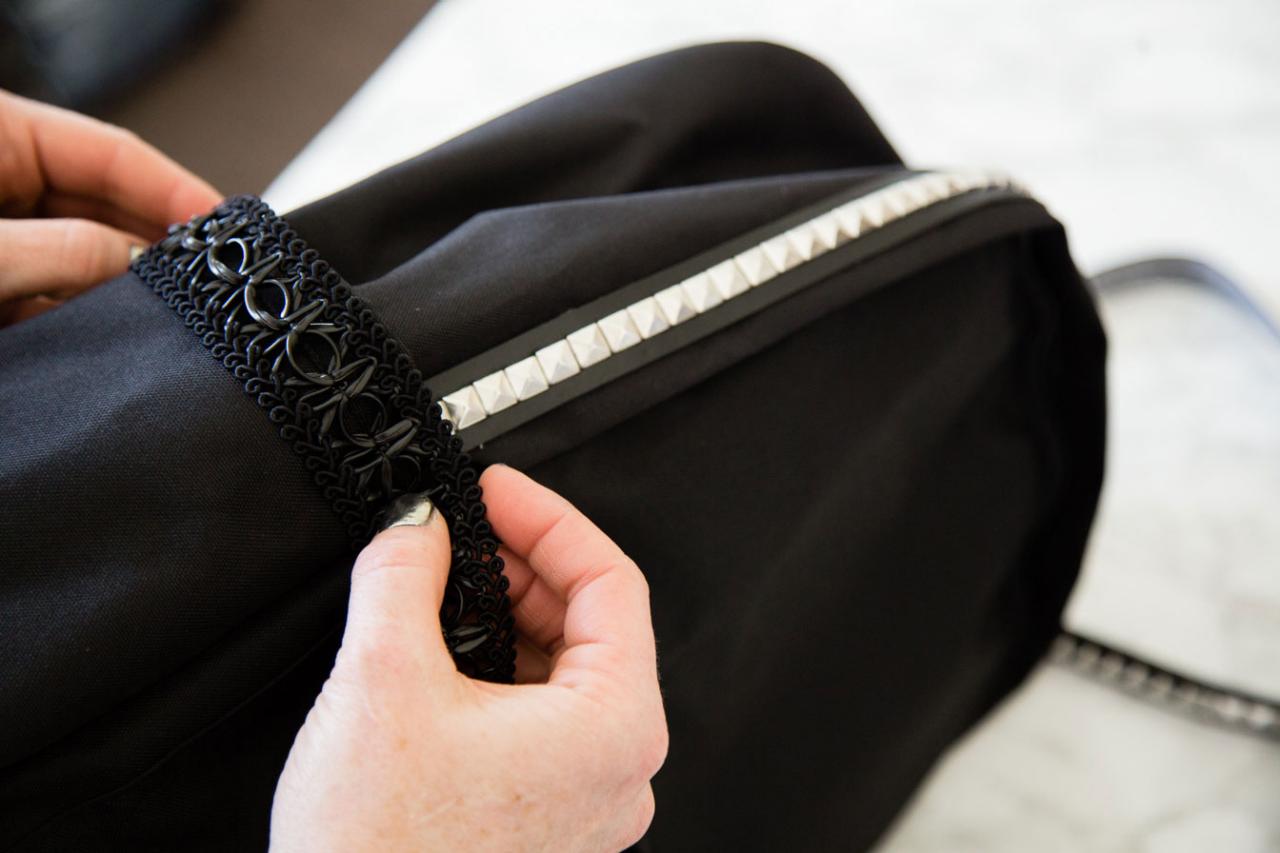
Add Studded Trim on Arch
If you have a trim that frays, fold over like you did in step one. Otherwise, start by gluing down one end starting down inside the side pockets, if the backpack has them (Image A). Then work your way around gluing down the trim. Work in sections and press until the glue is cool and the trim secure (Image B).
.jpg.rend.hgtvcom.616.411.suffix/1498146485888.jpeg)
Flynnside Out Productions
Image A
.jpg.rend.hgtvcom.616.411.suffix/1498146574633.jpeg)
Flynnside Out Productions
Image B
Add Chain to Front
Swag a lightweight chain across the front pouch for added glam (Image A). Lift the seam up to expose the zipper tape, then add a bead of glue to the left, then the right, to secure the chain to the backpack (Image B).
.jpg.rend.hgtvcom.616.411.suffix/1498146422753.jpeg)
Flynnside Out Productions
Image A
.jpg.rend.hgtvcom.616.411.suffix/1498146571660.jpeg)
Flynnside Out Productions
Image B
Add Leather Pull
Remove the original pull off the zipper’s pull tab, then replace with an 8-inch piece of leather cord.

Flynnside Out Productions
Add Trim to Side Pockets
Repeat the method used in the second and third steps. Use hot glue to embellish the top edge of the side pockets with coordinated trim.

Flynnside Out Productions
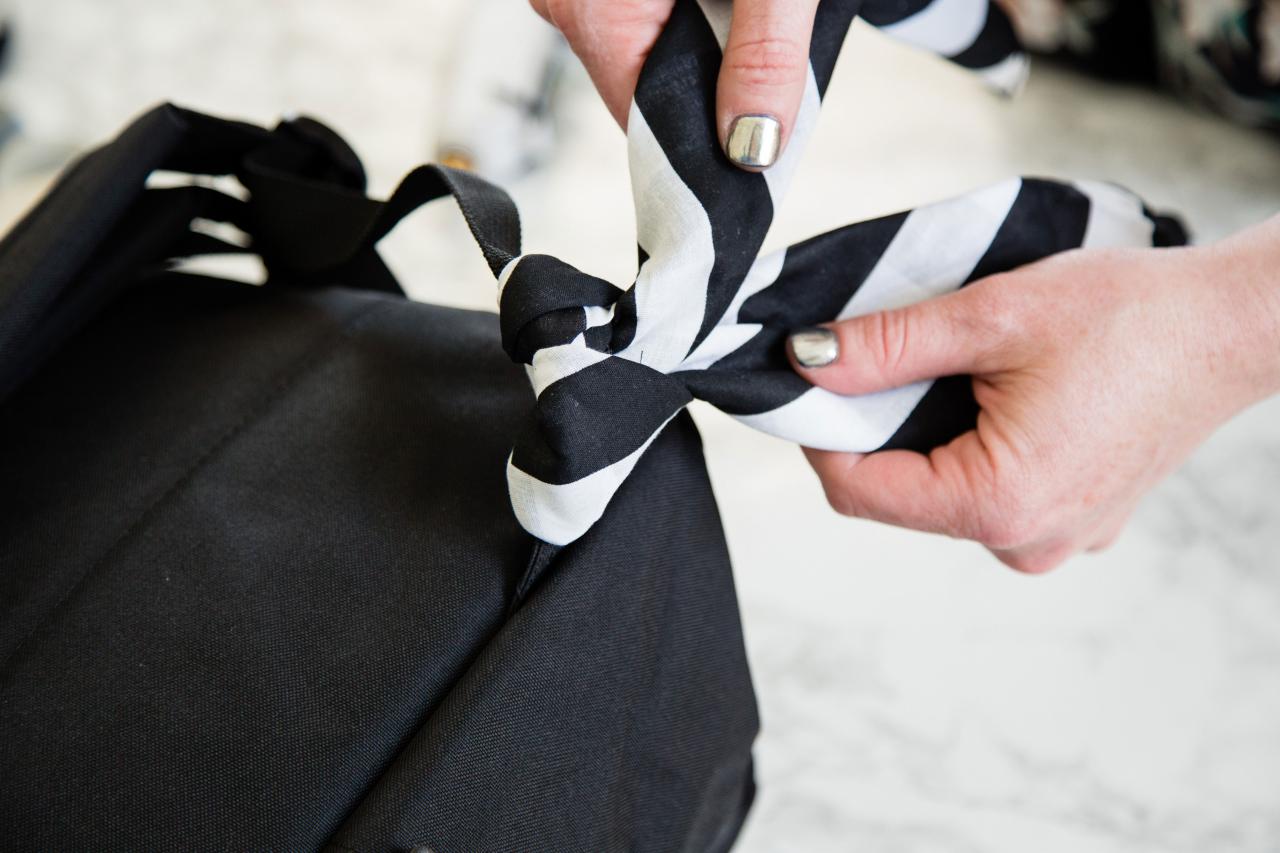
Add Scarf or Bandana
Tie a patterned scarf or bandana onto one of the backpack’s straps.

Flynnside Out Productions


.jpg.rend.hgtvcom.1280.853.suffix/1498147210826.jpeg)
.jpg.rend.hgtvcom.1280.853.suffix/1498147255489.jpeg)
.jpg.rend.hgtvcom.1280.853.suffix/1498147275987.jpeg)
.jpg.rend.hgtvcom.1280.853.suffix/1498146485888.jpeg)
.jpg.rend.hgtvcom.1280.853.suffix/1498146574633.jpeg)
.jpg.rend.hgtvcom.1280.853.suffix/1498146422753.jpeg)
.jpg.rend.hgtvcom.1280.853.suffix/1498146571660.jpeg)