
.-Battle-on-the-Beach-courtesy-of-HGTV.-.jpg.rend.hgtvcom.196.196.suffix/1714761529029.jpeg)


Best Braided Rug How-To
Turn scrap fabric into a hip, homespun rug.


Debbie Wolfe
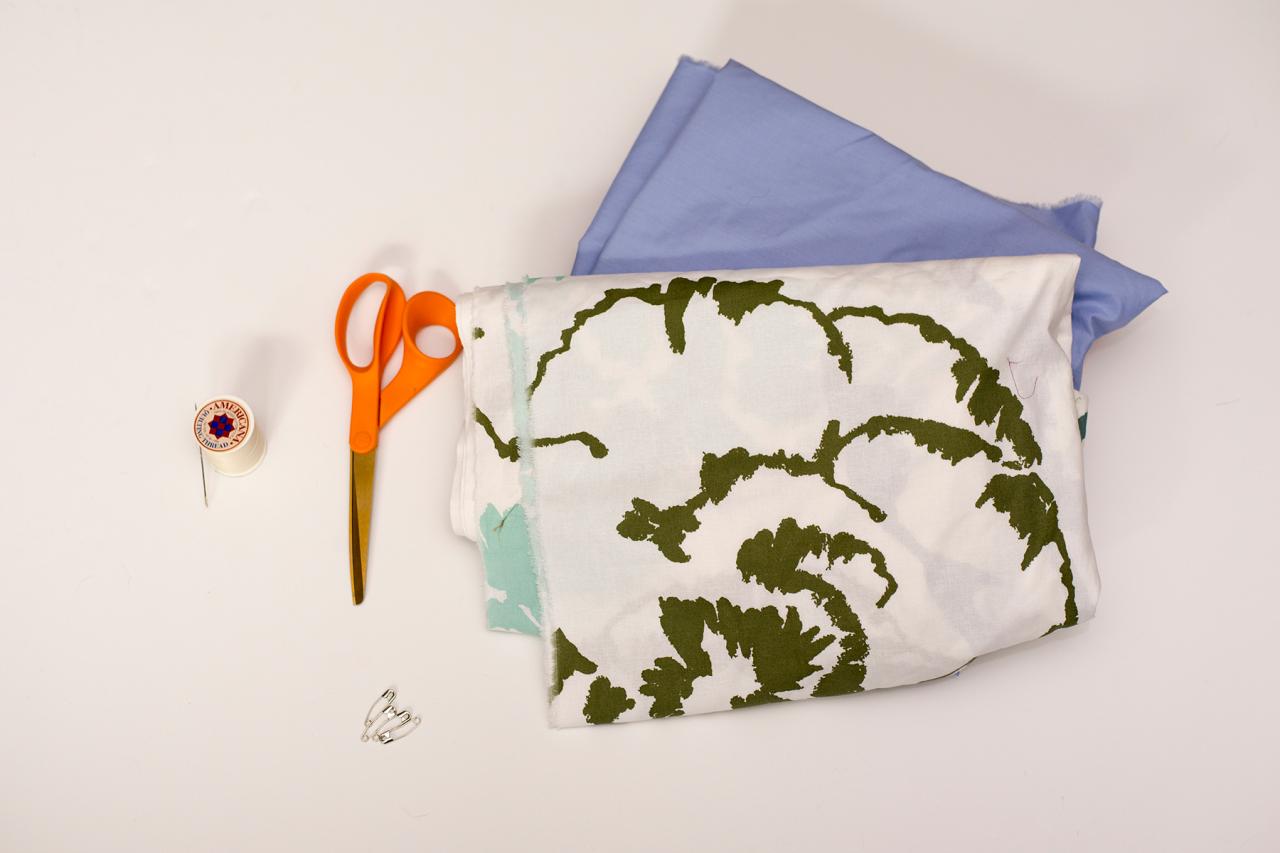
Supplies
- fabric
- scissors
- needle and thread
- safety pins

Debbie Wolfe
Here's an attractive floor cover that requires minimal sewing. Handmade braided rugs are expensive because they are labor intensive. The good news is that they are not that hard to make and they make great, thrifty use of old sheets and fabric scraps. A braided rug is a great way to recycle fabric and make your house cozy.

Debbie Wolfe

Debbie Wolfe
Make Fabric Strips
Make a small cut 2-3 inches wide along one side of the sheet. Cut lengthwise on your fabric to make the longest strips possible (Image 1). Tear the strips of fabric down the length of your fabric (Image 2). Cotton tears easily. If using knits or synthetics, you might have to cut instead of tearing.

Debbie Wolfe

Debbie Wolfe

Debbie Wolfe
Start the Braid
Before you begin, you need to decide how big your rug will be before you start it. The proportions of the finished rug will tell you how long to make the center braid. Generally, the length of the center braid can be determined by subtracting your planned rug's width from its length. For example, a 2-by-3-foot rug will need 1 foot of center braid, while a round rug only needs a few inches for the center braid. Select three strips of fabric of different lengths (very important). Hand stitch the ends of these three strips of fabric together. Begin a basic three-strand braid (Image 1). Start a basic three-strand braid (Image 2). Make braid an inch longer than the length you determined, because the end will have to turn back on itself when you begin to work on the next part of the rug. Once you get to your desired length, it’s time to add a fourth scrap of fabric. Sew a fourth fabric strip under the last crossover formed by the original three strips (Image 3).

Debbie Wolfe

Debbie Wolfe

Debbie Wolfe

Debbie Wolfe
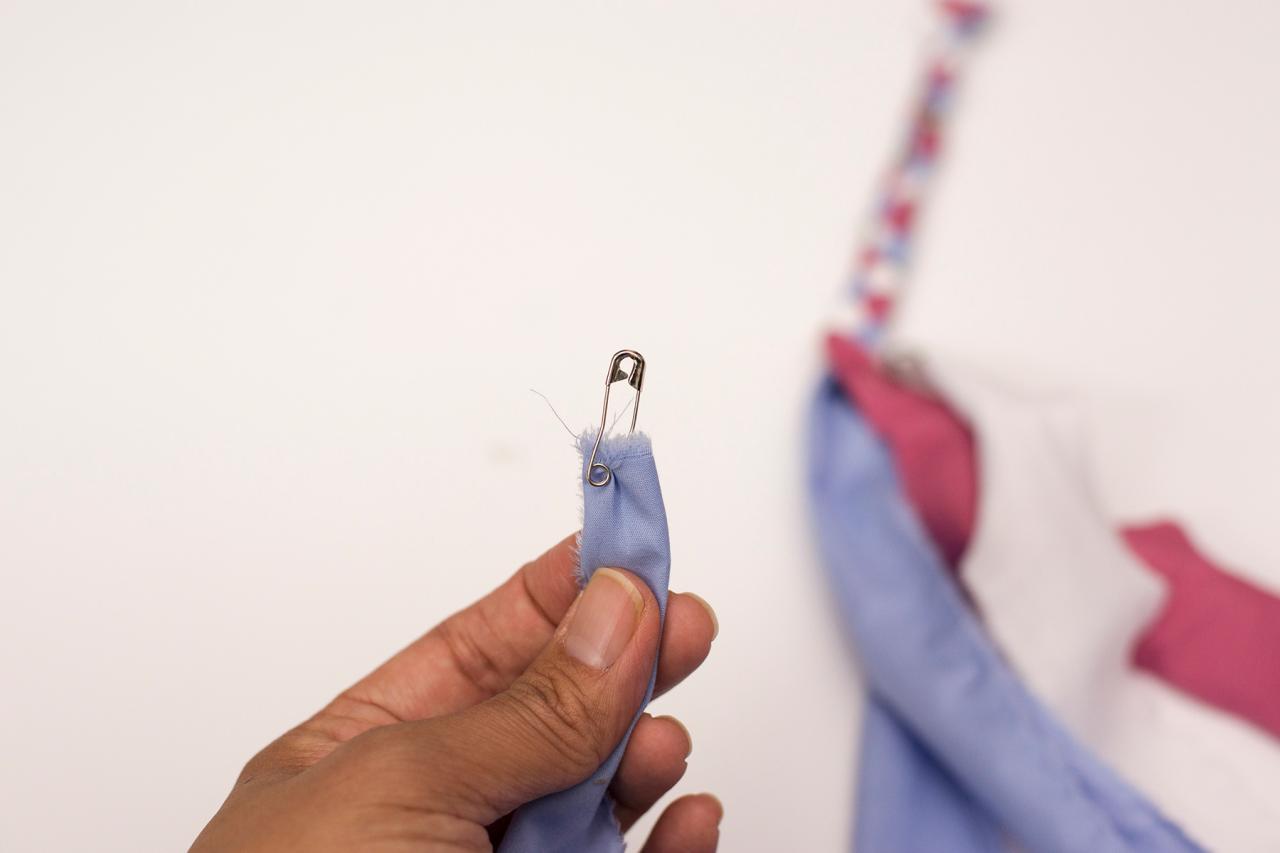
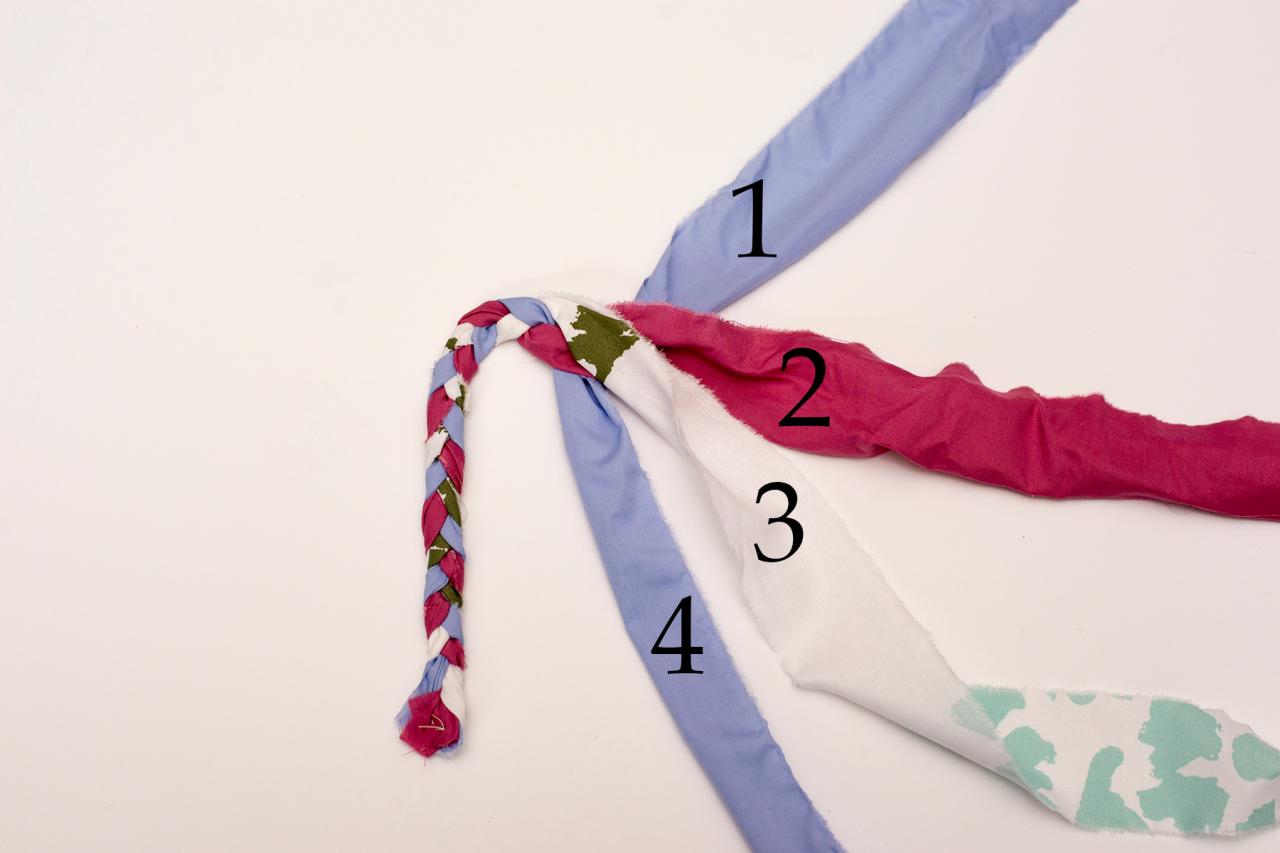
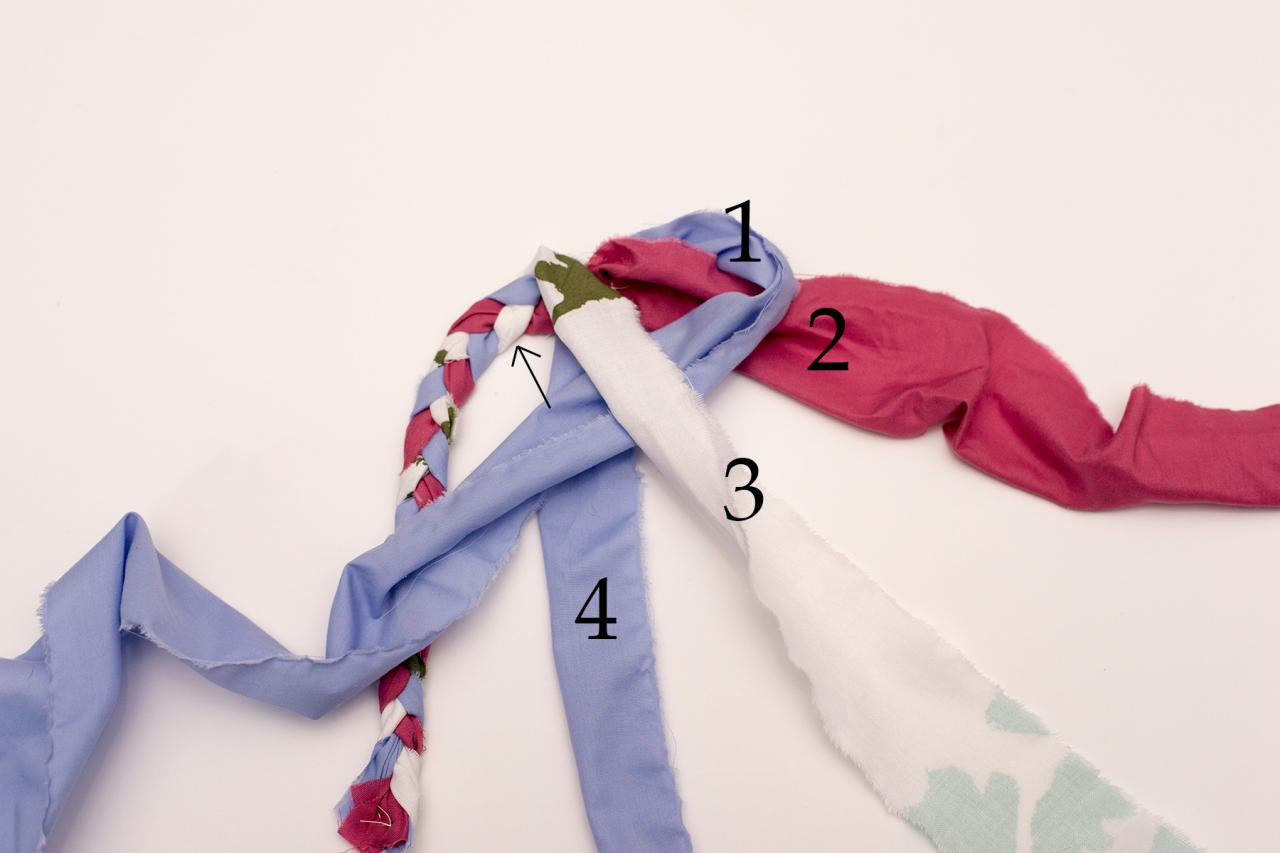
Interlock Weave
Fasten a safety pin to use as a "needle" to the end of each strip (Image 1). Fold the extra inch you braided into the center braid so that the four strands lie side by side, to the right of the braid. The weaving will go from right to left, so imagine the strips are numbered from one to four (Image 2). Take strip No. 1 and weave it over strip No. 2, under strip No. 3, and over strip No. 4. Then, using the safety pin as a needle, pull strip No. 4 through the adjacent loop of the center braid (Image 3). Now, strip No. 2 will be in the far right position. Weave it over No. 3, under No. 4, over No. 1, and through the next loop of the center braid. Continue in this manner until you get close to running out of fabric (Image 4).

Debbie Wolfe

Debbie Wolfe

Debbie Wolfe

Debbie Wolfe
Adding Fabric Strips
Cut a small slit in the end of the strip that is being woven. Cut a small slit on the new strip of fabric (Image 1). Insert the new strip of fabric through the slit at the tail of the strip that you need to add onto (Image 2). Pull the new strip through and insert its tail through the slit you cut in that new strip (Image 3). Pull the strip until it forms a knot connection the new strip of fabric to the tail of the old (Image 4). Continue to add strips as you need them. As you make your way around, your rug may start to “pucker.” Don’t pull too tight on the fabric. Also, you can compensate by braiding more than one strip through each corner loop as you round the turns.

Debbie Wolfe

Debbie Wolfe
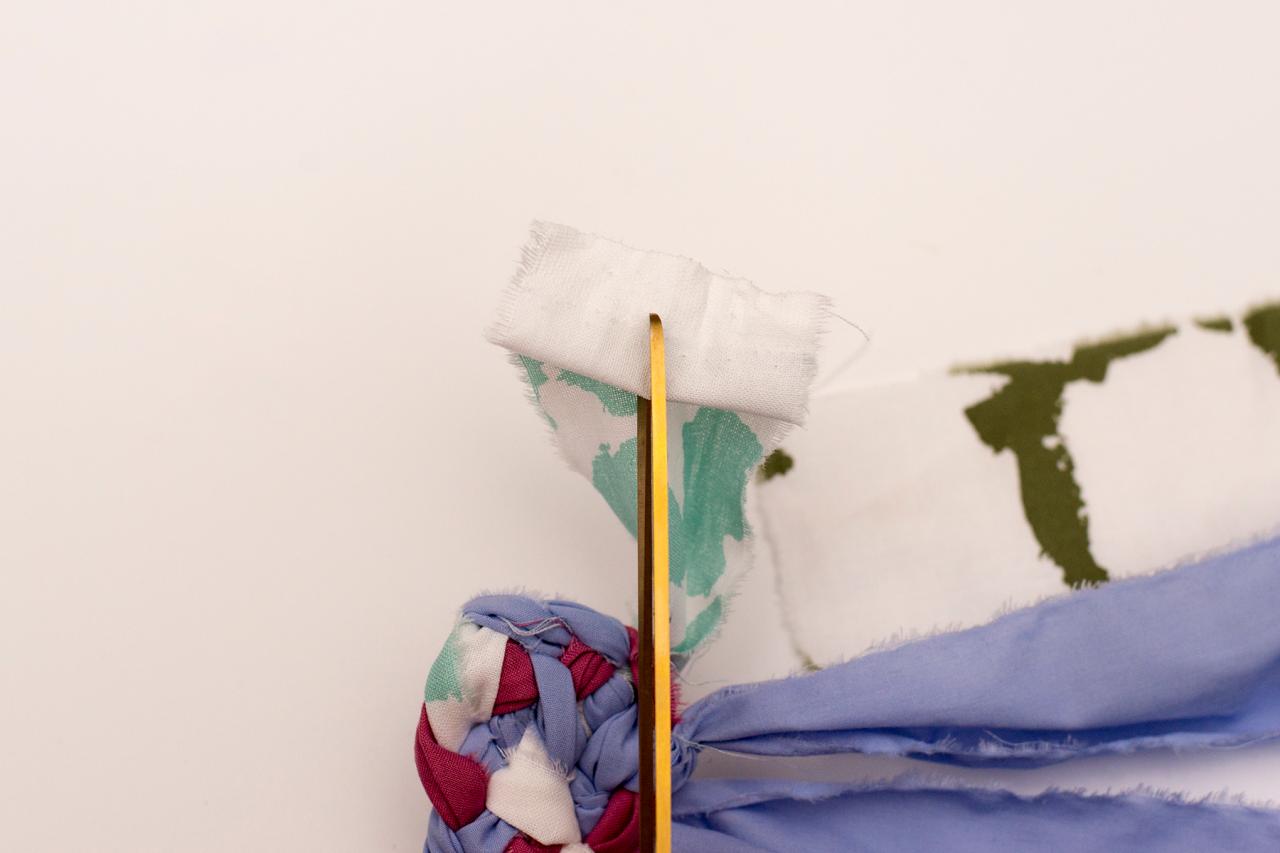
Finishing
When your rug is the right size, trim the longer strips (Image 1). Weave each of these strips under a loop and knot them on the back (Image 2). For added security, you can also stitch them in.

Debbie Wolfe
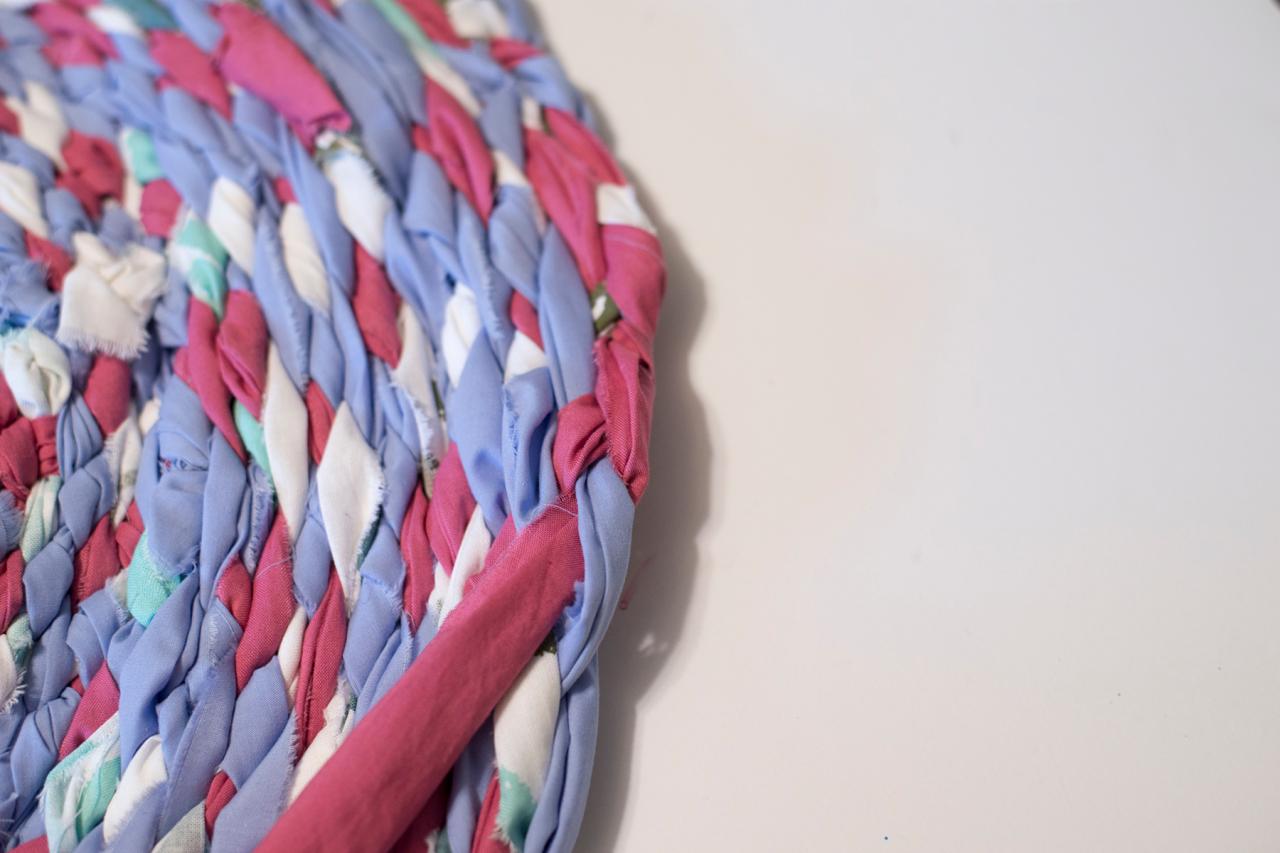
Lay your new rug down and enjoy the fruits of your labor.


