


How to Refinish an Antique Bookcase

Reattach all parts
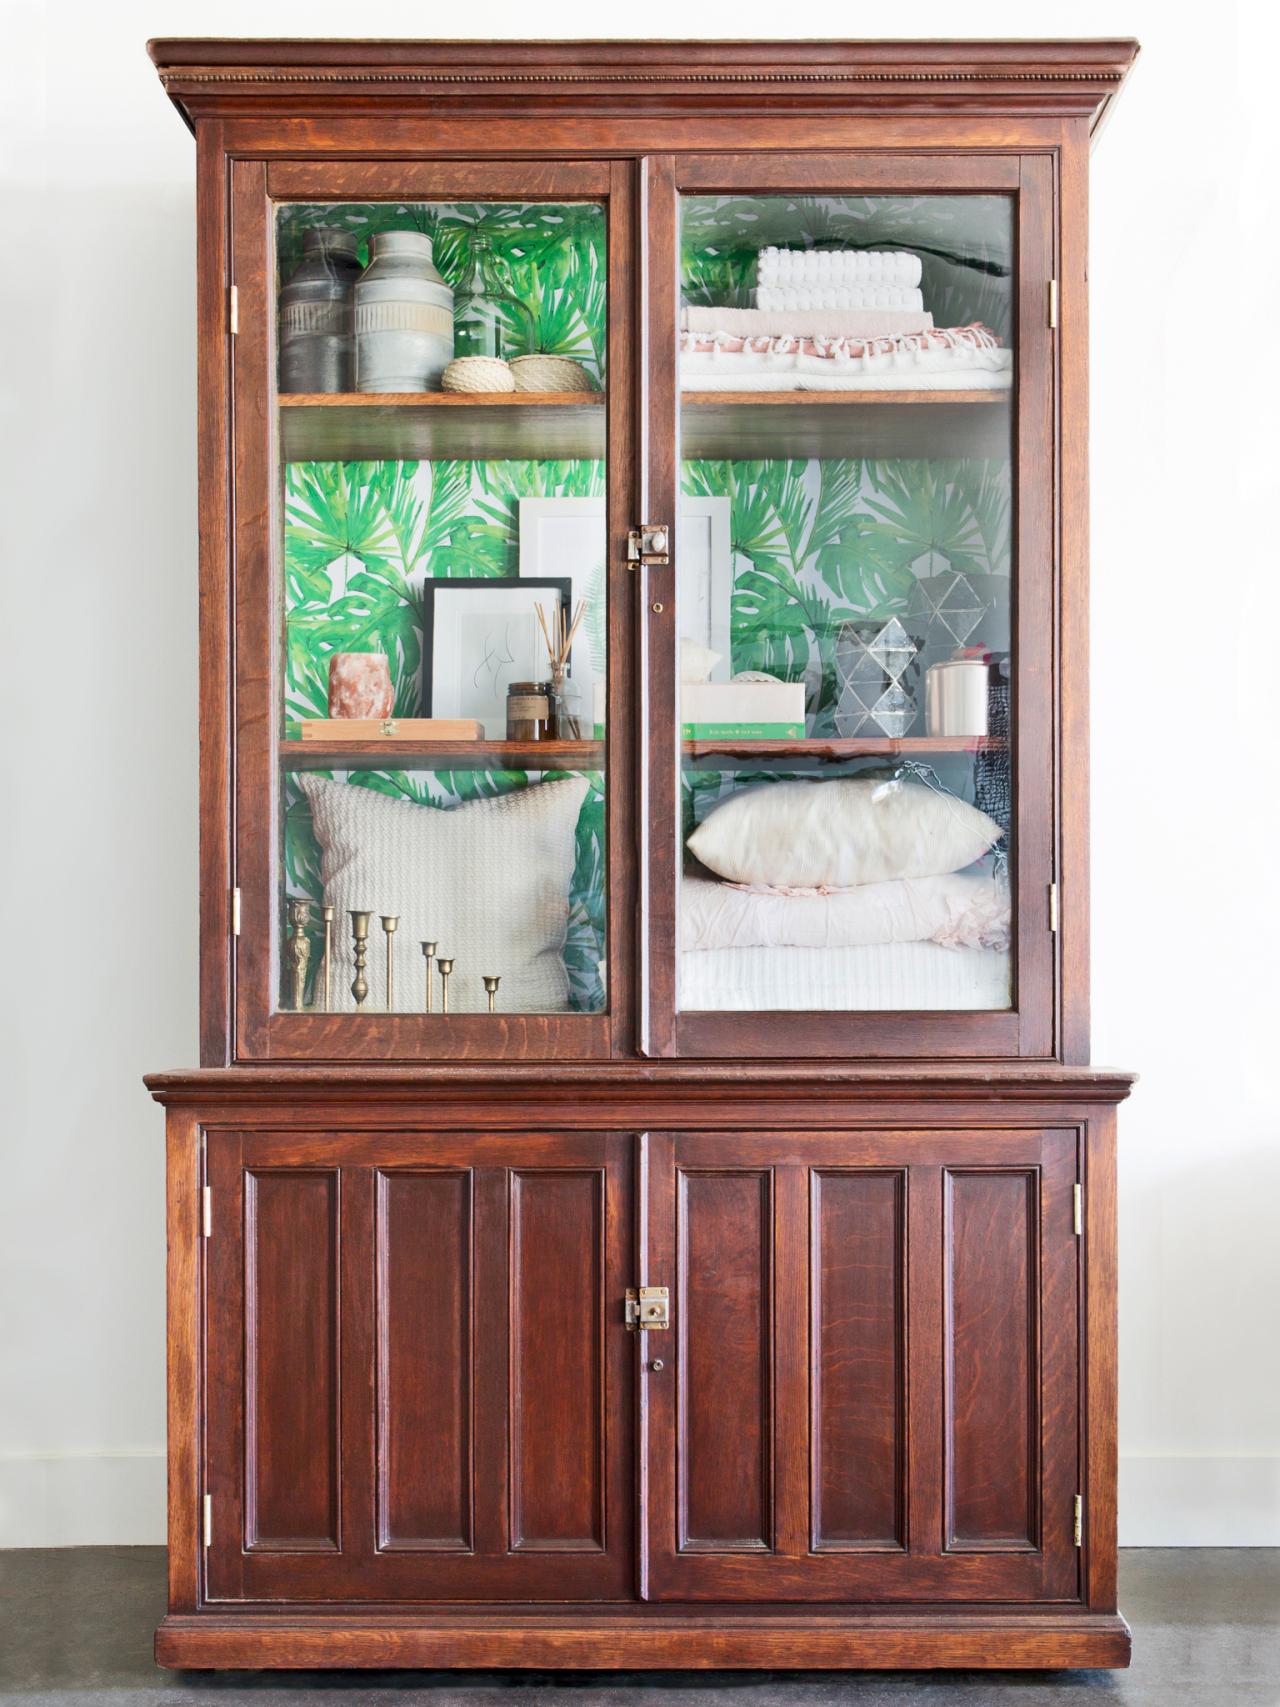
Reassemble your piece. We reattached the crown molding with a nail gun, then screwed all the hardware back in place and mounted the cabinet doors. Fill the piece with all your favorite belongings, then enjoy your hard work for years to come.

Photo by: Molly Winters
Molly Winters
Materials Needed
screw driver or drill
pry bar
handheld vacuum cleaner
several microfiber cloths and a bucket full of water
orbital sander with sandpaper pads ranging from 150-grit to 400-grit
loose sheets of sandpaper ranging from 150-grit to 400-grit
gel stain
bristle brush
ketchup
temporary wallpaper
What to Look For
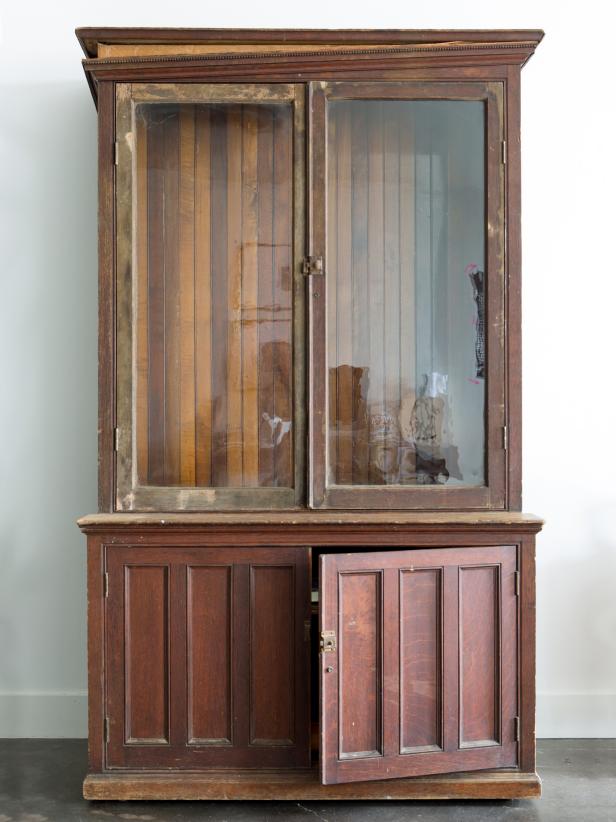
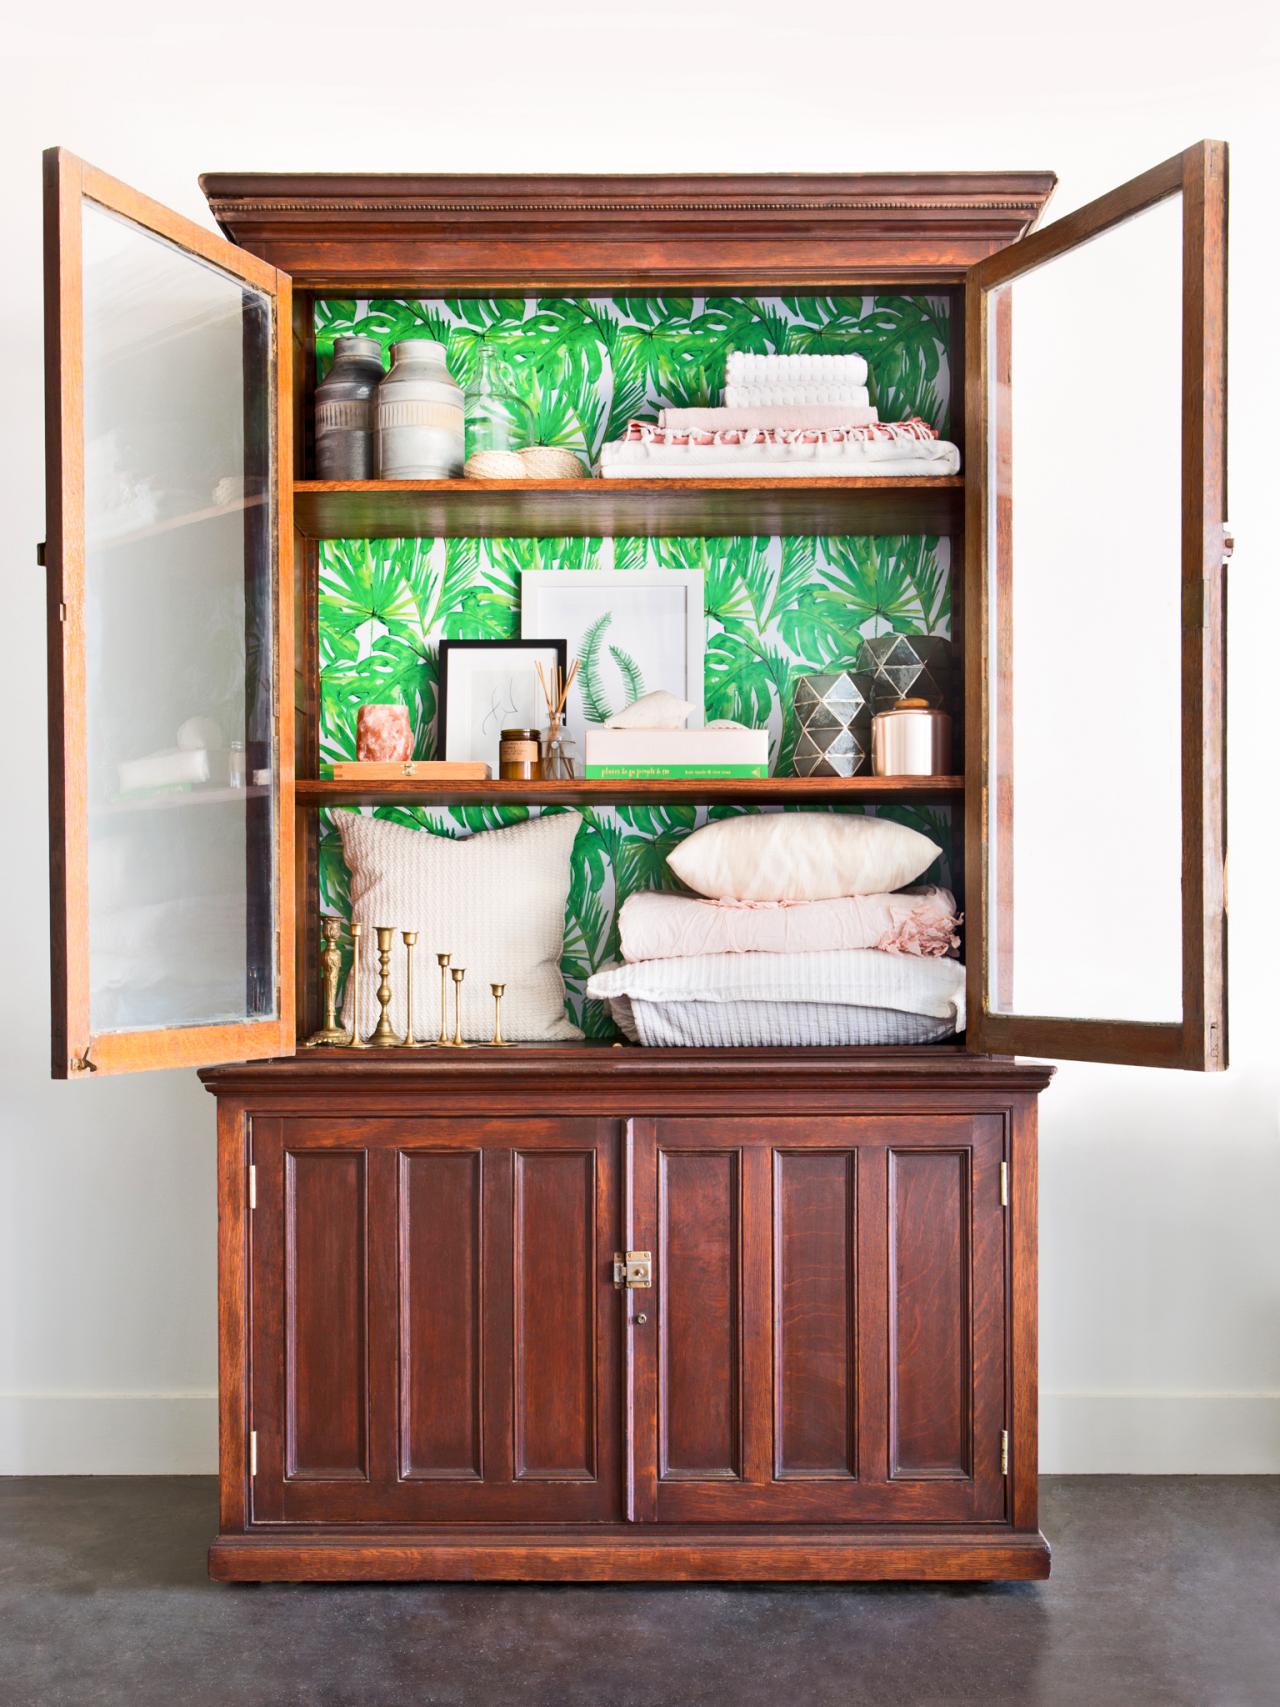
When it comes to choosing an antique to refinish, there are a few key things to keep in mind. First, look for a piece that has a shape you love, and that's made of solid, good quality wood — no veneers. Then, ensure that the piece is structurally sound. Refinishing the exterior of a large piece of furniture is one thing, but completely rehabilitating it is another. For beginners, a solid, sturdy antique is ideal for a cosmetic makeover. Think you've found just the one? Inquire about its history, and smell it to ensure you're not bringing the stench of mothballs or mildew into your home. Tip: Don't hesitate to consult with a professional. We had our friends at Hunter Wagner Designs inspect this piece before purchasing, and they informed us that the piece was made with quarter-sawn oak, making it more stable and resistant against warping. After that, our decision was made.
Molly Winters
Before: This antique bookcase had great bones and just needed a bit of sprucing up.
What to look for
Before: This antique bookcase had great bones and just needed a bit of sprucing up.
Photo By: Molly Winters
Fully Disassemble the Piece
Start by removing all doors, drawers and shelves. Use a drill or screwdriver to remove all hardware (hinges, latches or knobs), and a pry bar to to remove crown molding if possible. Set hardware to the side, and lay out all other parts flat in your workspace.

Fully disassemble your piece.
Start by removing all doors, drawers and shelves. Use a drill or screwdriver to remove all hardware (hinges, latches or knobs), and a pryer to to remove crown molding if possible. Set hardware to the side, and lay out all other parts flat in your workspace.
Photo by: Molly Winters
Molly Winters
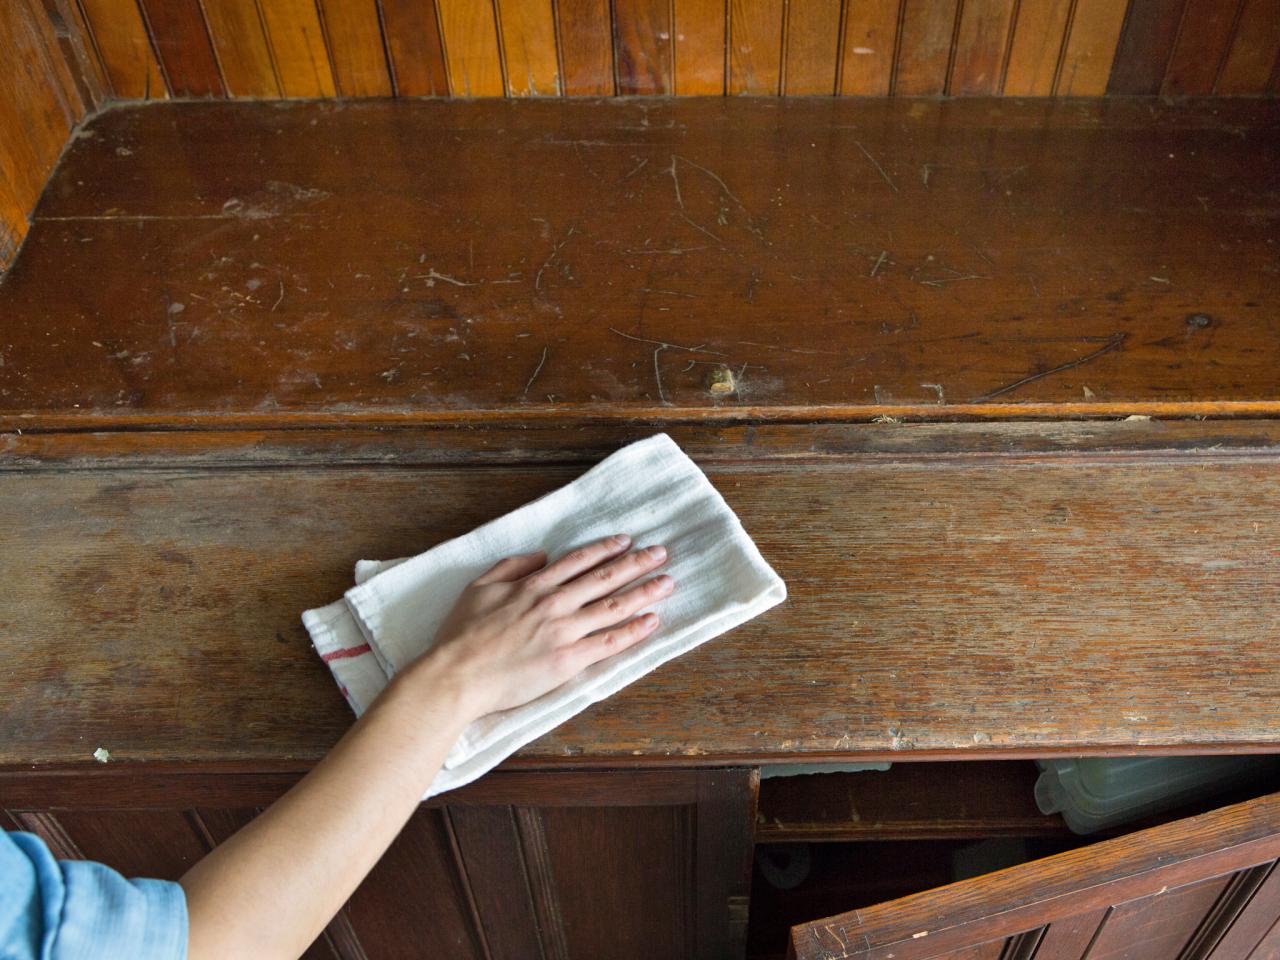
Clean Everything
Use a handheld vacuum cleaner to clean out cobwebs, dust and dirt. Then use a damp towel to wipe down all surfaces (including any removed doors, drawers or crown molding). Allow all pieces to fully dry.

Clean everything.
If your antique is in as bad of shape as this one, begin by using a handheld vacuum cleaner to clear out cobwebs, dust and dirt. Then use a damp towel or steel wool to wipe down all surfaces (including any removed doors, drawers or crown molding). Allow to fully dry.
Photo by: Molly Winters
Molly Winters
Sand Larger Areas
An electric orbital sander is extremely helpful when it comes to sanding down large, flat areas. Begin with a coarser 150-grit sandpaper — always moving with the grain — to get through any polyurethane, then continue sanding with 300- to 400-grit sandpaper until smooth.

Sand larger areas.
An electric orbital sander is extremely helpful when it comes to sanding down large, flat areas. Begin with a coarser 150 grit sandpaper —always moving with the grain —to get through any polyurethane, then continue sanding with 300-400 grit sandpaper until smooth.
Photo by: Molly Winters
Molly Winters
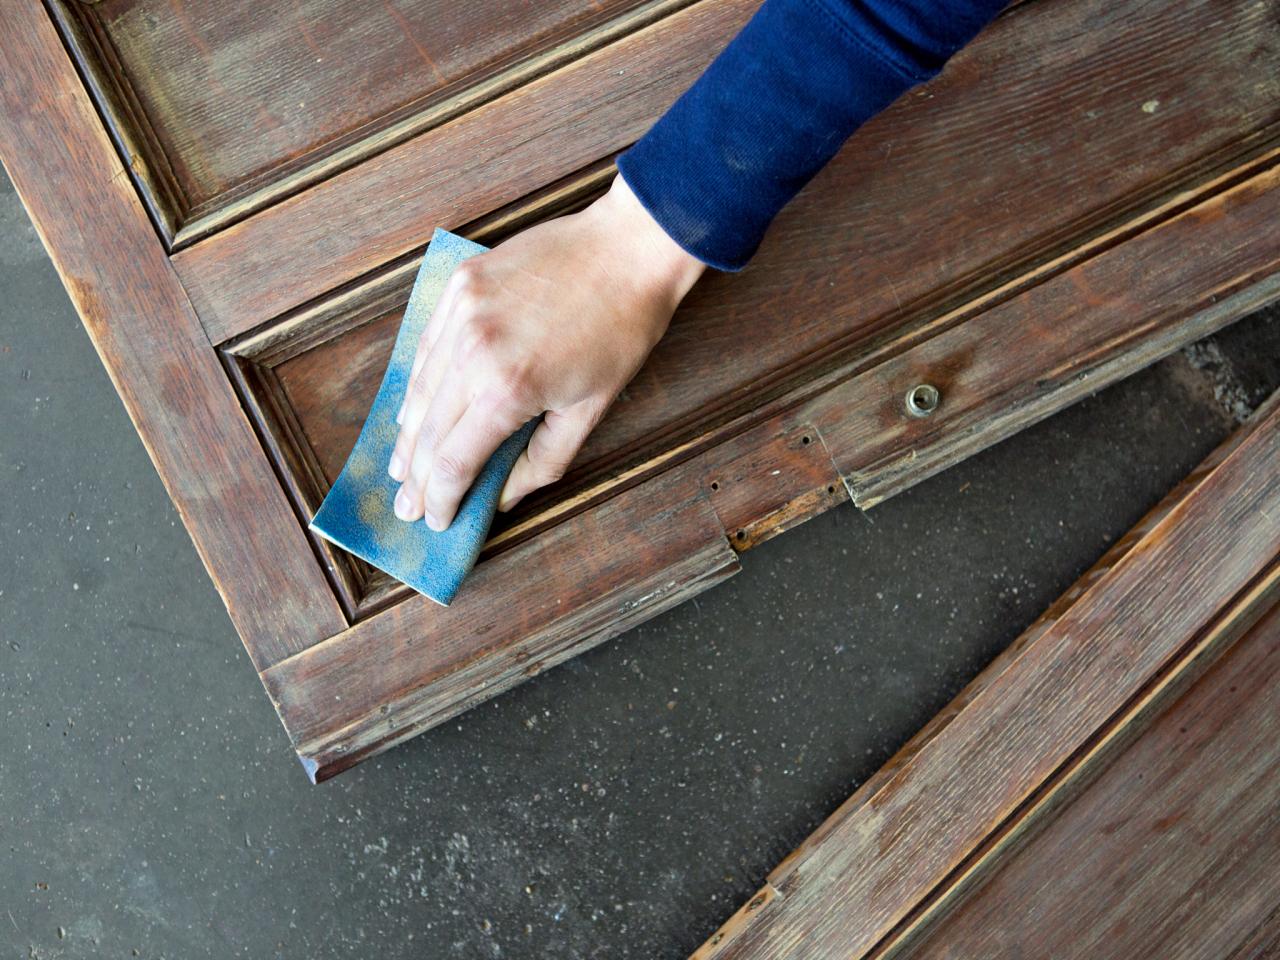
Sand Any Detailing
For smaller, harder-to-reach areas like crown molding and corners, sand using loose sheets of sandpaper. Again, begin with a coarser grit and end with a fine grit until all polyurethane has been sanded off. Tip: Sanding is the the most time-intensive and messiest part, so be patient, take breaks, and work in a space that has plenty of ventilation.

Sand any Detailing
For smaller, harder-to-reach areas like crown molding and corners, sand using loose sheets of sandpaper. Again, begin with a coarser grit and end with a fine grit until all polyurethane has been sanded off.
Photo by: Molly Winters
Molly Winters
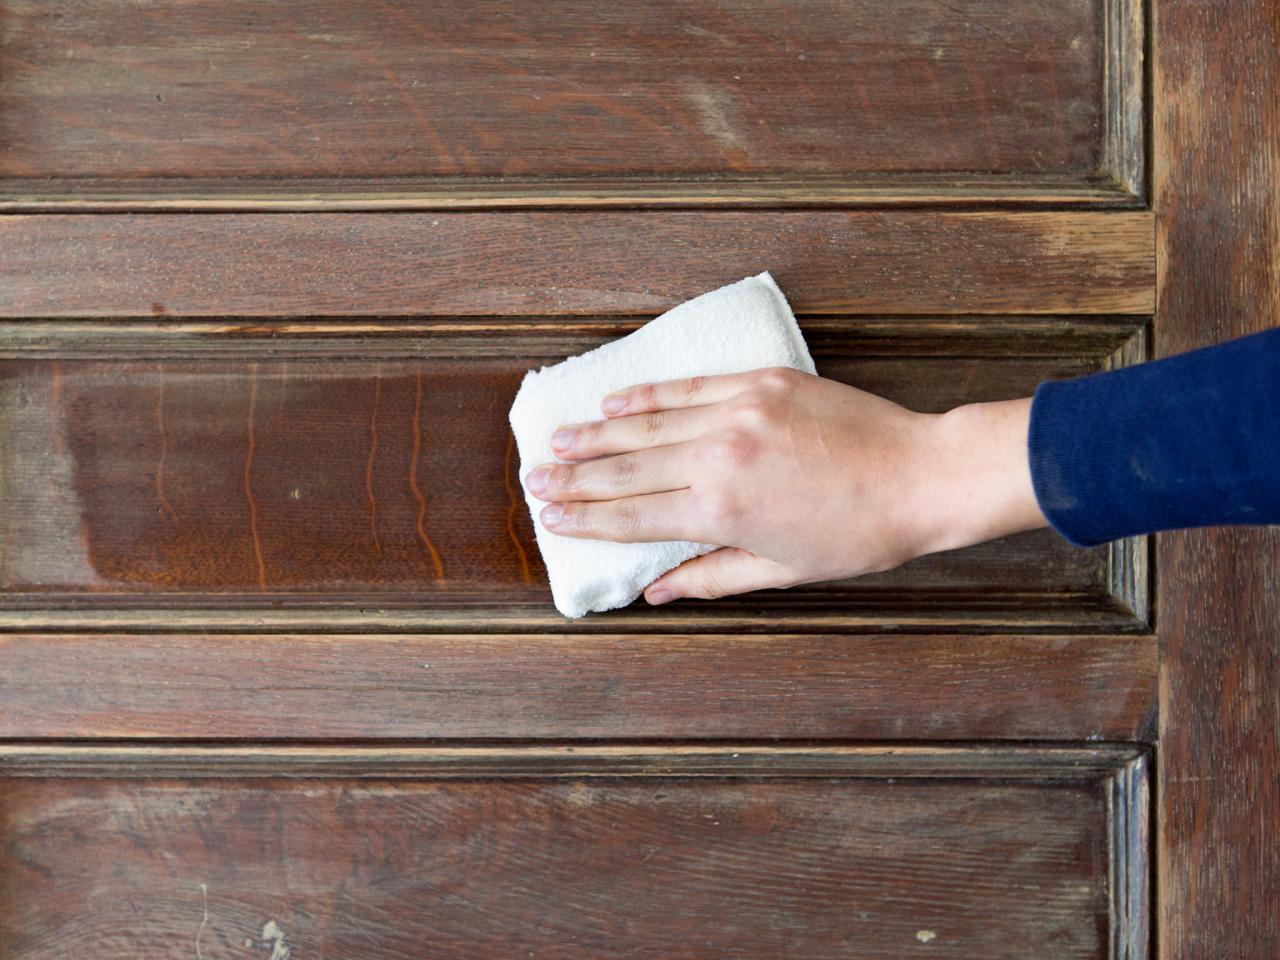
Wipe Clean
Ensure that all sanding residue is removed by wiping your whole piece down with a damp microfiber cloth. Allow to dry completely.

Wipe Clean
Ensure that all sanding residue is removed by wiping your whole piece down with a damp microfiber cloth or sponge. Allow to dry completely.
Photo by: Molly Winters
Molly Winters
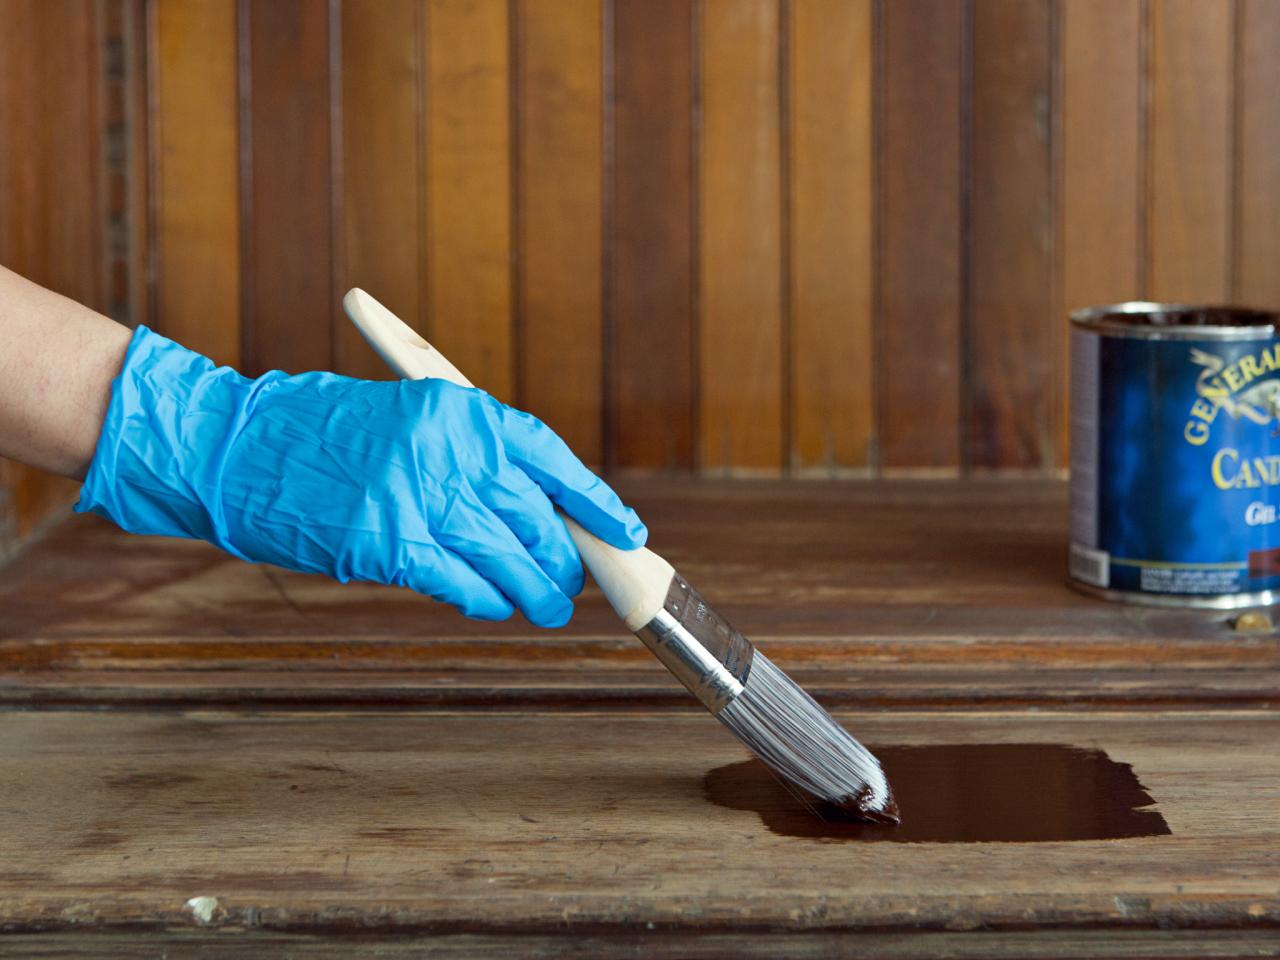
Apply Stain
Begin the staining process by working in a less-conspicuous area of your piece, especially if you've never worked with a wood stain before. Use a bristle brush to apply a generous amount of gel stain to the wood, then continue brushing with the grain to evenly distribute the stain. Note: If you've chosen to paint your antique instead of staining it, this is the time to prime and paint the wood.

Apply Stain
Begin the staining process by working in a less-conspicuous area of your piece, especially if you’ve never worked with a wood stain before. Use a bristle brush or foam brushes to apply a generous amount of gel stain to the wood, then continue brushing with the grain to evenly distribute the stain.
Photo by: Molly Winters
Molly Winters
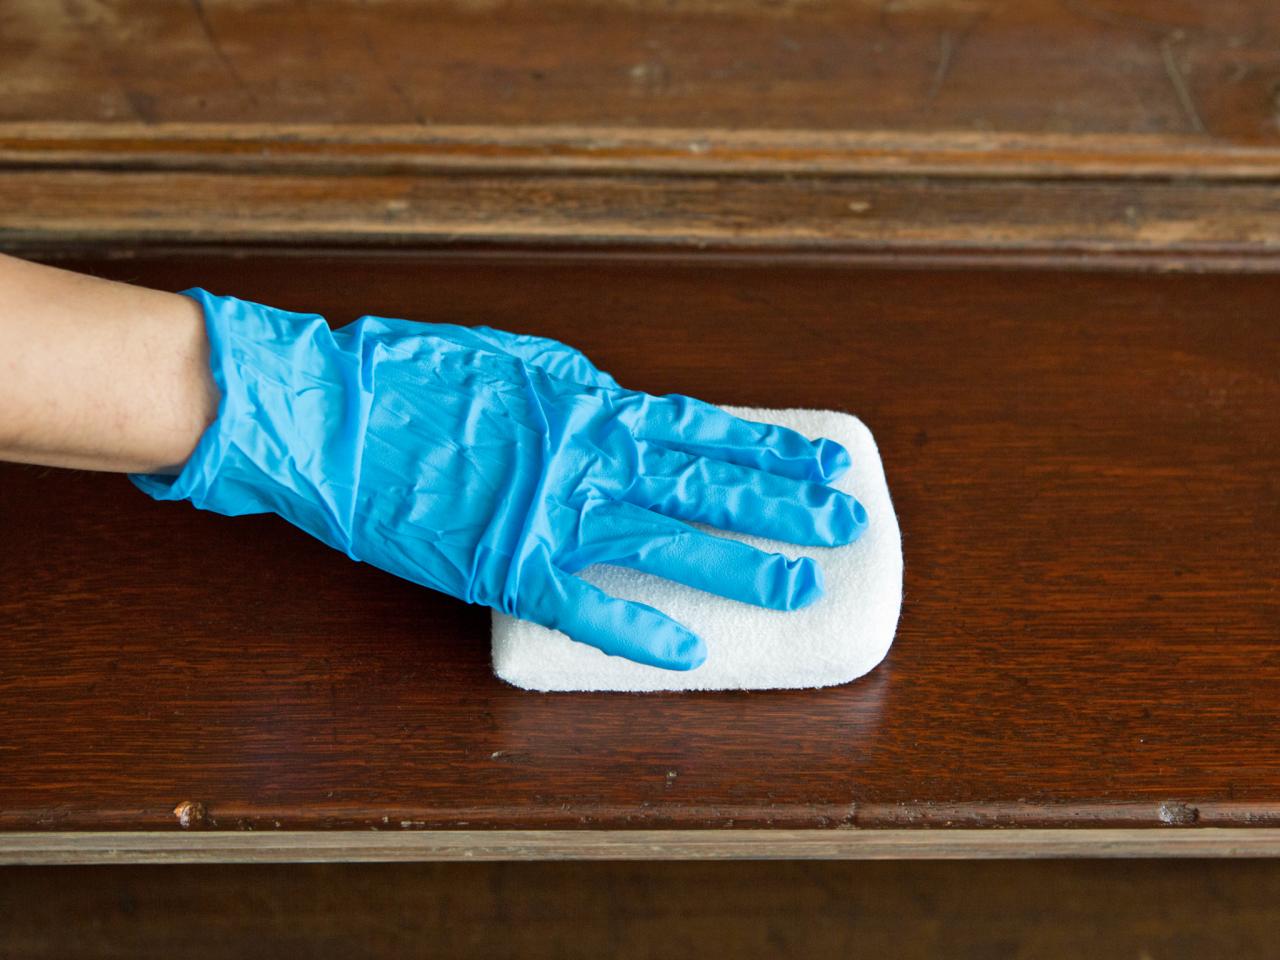
Wipe Stain
Use a staining pad or microfiber cloth to wipe away excess stain, moving with the grain. Repeat steps 6 and 7 until the entire piece, including its removed parts, has received a solid coat of stain. Following manufacturers' instrucions, allow stain to dry completely.

Wipe stain
Use a staining pad or microfiber cloth to wipe away excess stain, moving with the grain. Repeat these steps until the entire piece (and its removed parts) is covered, then allow to dry completely.
Photo by: Molly Winters
Molly Winters
On Choosing a Stain: We recommend gel stains because of their ease of use, and they produce a lustrous, hand-rubbed finish. The gel consistency minimizes drips and the thickness ensures even coverage throughout — meaning your sanding doesn't have to be as precise as it would need to be with a thinner, less-forgiving stain. We used General Finishes' Gel Stain in Candlelight to closely match the original color of the bookcase.
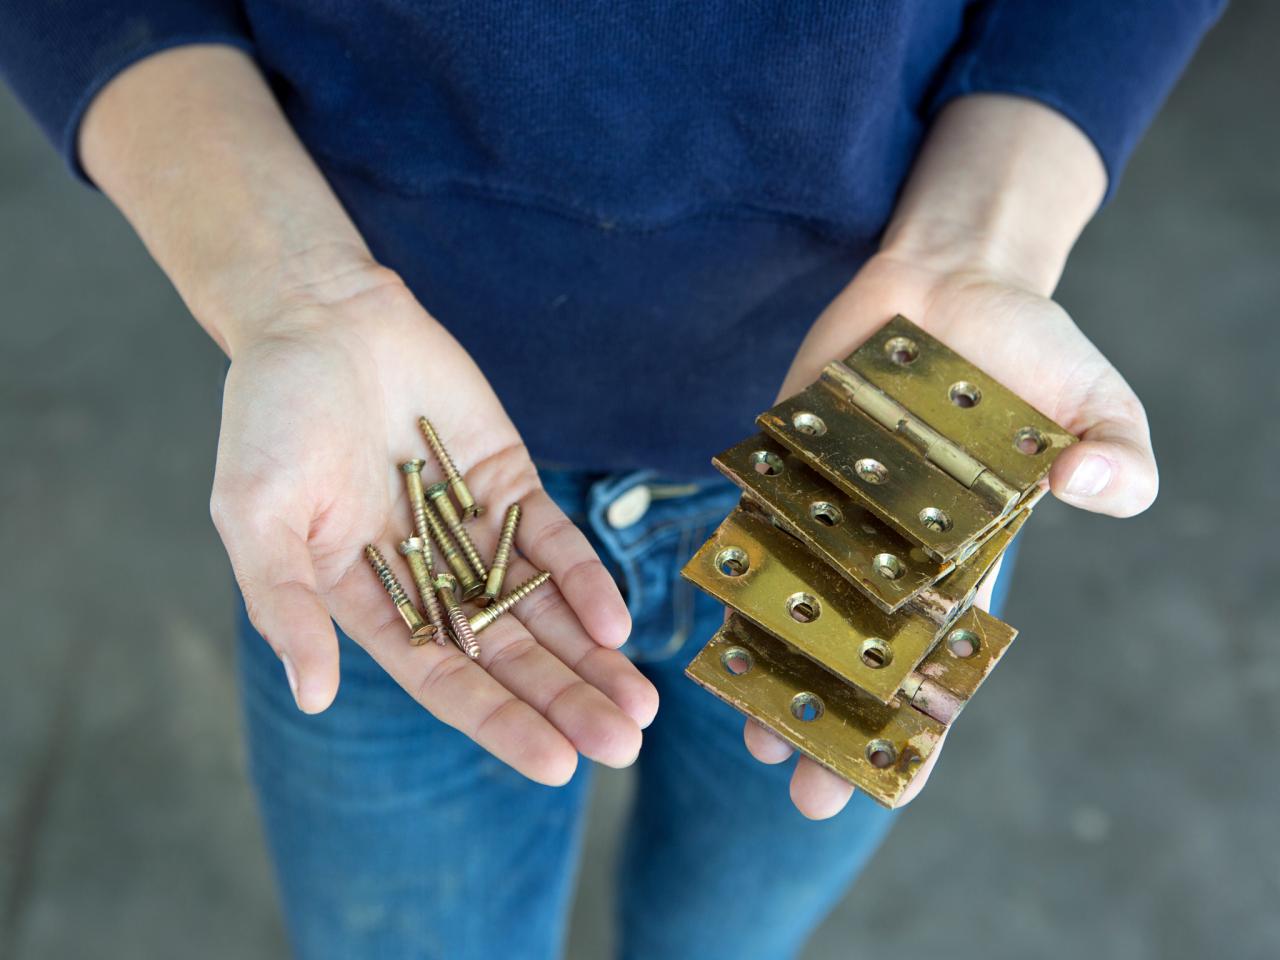
Polish Hardware
Chances are, the metal hardware on your antique is rusted or tarnished. Our trick to getting them shiny as new? Classic store-bought ketchup. To use it, completely cover all hardware with ketchup and allow to sit for 15-30 minutes, then scrub with a sponge under warm running water, and allow to dry completely.

Polish hardware.
Chances are, the metal hardware on your antique is rusted and tarnished. Our secret ingredient for getting them shiny as new? Classic store-bought ketchup. To use it, completely cover all hardware with ketchup and allow to sit for 15-30 minutes, then scrub with a sponge under warm running water, and allow to dry completely.
Photo by: Molly Winters
Molly Winters
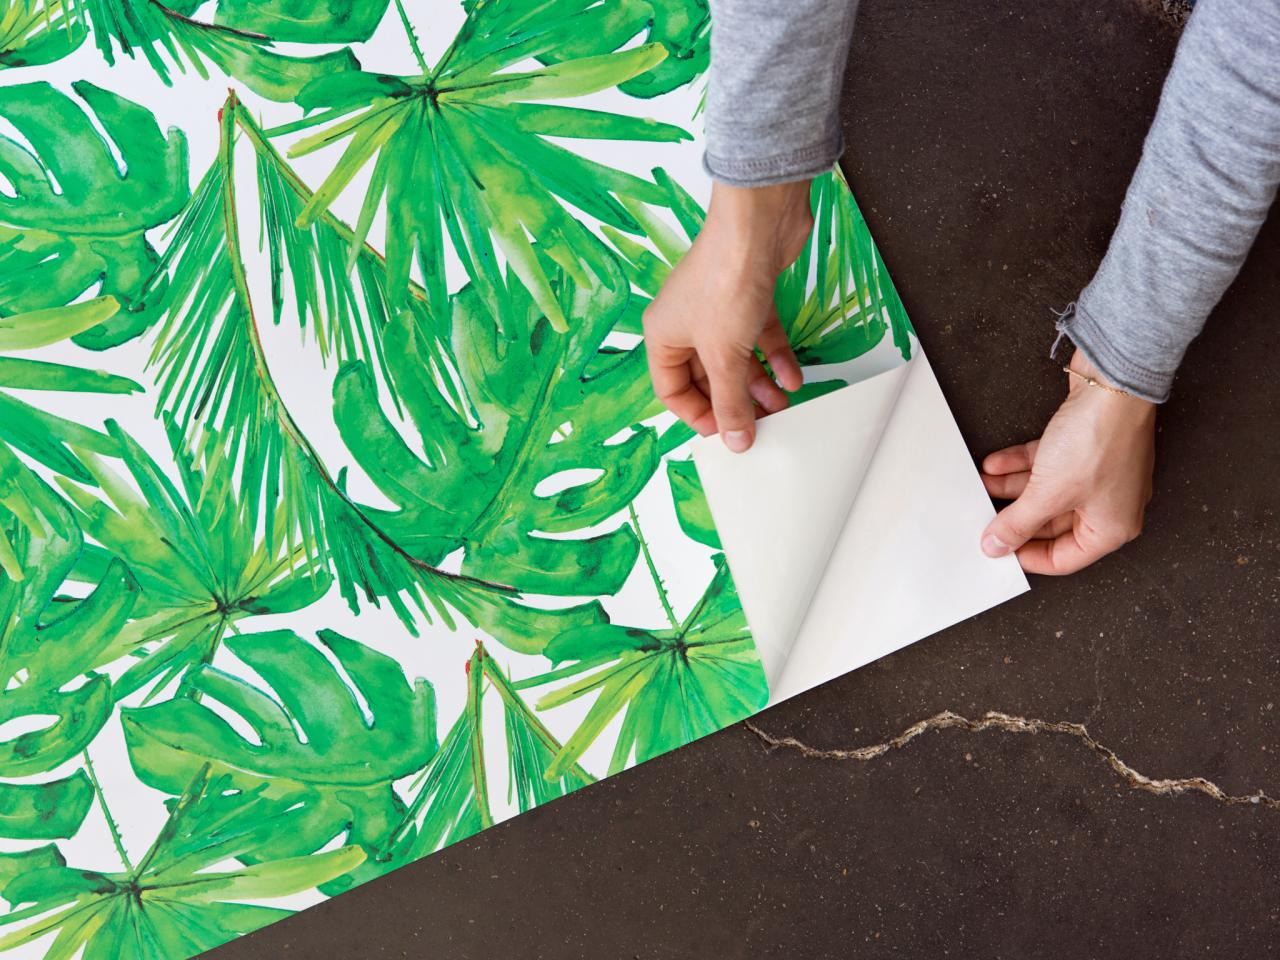
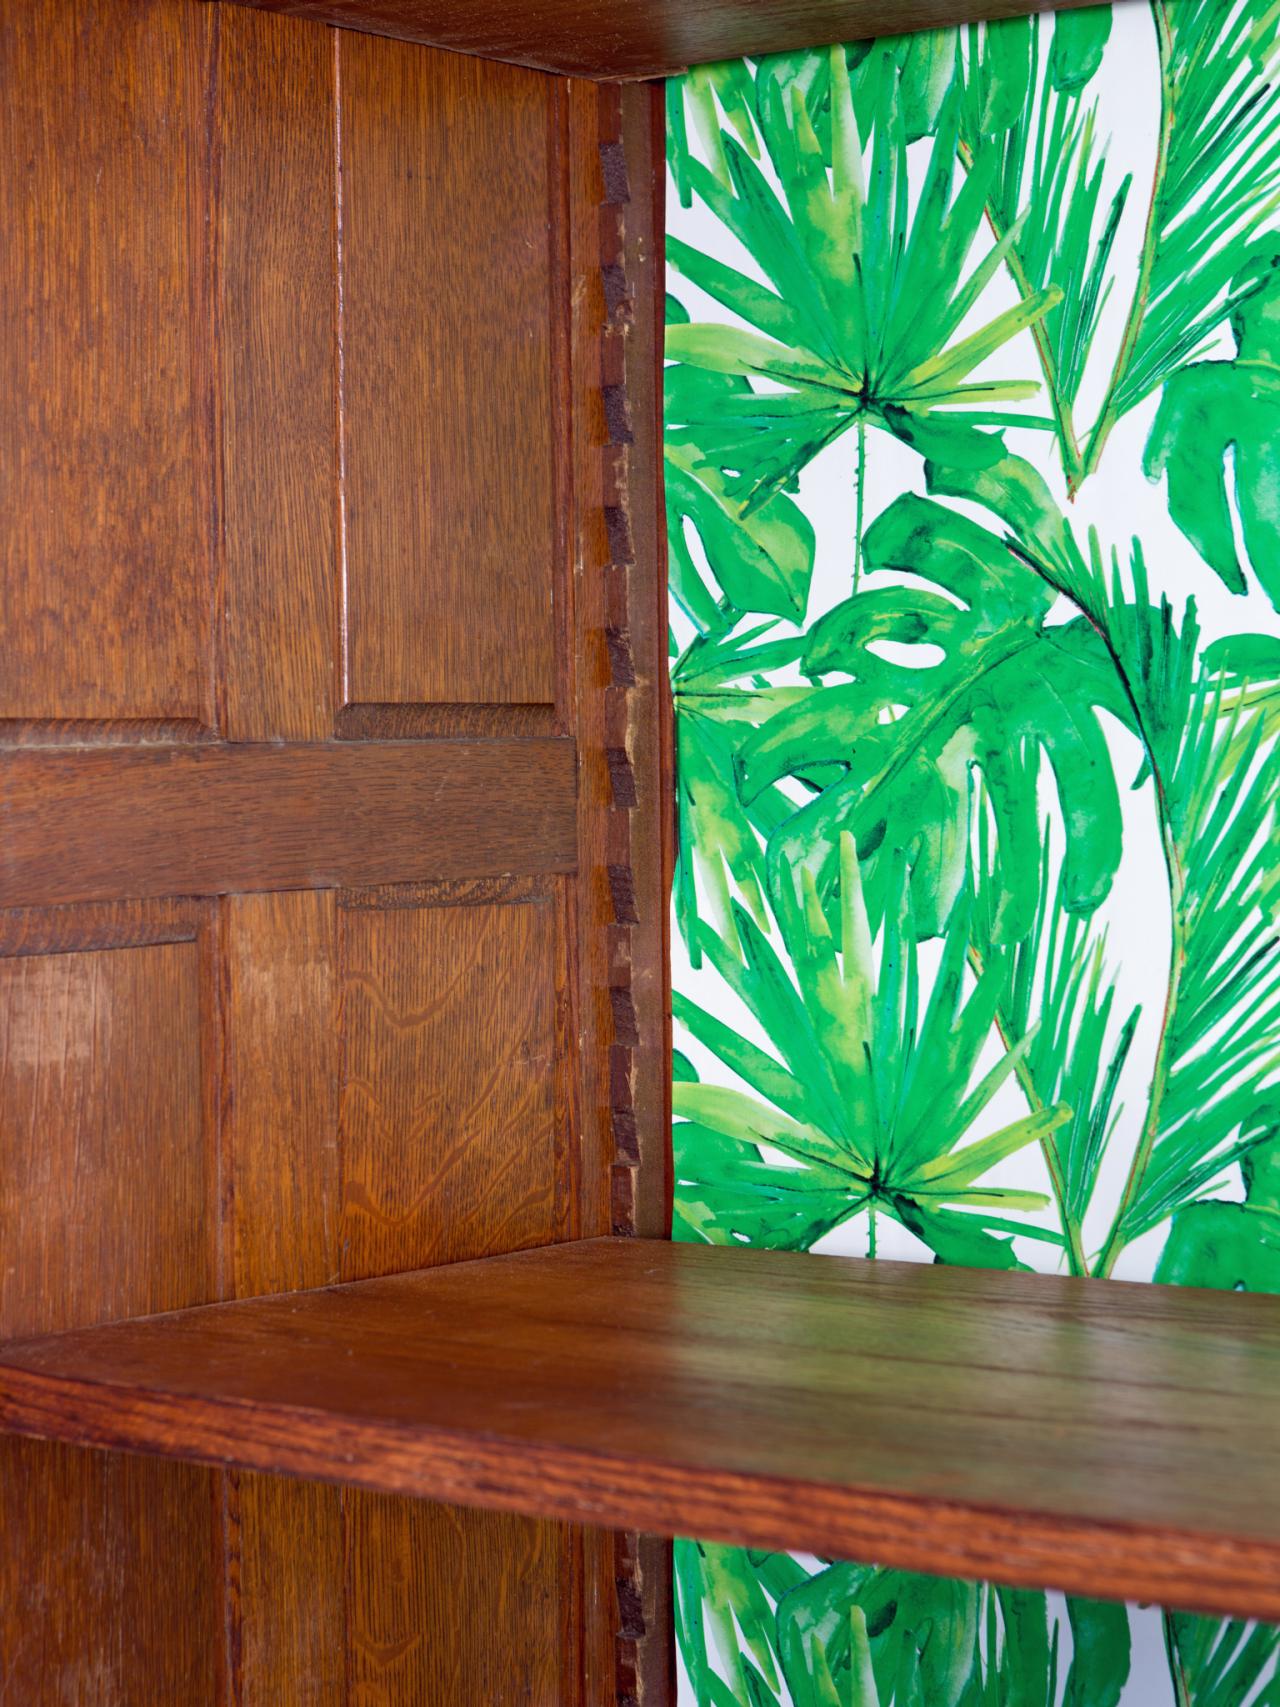
Add a Pop of Pattern
If you want to keep your antique as close-to-the-original as possible, but still want to give it some flair, temporary wallpaper is a great solution. Simply peel the backing, then adhere the wallpaper to the bookcase's back panel.

Add a pop of pattern.
If you want to keep your antique as close-to-the-original as possible, but still want to give it some flair, temporary wallpaper is a great solution. Simply peel the backing, then adhere the wallpaper to your wood.
Photo by: Molly Winters
Molly Winters
Make Your Piece Functional
Feel like your piece would work better for you if it only had that one thing? Now's the time to add casters, custom shelves, a keyed lock, a marble top, or anything else that improves your piece's functionality. And don’t hesitate to enlist the help of a professional! Our friends at Hunter Wagner Designs built these custom shelves better than we ever could have.

Make your piece functional.
Feel like your piece would work better for you if it only had that one thing? Now’s the time to add rolling casters, custom shelves, a key lock, a marble top, or anything else that improves your piece’s functionality. And don’t hesitate to enlist the help of a professional!
Photo by: Molly Winters
Molly Winters
Reattach All Parts
Reassemble your piece. We reattached the crown molding with a nail gun, then screwed the hardware back in place and mounted the cabinet doors. Fill the piece with all your favorite belongings, then enjoy your hard work for years to come.

Reattach all parts
Reassemble your piece. We reattached the crown molding with a nail gun, then screwed all the hardware back in place and mounted the cabinet doors. Fill the piece with all your favorite belongings, then enjoy your hard work for years to come.
Photo by: Molly Winters
Molly Winters


