


How to Install Tin Ceiling Tiles
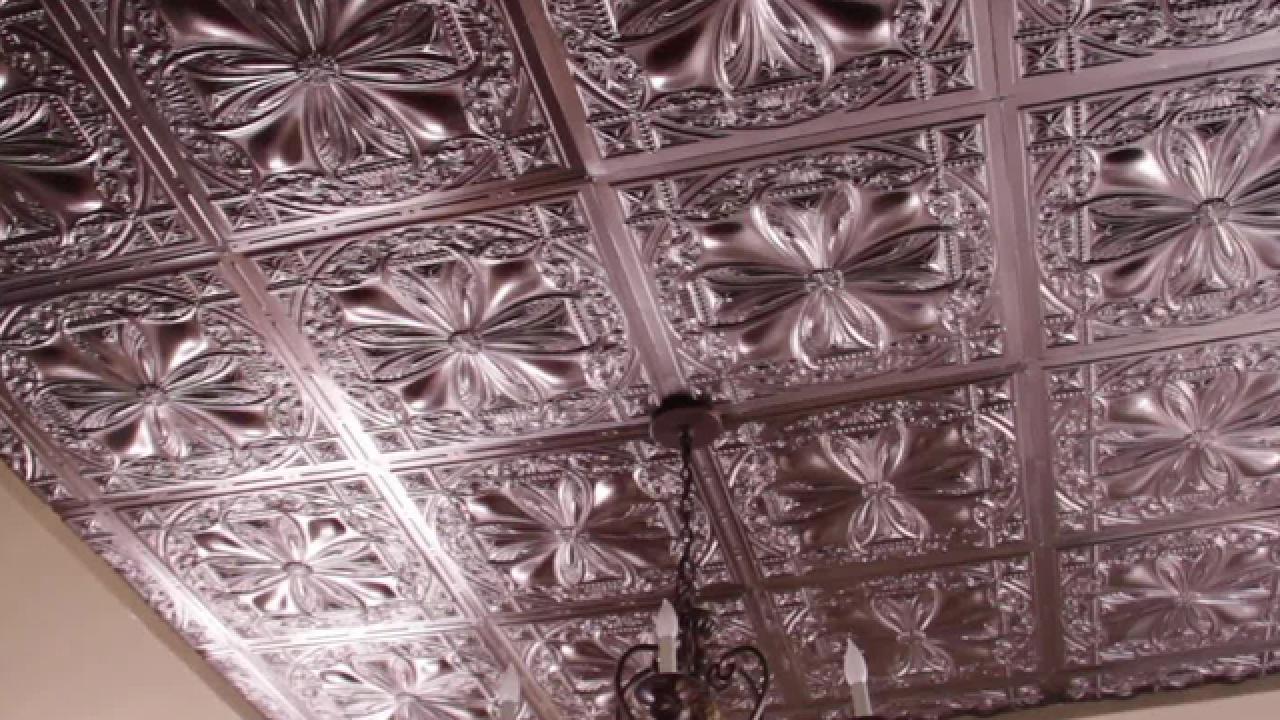
Get the look of 1920's glamour on your ceiling with unbelievably real-looking fake tin tiles.

People often think to decorate their walls with art and new paint colors, or their floors with fabulous rugs, but a famous designer secret to making a space special is to dress the ceiling. It isn't called the fifth wall for nothing. We started this project with a bare, square ceiling over a Spanish-style dining room. With some simple calculating and installing, this faux tin ceiling makes a dramatic impact, and it keeps with the 1920's style of the space. This plastic tile is made to look just like the real tin version. In addition to being easier to cut and work with, it's cheaper, too.
Materials Needed
- faux tin ceiling tiles
- concrete sealer
- measuring tape
- chalk snap line
- duct tape
- scissors
- paint roller
Get Started: Plan, Purchase and Install
Find the square footage of the area you'd like to tile. Measure the length and width of the space. Next multiply those numbers together to find the square footage. This will be important for ordering enough of the product you select. If you're working on a ceiling, have a friend help you measure if needed to get the correct dimensions.

Order Your Tiles
When picking faux tiles, think about the style of your home first. Look for a style that naturally blends with your space. Faux tin ceiling tiles come in several colors, and several faux metal finishes – it comes down to taste and color scheme. They also come in 6" patterns up to 24" patterns. We chose a larger pattern that had a Spanish-style vibe and ordered it in a dark, bronzed finish.
Purchase 15% more tile than you need, for any cutting mistakes and pattern matching. I also suggest ordering 1" decorative strips in the matching material of your tile to cover seams.
To determine your installation needs, check the ceiling's material. Many people prefer a glue-up install, so you can reposition tiles as needed while the glue sets up. Plaster, paneling and plywood work with glue, but check your manufacturer's instructions for best practices.

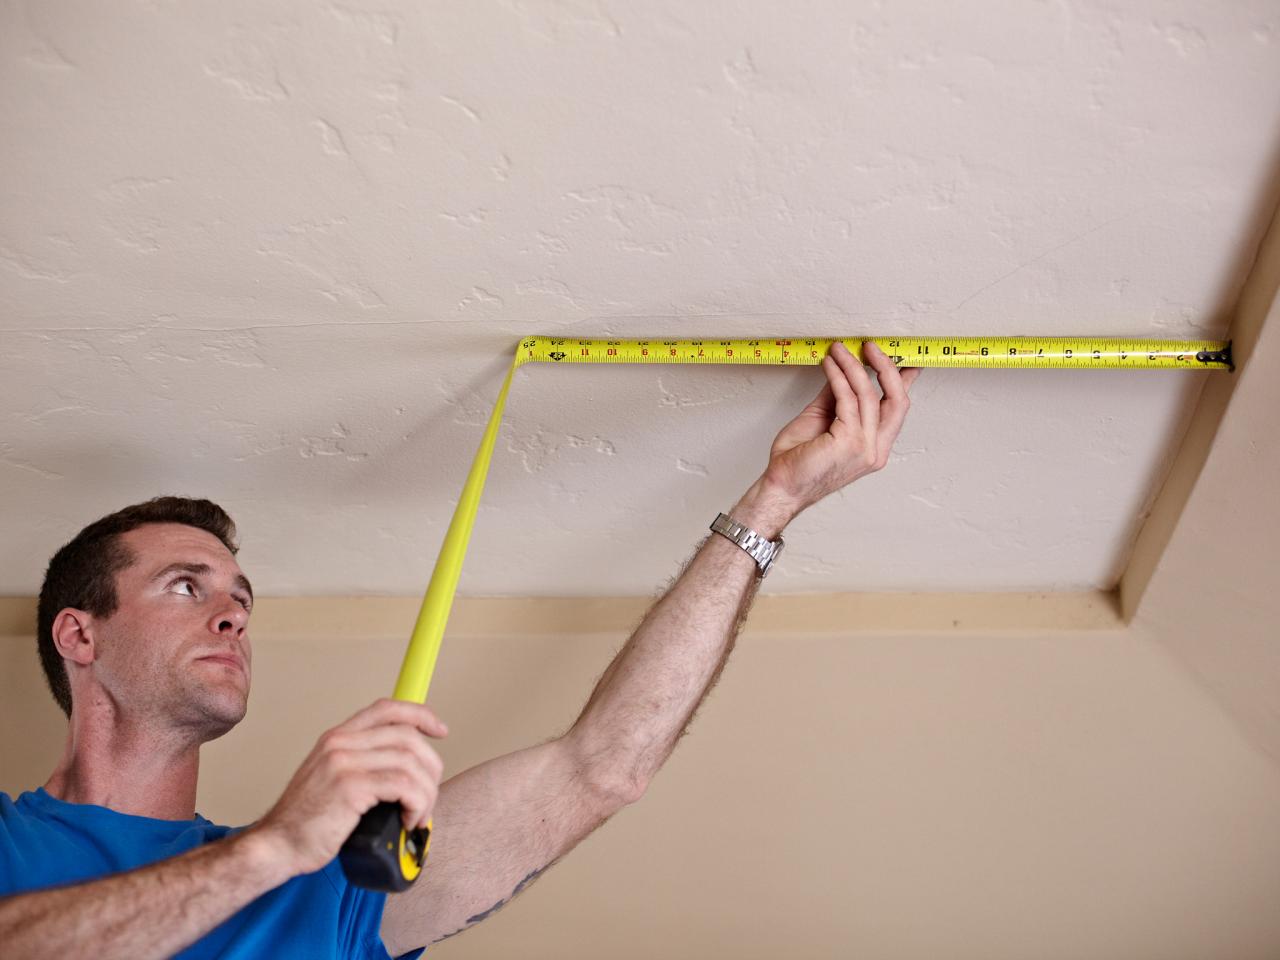
Mark the Control Lines
For most spaces, the control line should be a straight line cutting your tiled area in half. Measure to find a halfway point on either side of your space. Use a snapping chalk line to connect the two points by stretching it from one side to the other at your halfway mark. Two people should hold it in place, and one person should pull down and release the chalk-covered string to snap a chalky line on the ceiling. This will serve as a reference line that you can use to ensure straight tile placement.
Once you've completed a line going one direction, rotate 90 degrees and create another control line to create a cross and form straight lines bisecting your middle point. Plan for your first tile to be placed in the corner created by the intersection of the two chalk lines. For this project, that intersection fell behind a light fixture in the center of the room.

With a friends help, snap chalk line.
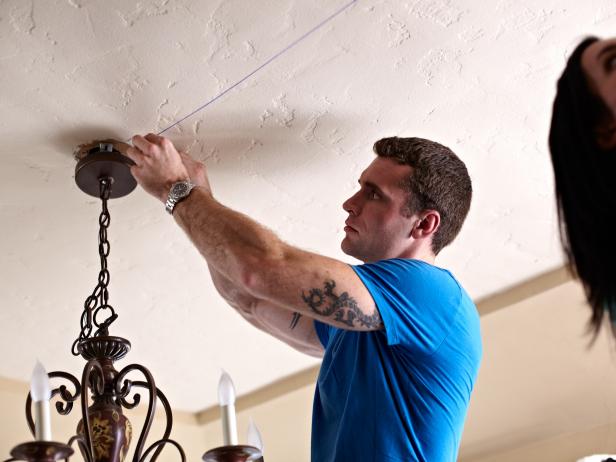
Two people should hold it taut in place, and one person should pull down and release the chalk-covered string to snap a chalky line on the ceiling.
Dry Fit Tiles Before Installing
It's always best to dry fit your tiles before gluing up. Before you apply adhesive, place your tiles on the ceiling and trace any fixtures you may have to cut around.
Duct tape on the back of your tiles will help hold it up while you trace and dry fit each tile.

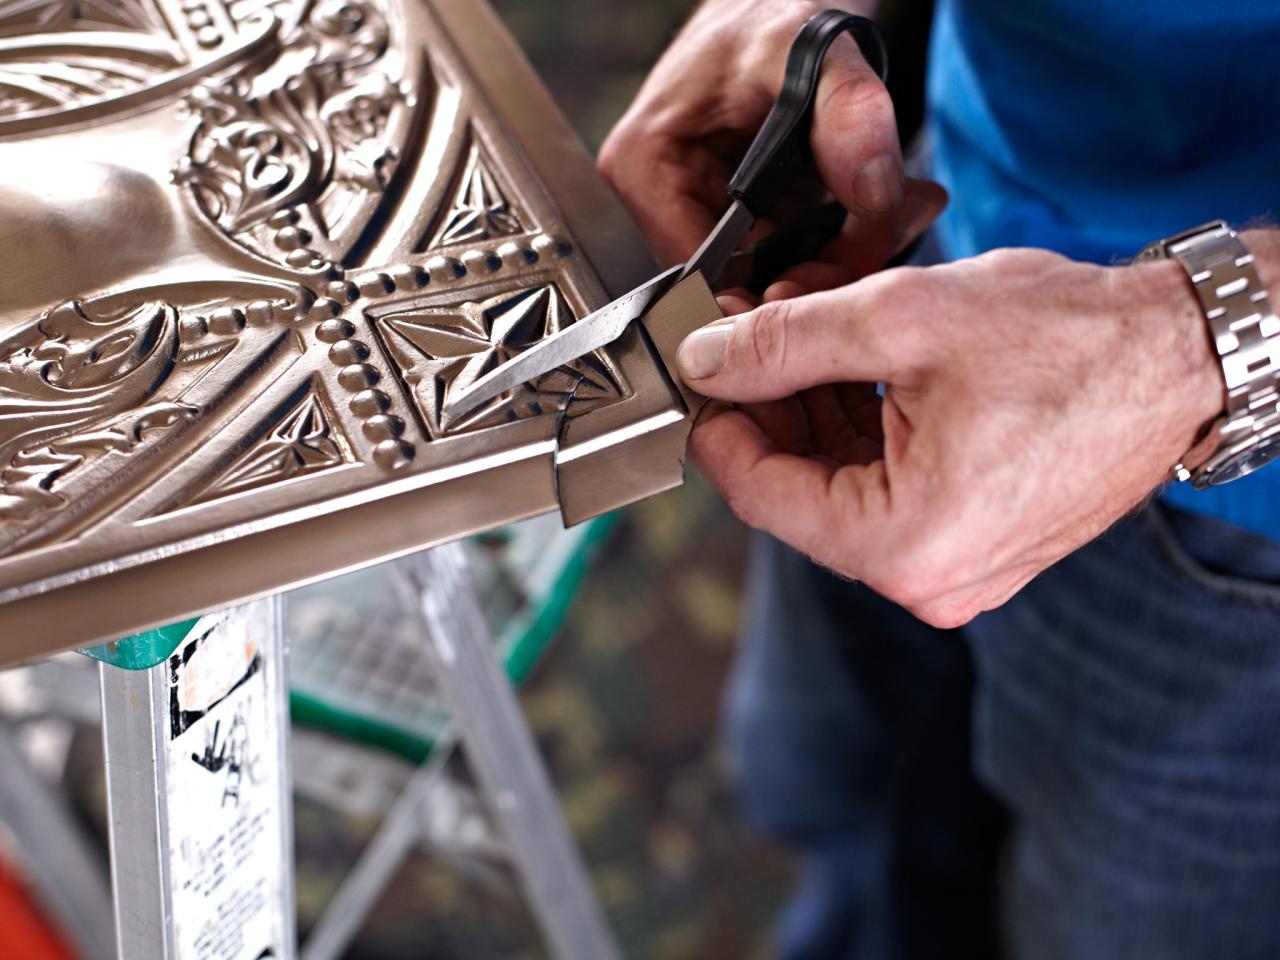
Make Cuts
Use scissors to cut tiles to fit your ceiling. We cut out rounded shapes, to leave room for the light fixture in the center of the room. Faux tin tiles are very easy to cut, but it is recommended to have a strong set of household scissors to do the job.

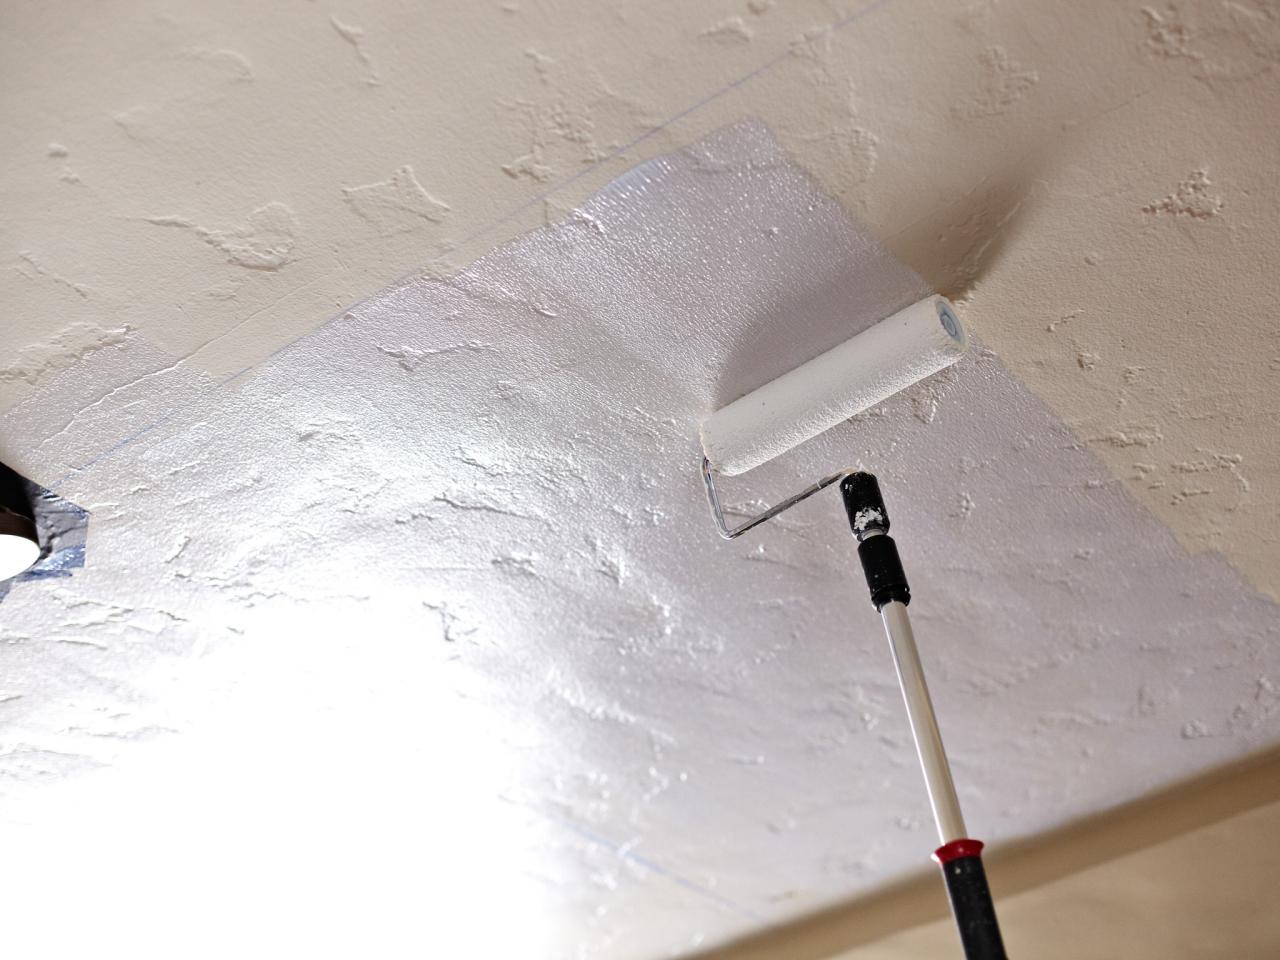
Roll On Cement and Install
The cement is applied using your paint roller. Apply an even coat to the back of your tiles. Contact cement has an open time of approximately 15 minutes. That means that once applied, you should let it sit for a few minutes to become tacky and the begin applying the tiles to the ceiling.
While they are setting up, apply an even coat of contact cement to your ceiling as well. The cement on both surfaces will bond with itself, creating a seal.
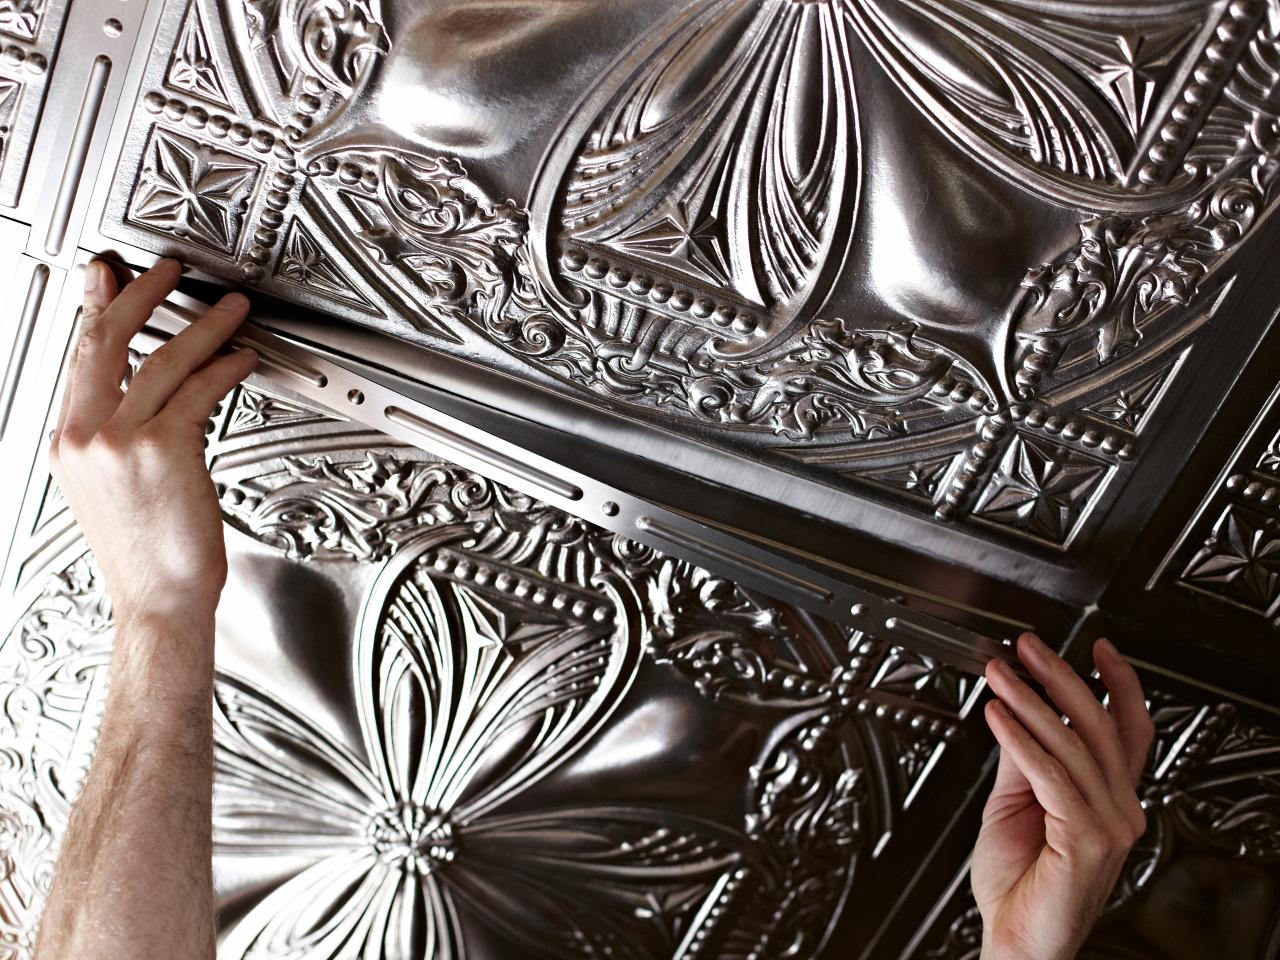
Apply the tiles on your reference line first and work out toward the edges of your ceiling. Measure and cut pieces of tile to fit any areas where a full tile cannot go. Stick to the pattern repeat for best results.
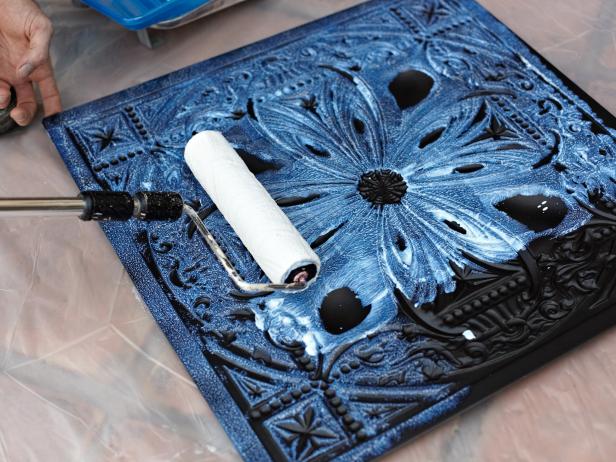
Apply an even coat to the back of your tiles.

Apply an even coat of contact cement to your ceiling as well.
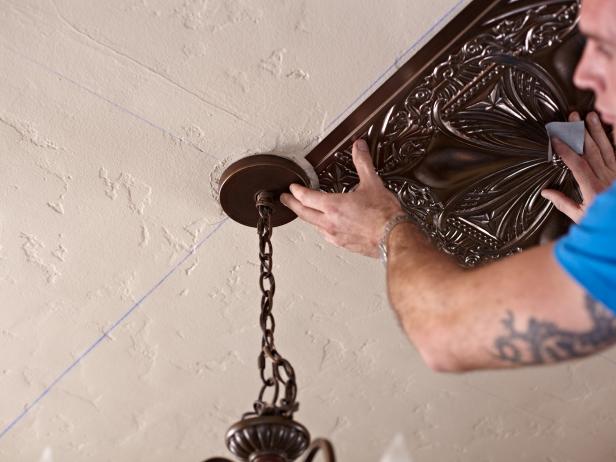
Apply Tiles radiating from center
Clean and Cover Gaps

Sometimes ceilings are not square, so you may find yourself having to adjust a tile here and there. The decorative strips that match the tile are very helpful for covering any gaps. Clean the tiles with a dry cloth and make sure any cement has been wiped off the surface before you apply the strips. They are not repositionable, so try to get it lined up perfectly the first time.


