


How to Build a Fold-Down Outdoor Bar
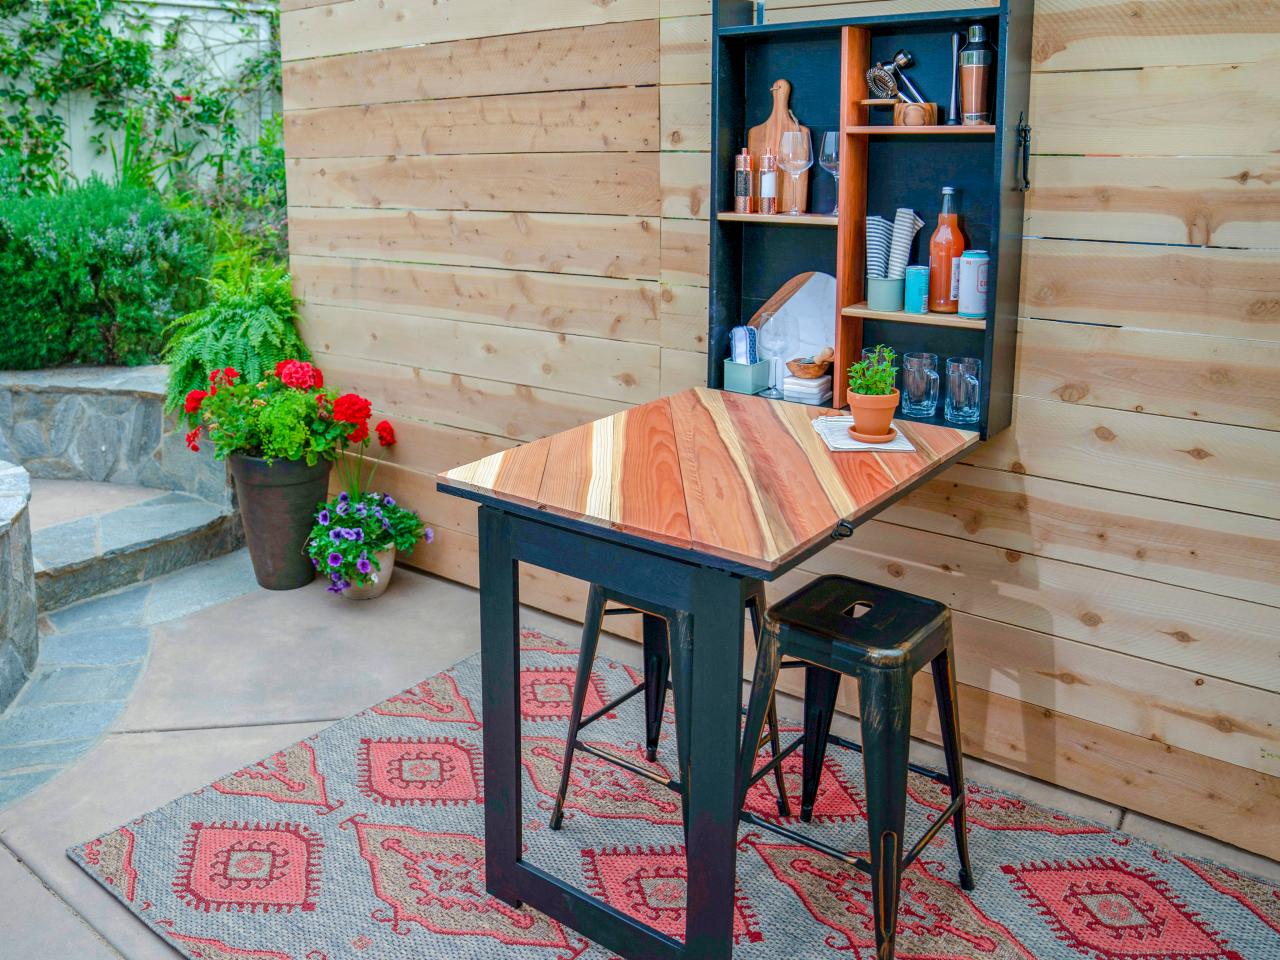
Love to entertain, but don’t have space for a permanent bar? Build a foldaway table and cabinet so you’ll be ready for a party at any time. We built ours for the patio, but it can be hung indoors too.

Gary Payne
Tools and Materials
We used redwood to build our tabletop and shelves; cedar is also a good choice. For the cabinet frame and legs, we used pine; fir is another good option.
- (6) 1x6 x 8’ redwood or cedar for tabletop and shelves
- (2) 1x2 x 6’ pine for cabinet supports
- (2) 1x8 x 8’ pine for cabinet frame
- (4) 1x10 x 8’ pine for cabinet back
- (4) 1x4 x 8’ pine for tabletop frame and legs
- (2) decorative gate hinges
- (2) flush cabinet hinges
- (2) gate latches
- pocket-hole jig with 1-1/4" pocket-hole screws
- nail gun
- 1-1/4" finishing nails
- 1-1/2” exterior-grade screws
- drill
- measuring tape
- hammer
- straight edge and a speed square
- level
- urethane
- exterior paint-and-primer-all-in-one
- paintbrush
- miter saw or circular saw
- metal straps for hanging cabinet
- (2) bar stools
Skill Level: Intermediate
Estimated Time: 1 day
Estimated Cost: $200
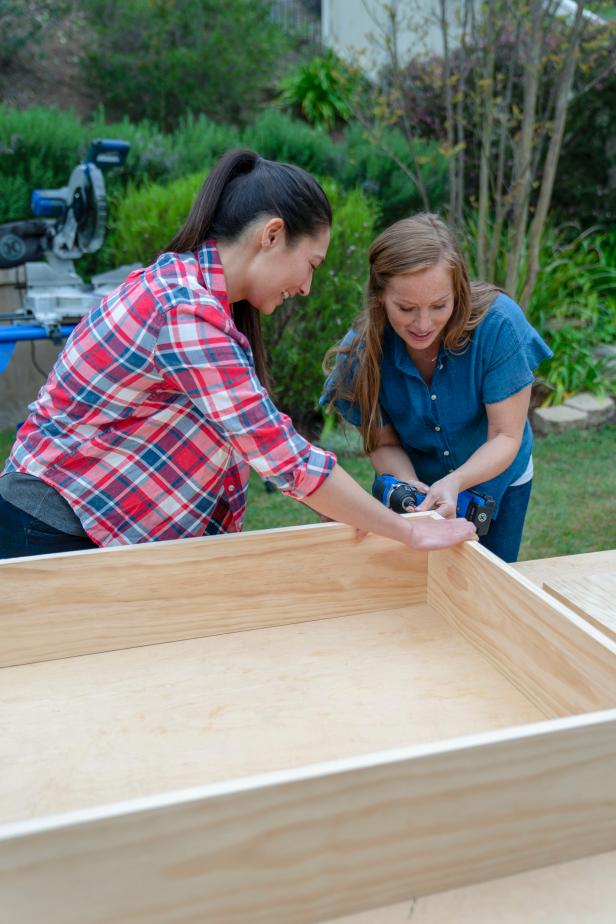
Step 1: Build Cabinet Frame
Gary Payne
Gary Payne
Gary Payne
Build the outer frame for the cabinet section out of 1x8s. Cut the two side (vertical) pieces at 42”. The top and bottom boards will be 28” and 29-1/2”, respectively. The top board should fit inside the two side boards, 5 inches below the top of the two side pieces. The excess 5 inches will create an additional shelf on top of the unit. The bottom will be flush with the ends of the two sides. Attach the boards together using screws.
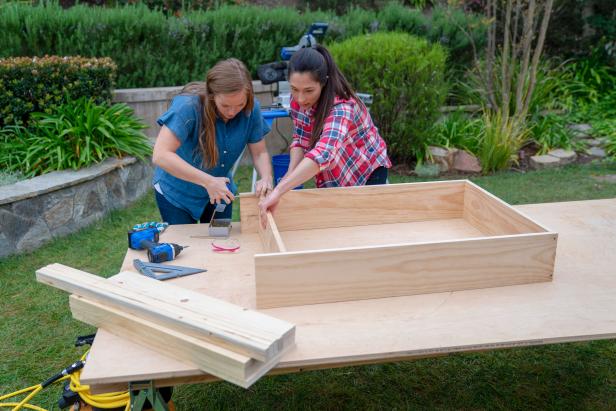
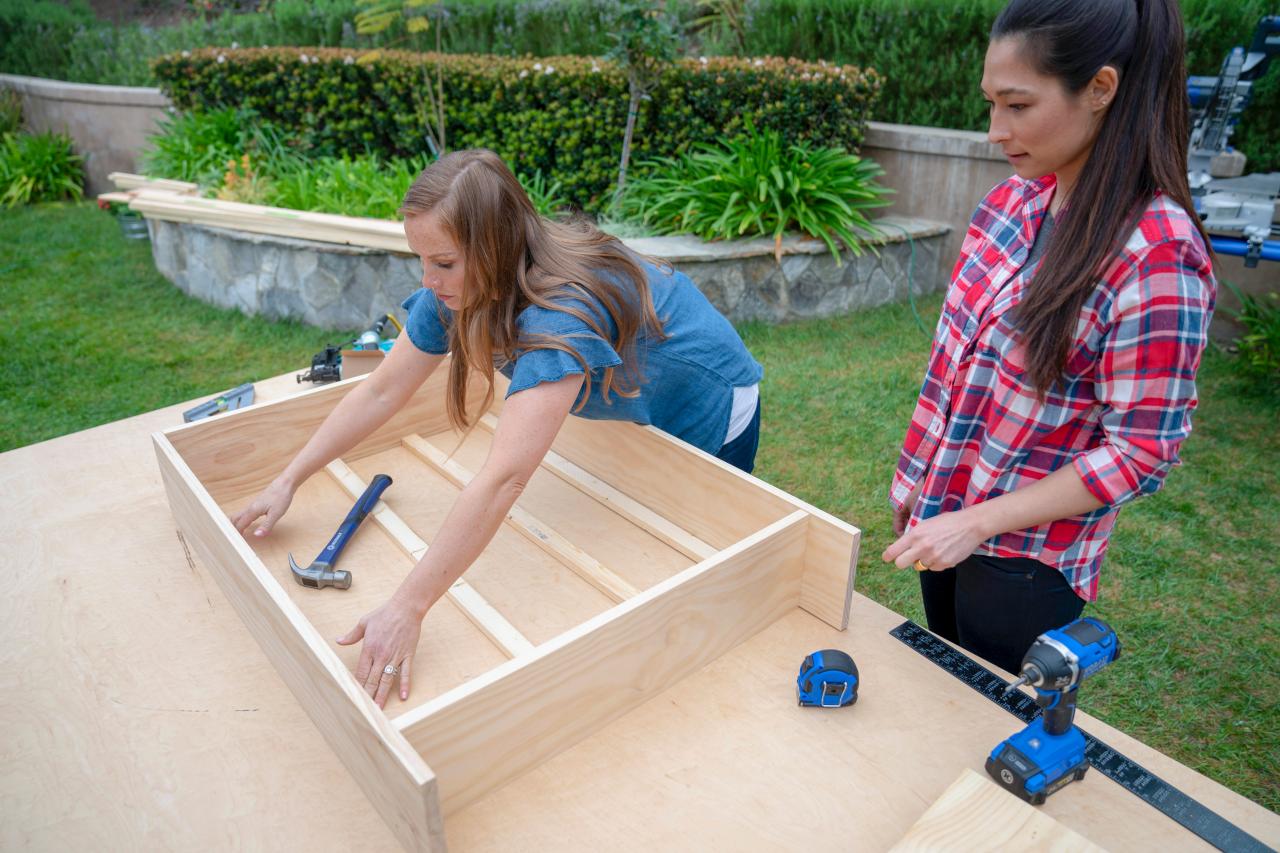
Step 2: Add Back Supports to Cabinet Frame

Gary Payne

Gary Payne
Cut four 1x2s to 37”. Lay the 1x2s inside the box evenly spaced apart. The two outer ones should butt up against the sides of the frame. Screw all four supports into place.
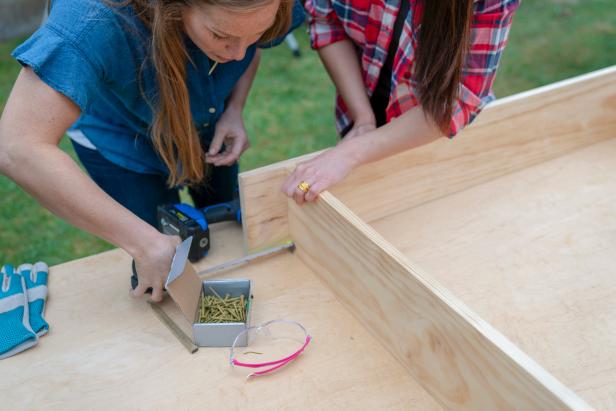
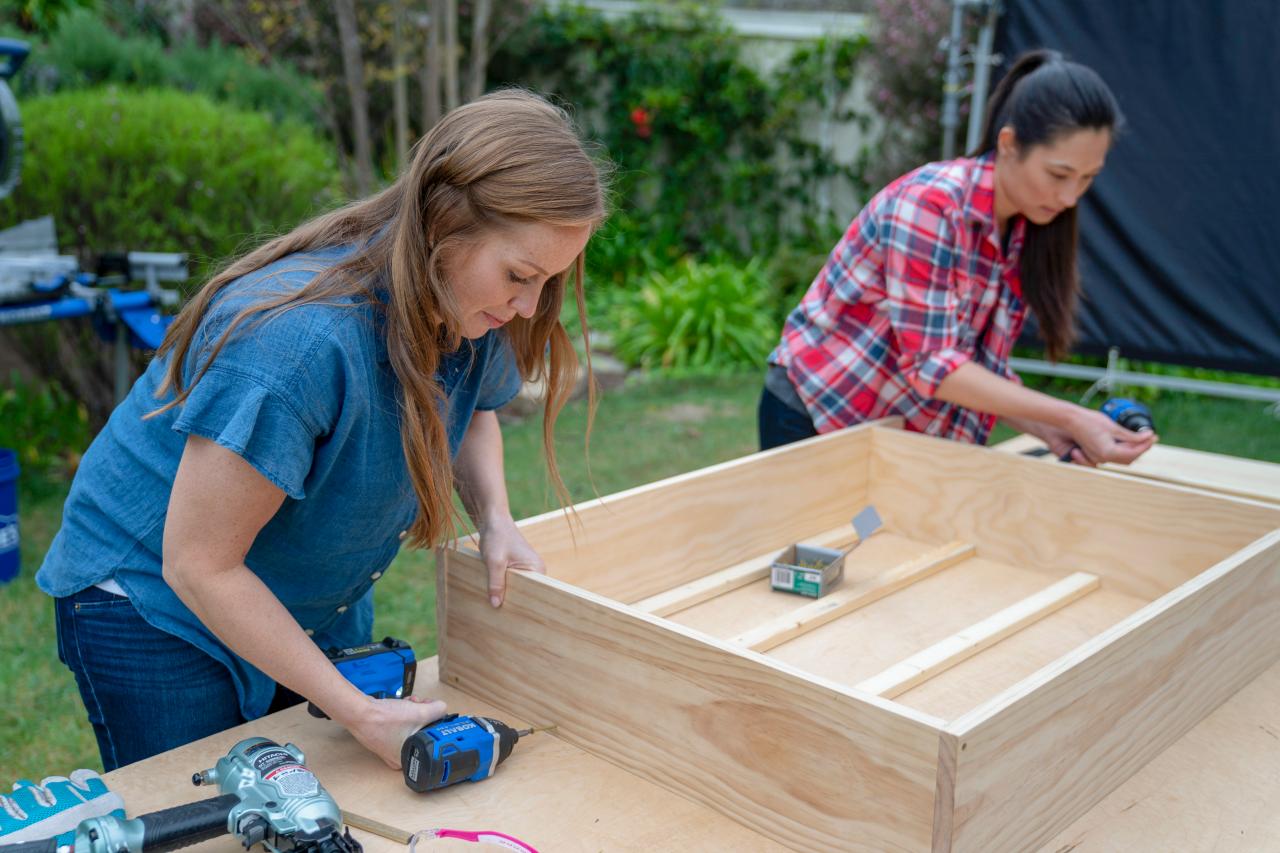
Step 3: Add Back to Cabinet Frame

Gary Payne

Gary Payne
To create the back, cut four 1x10s to 28”. Lay the 1x10s inside the frame on top of the 1x2s. If they are too snug, you may need a hammer or mallet to get them in place. Secure the 1x10s with screws.
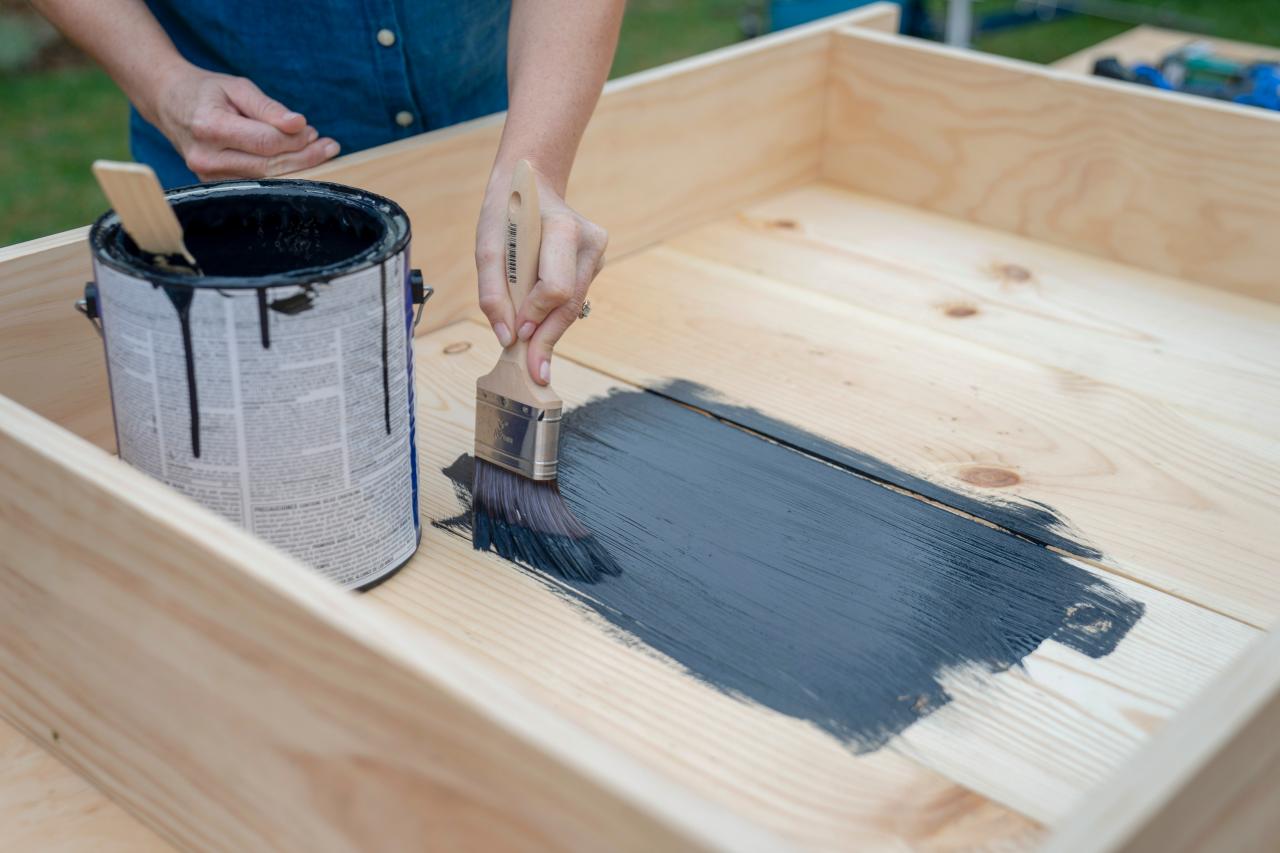
Step 4: Paint the Cabinet Frame

Gary Payne
Paint the cabinet frame with an exterior-grade paint-and-primer-all-in-one. Painting this section now will ensure there are no spills on the redwood boards for the shelves or tabletop.
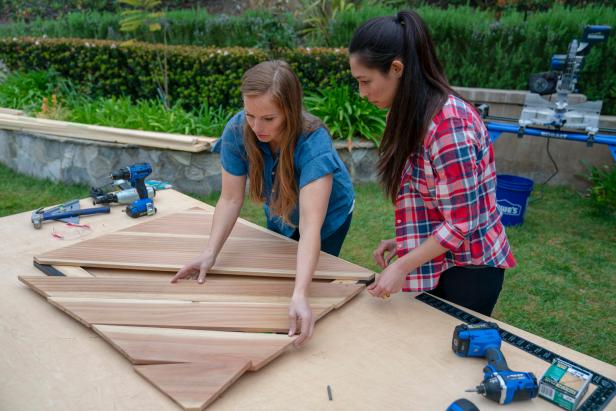
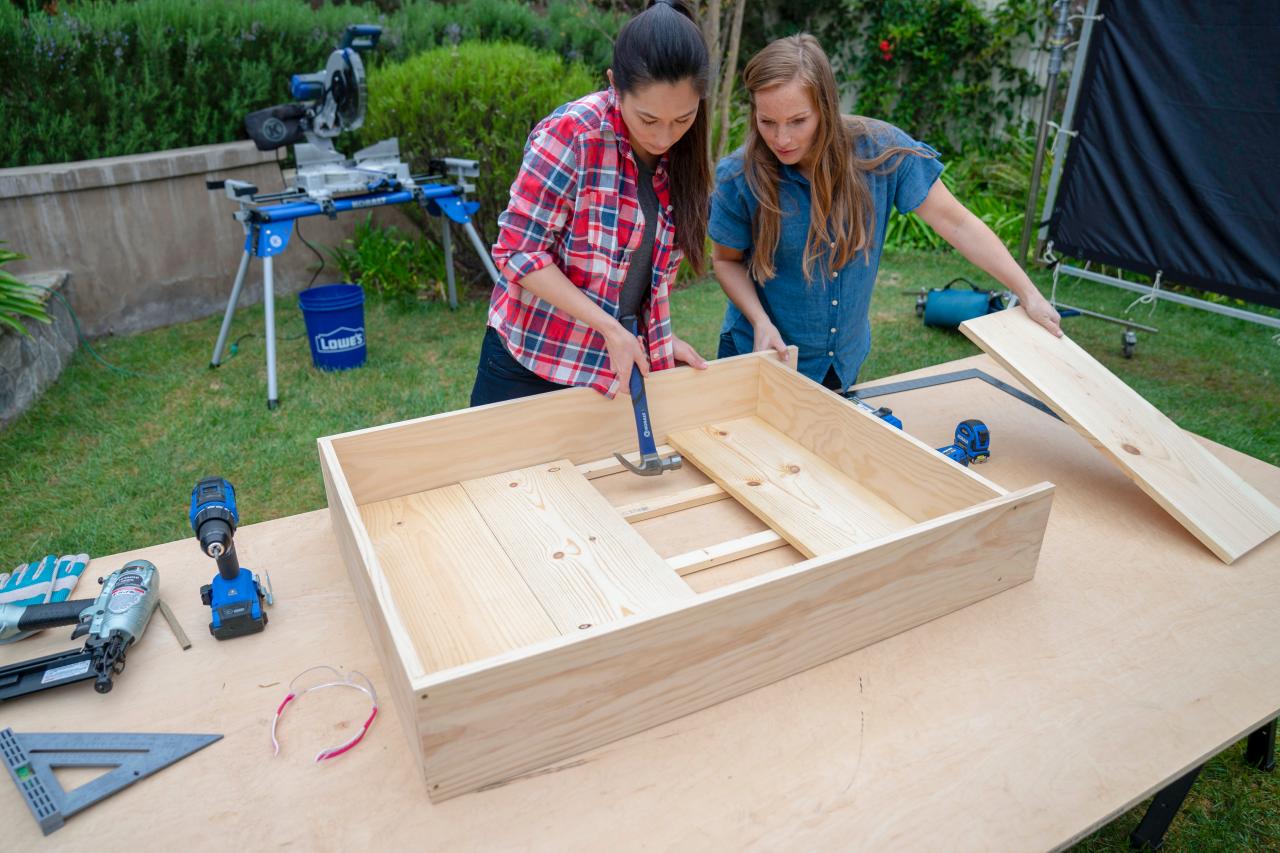
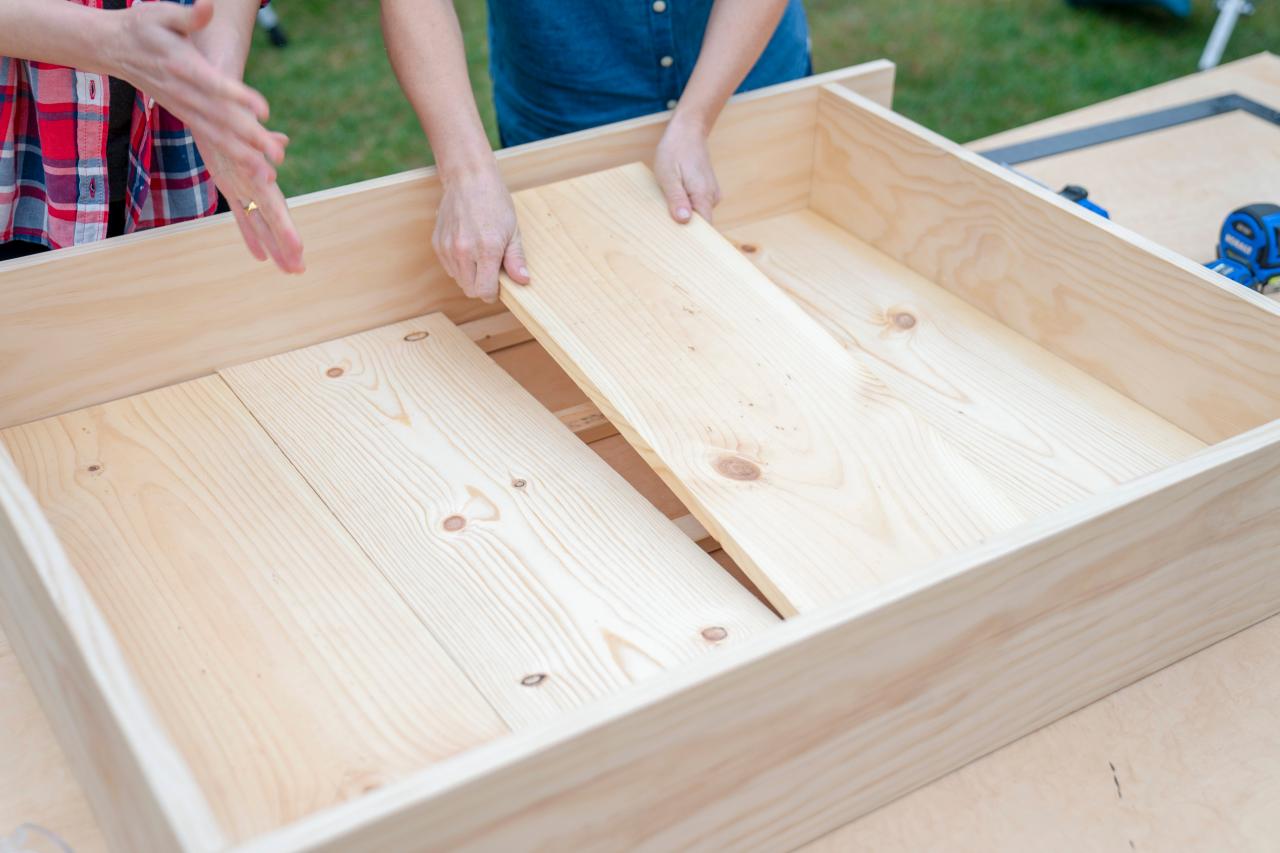
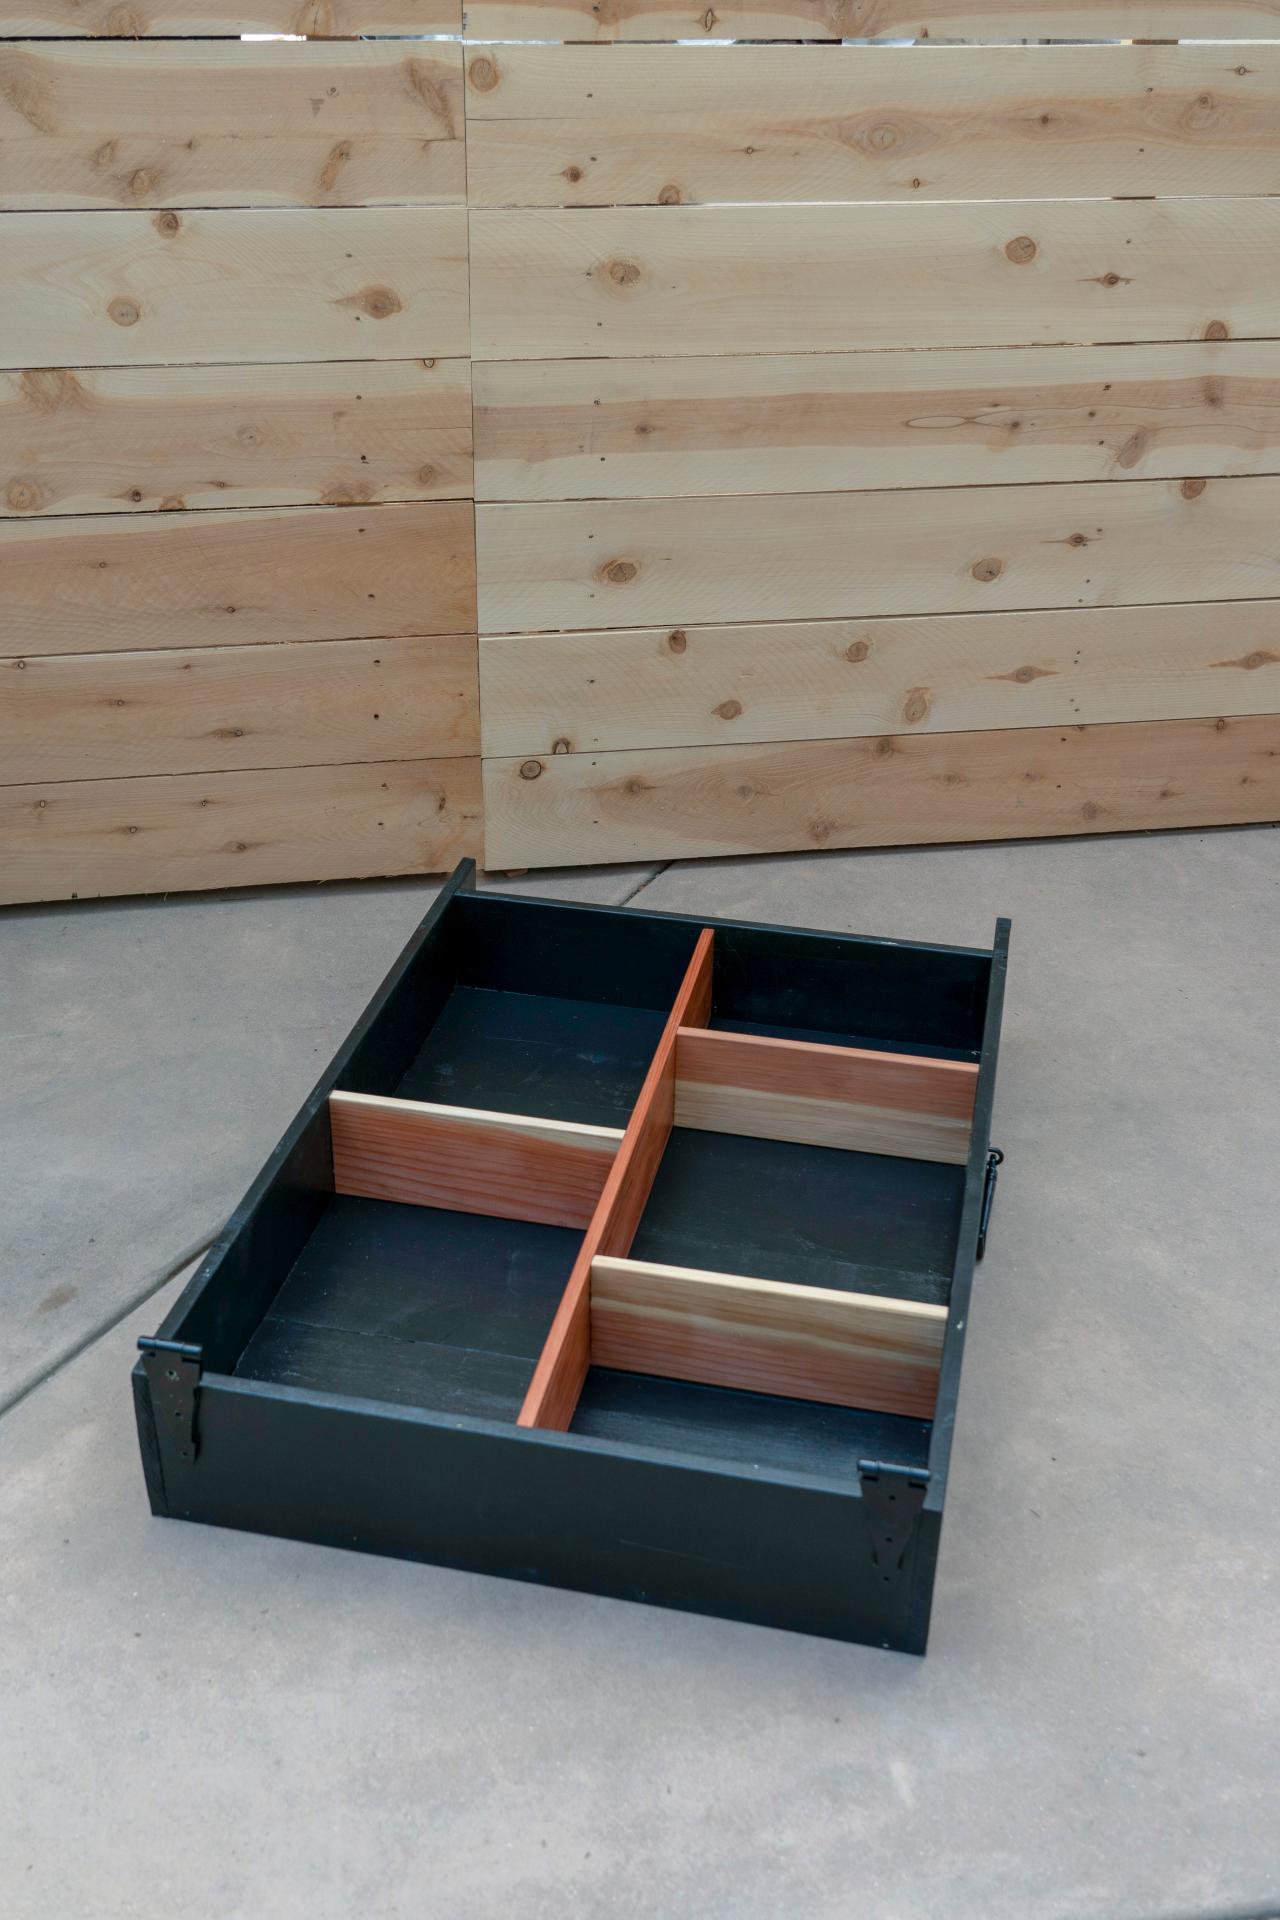
Step 5: Install Shelves

Gary Payne
Cut the 1x6s for the cabinet shelves. Cut the center divider to 34-1/4" and the shelves to 10-5/8”. The shelves should fit snugly within the frame. Apply exterior-grade urethane to the tabletop, let dry. When the shelves are dry, secure them to the frame using a nail gun with 1-1/4” nails. Arrange and customize the shelves however you’d like.
Step 6: Build the Tabletop Frame
Assemble the frame for the tabletop using 1x4s. The frame will measure 38-1/2” on the sides and 29-1/2” on the top and bottom. Paint the bottom and sides of each piece and allow them to dry. Use a 1-1/4” Kreg jig screw to hold them together for added stability.
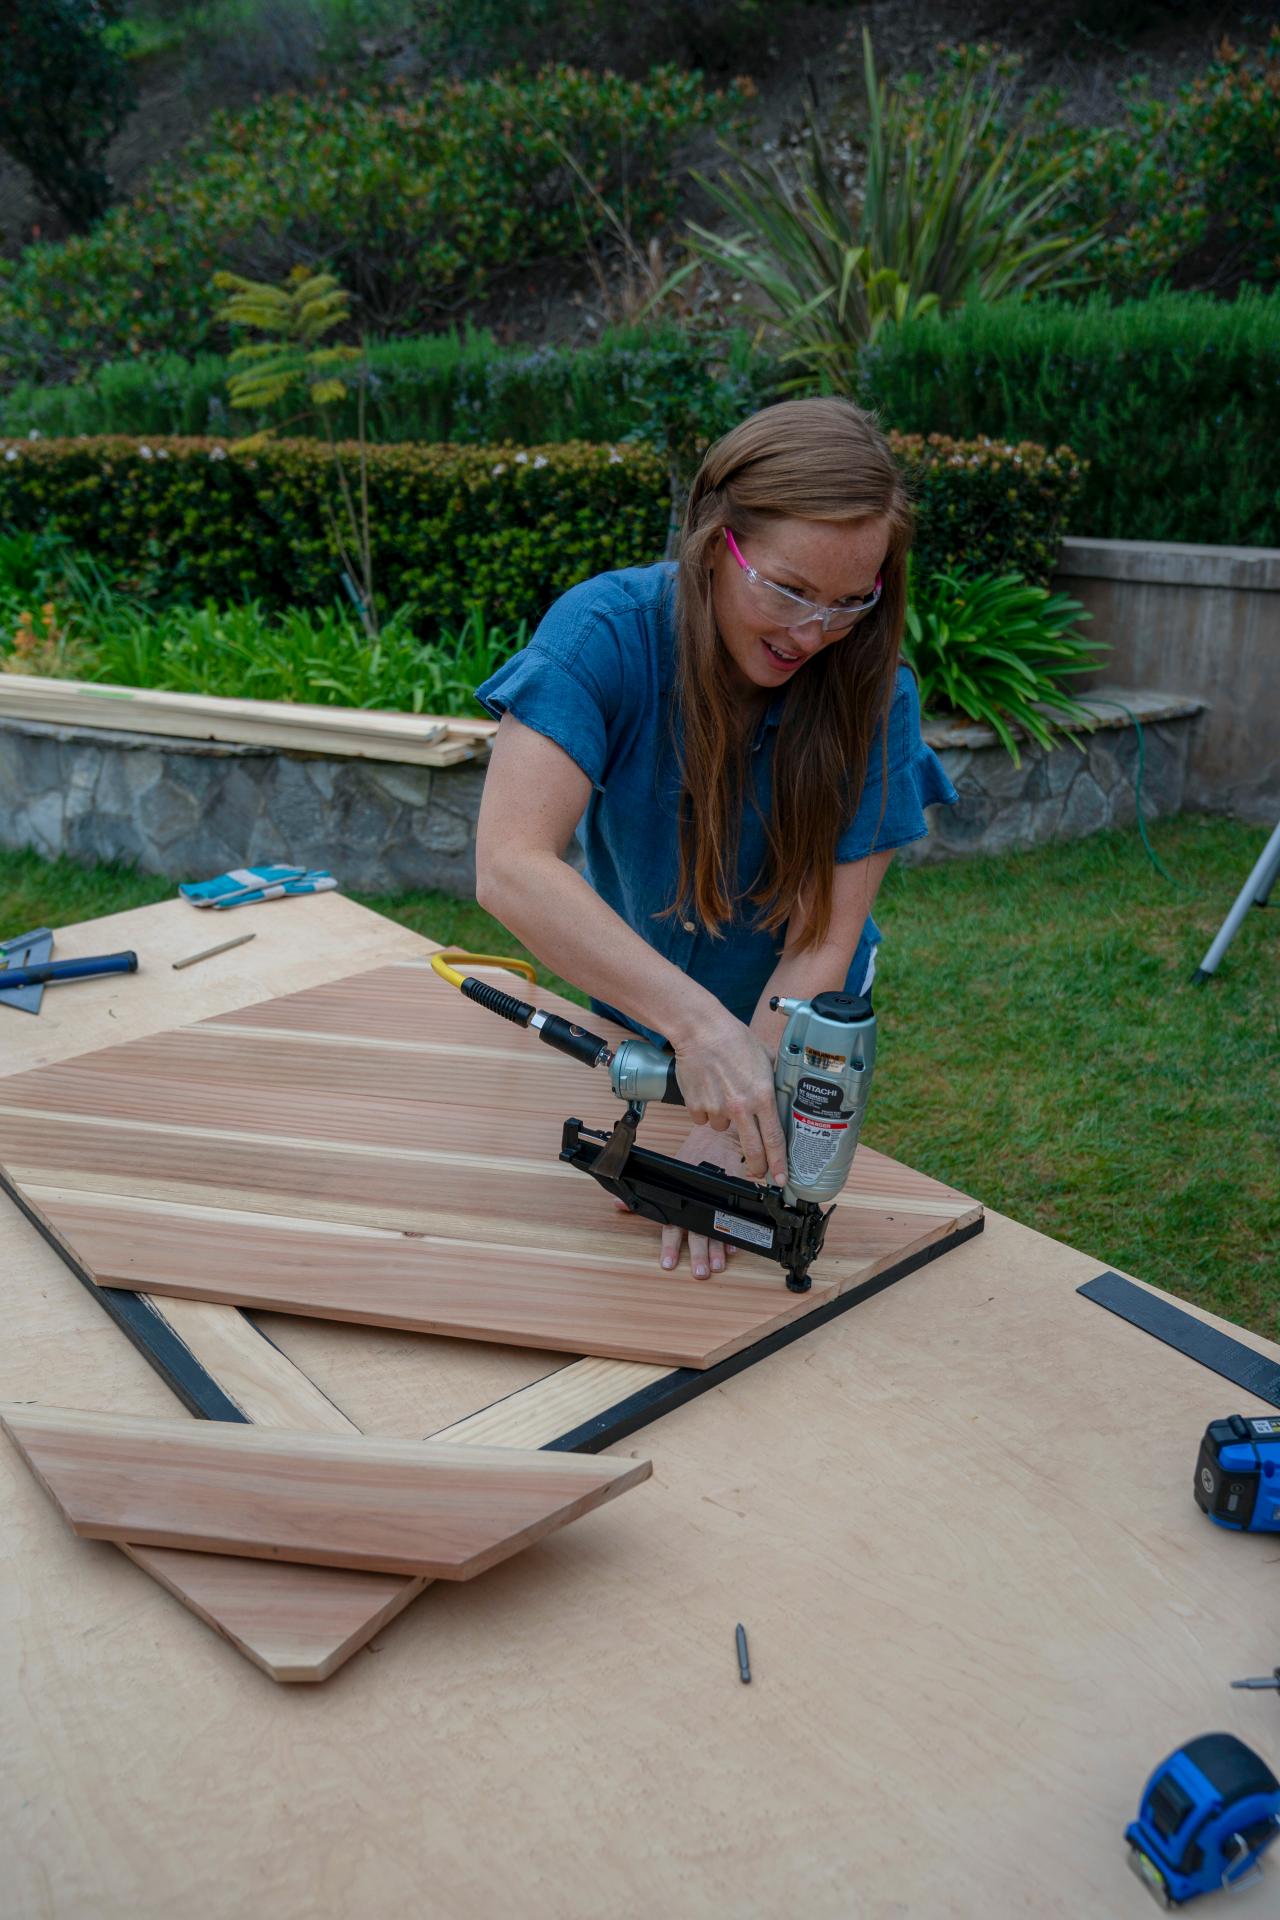
Step 7: Make the Tabletop
Gary Payne
Gary Payne
Gary Payne
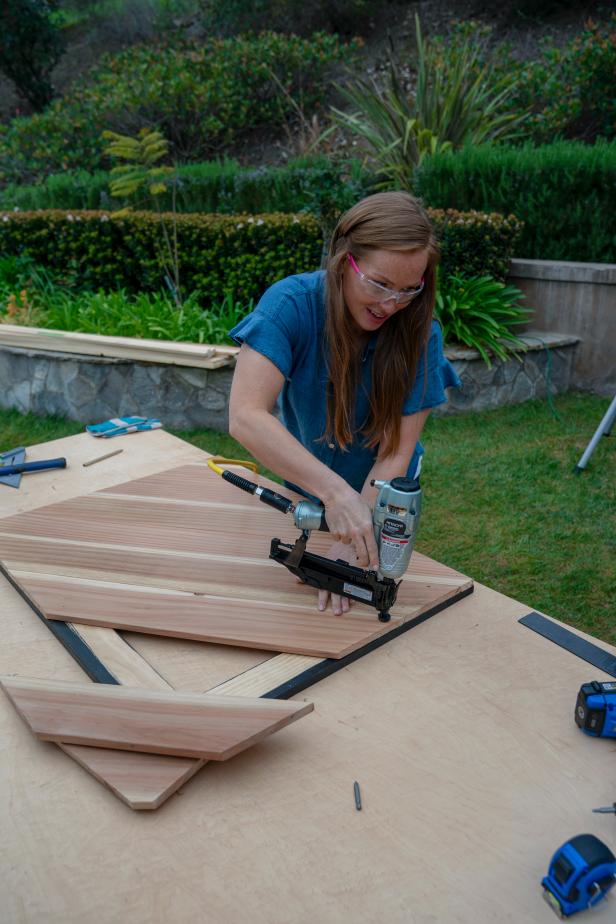
For a stylish tabletop, lay the 1x6s diagonally across the frame. Use a speed square and the frame as a guide for each of the boards. Start with the board running from corner to corner for the best look. Work your way toward the edges, adding one board at a time. Each board edge should be flush to the edge of the frame. Secure the tabletop boards to the frame using a nail gun with 1-1/4” finish nails. Apply exterior-grade urethane to the tabletop, let dry.
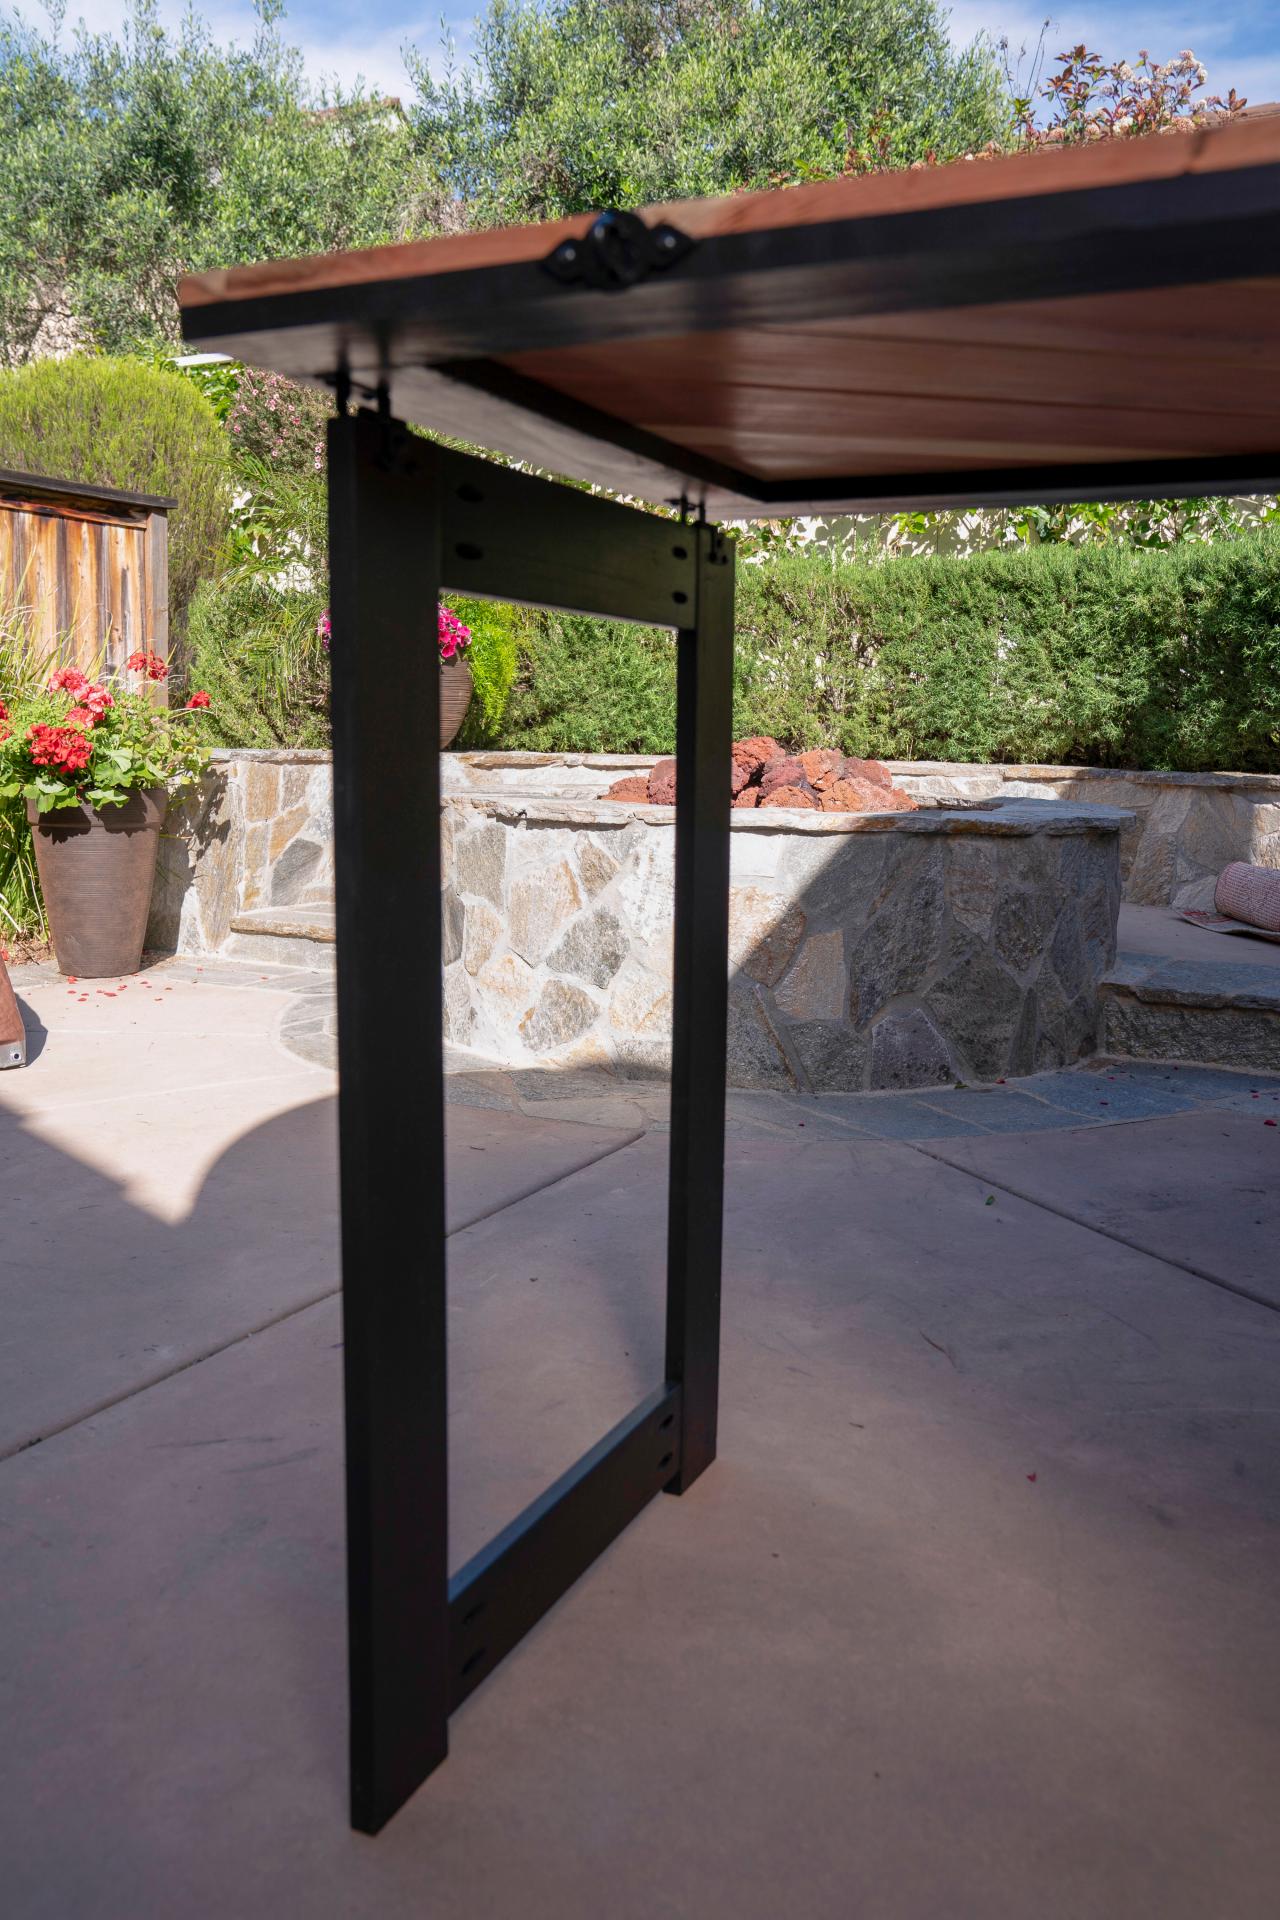
Step 8: Build the Table Legs

Gary Payne
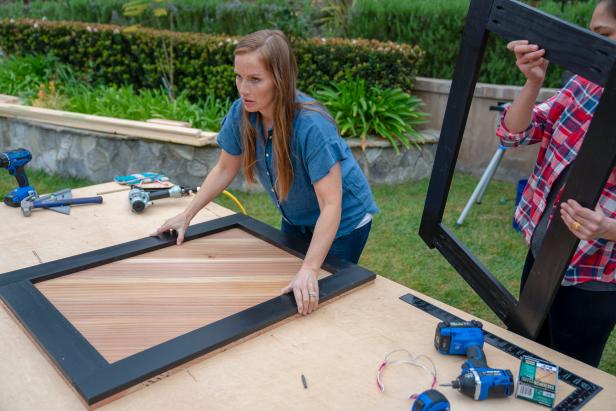
The table legs will be a frame made of 1x4s, similar to the tabletop frame. Cut the vertical pieces to 34-3/4” (adding the thickness of the tabletop, tabletop frame and hinges, the height of the table should be about 36”). Cut the horizontal leg pieces to 25-1/2”. The horizontal pieces are inset between the vertical pieces. The top horizontal piece should sit flush with the top of the legs. To give the legs a more finished look, the bottom board should be about 3” from the bottom of the vertical pieces. Use a pocket-hole jig to fasten the boards together. Paint the legs to match the frame from the tabletop so when it’s folded up it will act as a frame to the diagonal tabletop boards.
Step 9: Attach Legs to Tabletop Support

Gary Payne

Gary Payne
Gary Payne
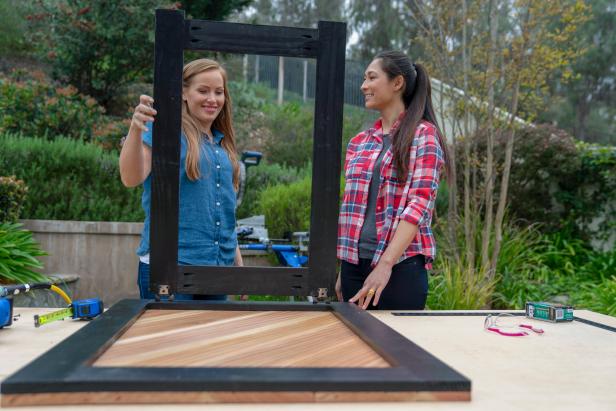
Lay the leg frame on top of the tabletop frame and center it on all sides. Add two cabinet hinges to the top of the legs and then attach the other end of the hinges to the tabletop frame.
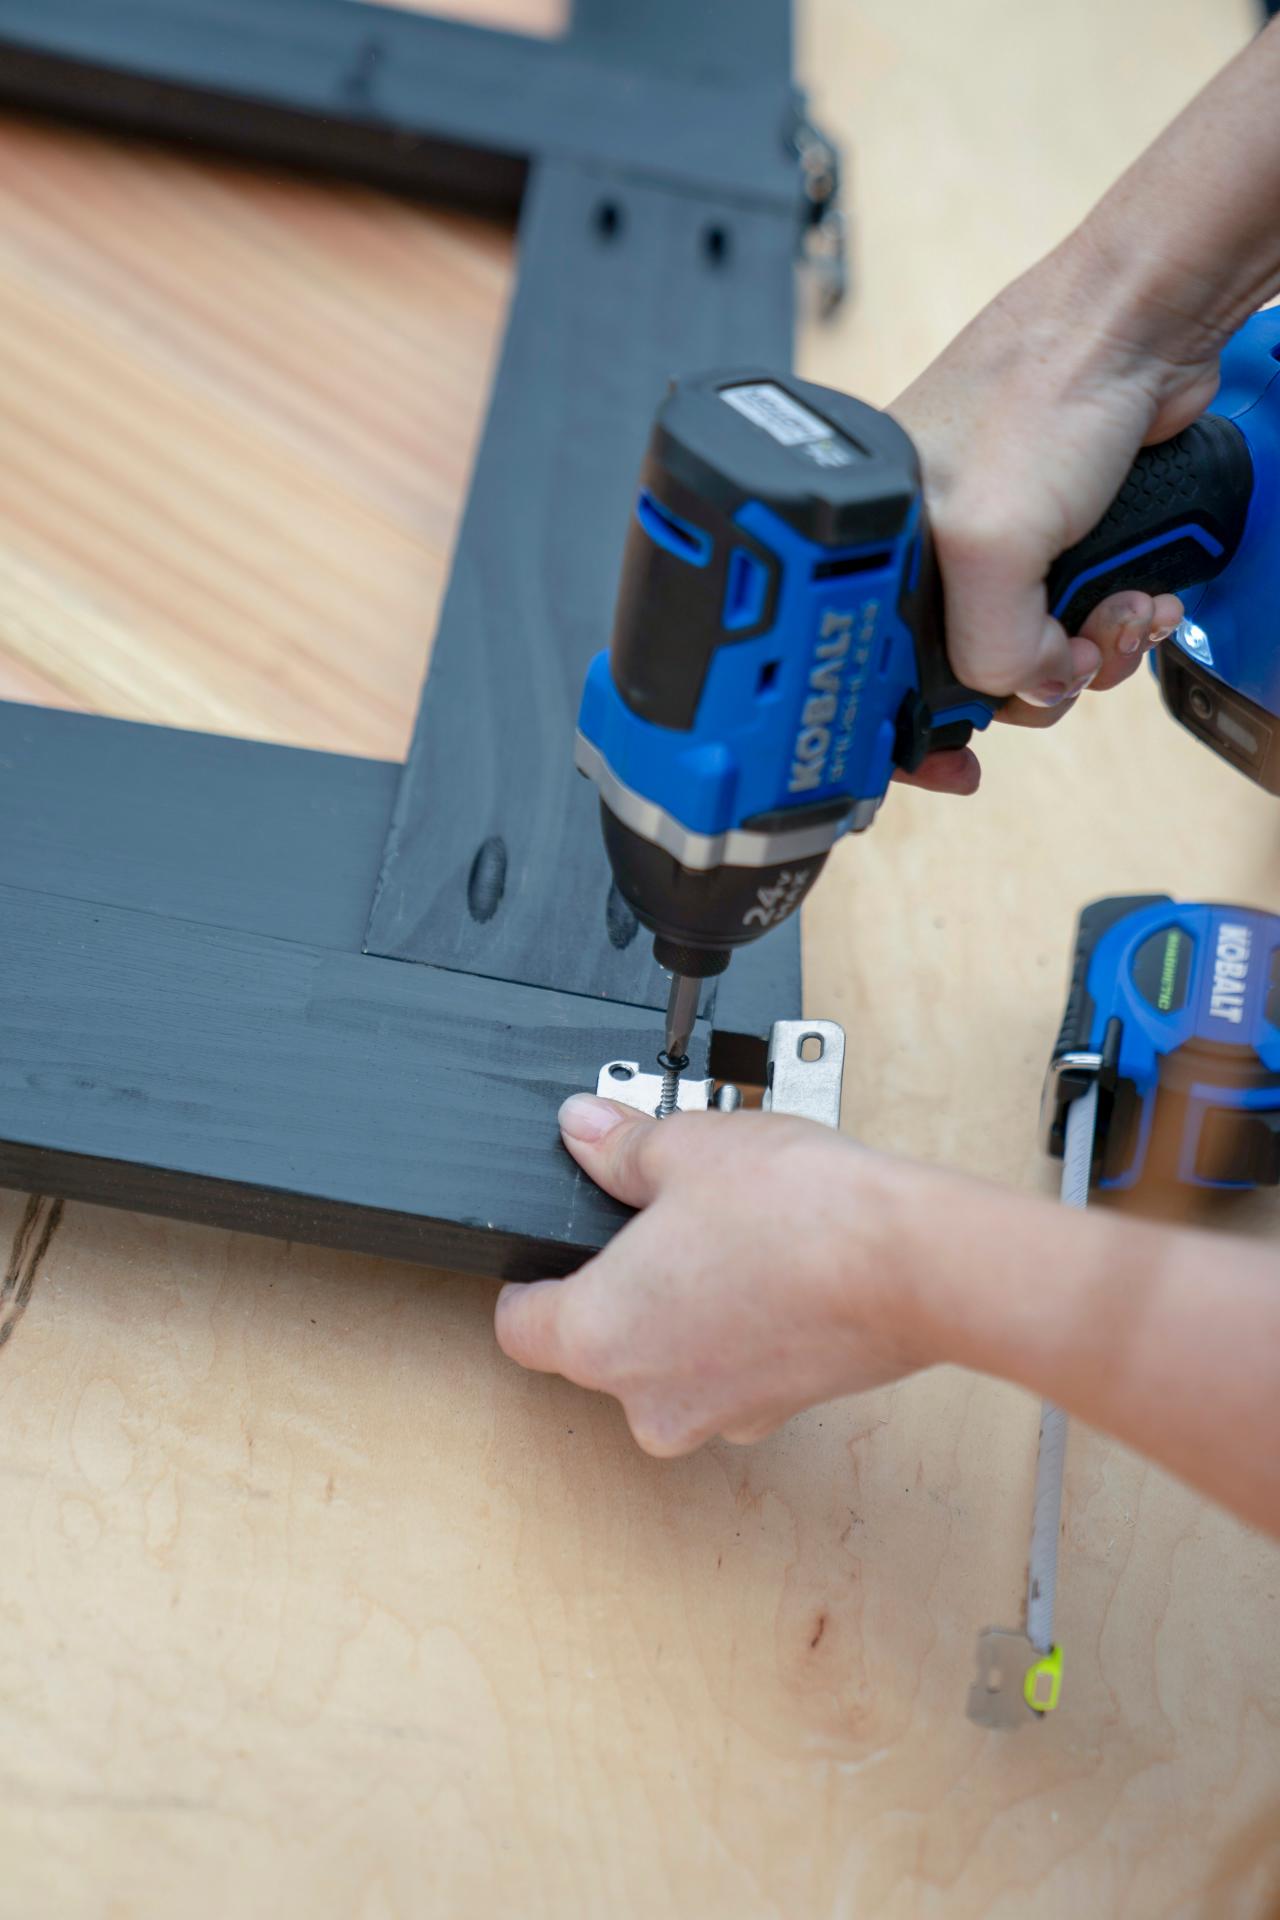
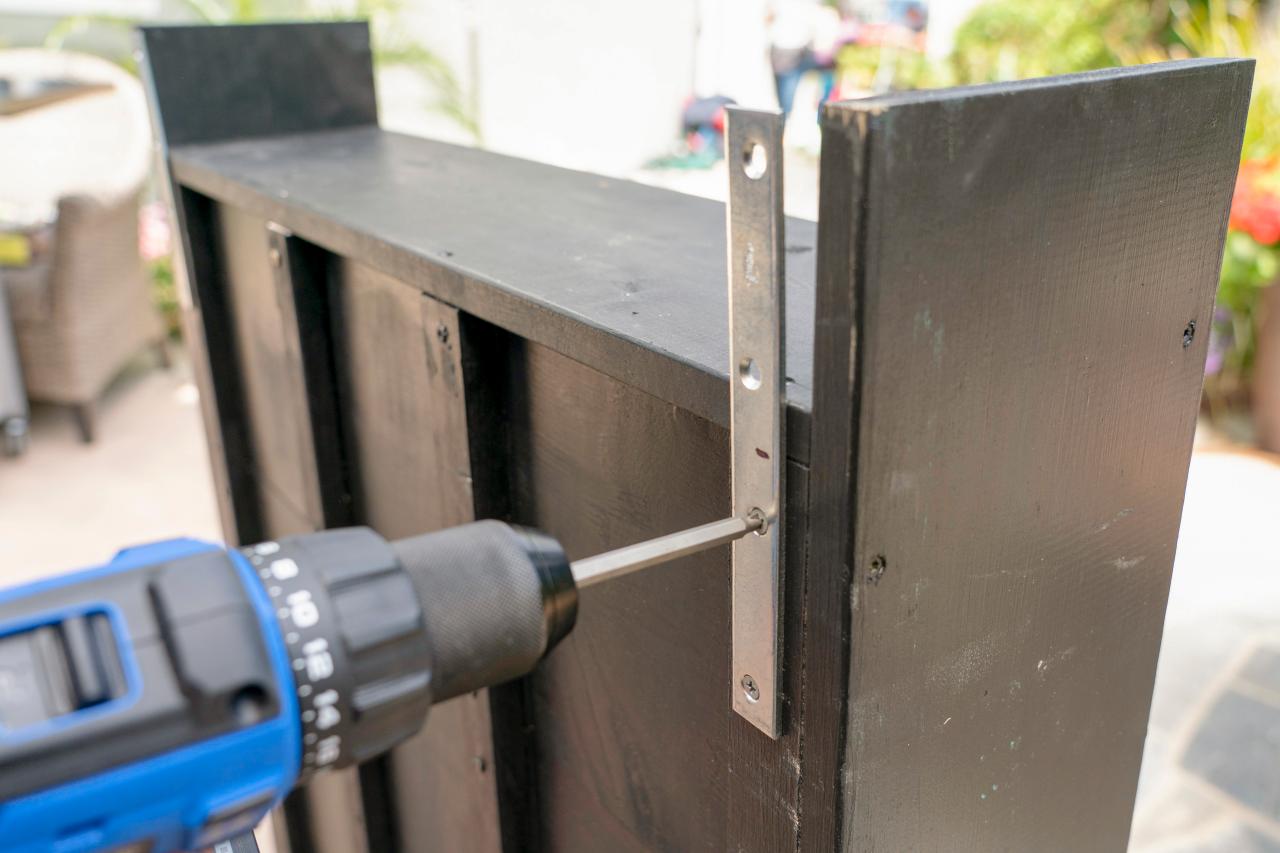
Step 10: Attach Hanging Hardware

Gary Payne

Gary Payne
Gary Payne
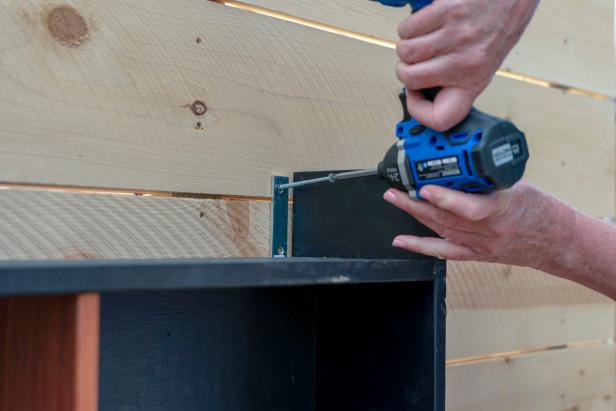
Hang the cabinet before attaching the tabletop for an easier assembly. Attach hanging hardware to the back of the cabinet; we used basic metal straps.
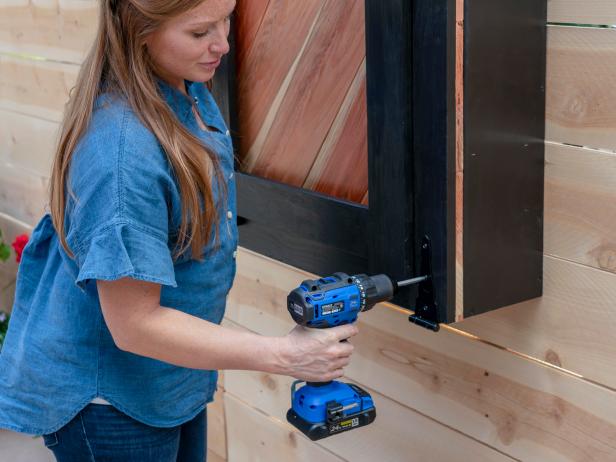
Step 11: Hang Cabinet
Gary Payne
Secure the cabinet to a wall or fence. Make sure it is level so your table will also be level.
Step 12: Attach Tabletop to Cabinet
Gary Payne
Attach the tabletop piece to the cabinet with the decorative gate hinges. Fasten the hinges to the bottom of the 1x4 tabletop frame and connect them to the underside of the cabinet. The tabletop will act as a door to the cabinet when it’s folded up.
Step 13: Add Latch

Gary Payne
To keep the bar secure when it’s folded up, add a gate hook on each side of the cabinet and front edge of the frame for the table top. This hook should go near the top of the cabinet for the best leverage, but it can be adjusted.
Step 14: Pull Up a Stool
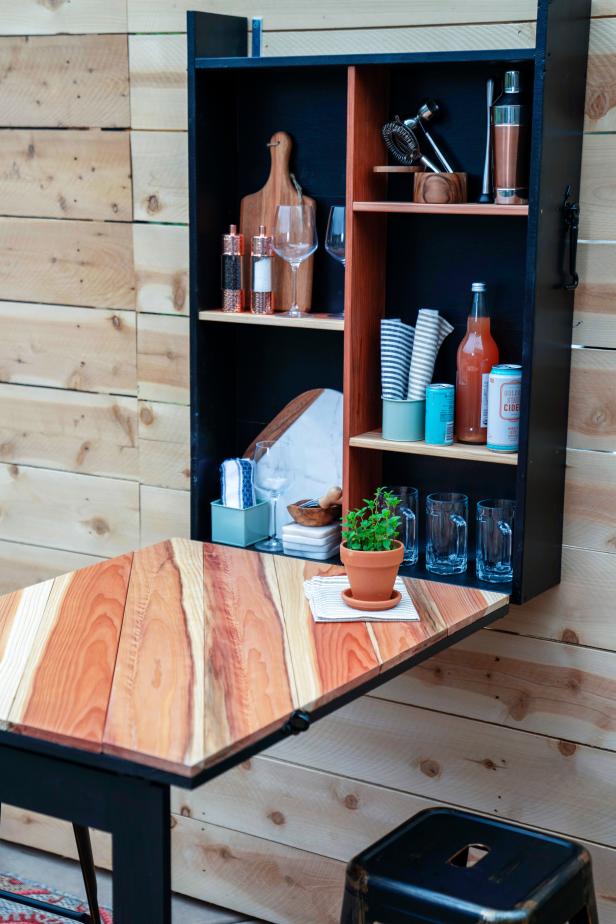
Gary Payne
Add seating and enjoy your new dining or entertaining space.


