


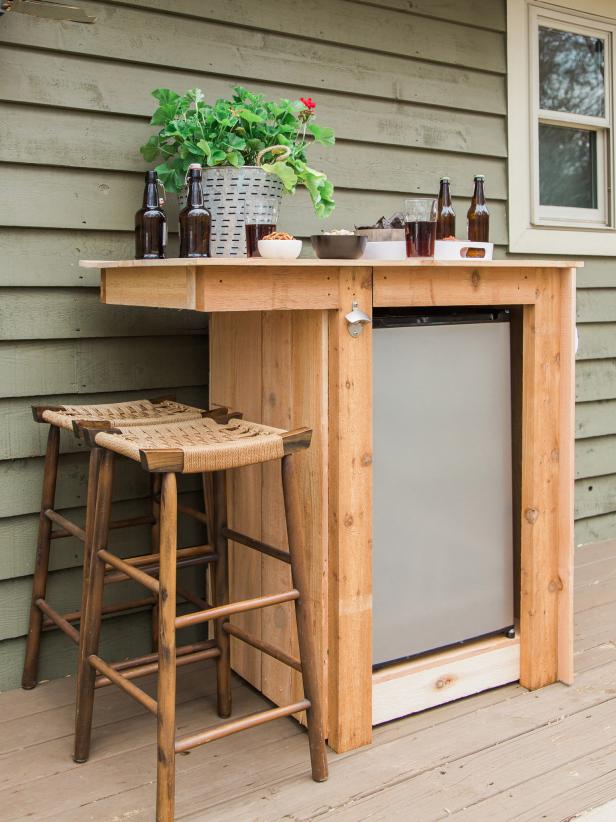
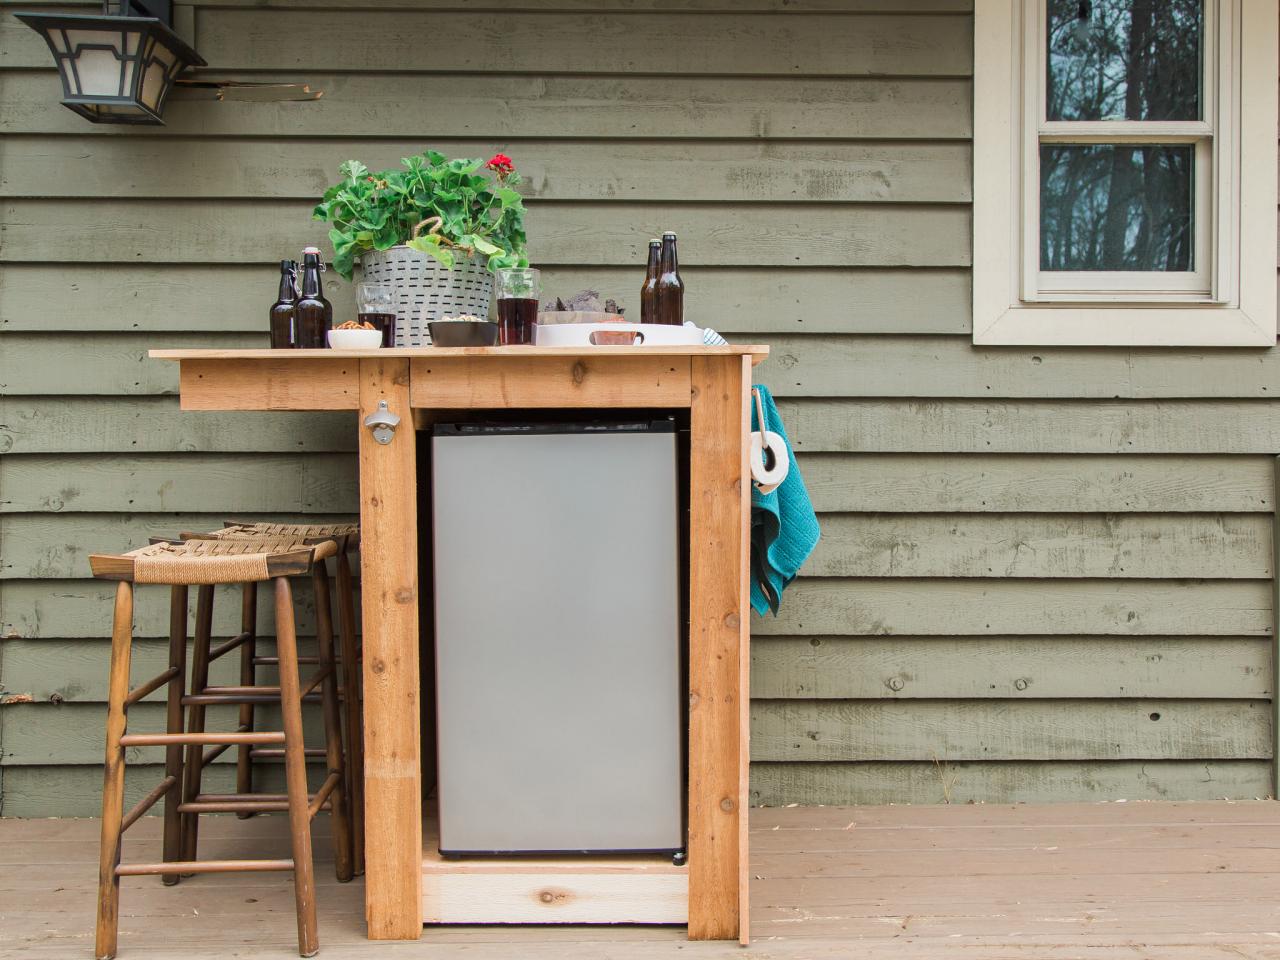
How to Build an Outdoor Minibar
Build an outdoor bar complete with a miniature refrigerator, bottle opener and towel hooks.

Tomas Espinoza/Flynnside Out Productions

Materials and Tools
- (6) 2x4 x 8' cedar boards
- (11) 1x6 x 6' dog ear cedar fence pickets
- mini fridge
- bottle opener
- stainless steel hooks
- stainless steel towel bar
- wood glue
- 1-1/2" and 2-1/2" wood screws
- 220-grit sanding paper
- orbital sander
- drill
- 3/16" drill bit
- measuring tape
- speed square
- pencil
- ear and eye protection
- miter saw
- dust mask
- scissors
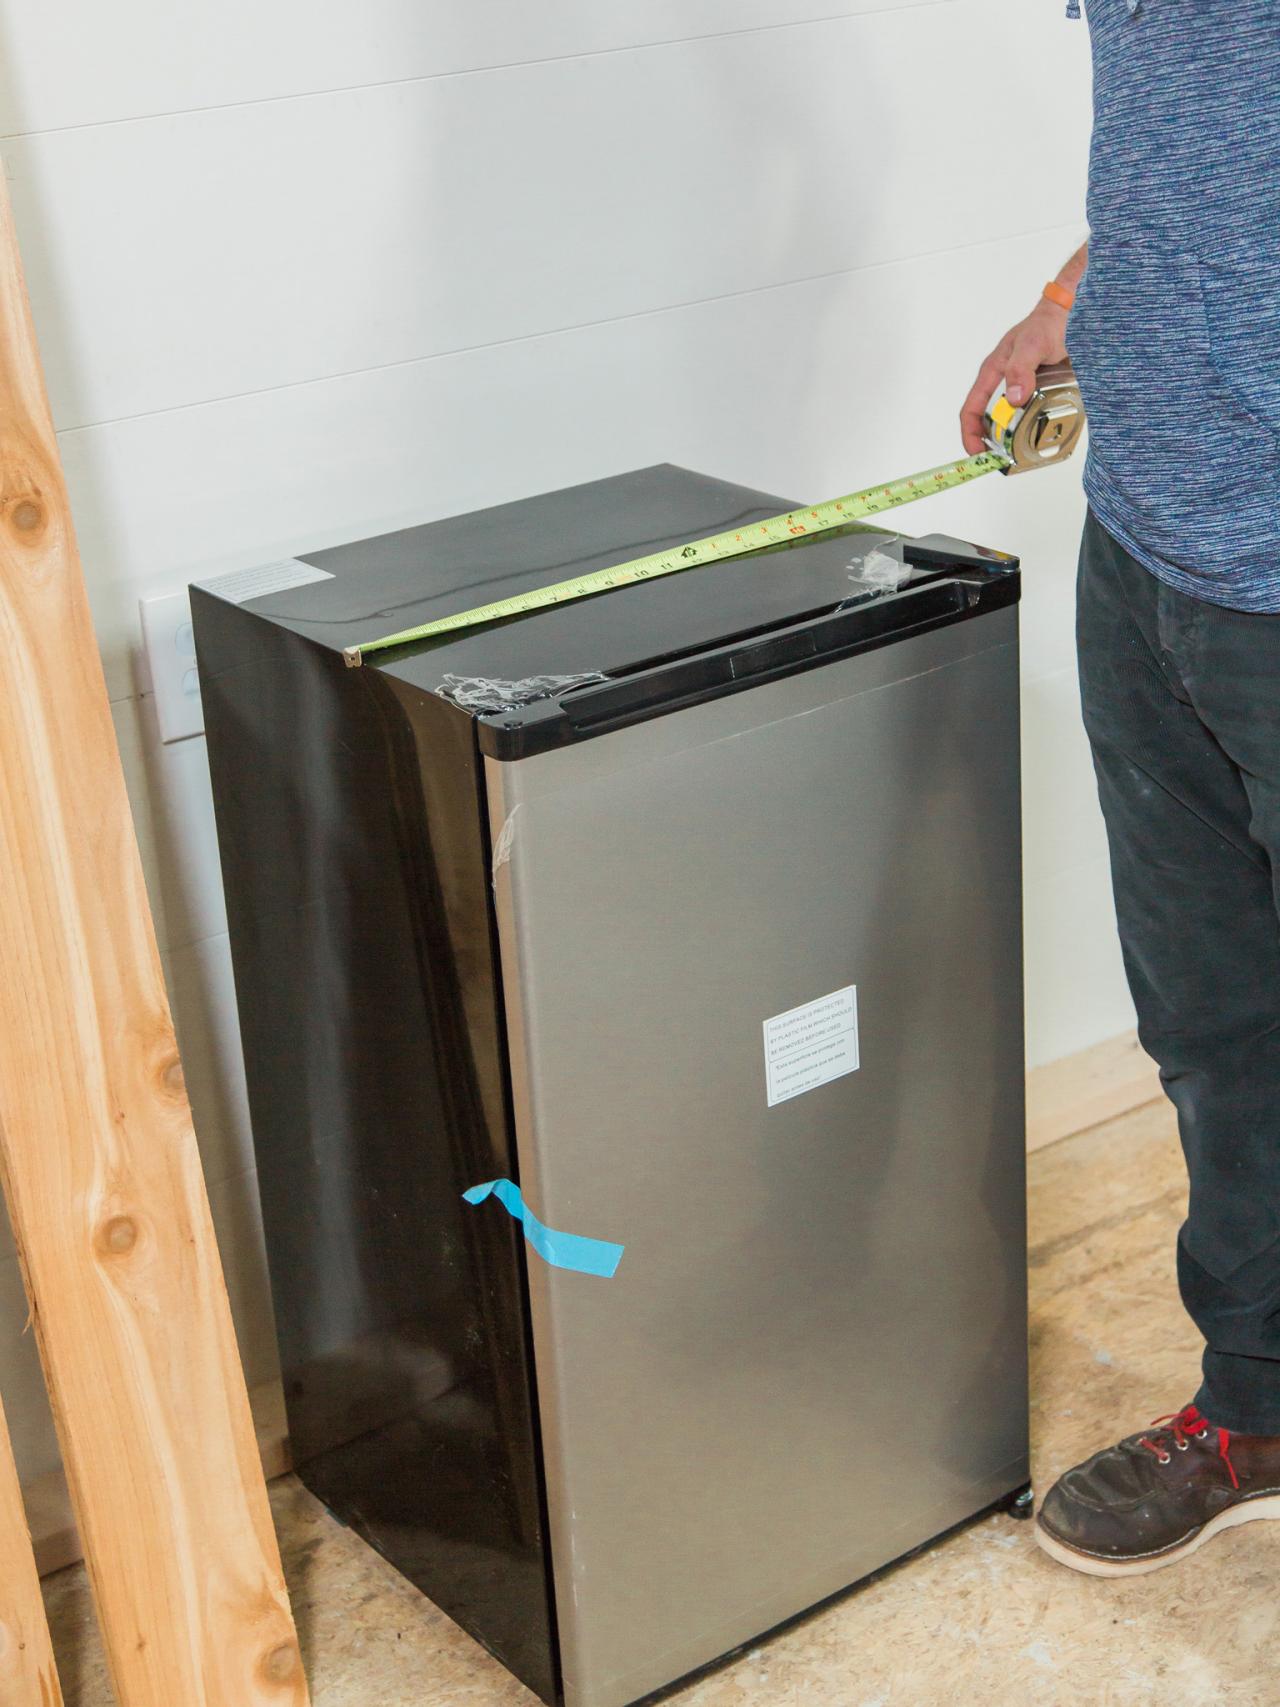
Measure Fridge
Use a tape measure to determine the overall dimensions of your mini fridge, as it will affect the bar's overall design. Add a couple of inches to the width and depth to allow for proper ventilation — per the fridge instructions. Our fridge is 18” x 18” x 34” tall, but you can easily alter the design to accommodate a cube style mini fridge.

Tomas Espinoza/Flynnside Out Productions
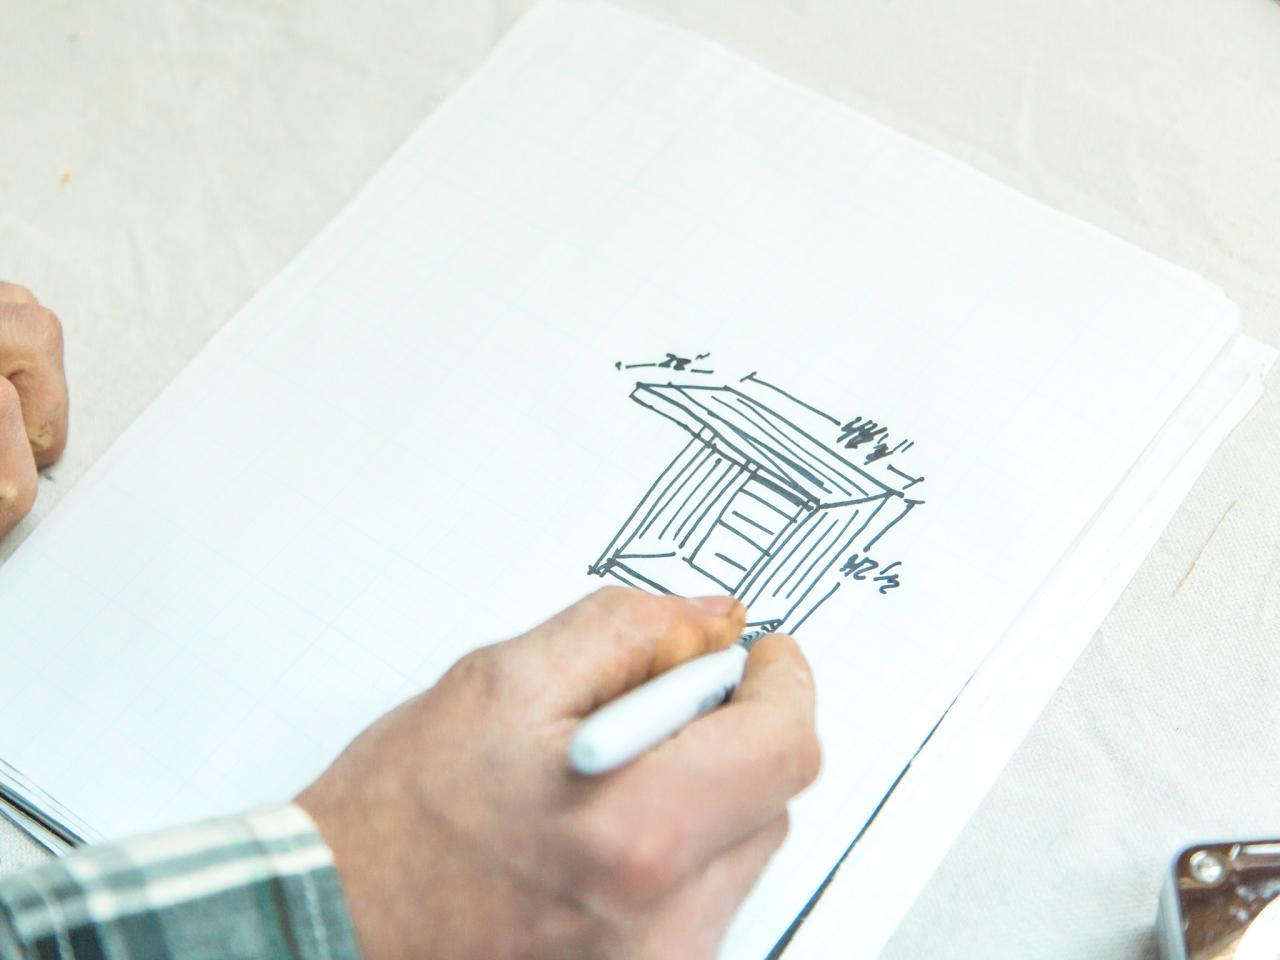
Sketch Design
It’s always a good idea to sketch out your design first, so you can visualize the bar and tweak anything ahead of time. It’s also a great place to jot down each board’s dimensions for your cut list.

Tomas Espinoza/Flynnside Out Productions
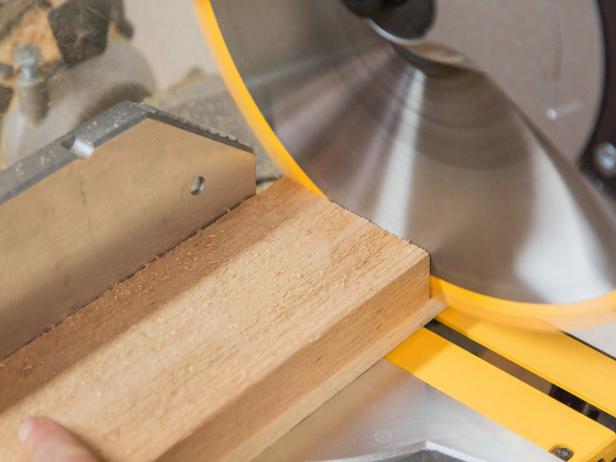
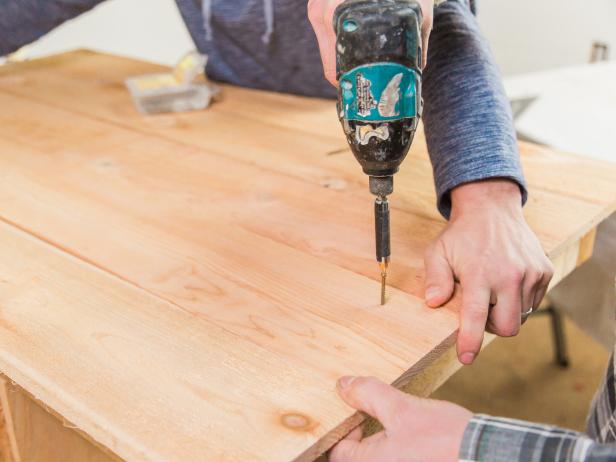
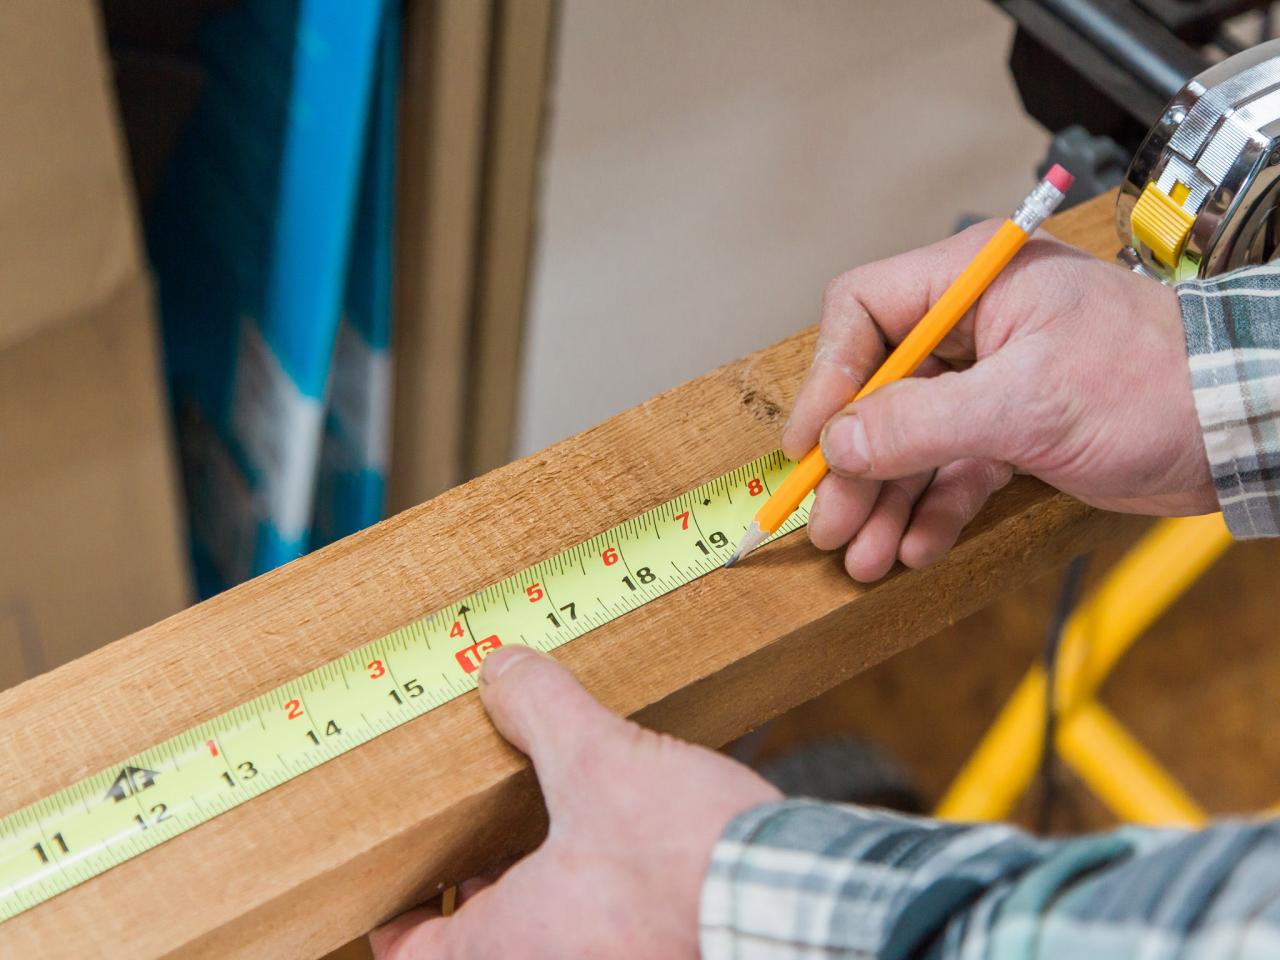
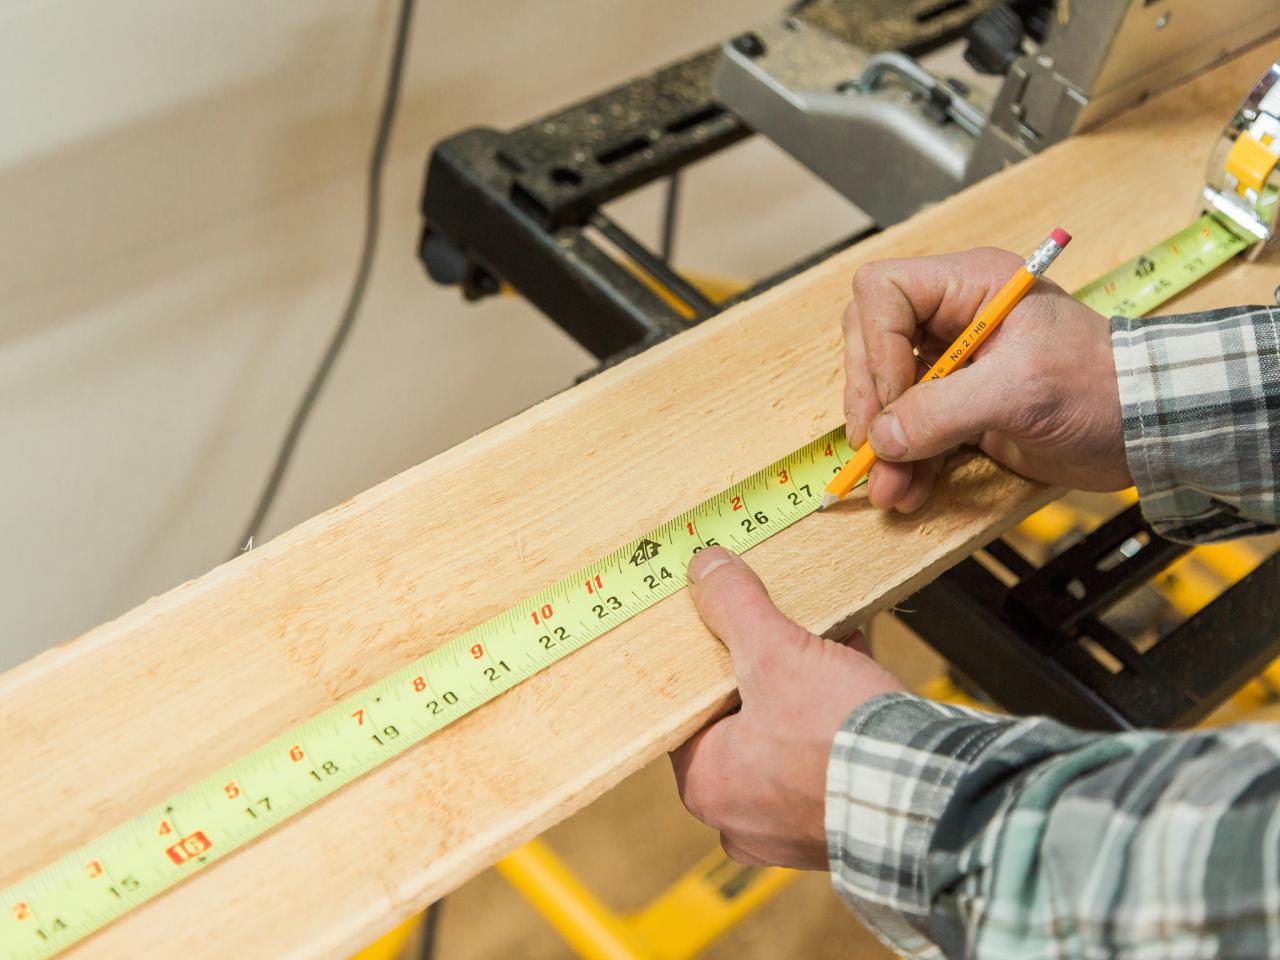
Cut Boards for the Frame
Measure, mark and cut the 2x4 board to build out the frame of the bar. Our design called for the following: two 2x4 x 27” and two 2x4 x 19” for the bottom shelf and two 2x4 x 40" and 2x4 x 19" for the countertop.

Tomas Espinoza/Flynnside Out Productions
Tomas Espinoza/Flynnside Out Productions
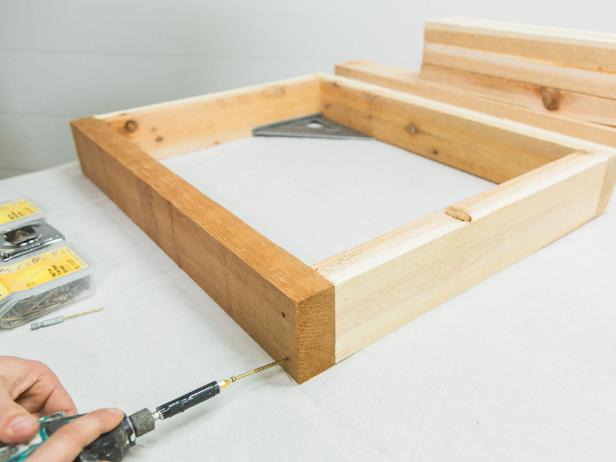
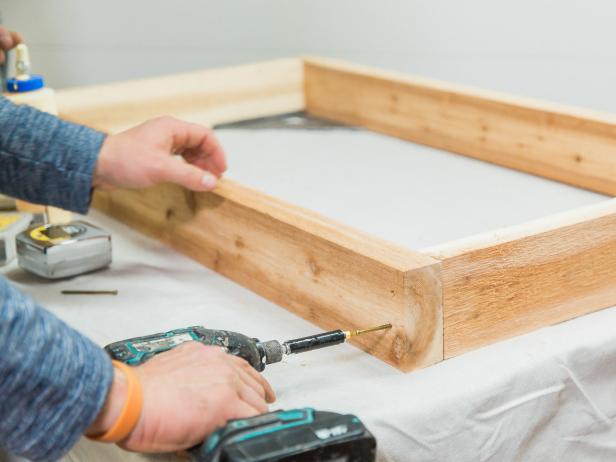
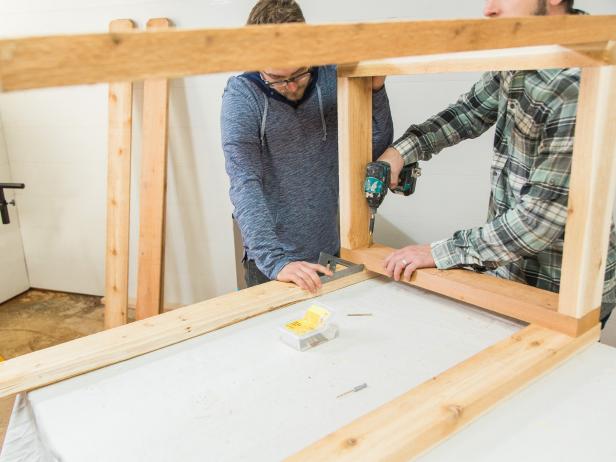
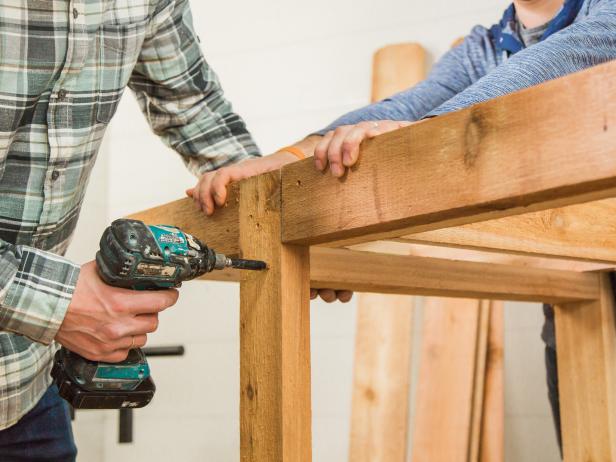
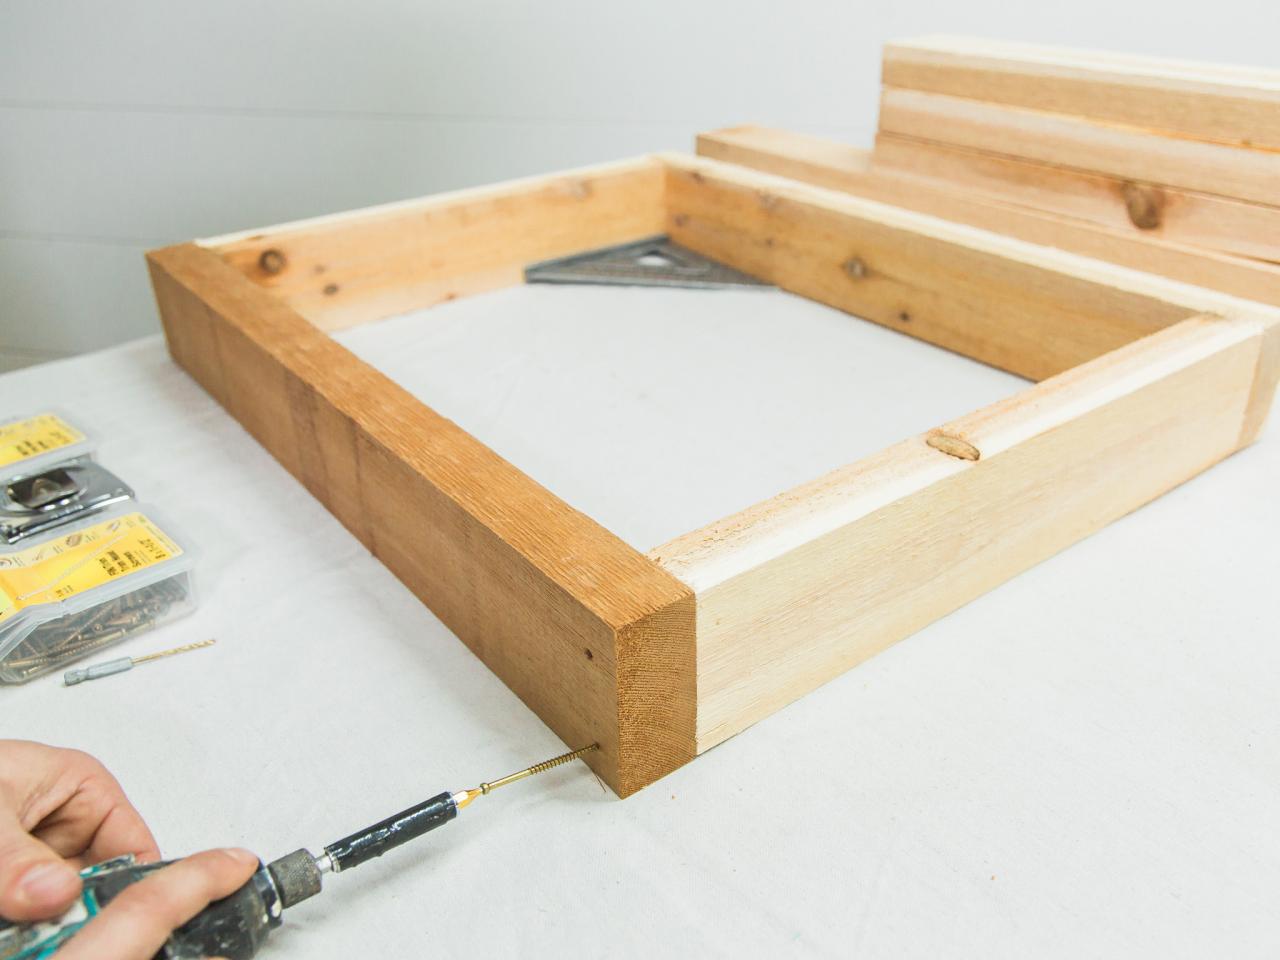
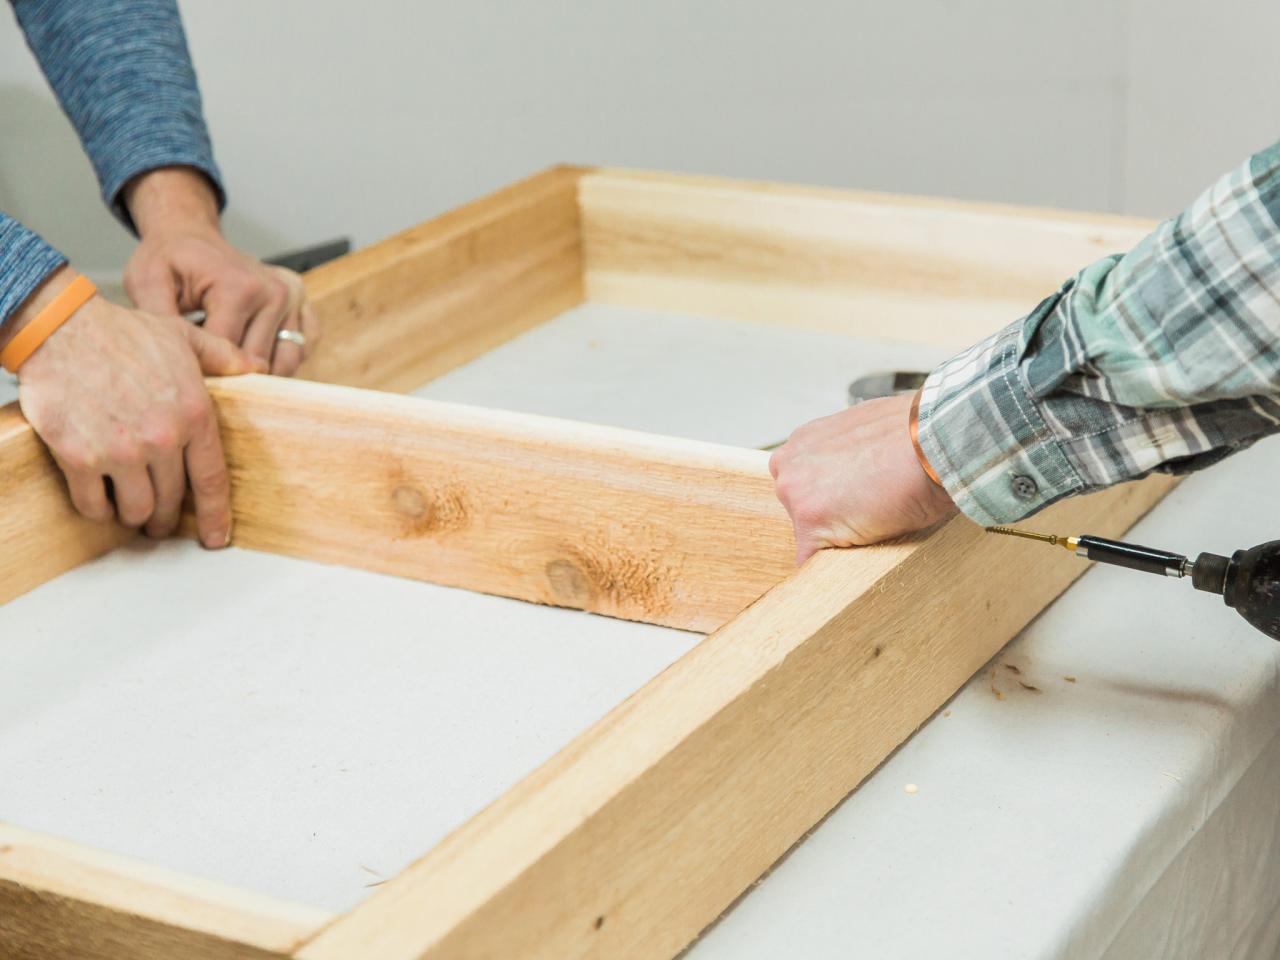
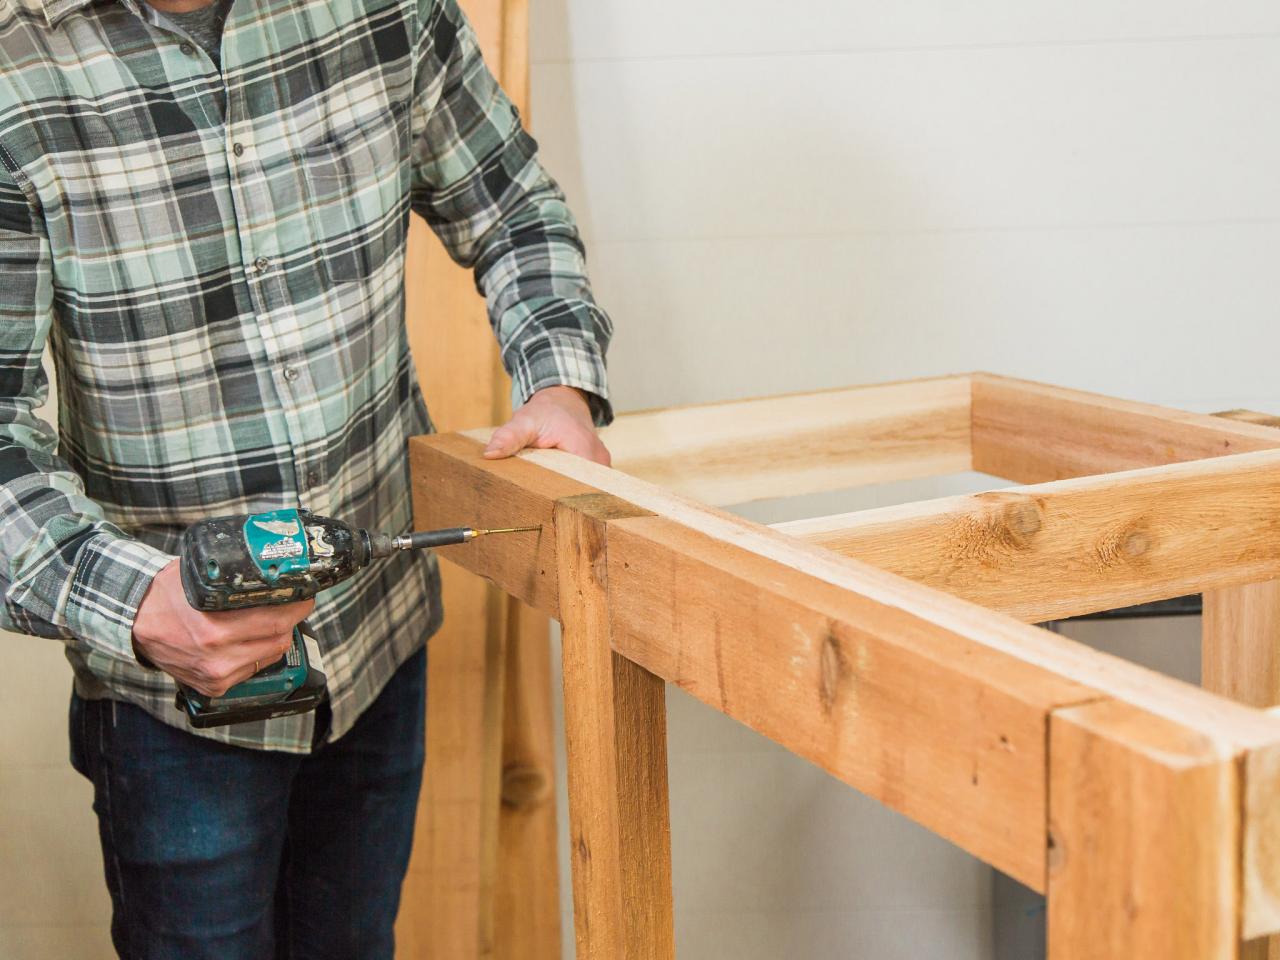
Assemble Frame
Assemble the smaller bottom shelf frame with a speed square and wood glue and screws (Image 1). Always pre-drill before adding wood screws to avoid splitting the wood. Use the same method to assemble the countertop (Image 2). Lastly, add the 19” center brace (Image 3).
Tomas Espinoza/Flynnside Out Productions
Image 1
Tomas Espinoza/Flynnside Out Productions
Image 2

Tomas Espinoza/Flynnside Out Productions
Image 3
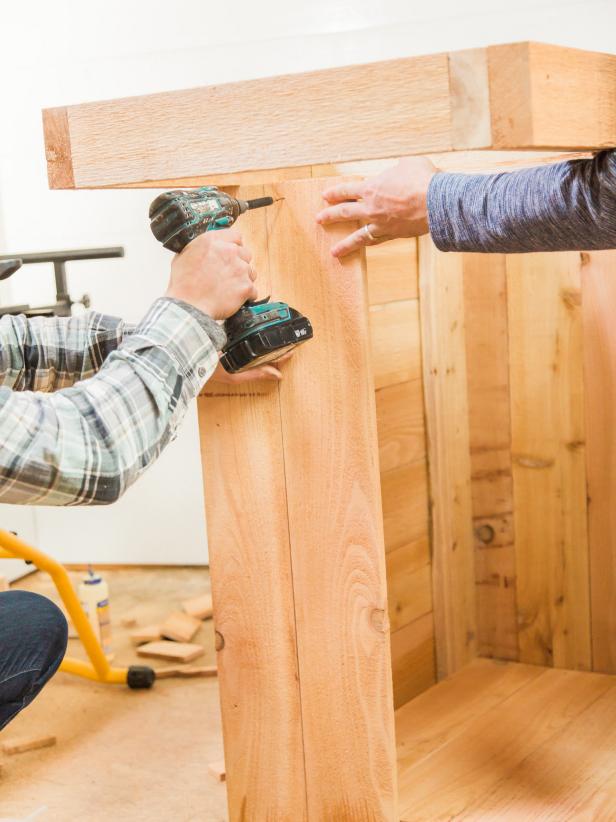
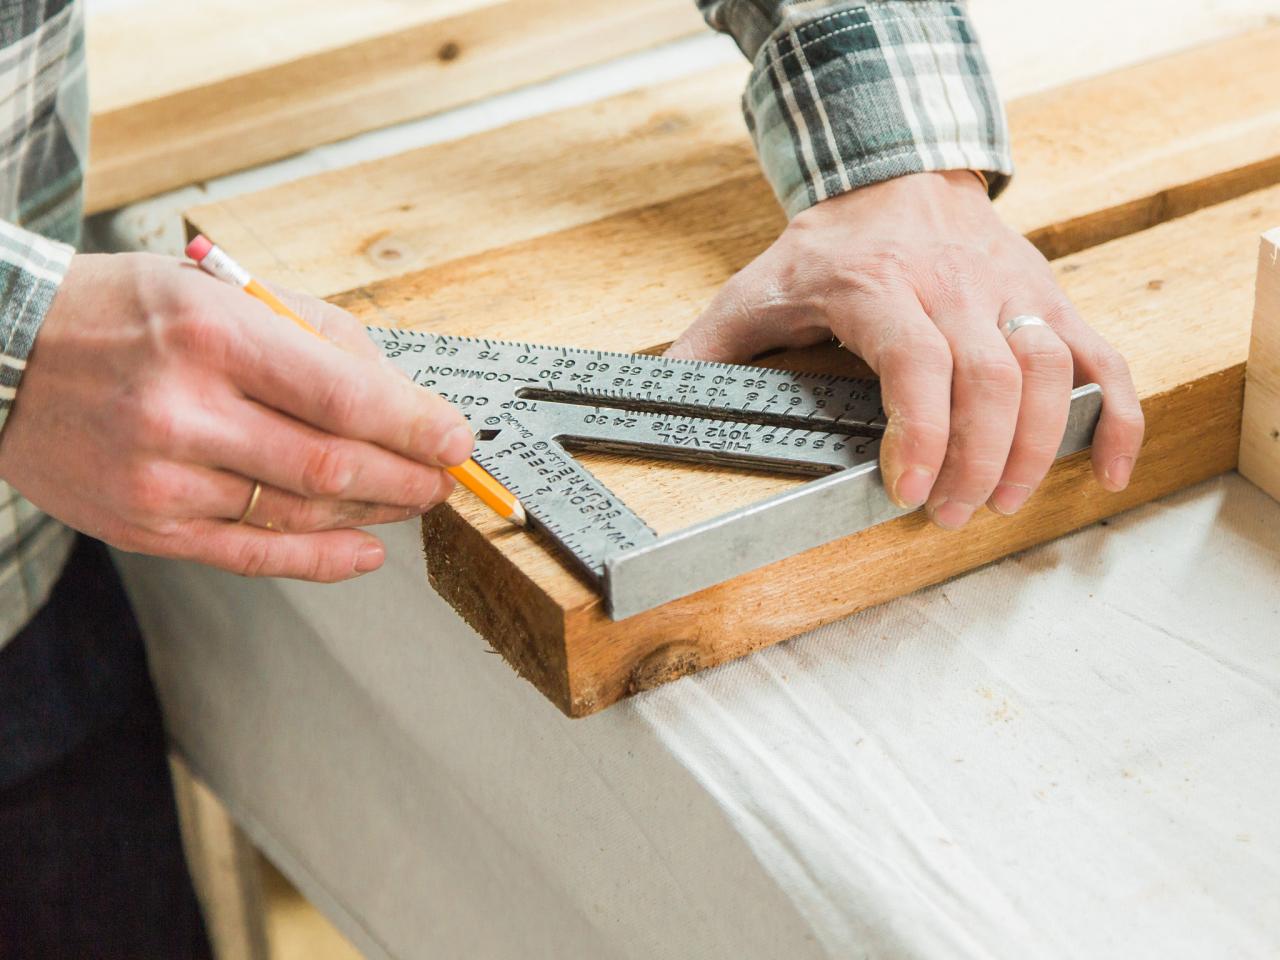
Cut Legs
Measure, mark and cut four 2x4 x 42" legs. Using a speed square, mark a 1/2" on the end of each board. You’ll need these marks when you attach the legs to the frames.

Tomas Espinoza/Flynnside Out Productions
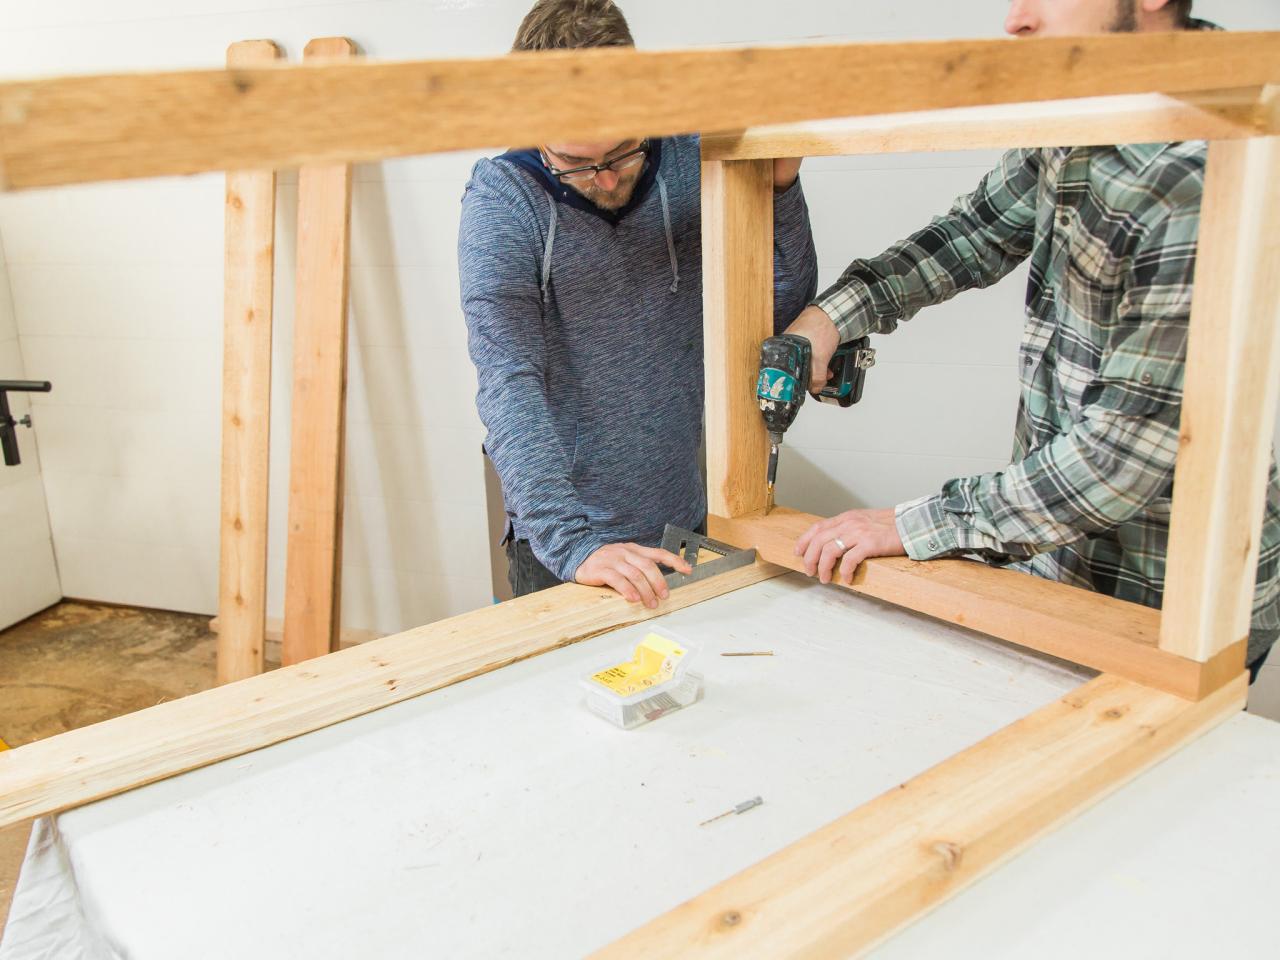
Attach Legs
On a flat surface, lay the legs out and align the 1/2" marks with the bottom shelf frame. Secure with wood glue and 2-1/3" wood screws (Image 1). Next, flip the bar upside down and line up the countertop frame with the legs, and secure. Make sure the tops of the legs are flush with the frame (Image 2).
Tomas Espinoza/Flynnside Out Productions
Image 1
Tomas Espinoza/Flynnside Out Productions
Image 2
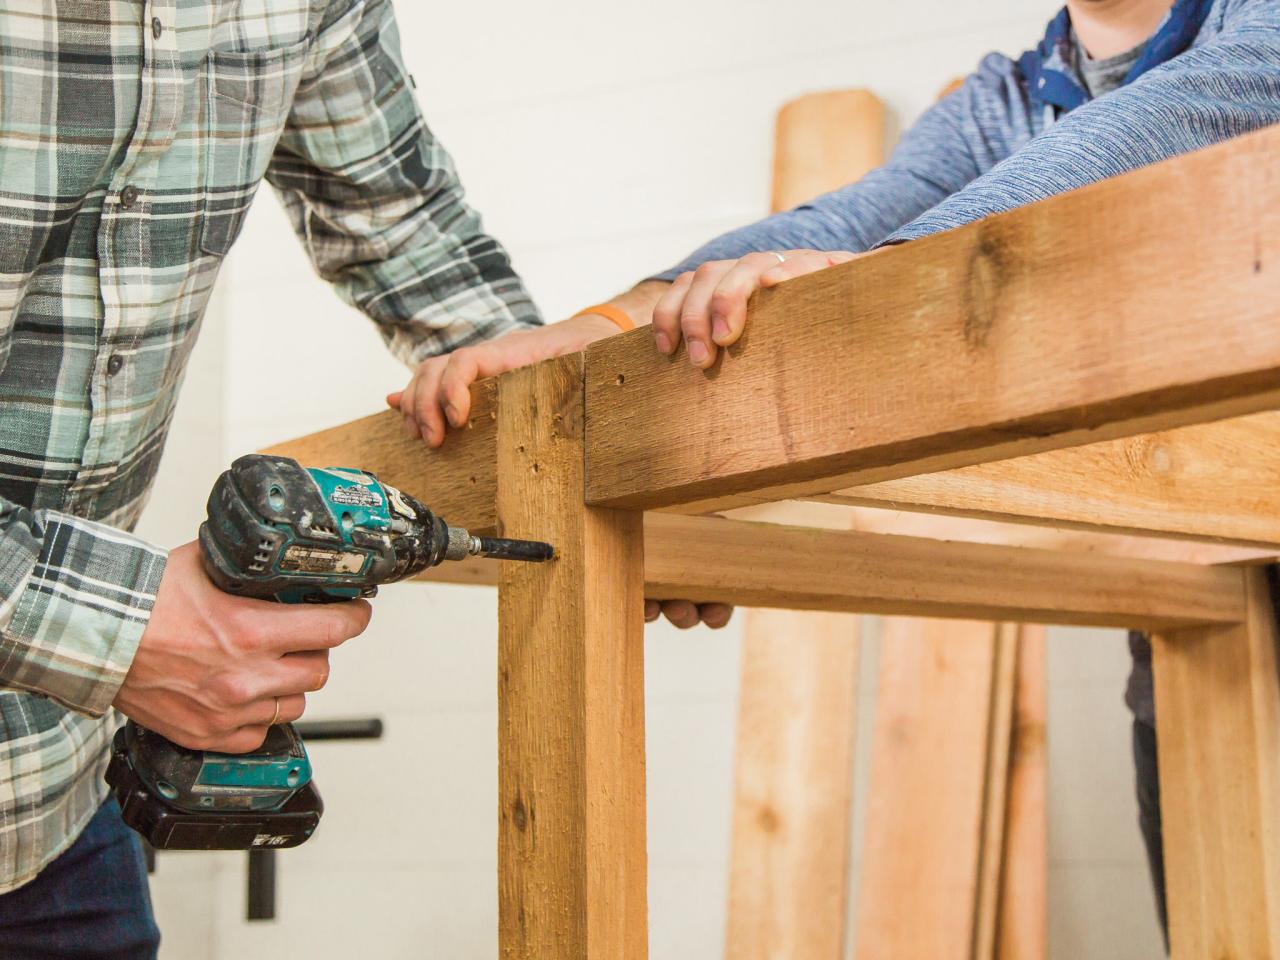
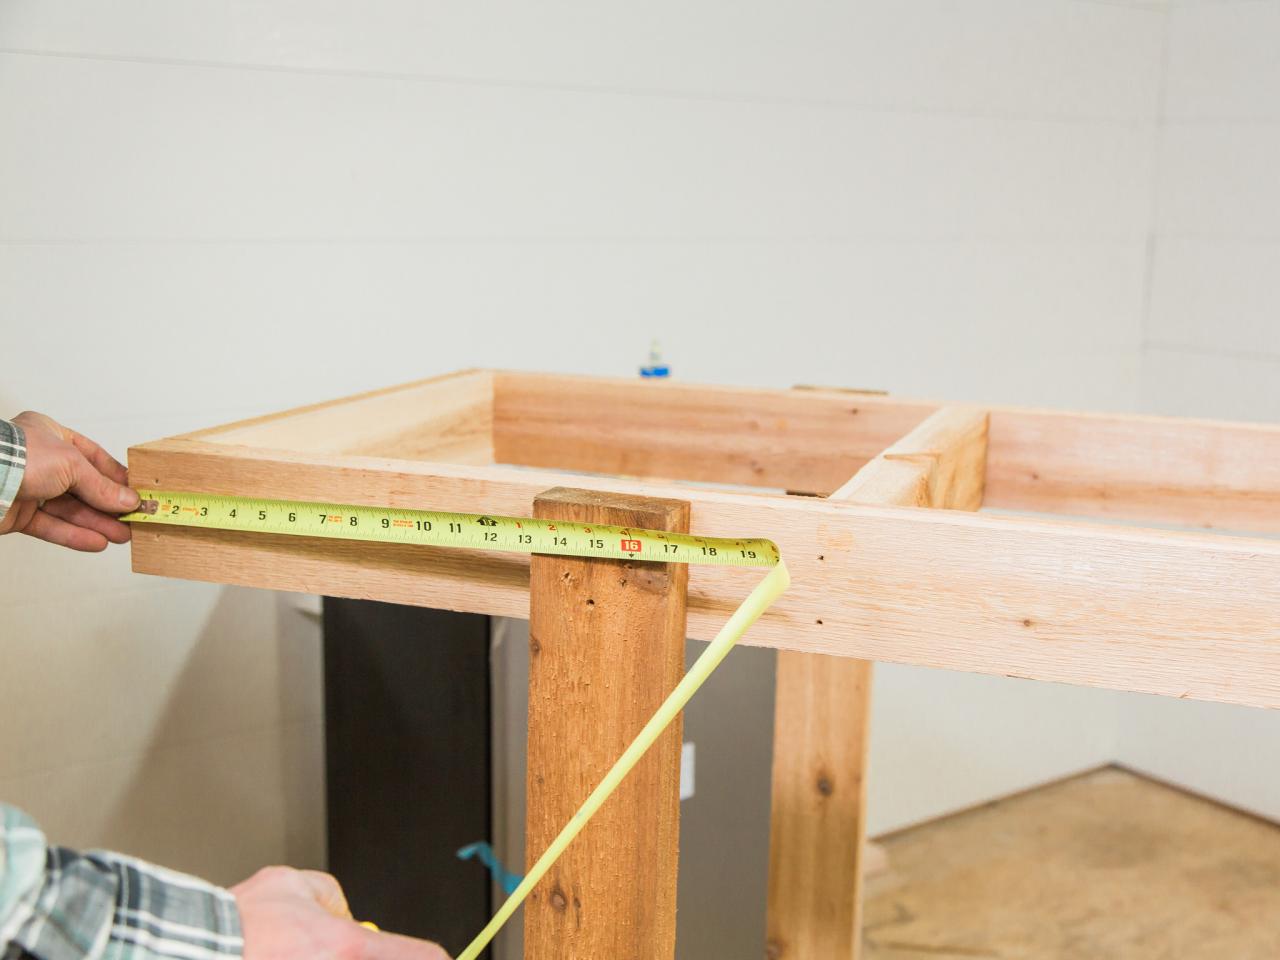
Attach Front Apron
Flip the bar right side up, then measure and mark for the front apron boards. The front apron will give the front of the bar a nice smooth fascia. Ours measures 2x4 x 13" and 2x4 x 19-3/4" (Image 1). Secure to the countertop frame with wood screws (Image 2).

Tomas Espinoza/Flynnside Out Productions
Image 1
Tomas Espinoza/Flynnside Out Productions
Image 2
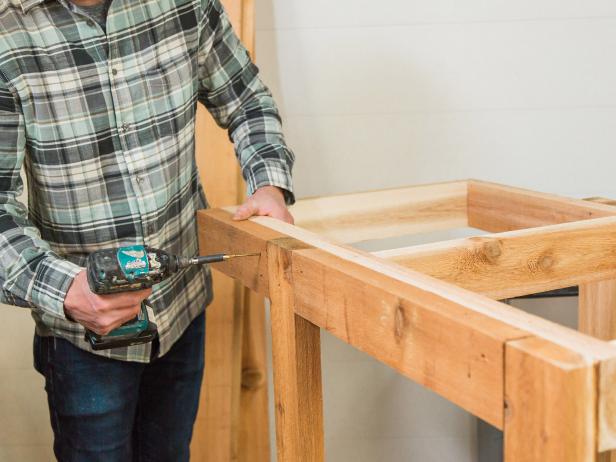
Attach Nailer
Attach a 2x4 nailer board, so you’ll have something to nail the vertical planks of the bottom cabinet to. Ours measures 22-1/2" (Image 1). Secure using wood screws (Image 2).

Tomas Espinoza/Flynnside Out Productions
Image 1
Tomas Espinoza/Flynnside Out Productions
Image 2
Cut Pickets
Measure, mark and cut the picket boards for the bottom shelf, the back of the fridge cabinet and the sides. Cut four bottom and seven back boards measuring at 1x6 x 27" long each. Cut five side boards measuring at 1x6 x 38" (underside of the overhang) long each and five boards measuring at 1x6 x 42" long each. Cut five countertop boards measuring at 1x6 x 43" long each.

Tomas Espinoza/Flynnside Out Productions
Install Bottom and Back Pickets
Using the 1-1/2" wood screws, secure the boards to the frame in a horizontal orientation (Image 1). Leave space in the back to run the fridge's power cord (Image 2).

Tomas Espinoza/Flynnside Out Productions
Image 1
Tomas Espinoza/Flynnside Out Productions
Image 2
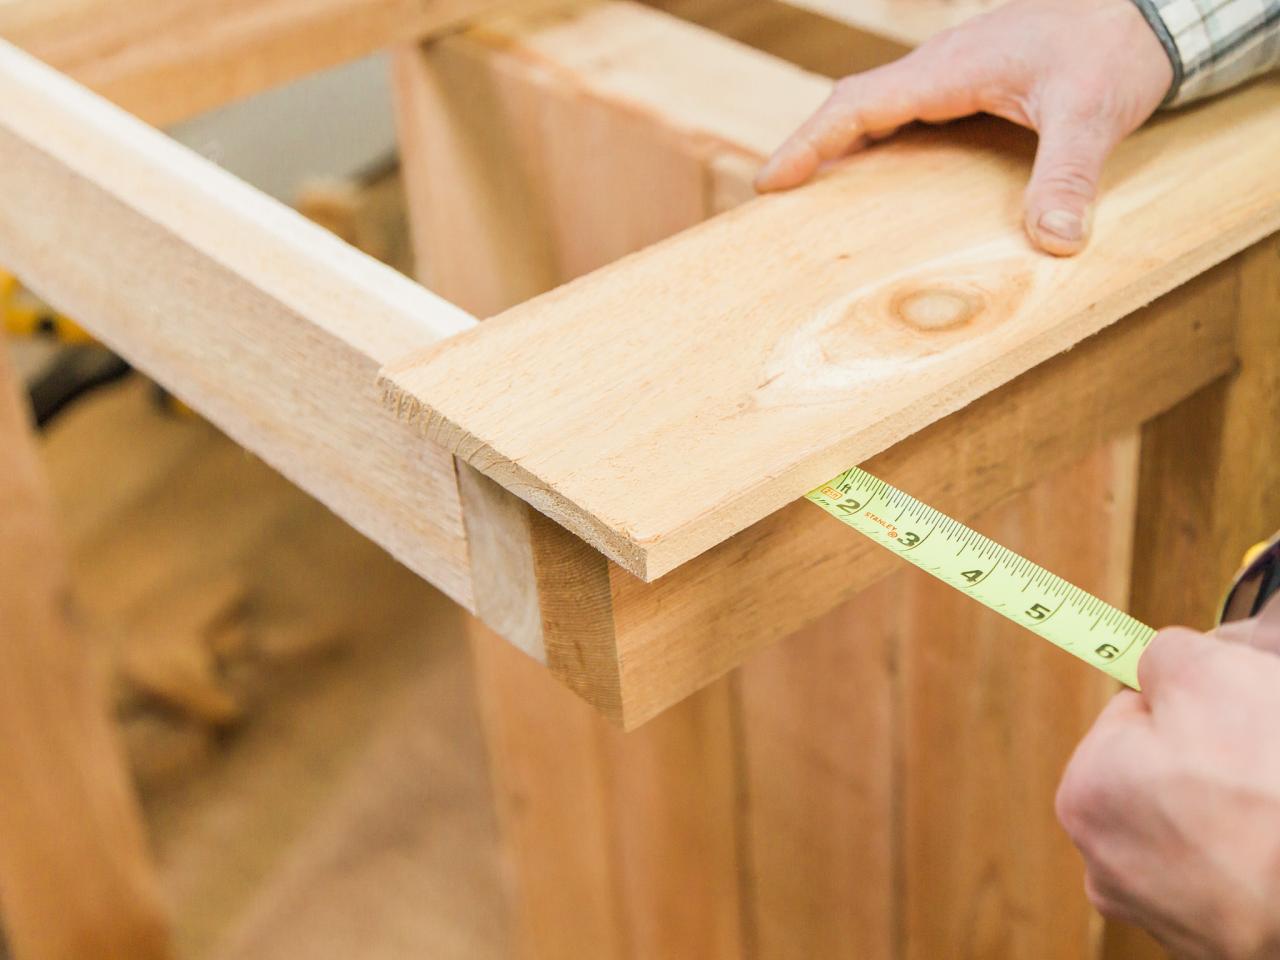
Install Top Pickets
Start with the front board, and allow for a 1-1/2" overhang (Image 1). Secure using the 1-1/2" screws (Image 2). You may need to rip the last board depending on your dimensions.

Tomas Espinoza/Flynnside Out Productions
Image 1
Tomas Espinoza/Flynnside Out Productions
Image 2
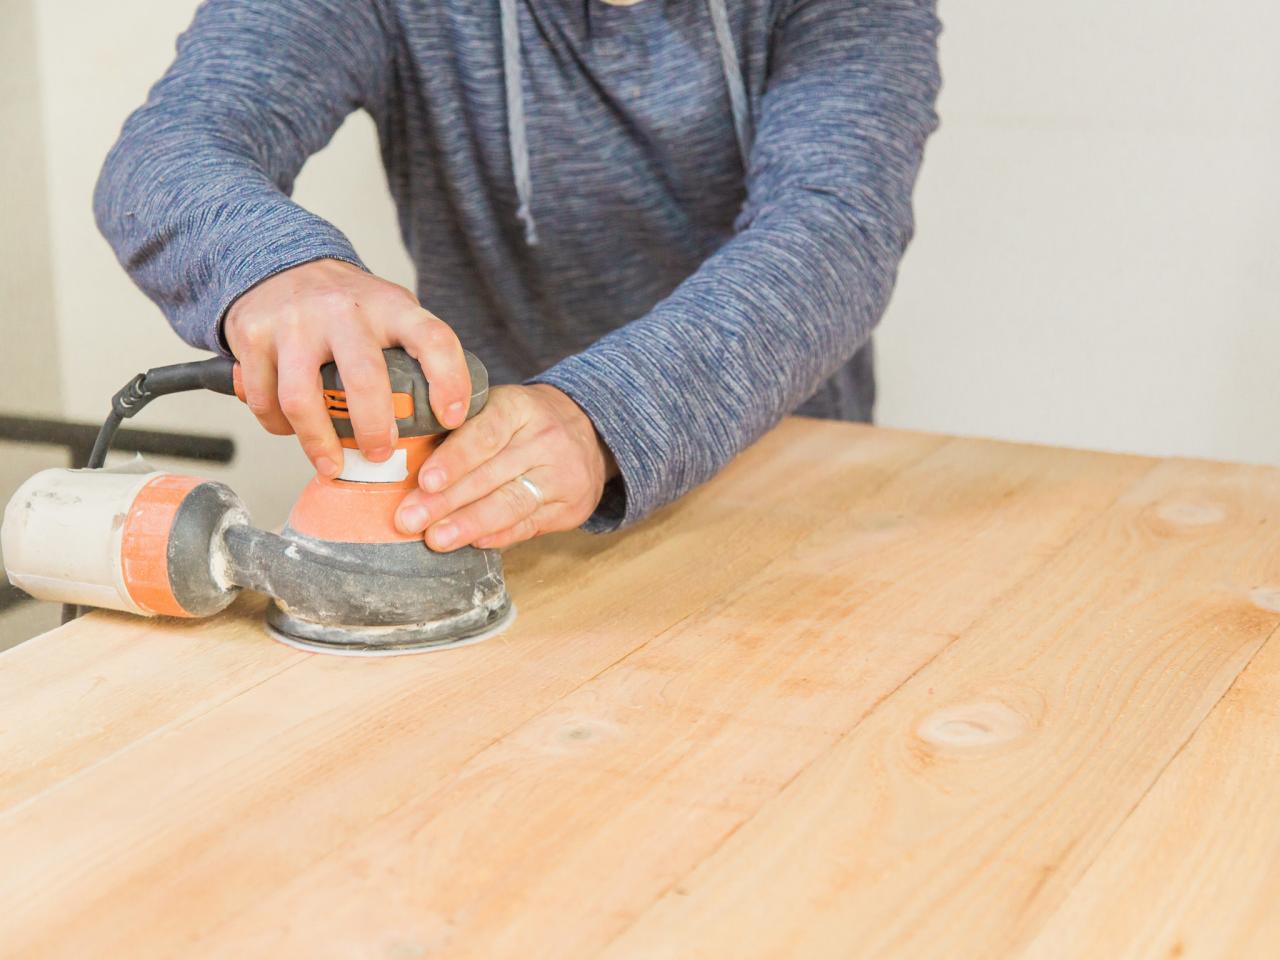
Sand Wood
Sand the bar top and any rough areas using an orbital sander and 220-grit sanding paper.

Tomas Espinoza/Flynnside Out Productions
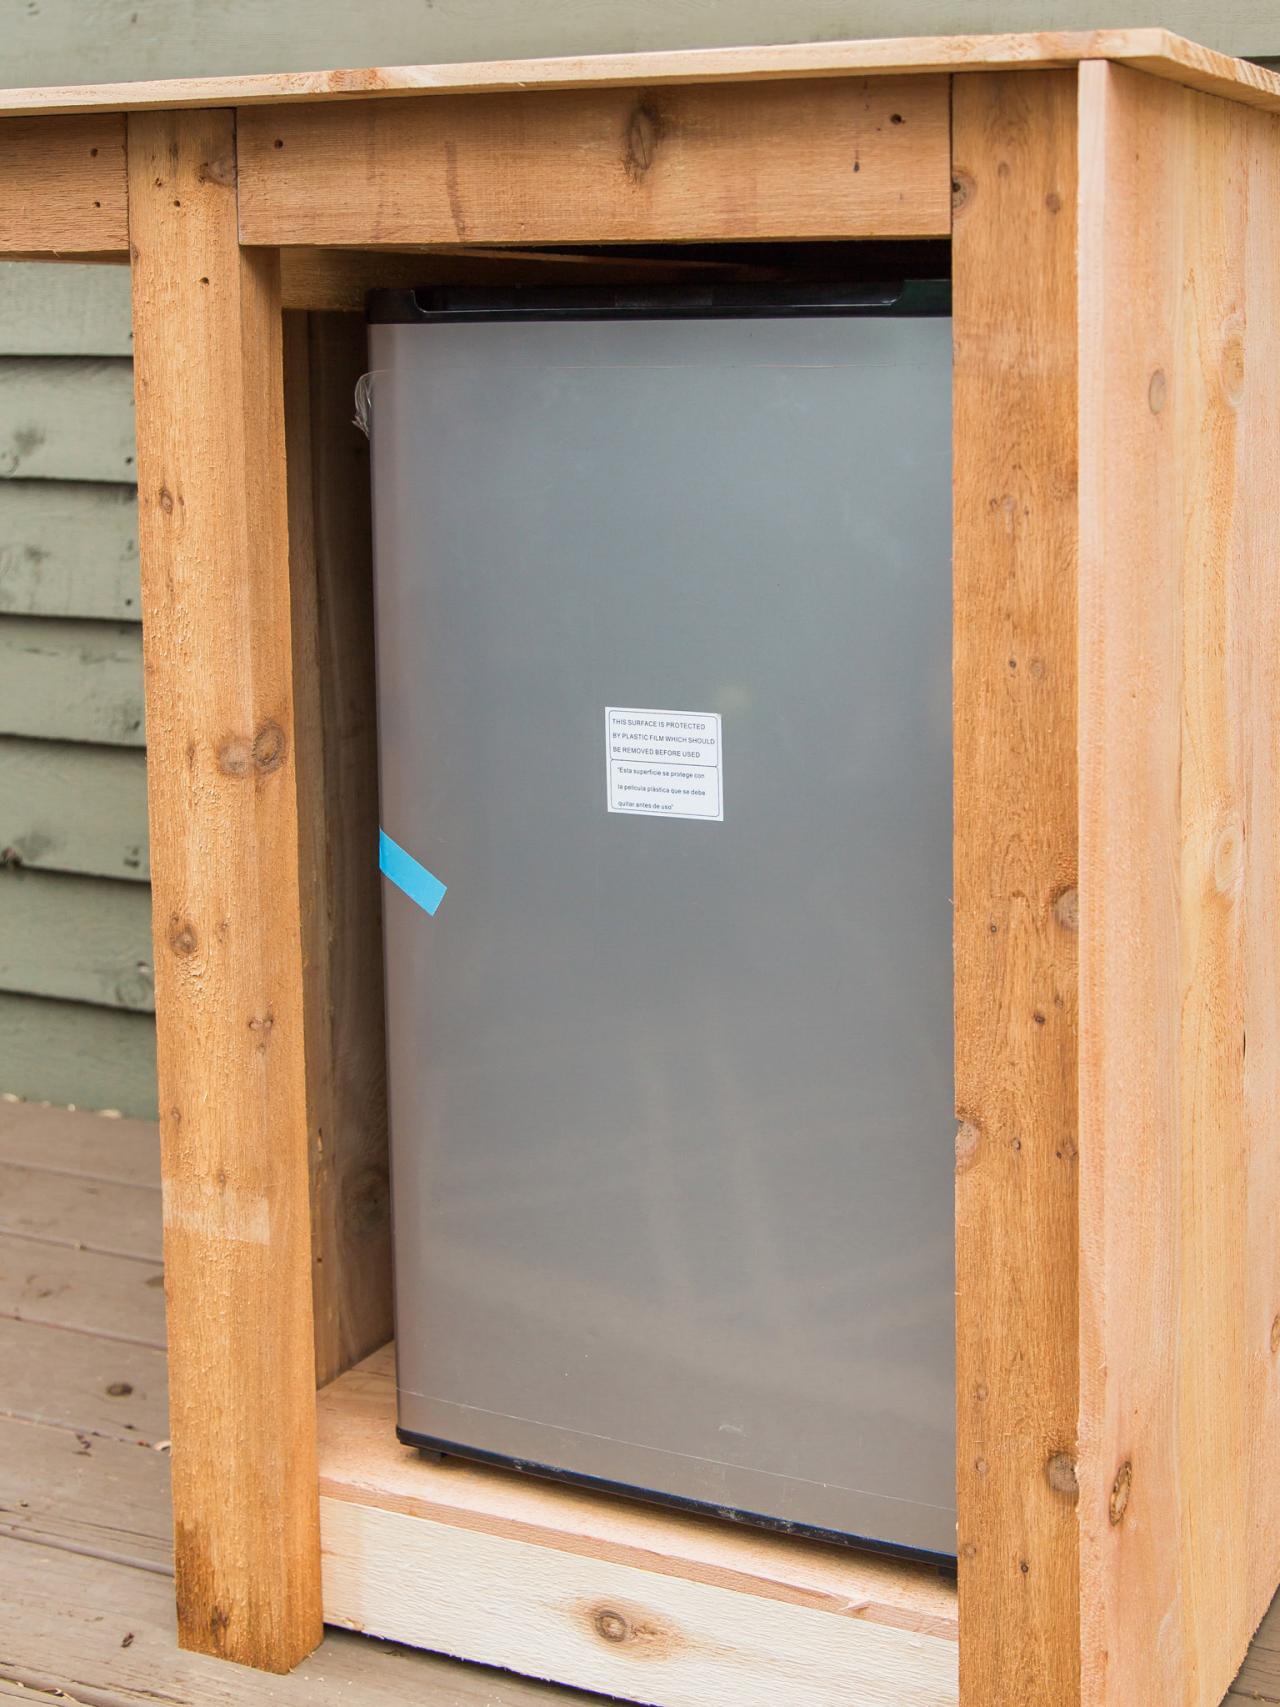
Insert Mini Fridge
Insert the fridge, allowing room for proper ventilation and the power cord to pass through the cabinet.

Tomas Espinoza/Flynnside Out Productions
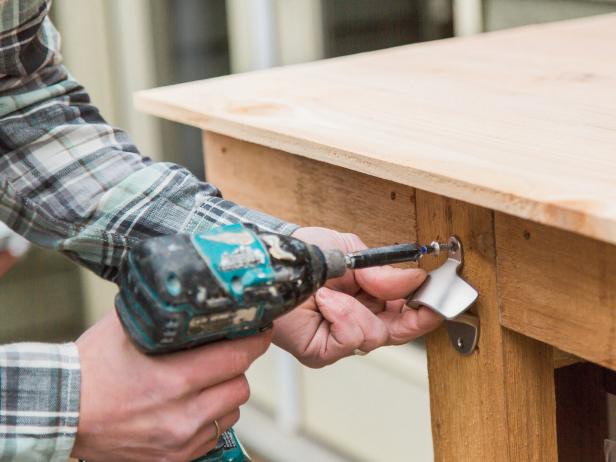
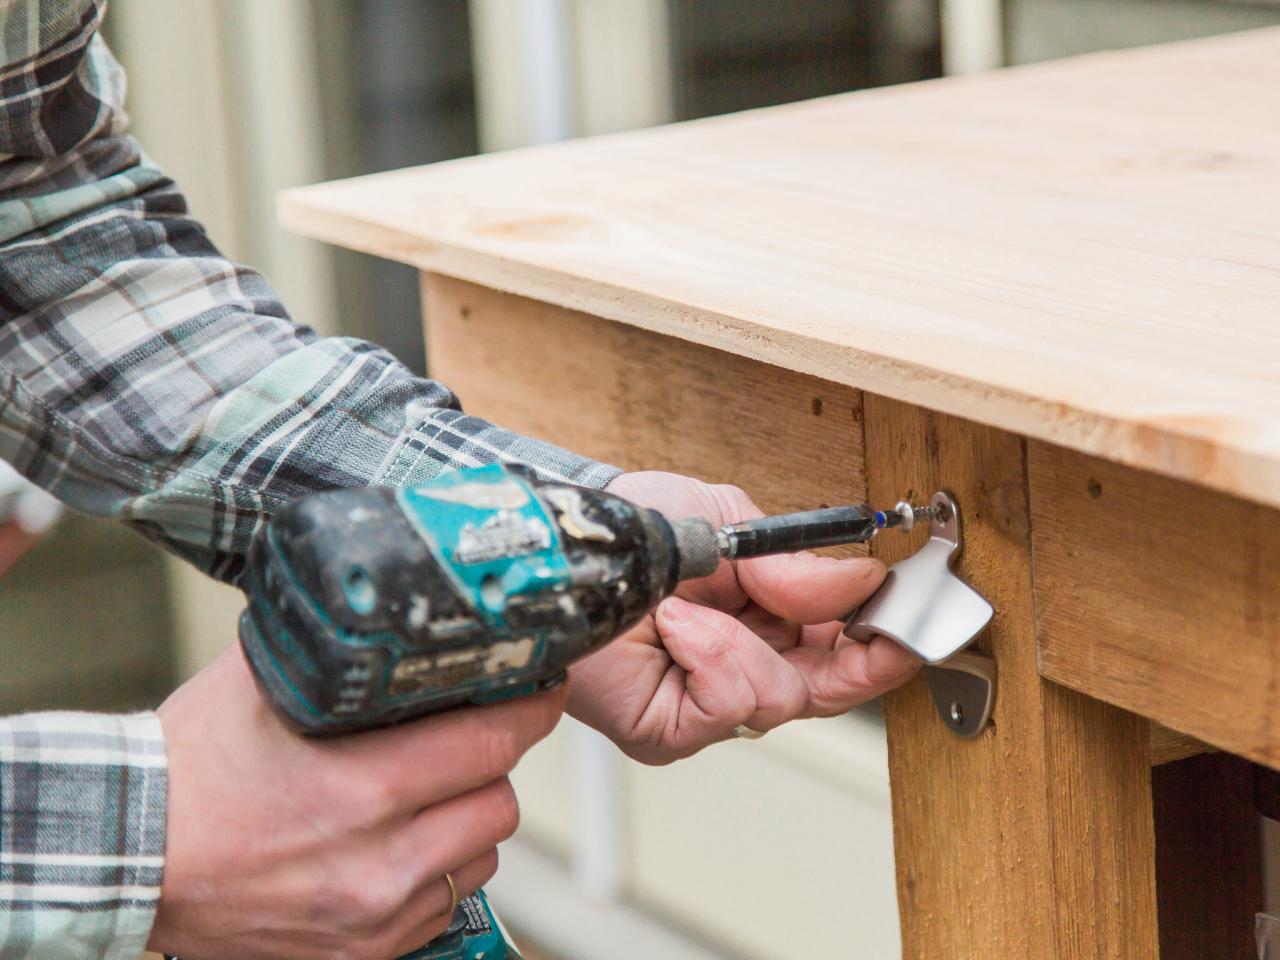
Attach Bottle Opener and Hooks
Attach a towel bar, bottle opener and hooks to keep accessories handy.
Tomas Espinoza/Flynnside Out Productions
Image 1
Tomas Espinoza/Flynnside Out Productions
Image 2


