


Build an Outdoor Bar With a Pebble Top

Tools and Materials:
1x3 redwood trim
3/4” exterior plywood
exterior fabric
nail gun with 2” Brad nails and 1-1/2” finish nails
1-1/4” wood screws
screw gun with pocket jig
sander and sandpaper
clear caulk
clear casting resin mix
river stones, pebbles or tumbled glass
marine spar varnish with rags, paint brushes and rollers
table saw and a miter saw
pneumatic staple gun
wood glue
wood putty
level and a tape measure
clamps
Steps:
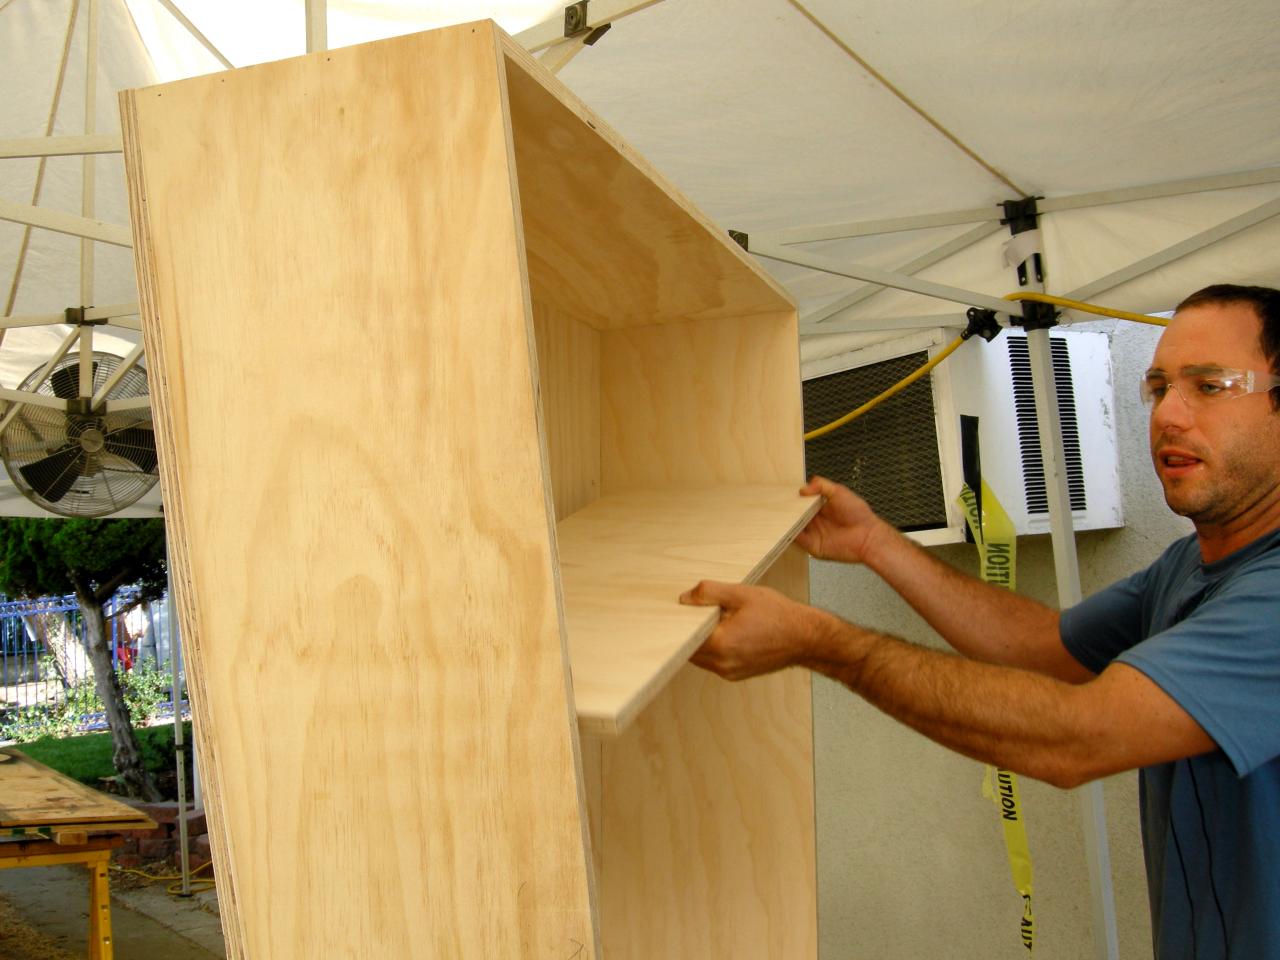
1. Cut the exterior plywood to size:
- one piece at 19-3/4” x 68” (bar top)
- one piece at 12” x 45” (sub bar top)
- one piece at 12” x 39” (shelf)
- one piece at 12” x 32-1/2”(bottom)
- two pieces at 12” x 42-5/8” (sides)
- one trapezoidal bar face at 48” (top) x 42-5/8” (sides) x 33-3/16” (bottom)
To compensate for the angle of the trapezoid, make a 10-degree bevel cut on the top and bottom of the side pieces, and also on the short ends of the shelf and bottom piece. This will allow all the pieces to sit flush against one another.

2. Construct the base of the bar using Brad nails and wood glue. Fasten the sides and top flush to the front trapezoid piece. Attach the sides first and then the top.
3. Place the bottom into the base. Attach it where it sits flush with the sides (should be about 2 inches from the ground). Place the shelf into the base (should be about 22 inches from the top) Attach the bottom and shelf to the sides using wood glue and Brad nails.

4. Wrap the sides and face of the bar with outdoor fabric. Staple the fabric at the corners (these will be covered in trim).
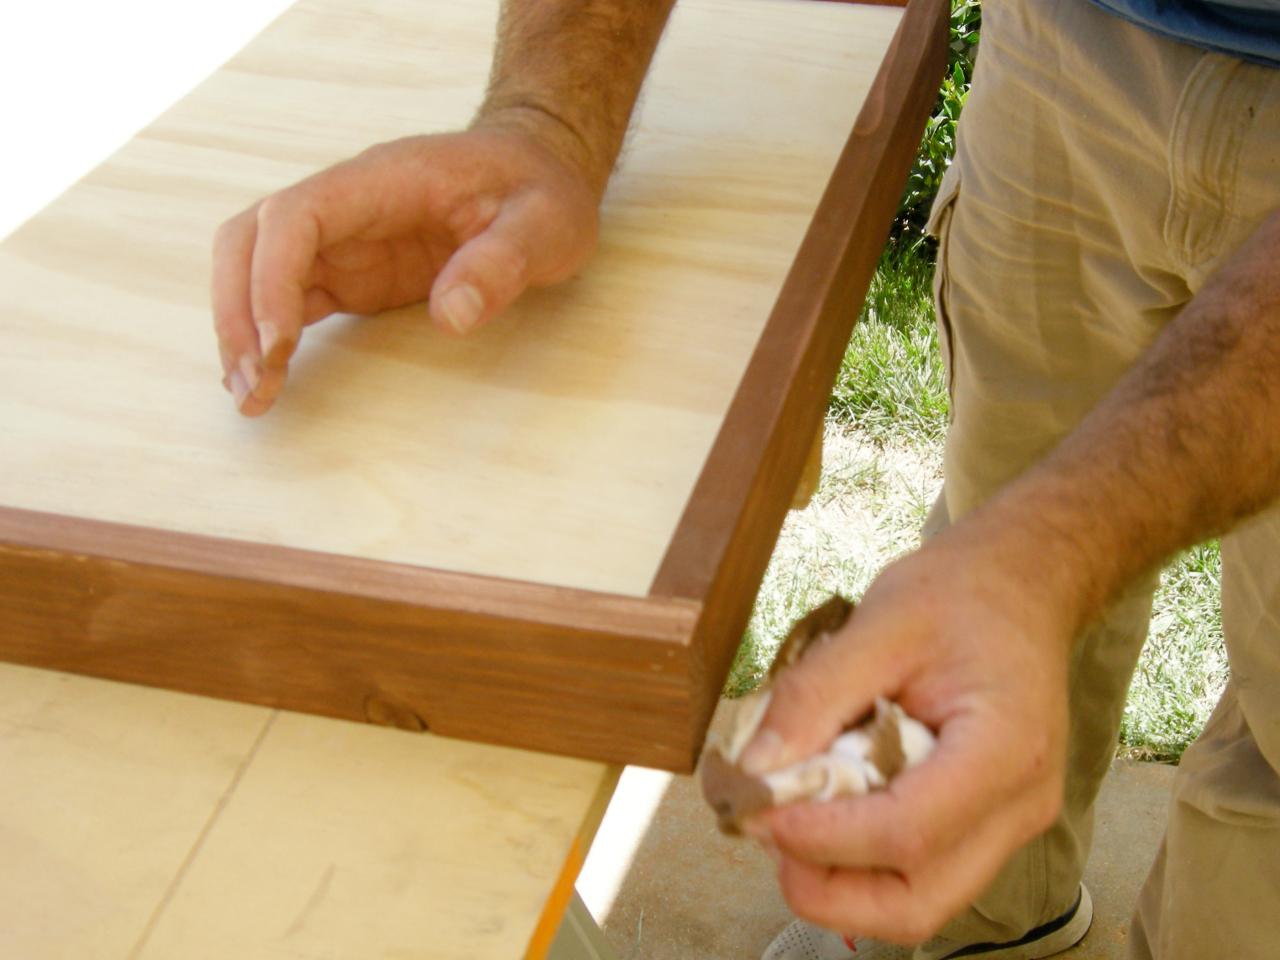
5. Measure and cut the 1x3 redwood trim for the edges of the bar. Use the same 10-degree bevel cut. Stain the 1x3 trim with spar varnish appropriate for redwood. Allow the pieces to thoroughly dry.
6. Attach the redwood trim to the edges of the bar base using finish nails. Fill nail holes with putty and touch up the stain if necessary.

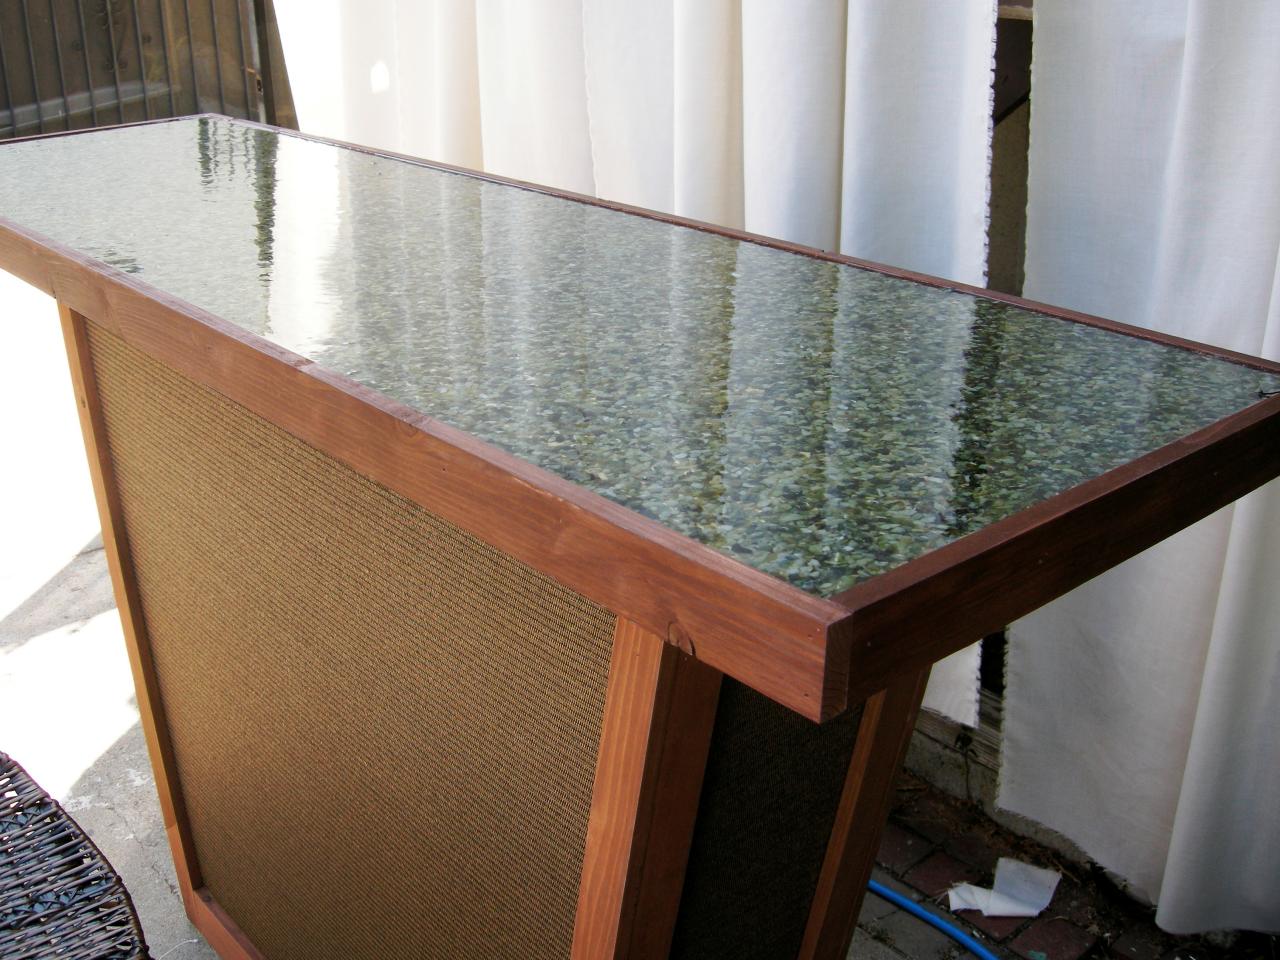
7. Build the bar top. Cut the 1x3 trim to wrap around the 19-3/4” x 68” piece of plywood. Miter cut the joints so you will have tight corners. Attach the trim to the plywood with wood glue and finish nails. The bar top should have a 2-inch reservoir. Fill nail holes with putty and touch up the stain if necessary.
8. Seal the inside joints and nail holes or gaps of the reservoir with clear caulk. Allow the caulk to dry. This will hold the resin in place so it doesn’t leak out.
9. Fill the bar top with river pebbles or the decorative stones.
10. Make sure that the bar top is sitting on a level surface. Mix the casting resin and pour it into the reservoir. You may need several boxes of resin mix to fill the reservoir.
11. Use a disposable float or squeegee to even out the surface of the resin, much like floating concrete. Usually this tool is included with you resin mix. Follow the manufacturer's instructions for drying time.

12. When the resin is completely dry (about 24 hours), center the bar top onto the bar base and attach it from underneath with 1-1/4” wood screws.
13. Set your bar on a level surface in your yard or home.


