


How to Make a Fresh Boxwood Garland for the Holidays
Learn how to make a beautiful garland made from fresh boxwood and pine, sourced straight from your backyard or local garden center, to adorn any space in your home this holiday. Not only will it add a festive touch to your holiday decor, but the process of making it is certain to get you into the Christmas spirit.

DIY Garland With Real Greenery
Rajiv Surendra shares his favorite way to decorate with garland using real greenery. Make your own boxwood and pine garland with his step-by-step guide on HGTV.com.

Photo by: Phillip Reed
Phillip Reed
I love making fresh evergreen garlands every December for my apartment. These garlands can be made out of any evergreen (spruce, pine, boxwood), and when entwined with lights and hung up over a doorway or along a banister, they make such a big impact in a small space. I guarantee that once you try it yourself, you’ll fall in love with the look and make the project an annual tradition.

Materials + Tools
- evergreen shrub or tree clippings
- strong jute twine (look for twine that is 4 millimeters thick or more)
- paddle of green floral wire
- hand pruners or garden clippers
- scissors
- nails, adhesive hooks or other hanging hardware
- ribbon (optional)
- fairy lights or string lights (optional)
You’ll need quite a bit of greenery to make a garland — for this 14-foot garland, I needed about five bushels of greenery. If you live near a forest or have a wooded backyard, you can go out and gather branches from whatever you have growing. (Just make sure you're not foraging on private property or protected areas.) If you’re in a city, like me, you’ll be able to find greenery at most farmer’s markets and garden centers.

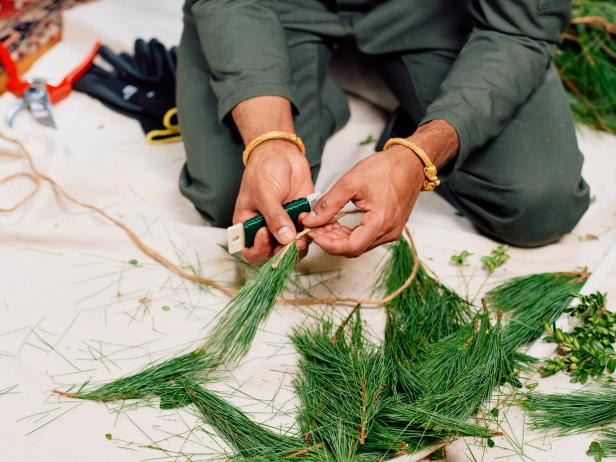
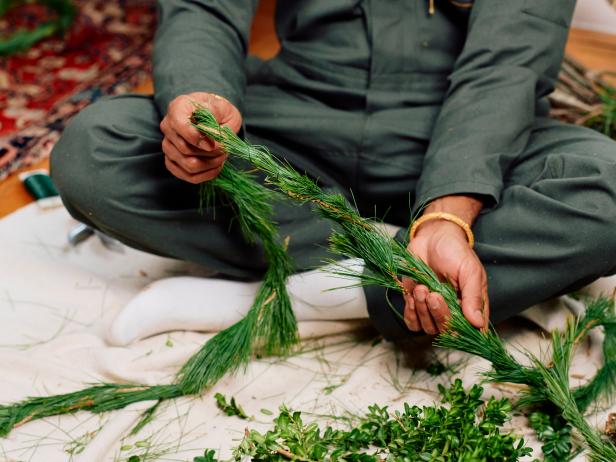
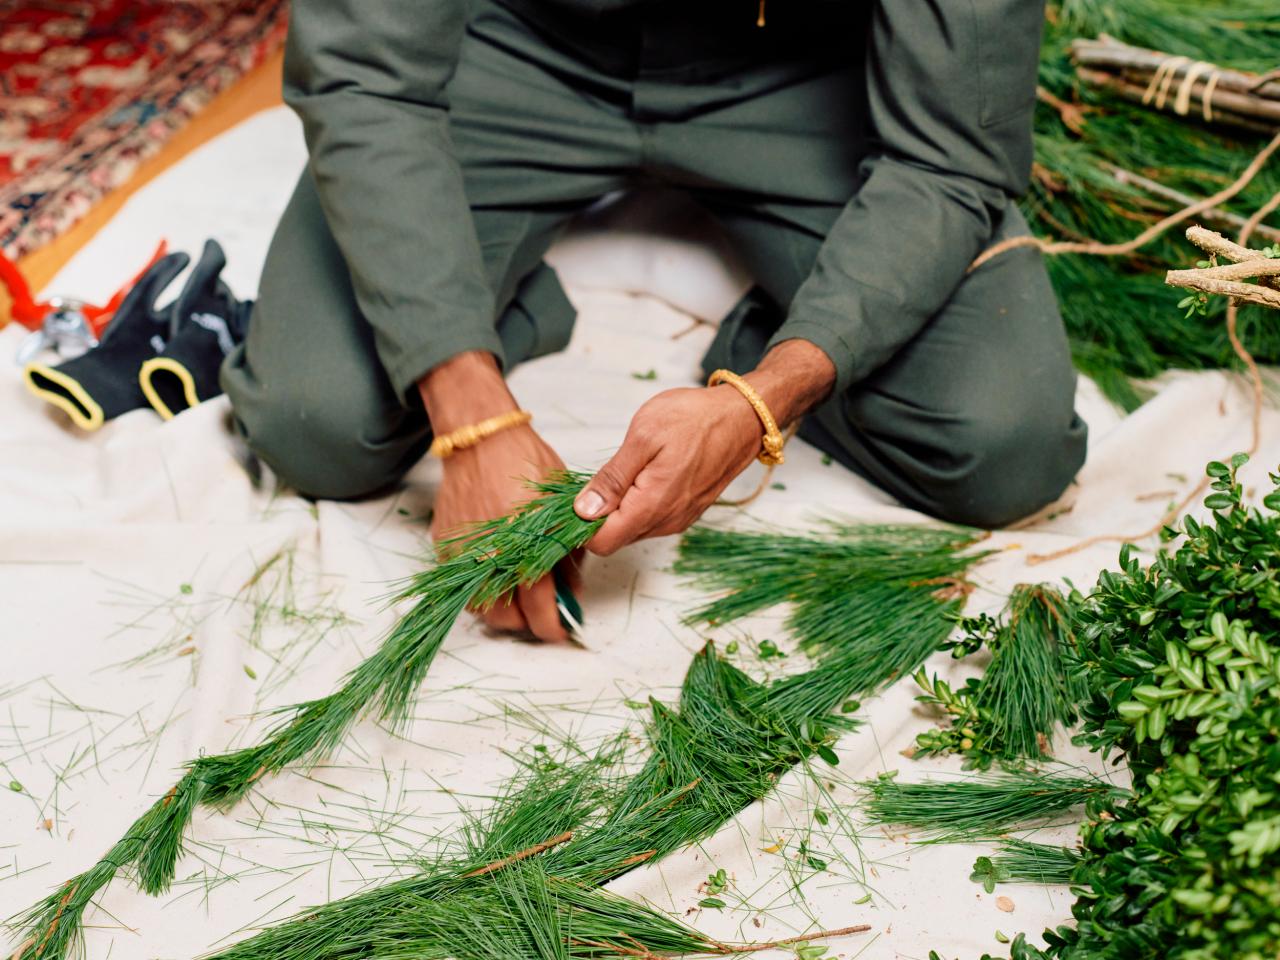
DIY Garland With Real Greenery: Pine Branches
To make real garland you need jute twine, green floral wire on a paddle, pruning shears and lots of greenery. Tip: Use pine to create the understructure and boxwood to make layers in the garland. First, use pruning shears to snip off small branches from the pine bundles.
Photo by: Phillip Reed
Phillip Reed
Creating the Base
Making a garland requires two stages of greenery-tying. You start by making an understructure or "base" by wrapping jute twine with small cuttings of spruce or pine using green floral wire (Image 1); then, you go over this base with the actual greenery that’ll be seen on the finished garland (Image 2).
Phillip Reed

Phillip Reed
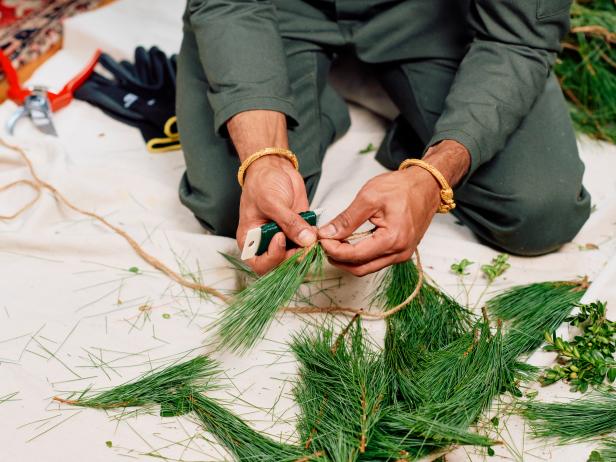
DIY Garland With Real Greenery: Floral Wire
To make real garland you need jute twine, green floral wire on a paddle, pruning shears and lots of greenery. Tip: Use pine to create the understructure and boxwood to make layers in the garland. First, use pruning shears to snip off small branches from the pine bundles. Then, add pieces of pine stems along a long piece of twine securing it with floral wire and pulling tightly as you go. Overlap the pine branches working down the twine to create one continual strand of uninterrupted garland. Leave a bit of twine at the end without greenery so you can tie all the components together.
Photo By: Phillip Reed
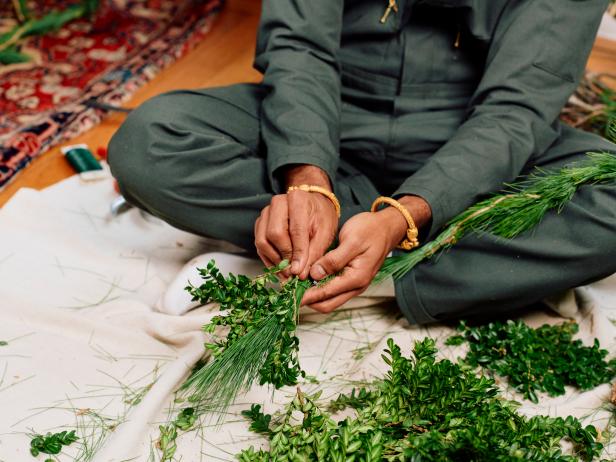
DIY Garland With Real Greenery: Layer Boxwood
Once the pine base is complete, layer in boxwood branches. Prepare the boxwood branches by snipping smaller pieces with the pruning shears. Next, add the boxwood onto the pine base garland structure and wrap with floral wire. Add more layers of stems working down the pine and twine garland.
Photo By: Phillip Reed
The greenery you use for this base can be anything — here I’m using pine (Image 1) because it’s much cheaper than the boxwood I’m going to use on the outer part of the garland. Spruce would also work for this step. To make the inner base, start by cutting the length of jute twine you want for the finished garland. Next, tether little clippings of the greenery to the jute twine using the floral wire, overlapping the greenery as you go (Image 2 + 3). Pull the floral wire tightly as you wrap, making sure to really anchor the greenery in place (Image 4 + 5). You don’t want any pieces of the base to be loose or to be moving around at all. This can all be done quickly and doesn’t need to be pretty, as it’ll be completely hidden when the garland is done.
Phillip Reed
Phillip Reed
Phillip Reed
Phillip Reed
Phillip Reed
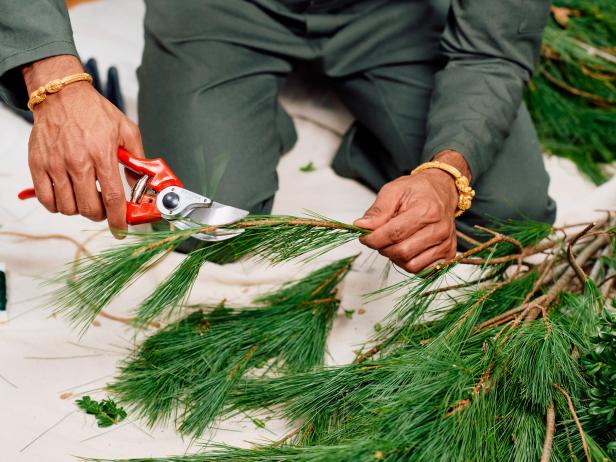
DIY Garland With Real Greenery: Pruning Shears
To make real garland you need jute twine, green floral wire on a paddle, pruning shears and lots of greenery. Tip: Use pine to create the understructure and boxwood to make layers in the garland. First, use pruning shears to snip off small branches from the pine bundles.
Photo By: Phillip Reed
DIY Garland With Real Greenery: Floral Wire
To make real garland you need jute twine, green floral wire on a paddle, pruning shears and lots of greenery. Tip: Use pine to create the understructure and boxwood to make layers in the garland. First, use pruning shears to snip off small branches from the pine bundles. Then, add pieces of pine stems along a long piece of twine securing it with floral wire and pulling tightly as you go. Overlap the pine branches working down the twine to create one continual strand of uninterrupted garland. Leave a bit of twine at the end without greenery so you can tie all the components together.
Photo By: Phillip Reed
DIY Garland With Real Greenery: Pine Garland Base
To make real garland you need jute twine, green floral wire on a paddle, pruning shears and lots of greenery. Tip: Use pine to create the understructure and boxwood to make layers in the garland. First, use pruning shears to snip off small branches from the pine bundles. Then, add pieces of pine stems along a long piece of twine securing it with floral wire and pulling tightly as you go. Overlap the pine branches working down the twine to create one continual strand of uninterrupted garland. Leave a bit of twine at the end without greenery so you can tie all the components together. Once the pine base is complete, layer in boxwood branches.
Photo By: Phillip Reed
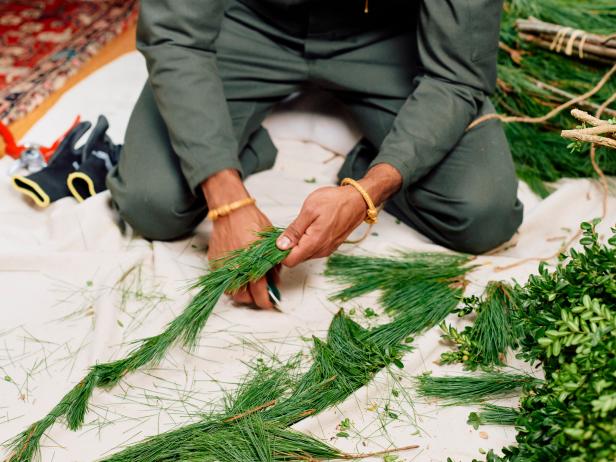
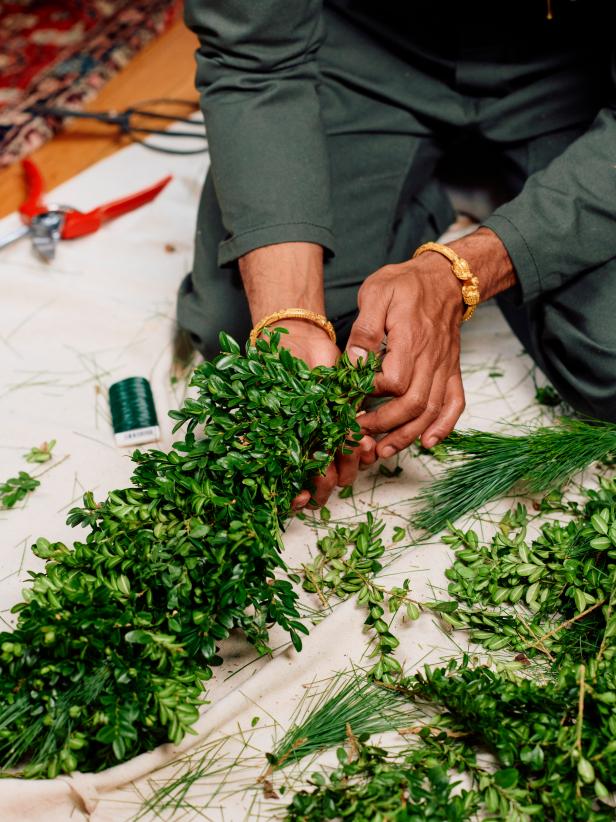
Make the Garland
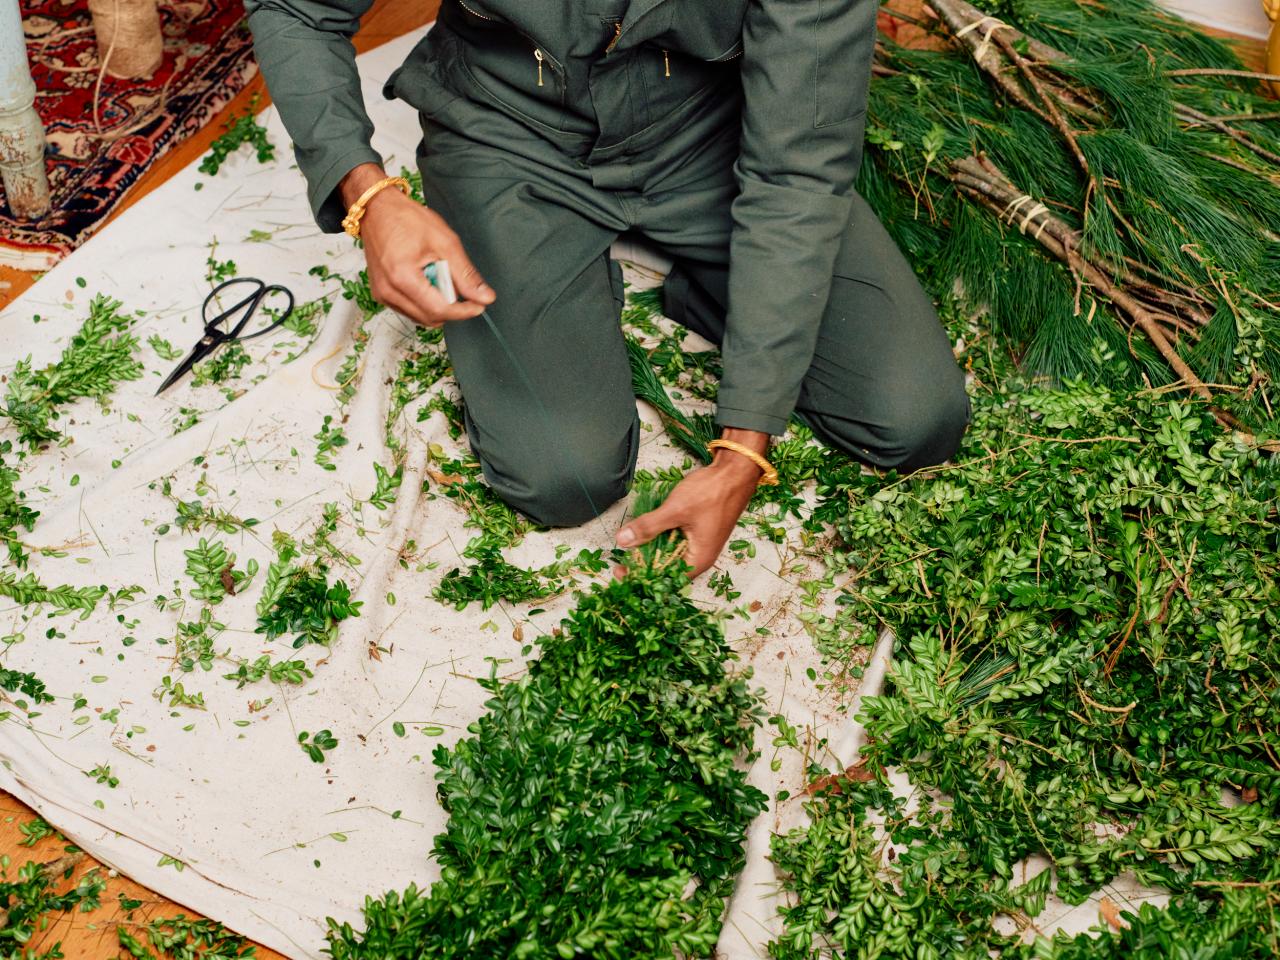
Once you’ve covered the entire length of twine with small cuttings of spruce or pine, you’re ready to start making the garland-proper. Begin by cutting sprigs of boxwood (or whatever other greenery you’re using) into pieces that are about 6-8 inches long. You want to cut these pieces from the larger branches, avoiding any thick and stiff stems that will prevent the finished garland from being fluid and flexible; the garland has to drape without having stiff stems interrupting the flow.

DIY Garland With Real Greenery: Trim Boxwood
Once the pine base is complete, layer in boxwood branches. Prepare the boxwood branches by snipping smaller pieces with the pruning shears.
Photo by: Phillip Reed
Phillip Reed
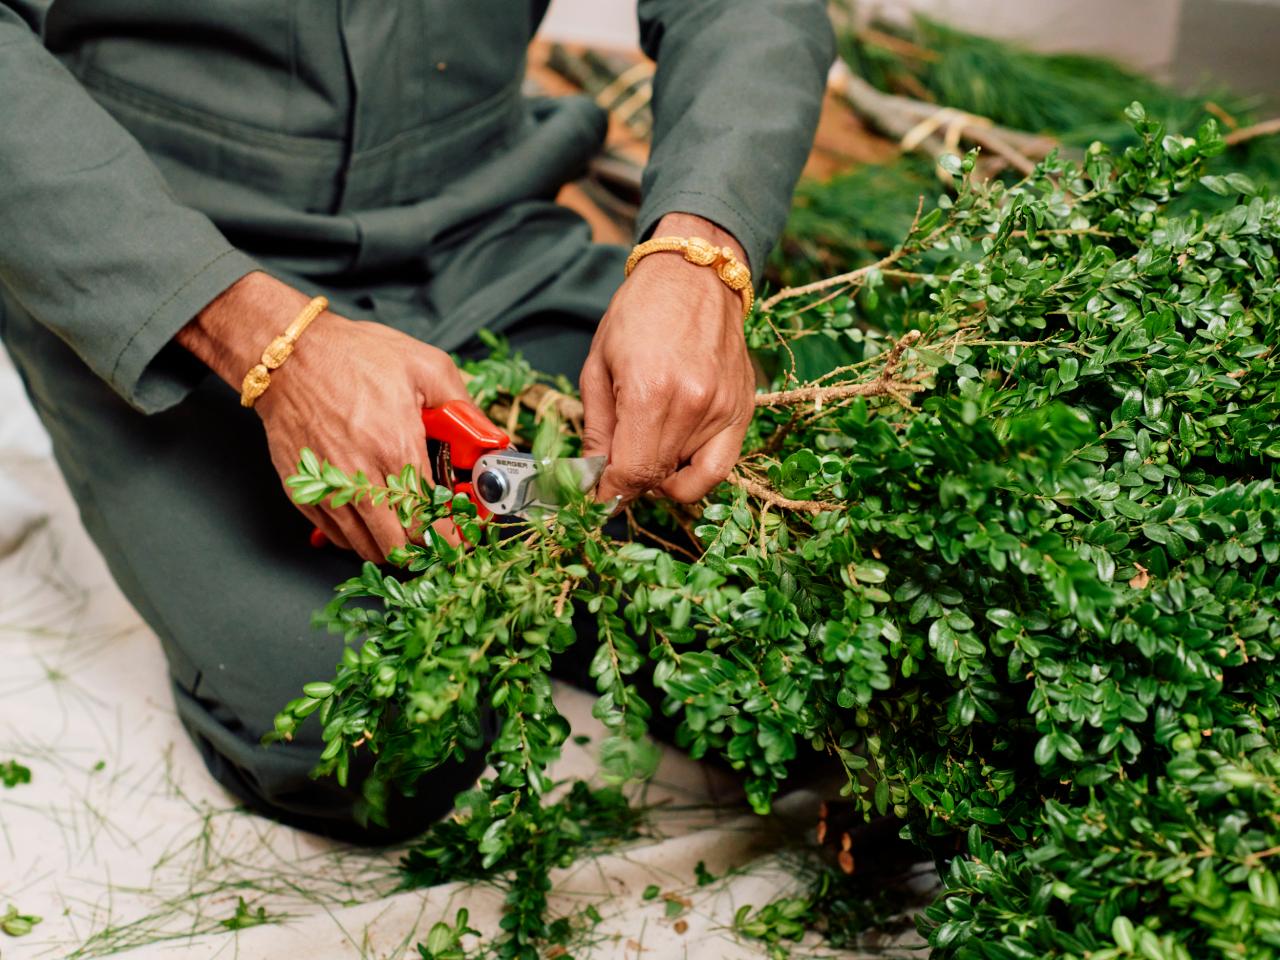
Tether the boxwood to the base using the same green floral wire. Anchor and secure the floral wire by twisting it around the end of the base a few times, pulling it tightly while holding the paddle. Then, lay the boxwood sprigs around the base (use about three springs for each segment) and wrap the green wire around the tops of the springs, pulling tightly to secure them to the base (Image 1). Lay more boxwood, overlapping the first segment by about one third of its length, and pull the wire up and around the tops of these newly laid sprigs (Image 2 + 3). Continue in this way, being conscious of maintaining a consistent diameter (or thickness) of the garland so that it is even and unified as much as possible for the entire length (Image 4).
Phillip Reed
Phillip Reed
Phillip Reed
Phillip Reed
DIY Garland With Real Greenery: Layer Boxwood
Once the pine base is complete, layer in boxwood branches. Prepare the boxwood branches by snipping smaller pieces with the pruning shears. Next, add the boxwood onto the pine base garland structure and wrap with floral wire. Add more layers of stems working down the pine and twine garland. For the central part of the garland, the swag, find the center point of the pine, boxwood and twine garland and layer pieces of boxwood in the middle, securing it with floral wire. The center of the swag should be the fullest part and should taper slightly toward both ends. As you near the end of the garland, add slimmer, thin branches of boxwood. Trim off any uneven pieces using the pruning shears. Last, wrap some colorful ribbon around the green garland and add holiday lights for added interest. Decorate a doorway with the green garland and enjoy throughout the season.
Photo By: Phillip Reed
DIY Garland With Real Greenery: Layer Boxwood
Once the pine base is complete, layer in boxwood branches. Prepare the boxwood branches by snipping smaller pieces with the pruning shears. Next, add the boxwood onto the pine base garland structure and wrap with floral wire. Add more layers of stems working down the pine and twine garland.
Photo By: Phillip Reed
DIY Garland With Real Greenery: Make Center Piece
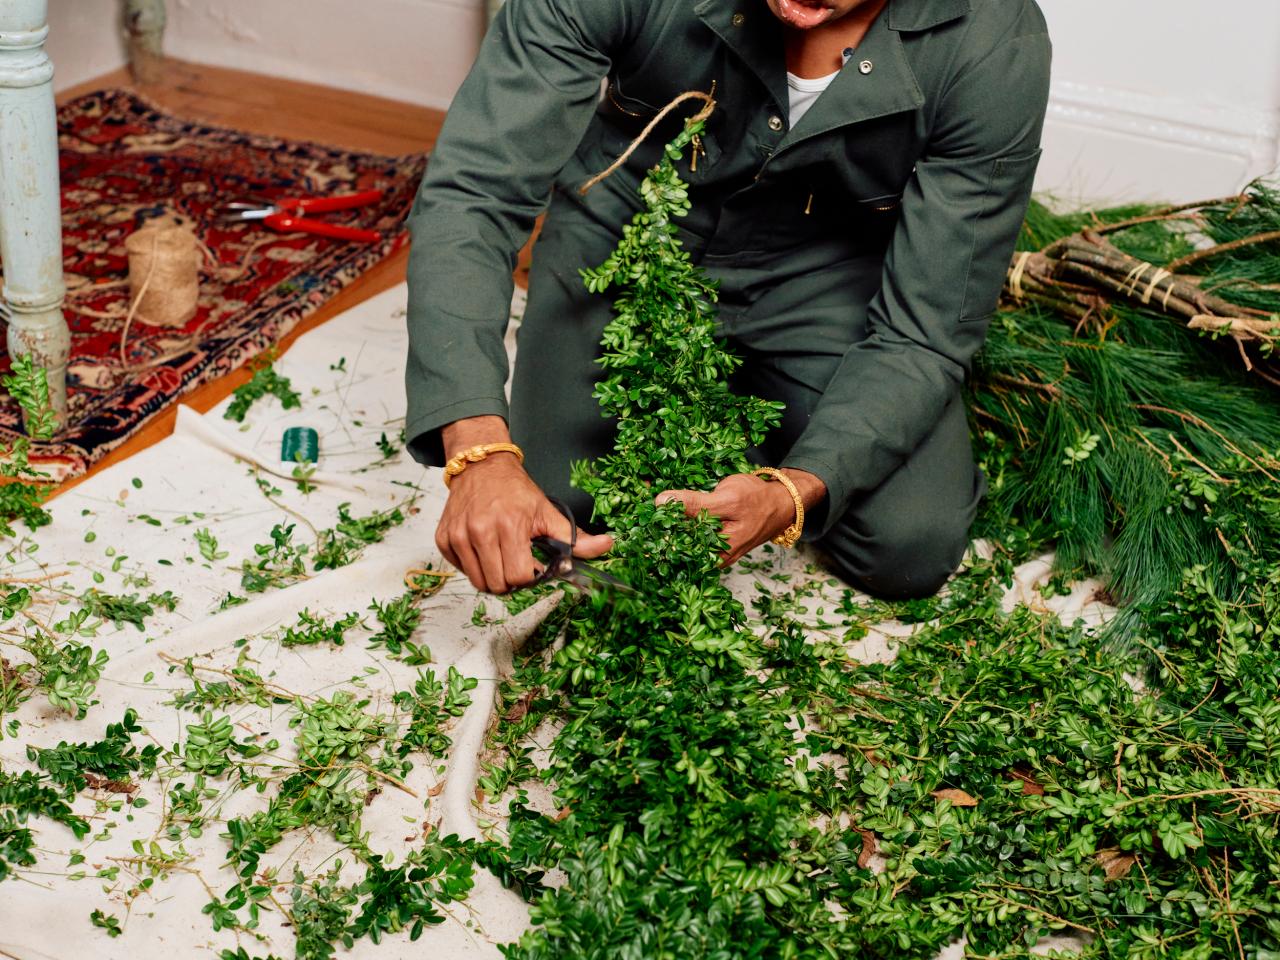
For the central part of the garland, the swag, find the center point of the pine, boxwood and twine garland and layer pieces of boxwood in the middle, securing it with floral wire. The center of the swag should be the fullest part and should taper slightly toward both ends. As you near the end of the garland, add slimmer, thin branches of boxwood.
Photo By: Phillip Reed
DIY Garland With Real Greenery: Layer Boxwood
Once the pine base is complete, layer in boxwood branches. Prepare the boxwood branches by snipping smaller pieces with the pruning shears. Next, add the boxwood onto the pine base garland structure and wrap with floral wire. Add more layers of stems working down the pine and twine garland.
Photo By: Phillip Reed
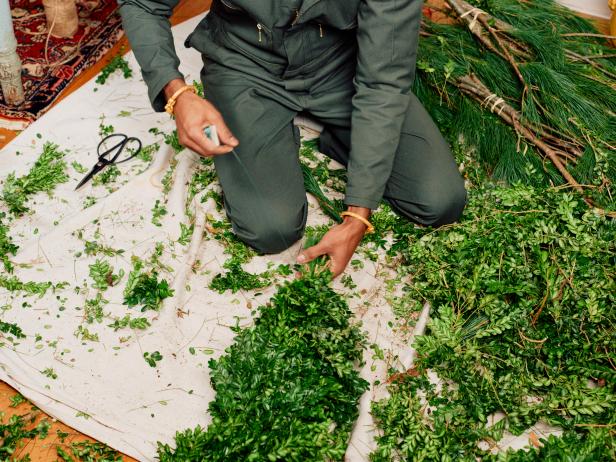
Trim the Garland
Once you’ve come to the end of the garland, hurray! Now use a pair of scissors to trim off any bits of greenery that are poking out awkwardly and interfering with the cylindrical silhouette you’ve tried to create.

DIY Garland With Real Greenery: Shape Up
Trim off any uneven pieces using the pruning shears. Last, wrap some colorful ribbon around the green garland and add holiday lights for added interest. Decorate a doorway with the green garland and enjoy throughout the season.
Photo by: Phillip Reed
Phillip Reed
Prepare to Hang
Lift up the entire garland to get a sense of how heavy it is. Consider where you'll be hanging your garland and choose appropriate hanging hardware for walls, doors and mantels; if you're twisting it around a banister, you can often use zip-ties to secure it. I'll be hanging my garland on brass hooks screwed into my door frame's picture molding.

DIY Garland With Real Greenery
Rajiv Surendra shares his favorite way to decorate with garland using real greenery. Make your own boxwood and pine garland with his step-by-step guide on HGTV.com.
Photo by: Phillip Reed
Phillip Reed
Add Lights
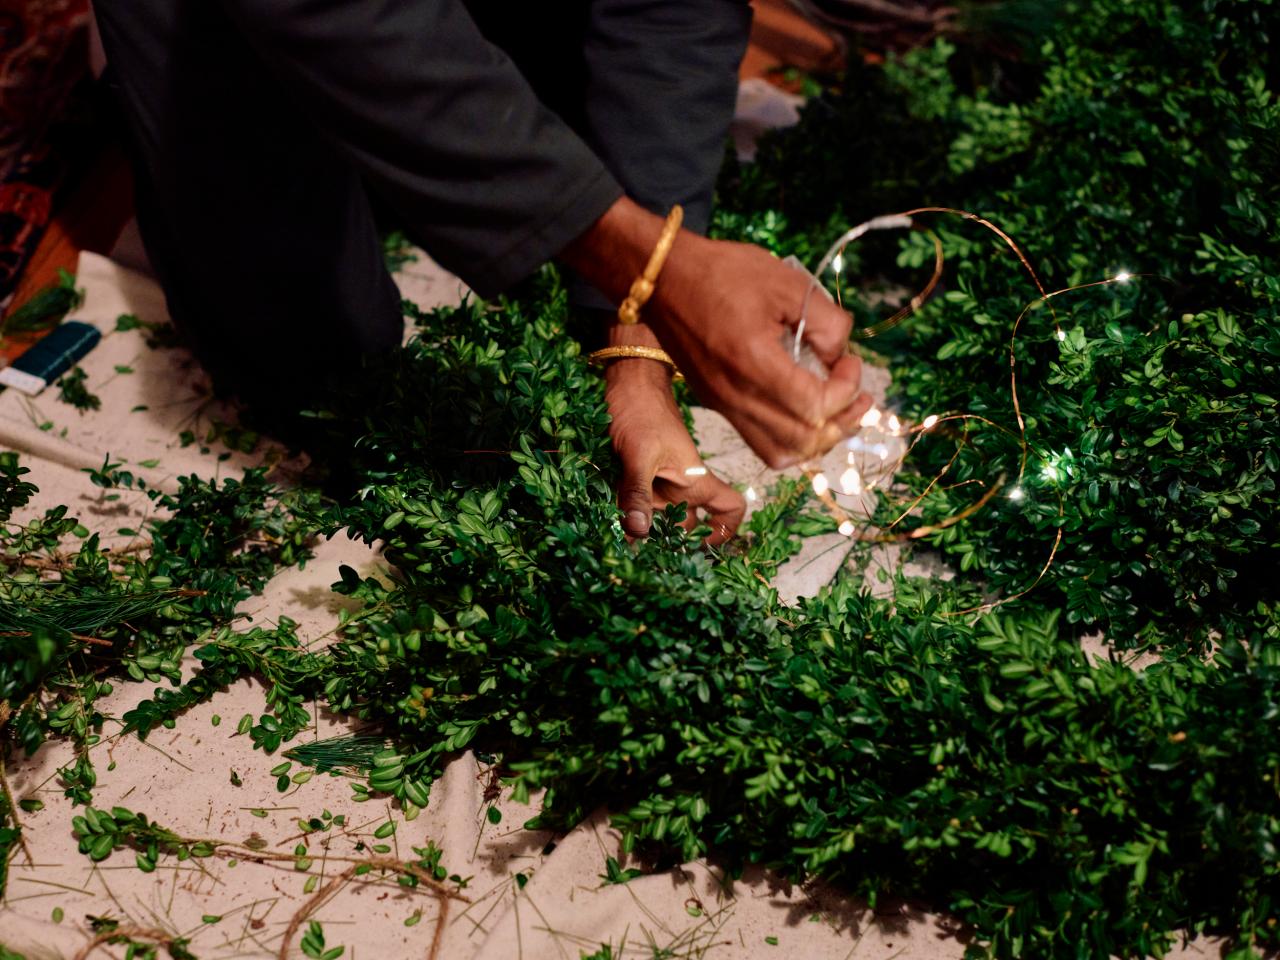
Just before hanging up the garland, twist in twinkle lights (if you’d like) and orient the garland so the plugs have easy access to a nearby outlet or extension cord (Image 1 + 2). I’m using battery-operated lights with the power packs concealed in the greenery.

Phillip Reed

Phillip Reed
DIY Garland With Real Greenery: Add Lights
Wrap some colorful ribbon around the green garland and add holiday lights for added interest. Decorate a doorway with the green garland and enjoy throughout the season.
Photo By: Phillip Reed
DIY Garland With Real Greenery: Add Lights
Wrap some colorful ribbon around the green garland and add holiday lights for added interest. Decorate a doorway with the green garland and enjoy throughout the season.
Photo By: Phillip Reed
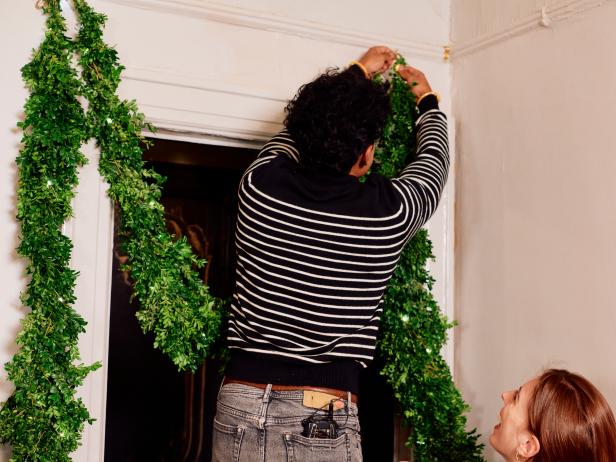
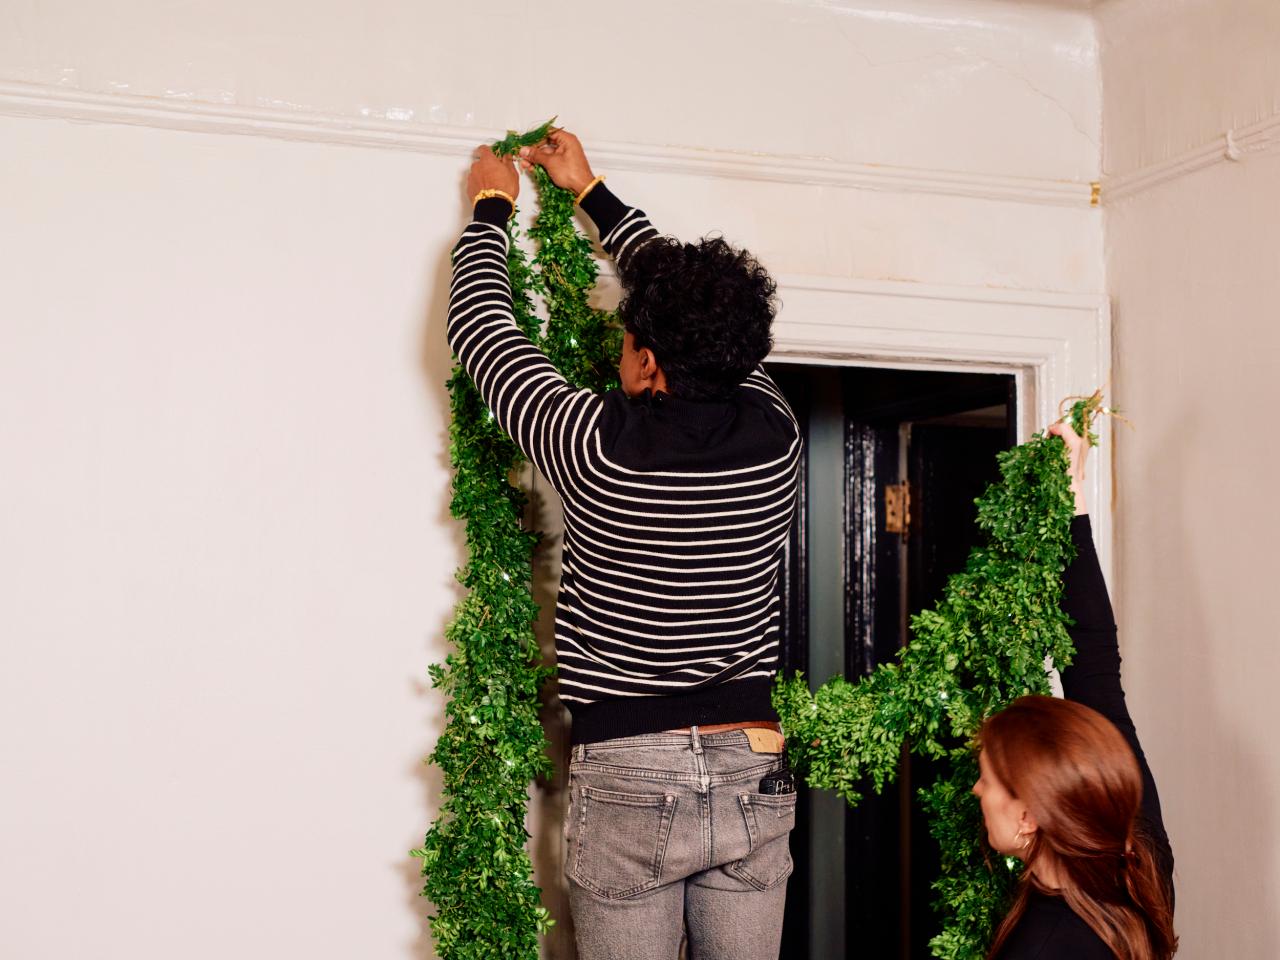
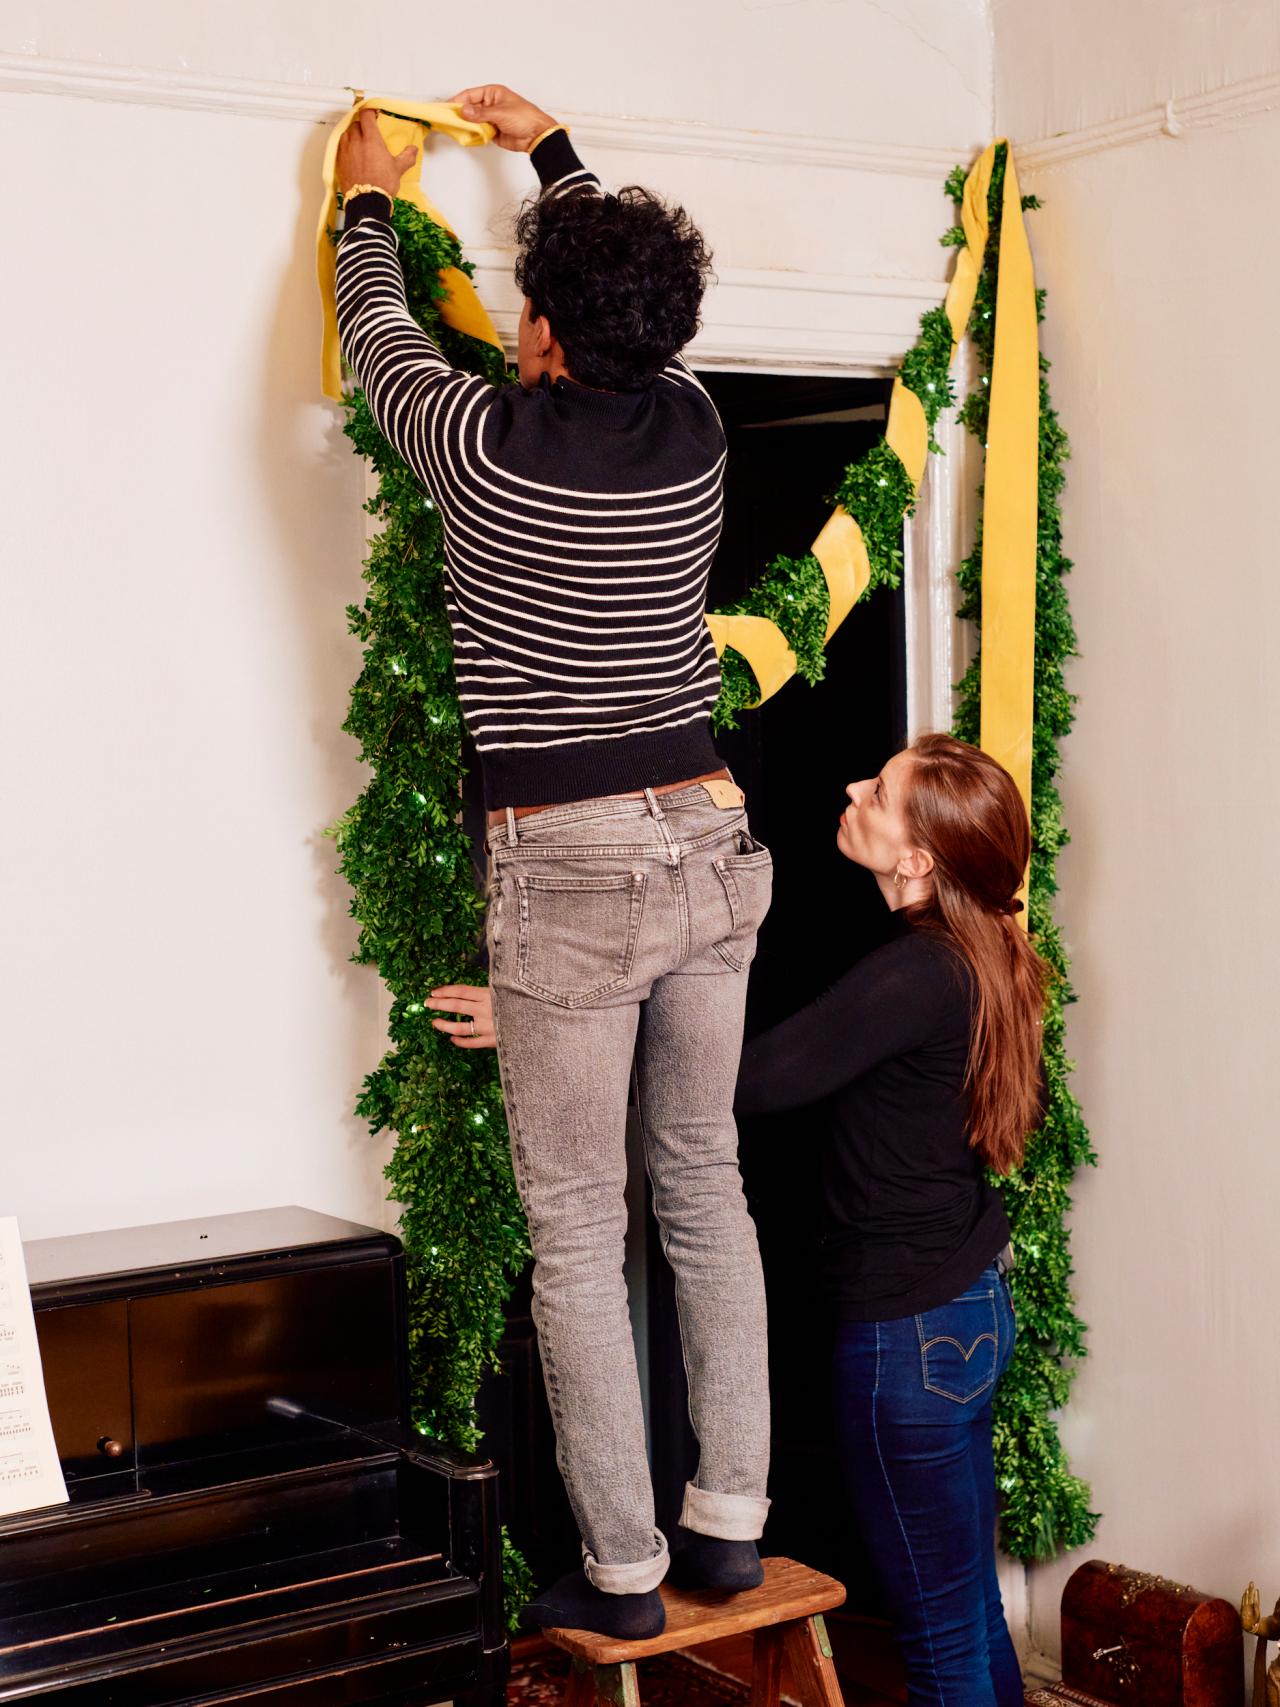
Hanging the Garland
To make hanging easier, I cut two lengths of green floral wire and made loops around the sections of the garland that I wanted to hang on the hardware (Image 1); I'm using brass hooks screwed into the picture rail molding. Lifting the corners of the garland can be awkward. Many hands make light work — it helps to have a friend hold the garland up while securing it to the hardware. My friend (and incredible harpist) Caroline Cole held up the garland while I fidgeted with the wire and hooks.

Phillip Reed

Phillip Reed
Phillip Reed
DIY Garland With Real Greenery: Add Lights
Wrap some colorful ribbon around the green garland and add holiday lights for added interest. Decorate a doorway with the green garland and enjoy throughout the season.
Photo By: Phillip Reed
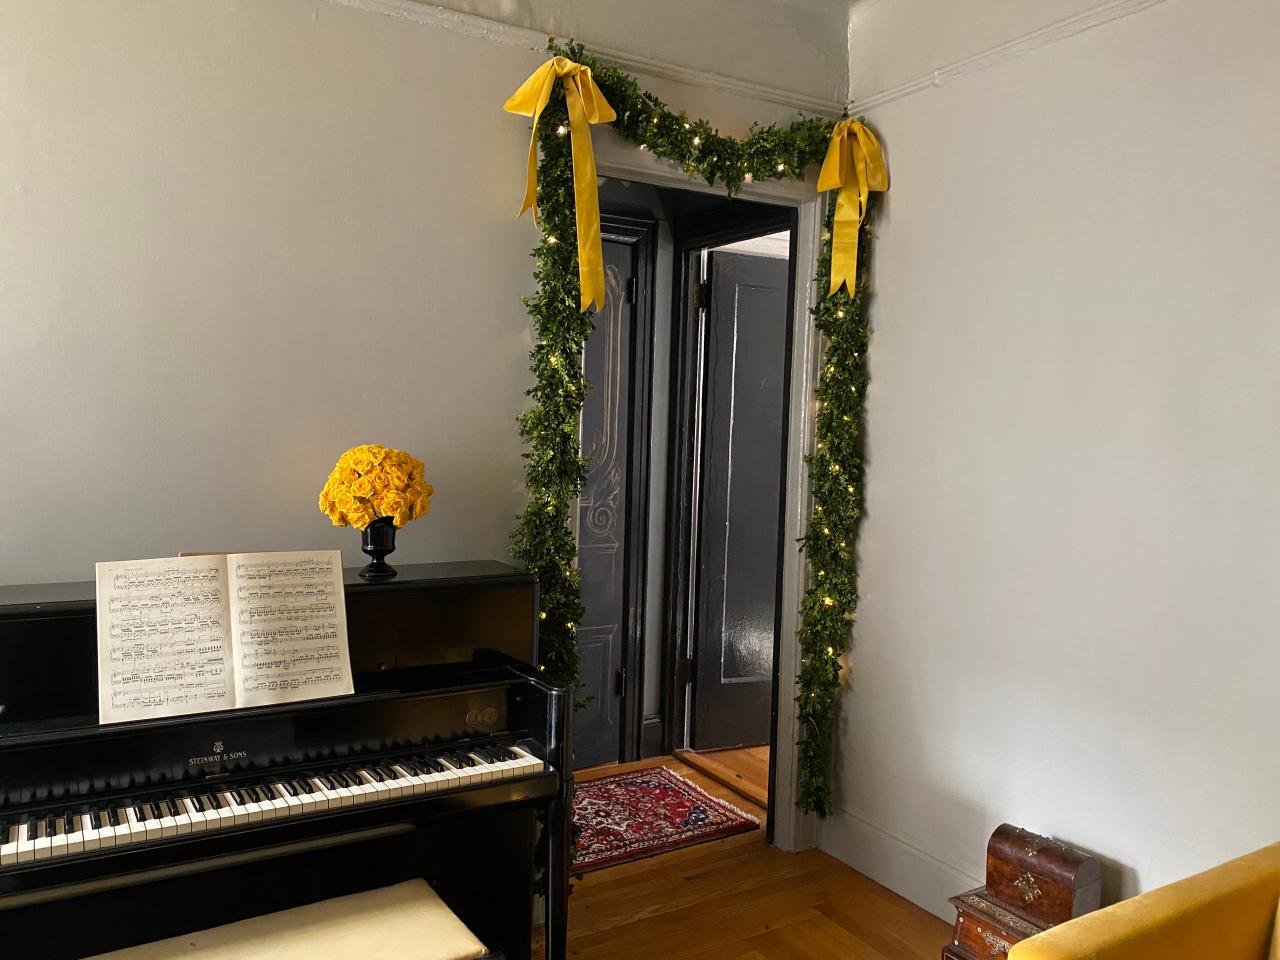
DIY Garland With Real Greenery: Hang Garland
Decorate a doorway with the green garland and enjoy throughout the season.
Photo By: Phillip Reed
DIY Garland With Real Greenery: Hang Garland
Decorate a doorway with the green garland and enjoy throughout the season.
Photo By: Phillip Reed
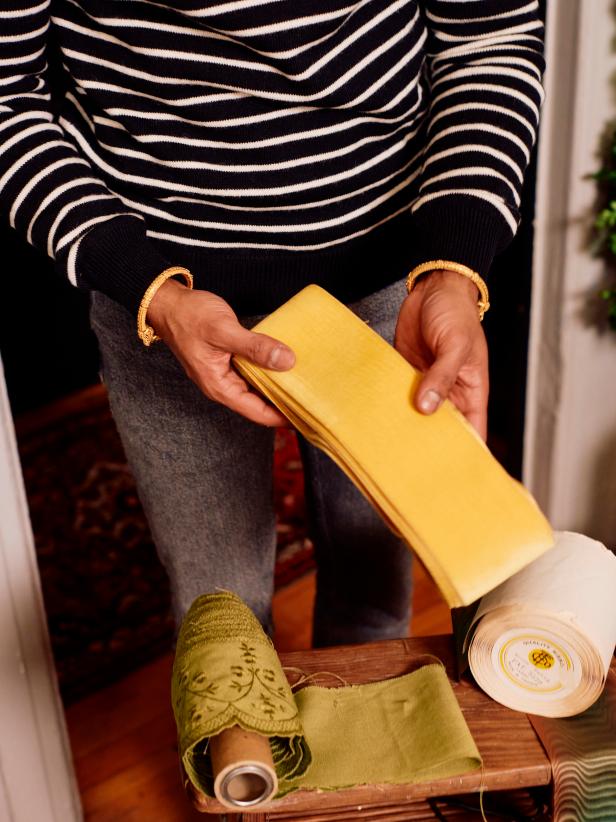
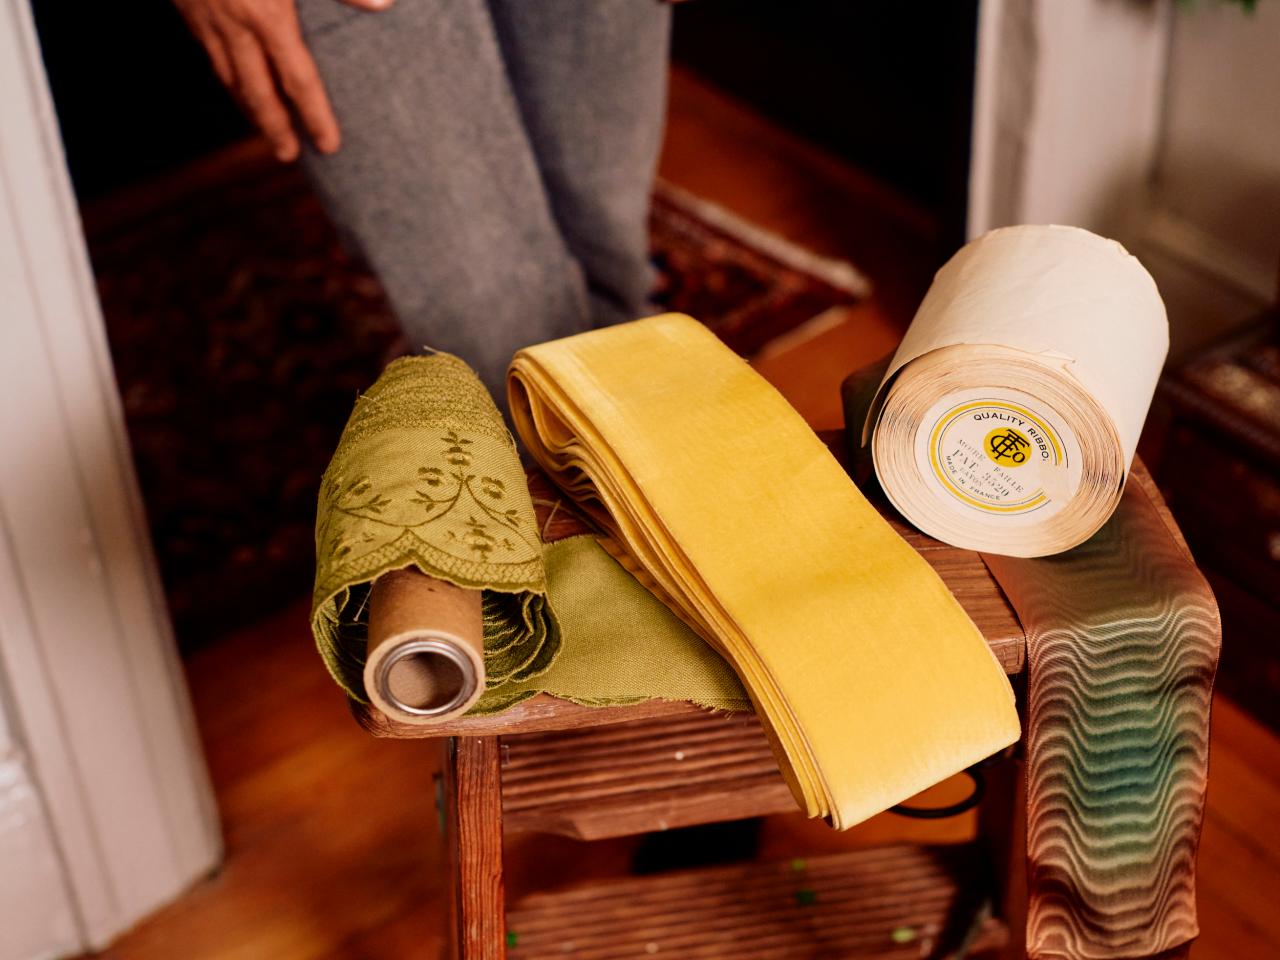
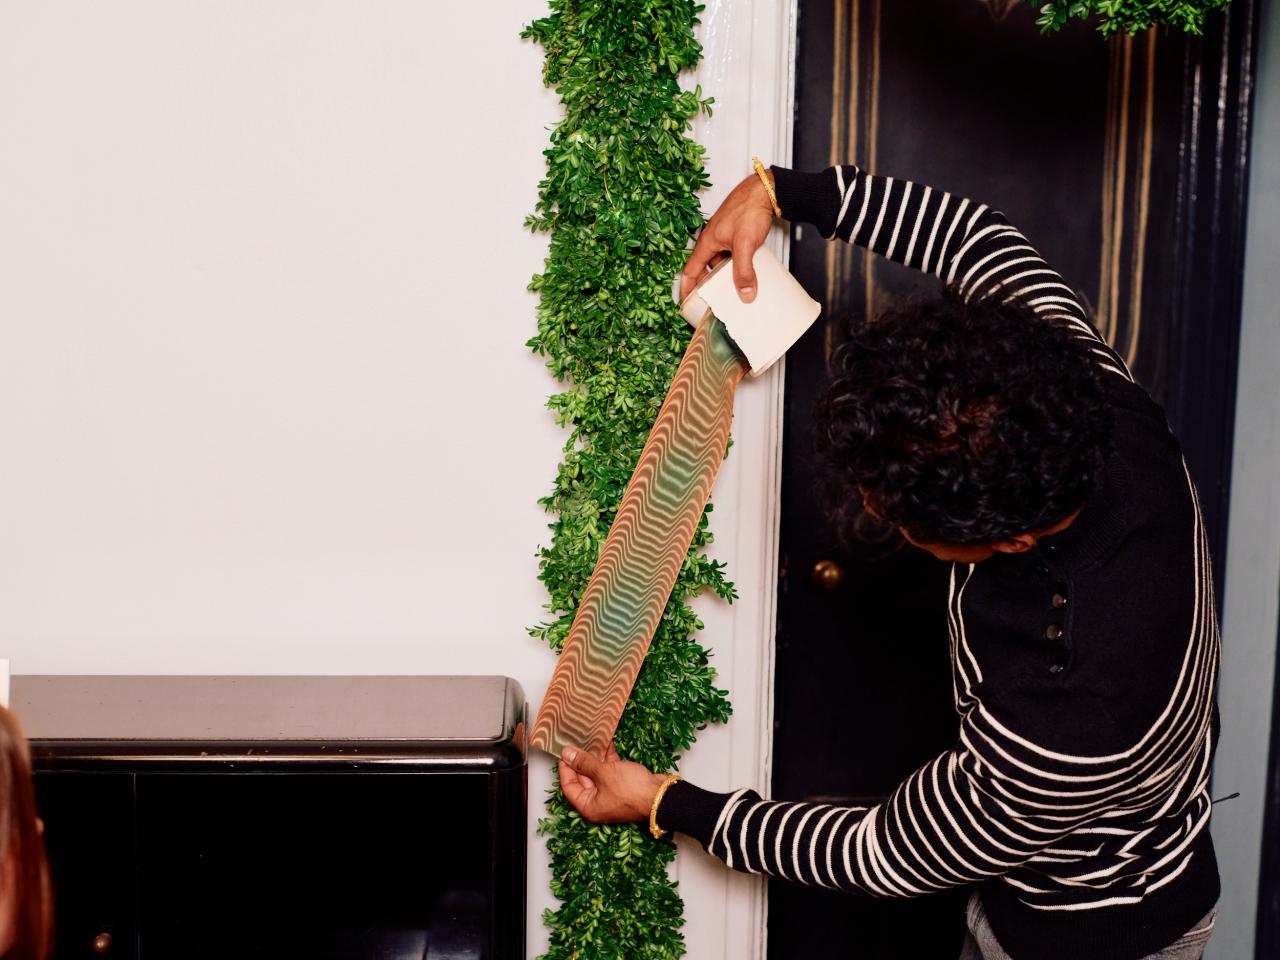
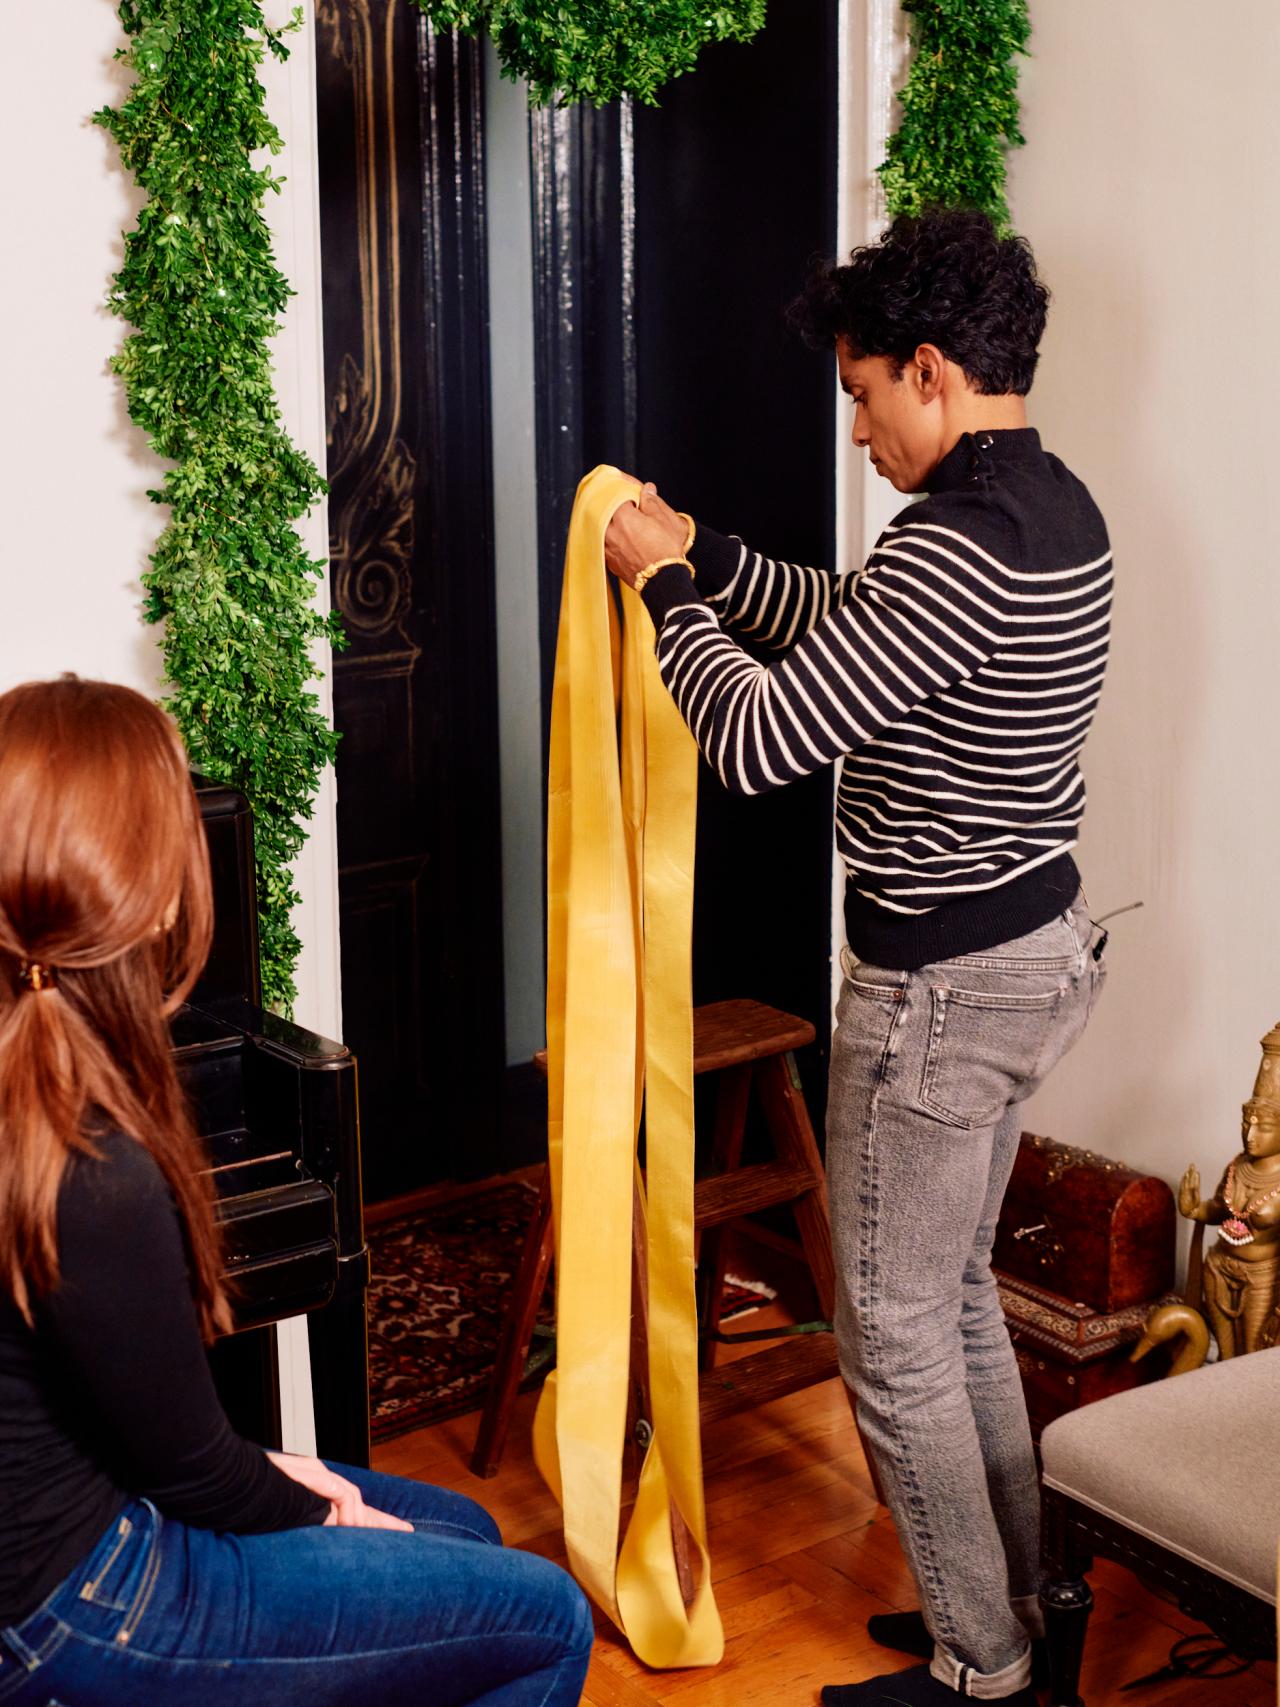
Festooning
And the final touch that’ll make your garland sing: ribbon. Don’t skimp on the ribbon budget. After all the work and time it took to make your garland, adorning it with cheap plastic ribbon just makes the whole thing look pedestrian (yes, I’m a snob). Find nice ribbon that’s wide, with as much natural fiber as possible (cotton or silk) — this often means sourcing vintage ribbon online (Image 1). Hold the ribbon up to the garland and see what you like the look of (Image 2). I love this lemon-colored silk-velvet ribbon from Hyman Hendler and Sons in New York (Image 3 + 4). They’ve been selling ribbon and trim since 1901 and have a large selection of incredibly beautiful vintage ribbon. This silk velvet ribbon was an investment for me; it’s $45 per yard! But I know that I’ll use it every year for years to come, and that makes it worth it to me.

Phillip Reed

Phillip Reed
Phillip Reed

Phillip Reed
DIY Garland With Real Greenery: Ribbon
Wrap some colorful ribbon around the green garland and add holiday lights for added interest. Decorate a doorway with the green garland and enjoy throughout the season.
Photo By: Phillip Reed
DIY Garland With Real Greenery: Display
Wrap some colorful ribbon around the green garland and add holiday lights for added interest. Decorate a doorway with the green garland and enjoy throughout the season.
Photo By: Phillip Reed
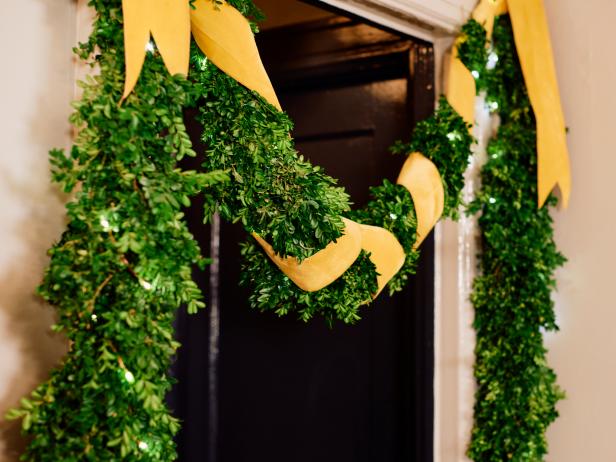
Play around and find your own way of using the ribbon on the garland. I tried a version with the single length of ribbon twined around the whole garland (Image 1 - 3), and then another version where I cut lengths of ribbon into bows and attached them to the corner of the garland with floral wire (Image 4). Done. Beautiful. Love it.

Phillip Reed
Phillip Reed

Phillip Reed

Rajiv Surendra

Phillip Reed
DIY Garland With Real Greenery: Display
Wrap some colorful ribbon around the green garland and add holiday lights for added interest. Decorate a doorway with the green garland and enjoy throughout the season.
Photo By: Phillip Reed
DIY Garland With Real Greenery
Rajiv Surendra shares his favorite way to decorate with garland using real greenery. Make your own boxwood and pine garland with his step-by-step guide on HGTV.com.
Photo By: Phillip Reed
DIY Garland With Real Greenery
Rajiv Surendra shares his favorite way to decorate with garland using real greenery. Make your own boxwood and pine garland with his step-by-step guide on HGTV.com.
Photo By: Phillip Reed
DIY Garland With Real Greenery
Rajiv Surendra shares his favorite way to decorate with garland using real greenery. Make your own boxwood and pine garland with his step-by-step guide on HGTV.com.
Photo By: Phillip Reed
More Holiday Decorating DIYs

How to Make a Boxwood Christmas Wreath
Why settle for plastic evergreen wreaths or natural greens that will dry out in a few weeks? Make a preserved boxwood wreath that will keep its good looks throughout the holidays and beyond.

Step Up Your Holiday Decor With This Pretty Citrus Garland 13 Photos
Get crafty this Christmas with a homespun, DIY dried orange garland that pairs perfectly with farmhouse-style holiday decor.

Embroidery Hoop Boxwood Holiday Wreath
Make an elegant, oversized (but lightweight!) holiday wreath by wrapping faux greenery around an embroidery hoop and upcycling plastic pots into antique bells.


