


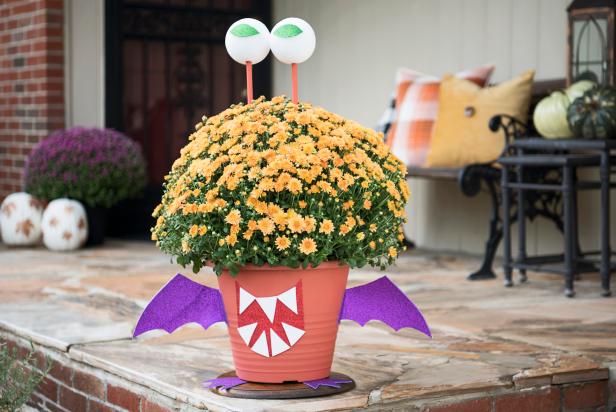
Halloween Front Porch Fix-Up: Magic a Mum Into a Monster
Give your entryway a not-too-scary Halloween update with this easy-to-craft blooming beastie.

Materials Needed
- orange potted mum (preferably with a rounded shape)
- russet-orange acrylic craft paint
- chip or foam brush
- scissors
- 2 sheets purple self-adhesive craft foam
- 1 sheet green self-adhesive craft foam
- 1 sheet white self-adhesive craft foam
- 1 sheet red self-adhesive craft foam
- (2) 36” wood dowels
- optional: pencil sharpener
- heavy-duty shears or bypass pruner
- 2 foam balls
Paint Pot
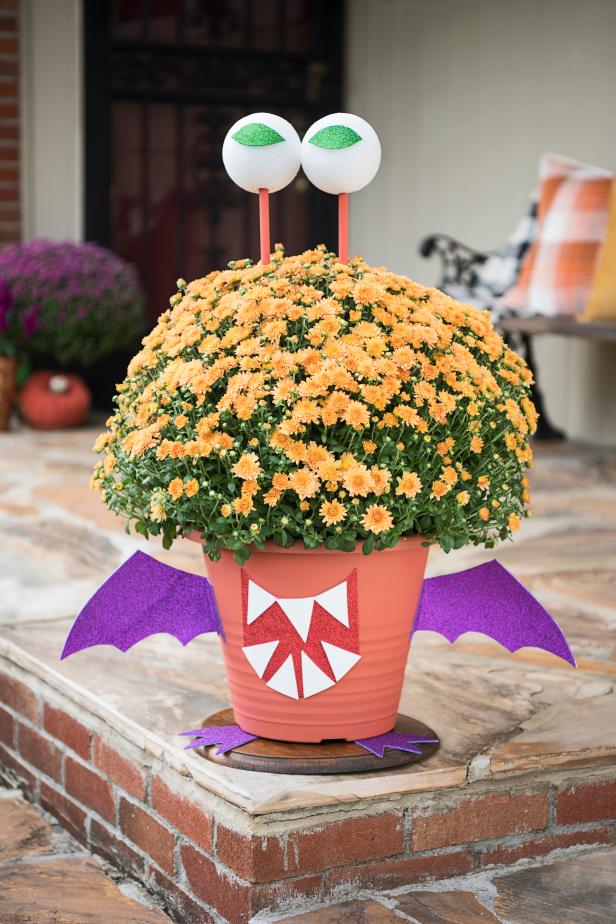
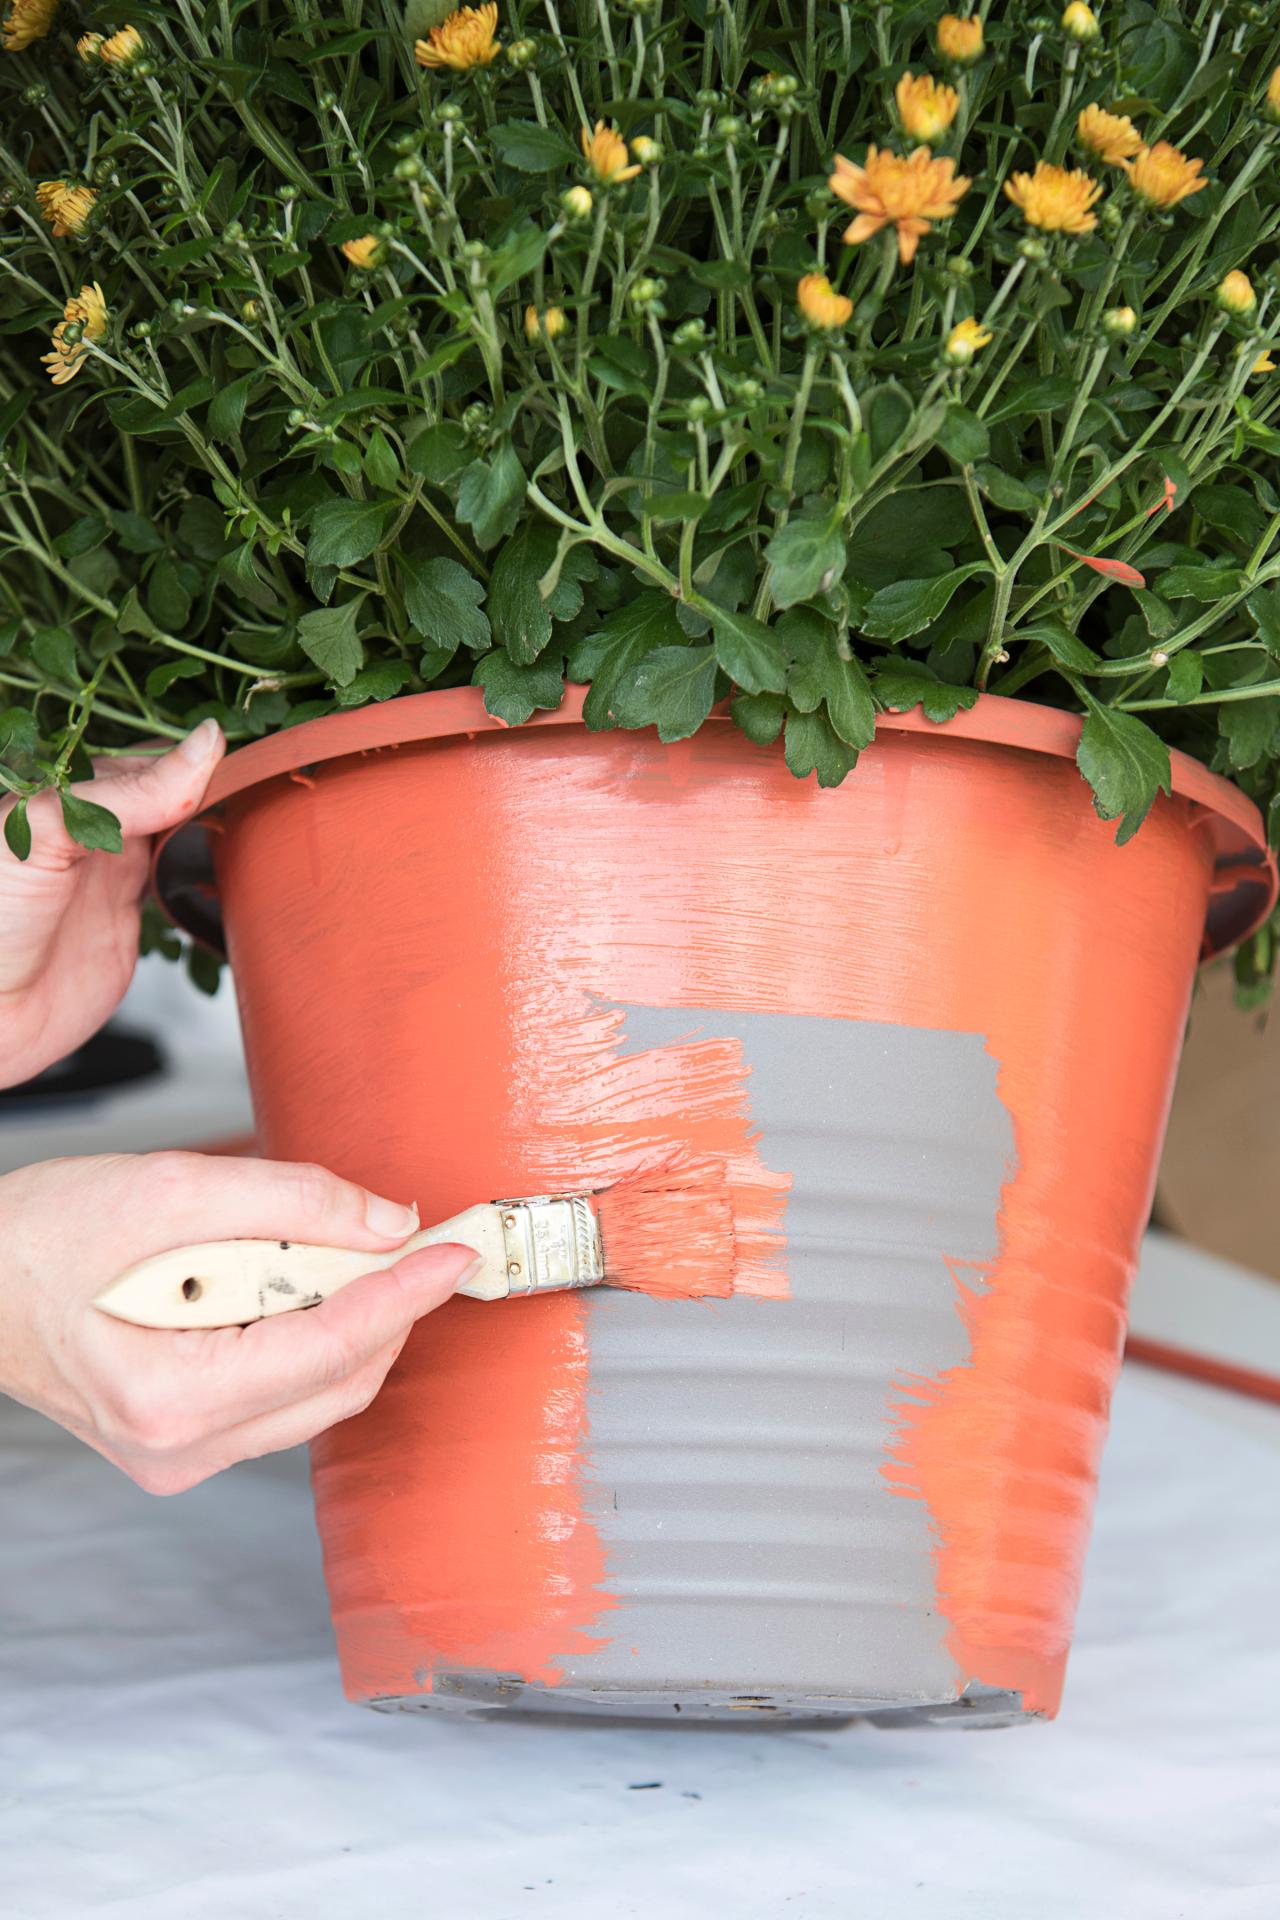
Paint mum’s pot with 1-2 coats of orange craft paint, depending on desired coverage, and allow to dry.

Sarah Busby
Create Wings
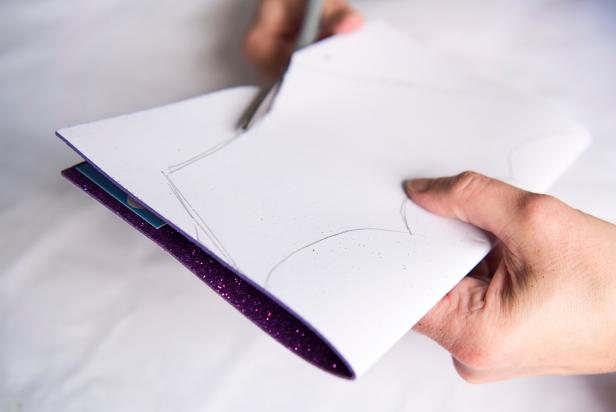
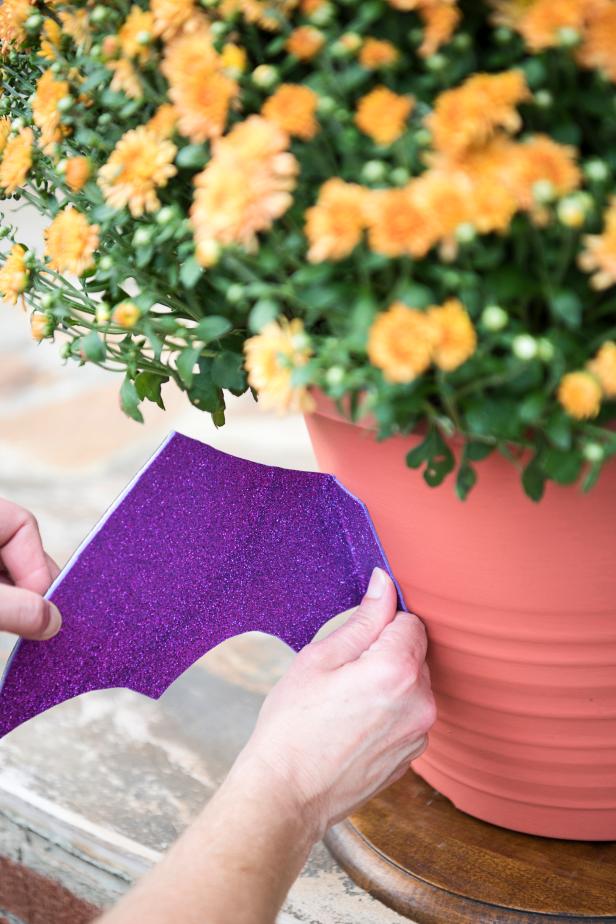
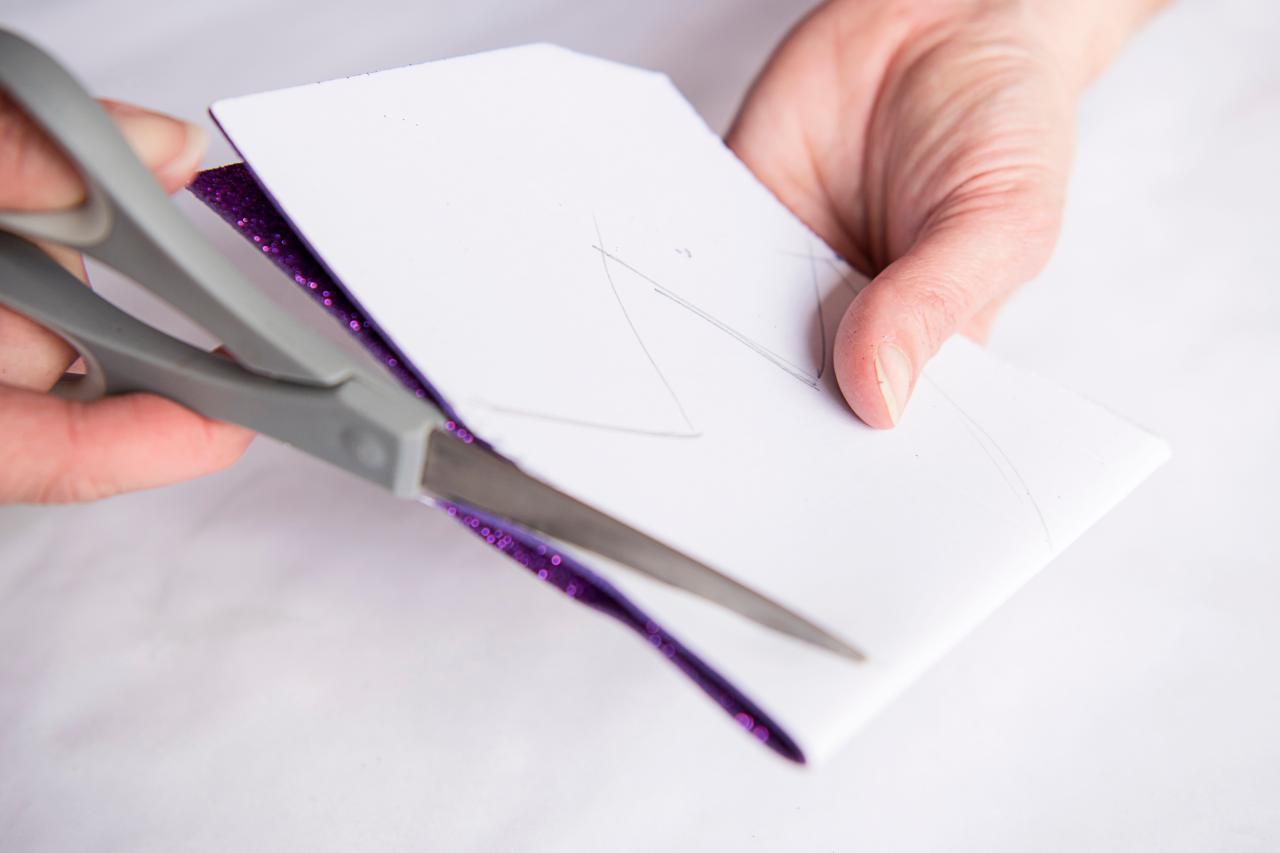
Fold purple craft foam in half, sketch a bat-like wing and cut out (Image 1). Tip: Folding the foam in half before cutting creates 2 wings whose shape mirrors each other. The wings will be attached to the sides of the pot. To create this look, trace each of the wing cut-outs onto another piece of craft foam and cut out so each wing is double-sided. Remove the paper backing from each side and press together, leaving just the backing's inner edge intact that you'll remove later to secure the wings to the pot's sides (Image 2).
Sarah Busby

Sarah Busby
Create Eye 'Stalks'
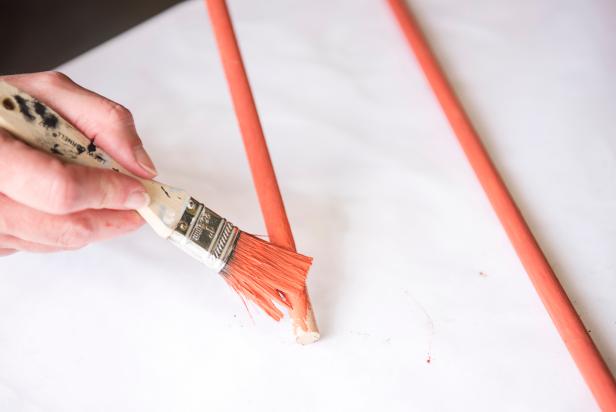
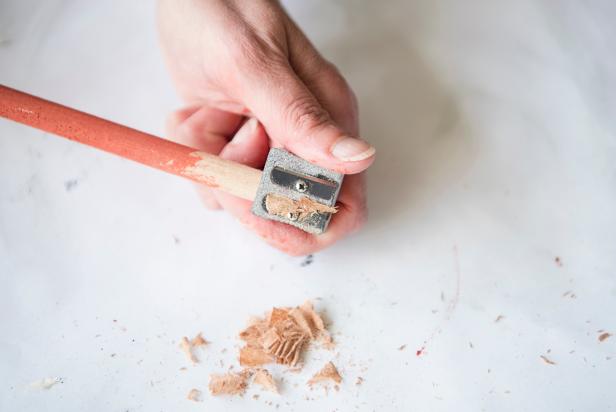
The monster's eyes will be attached to 'stalks' protruding from the top of the mum. To create this look, paint dowels orange and allow to dry (Image 1). To make inserting the dowels into the mum's soil easier, sharpen each dowel's end (Image 2).
Sarah Busby
Sarah Busby
Create Feet
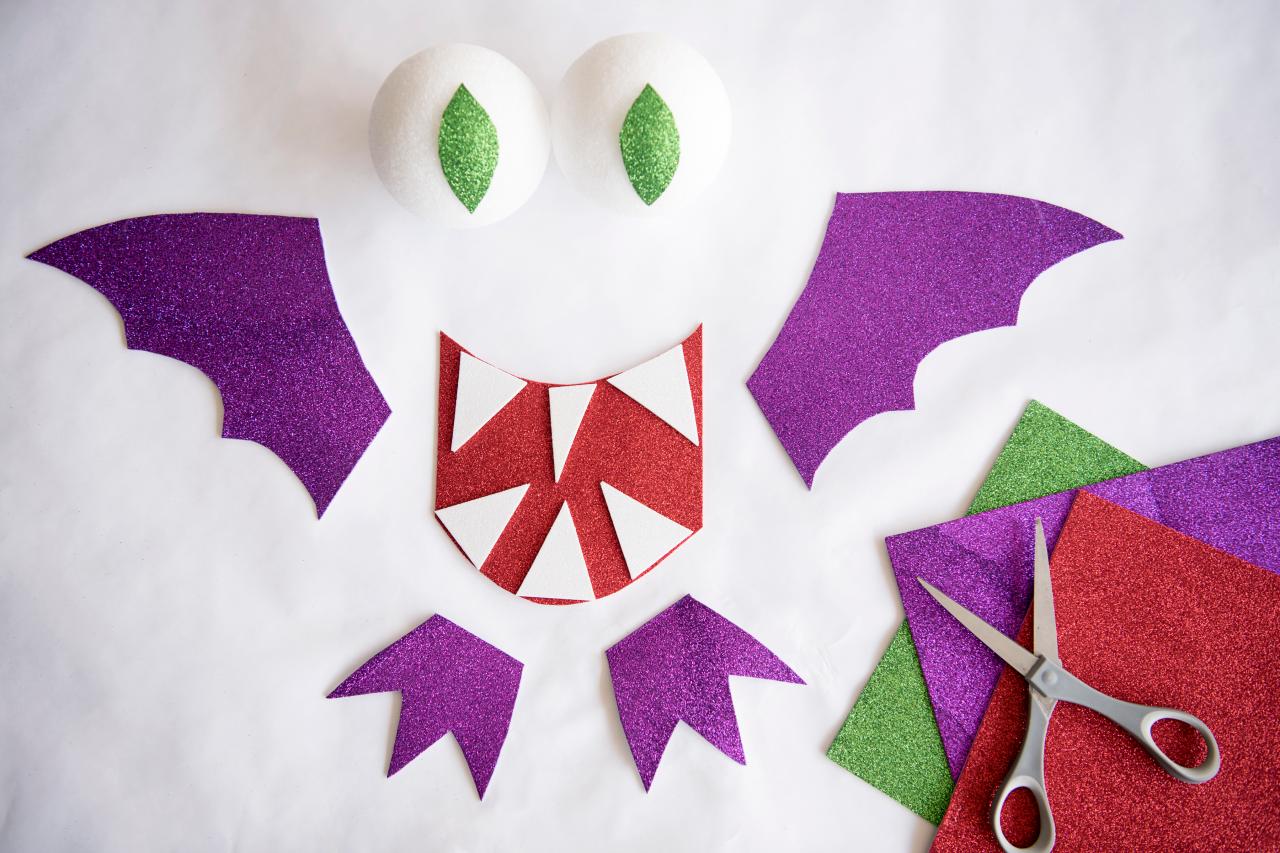
Fold purple craft foam in half and sketch a webbed foot design onto the paper backing; cut out to create 2 feet.

Sarah Busby
Create Monster's Features
Fold green craft foam in half and cut out a long slit pupil shape for the eyes. Fold the red craft foam in half, sketch a wide open mouth shape onto the foam’s paper backing, then cut out. Tip: Folding the foam in half before cutting ensures the finished shape will be symmetrical. Sketch several triangular shapes for teeth onto the white foam’s backing and cut out.

Sarah Busby
Attach Features
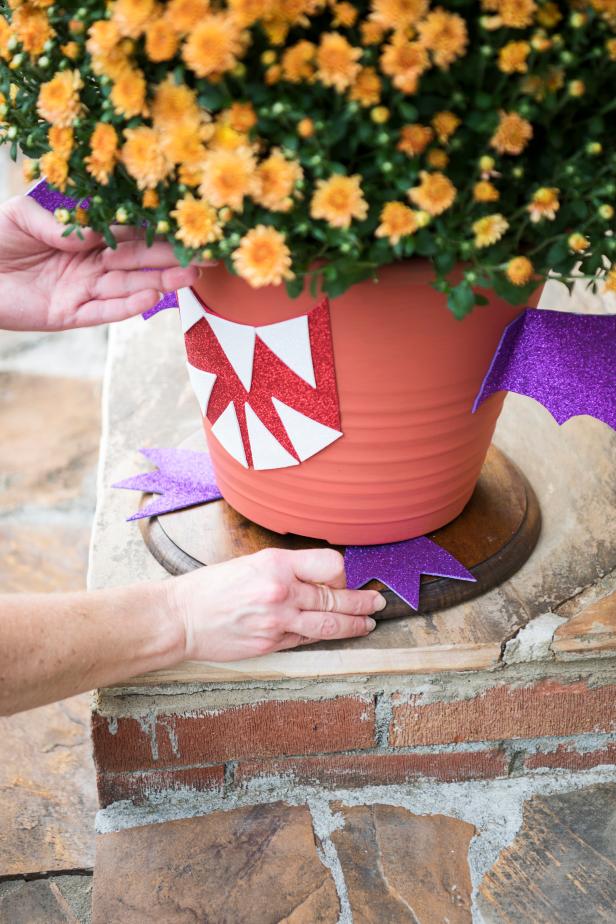
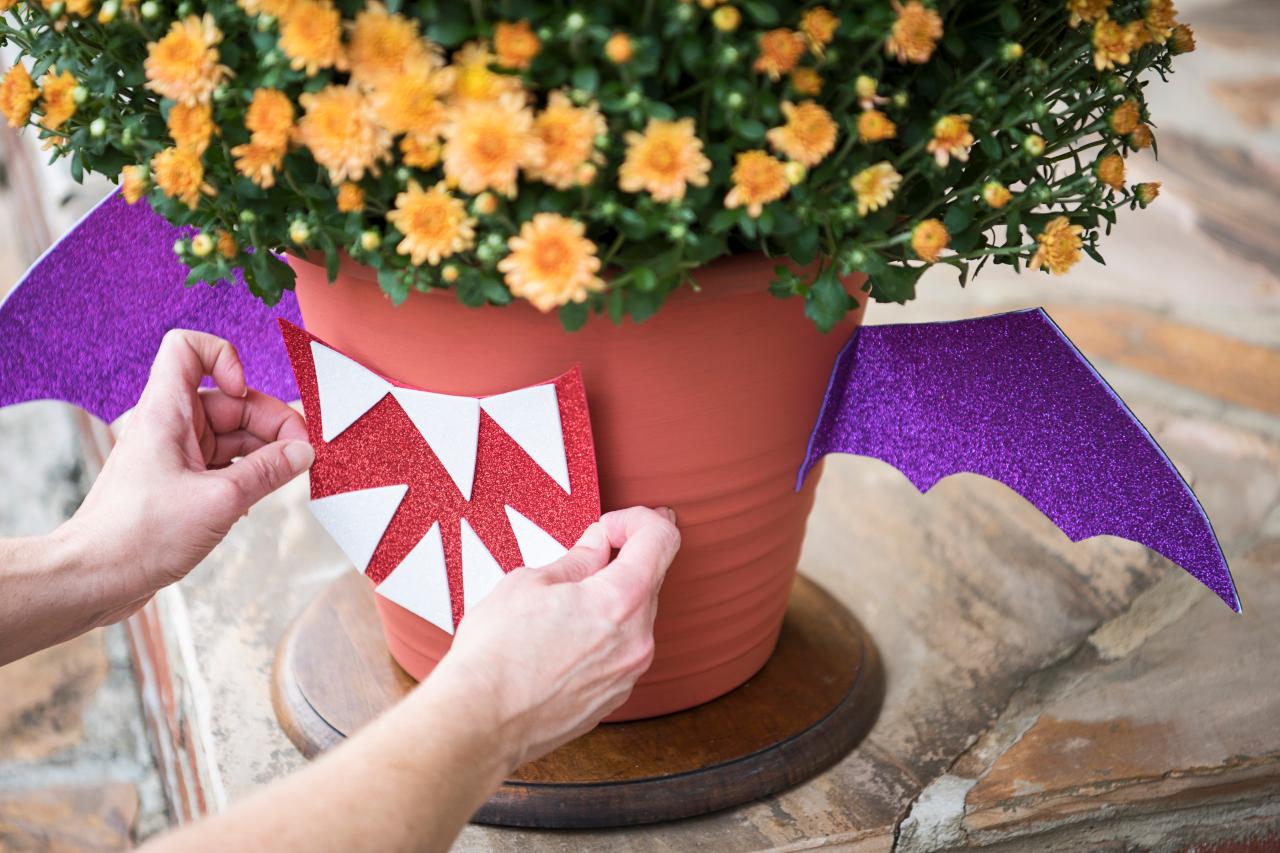
Remove the small amounts of paper backing you left earlier on the double-sided wings and attach a wing to each side of the planter (Image 1). Remove the paper backing from each white fang cut-out and attach to the red mouth, then remove the paper backing from the mouth and attach to the planter (Image 2). Lift up the planter and slide feet underneath, no need to remove the paper backing (Image 3).
Sarah Busby

Sarah Busby
Sarah Busby
Finally, Add Eyes
Securely insert dowels into planter. Hold foam balls at the desired height for eyes and, if necessary, use pruning shears to trim off any excess. Slide foam balls onto 'stalks'; remove paper backing from green eye slits and attach them however you'd like — horizontal, vertical or angled — to foam eyes.


