


How to Craft an Over-The-Top Floral Pumpkin Arch for Fall
Add some major wow factor to your front porch this fall with a larger-than-life faux foliage arch you can use year after year.

Cassidy Garcia, Styling by Jill Tennant Design

Once autumn arrives, it seems that every magazine cover is plastered with the most over-the-top, beautiful fall displays. We’re talking giant arches over entryways with more pumpkins, gourds and fall foliage than your mind could muster up. They’re stunning, but they tend to be a little less than practical. Turns out, with a little DIY prowess, you can achieve the fall decor dreams you never thought possible! Watch the video below, then check out the step-by-step instructions to learn how to make a giant fall floral pumpkin arch you can enjoy all the way through Thanksgiving, then take apart and store for next year.
Materials Needed
- PVC pipes and fittings
- PVC cement
- 90-degree PVC elbows
- PVC tee fittings
- PVC caps
- PVC cutting tool
- measuring tape
- Dremel
- faux gourds and pumpkins
- faux fall foliage
- Spanish moss
- eye bolts
- extra-large zip ties
- small zip ties
- chicken wire
- wire cutters
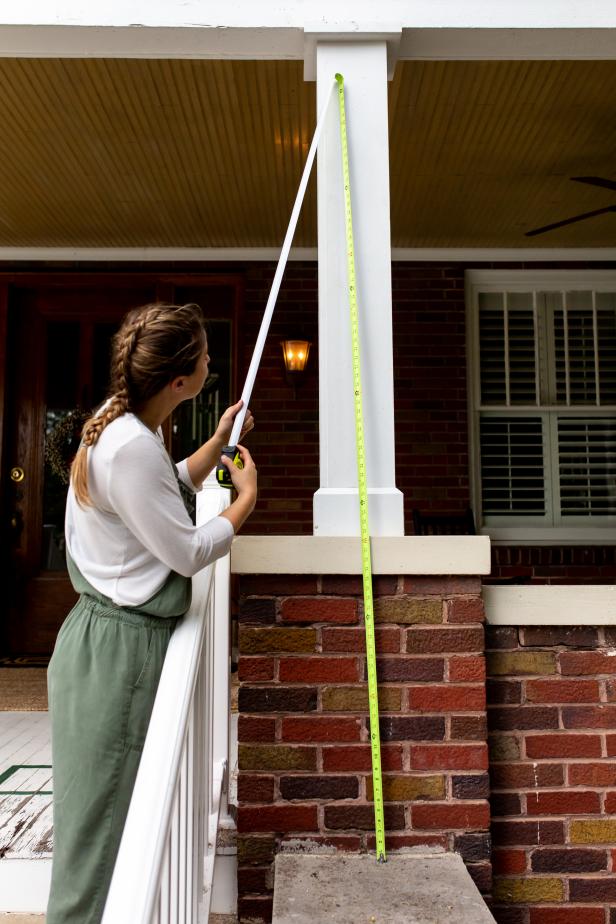
Measure Entryway
Start by measuring your entryway’s width and height. Use these numbers to determine how much pipe you will need to buy. Be sure to account for the full height of where the bottom of the PVC will rest when buying supplies. We recommend using 2-inch PVC and fittings for strength.
Cassidy Garcia, Styling by Jill Tennant Design
Use PVC Pipe to Create Frame
Create the frame using the measurements you noted before. Use an assortment of lengths of pipe, 90-degree elbows and tee fittings to assemble the frame according to image shown here but modified to suit your home’s height and width. On the bottom, use a tee fitting to create lateral supports, then close off the ends using PVC caps. When assembling, use PVC cement anywhere you don’t intend to disassemble for storage. This will strengthen the structure but allow you to easily store the smaller pieces.
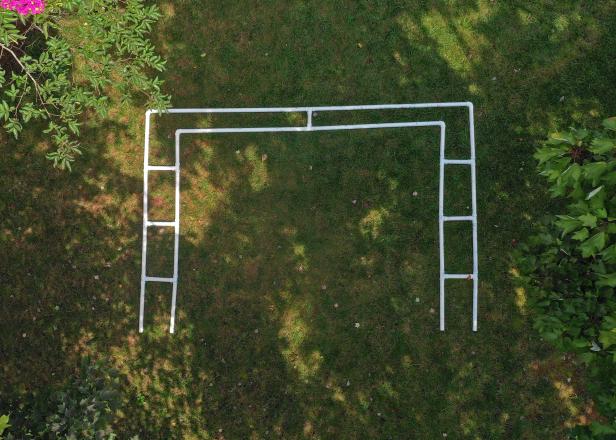
Pro Tip: If you have uneven ground or an otherwise unsuitable foundation, leave the bottom of the PVC open and drive rebar into the ground. Skip the lateral supports and instead position the PVC over the rebar to keep in place.
Attach to House
Once you’ve determined how to position the bottom of your arch’s frame, it’s time to attach the frame to your house. We used extra-large zip ties to fasten our PVC frame to the porch posts.
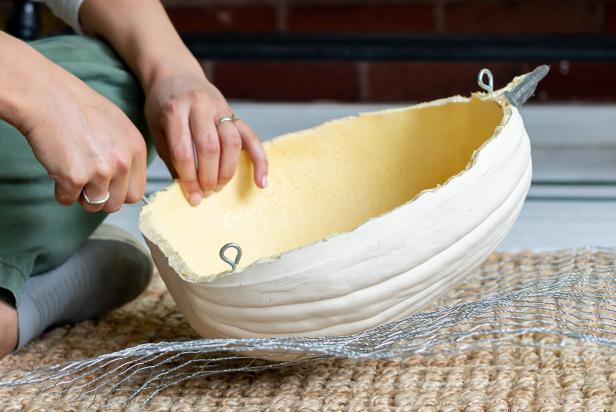
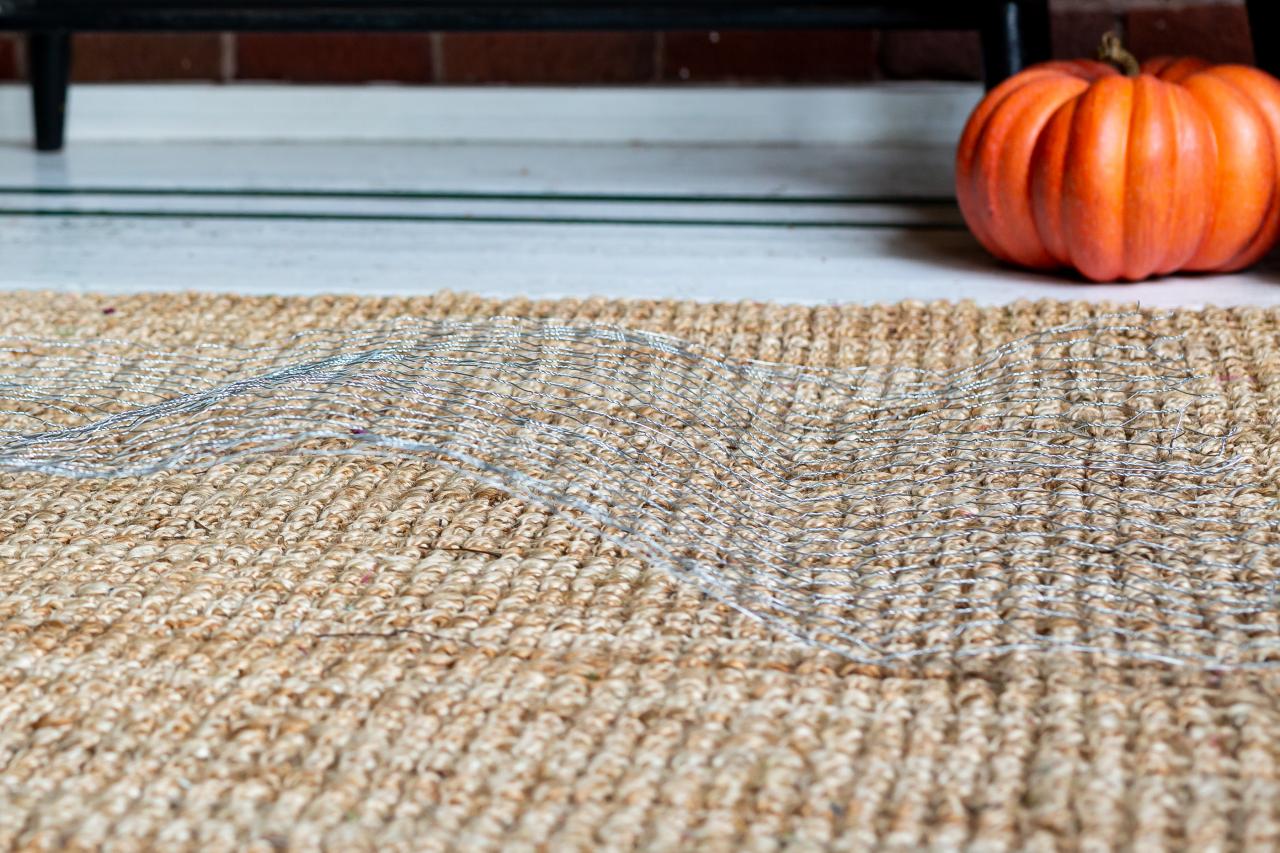
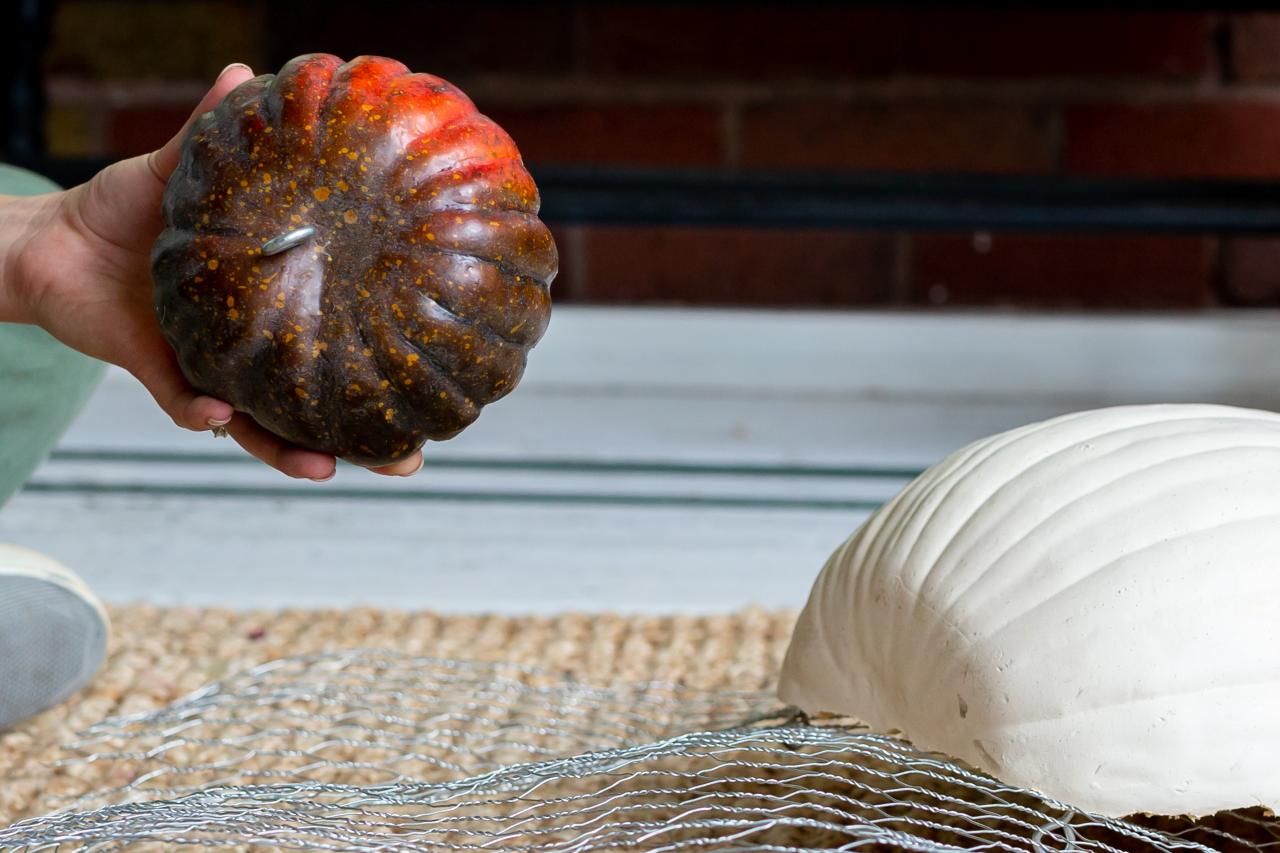
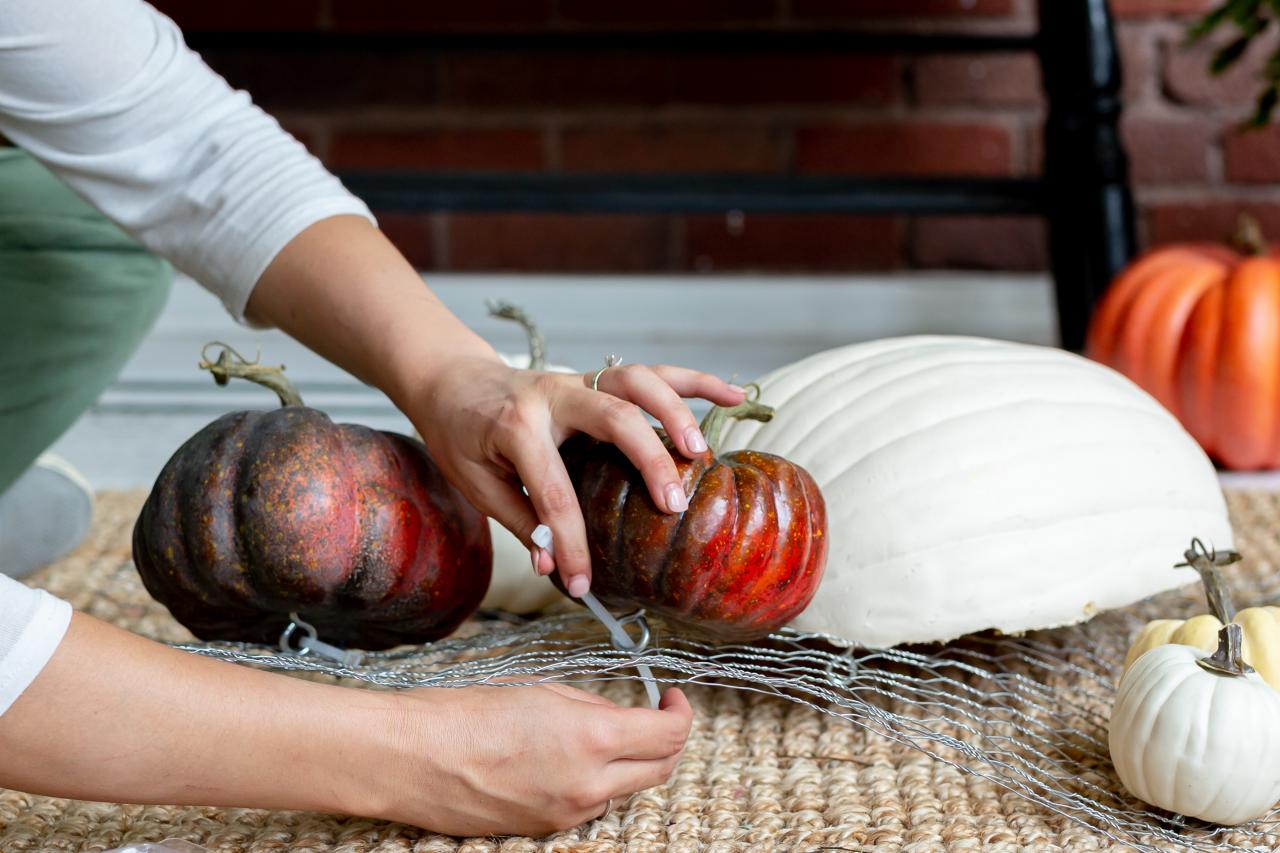
Create and Attach Decor Panels
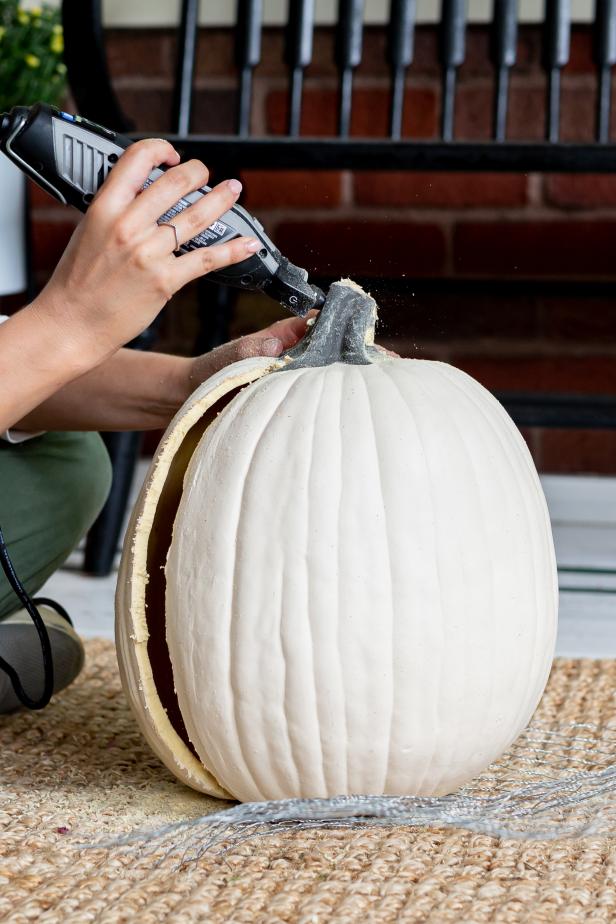
Do your future self a favor by cutting chicken wire into sections that fit into storage bins (Image 1). Screw small eye bolts into faux pumpkins and gourds, then attach to the panels using zip ties (Images 2 + 3). When attaching larger pumpkins, first use a Dremel tool to cut the pumpkin in half, then attach both halves, turning one pumpkin into two! (Images 4 + 5). Fill in around the larger items using faux fall foliage and Spanish moss.

Cassidy Garcia, Styling by Jill Tennant Design

Cassidy Garcia, Styling by Jill Tennant Design

Cassidy Garcia, Styling by Jill Tennant Design
Cassidy Garcia, Styling by Jill Tennant Design
Cassidy Garcia, Styling by Jill Tennant Design
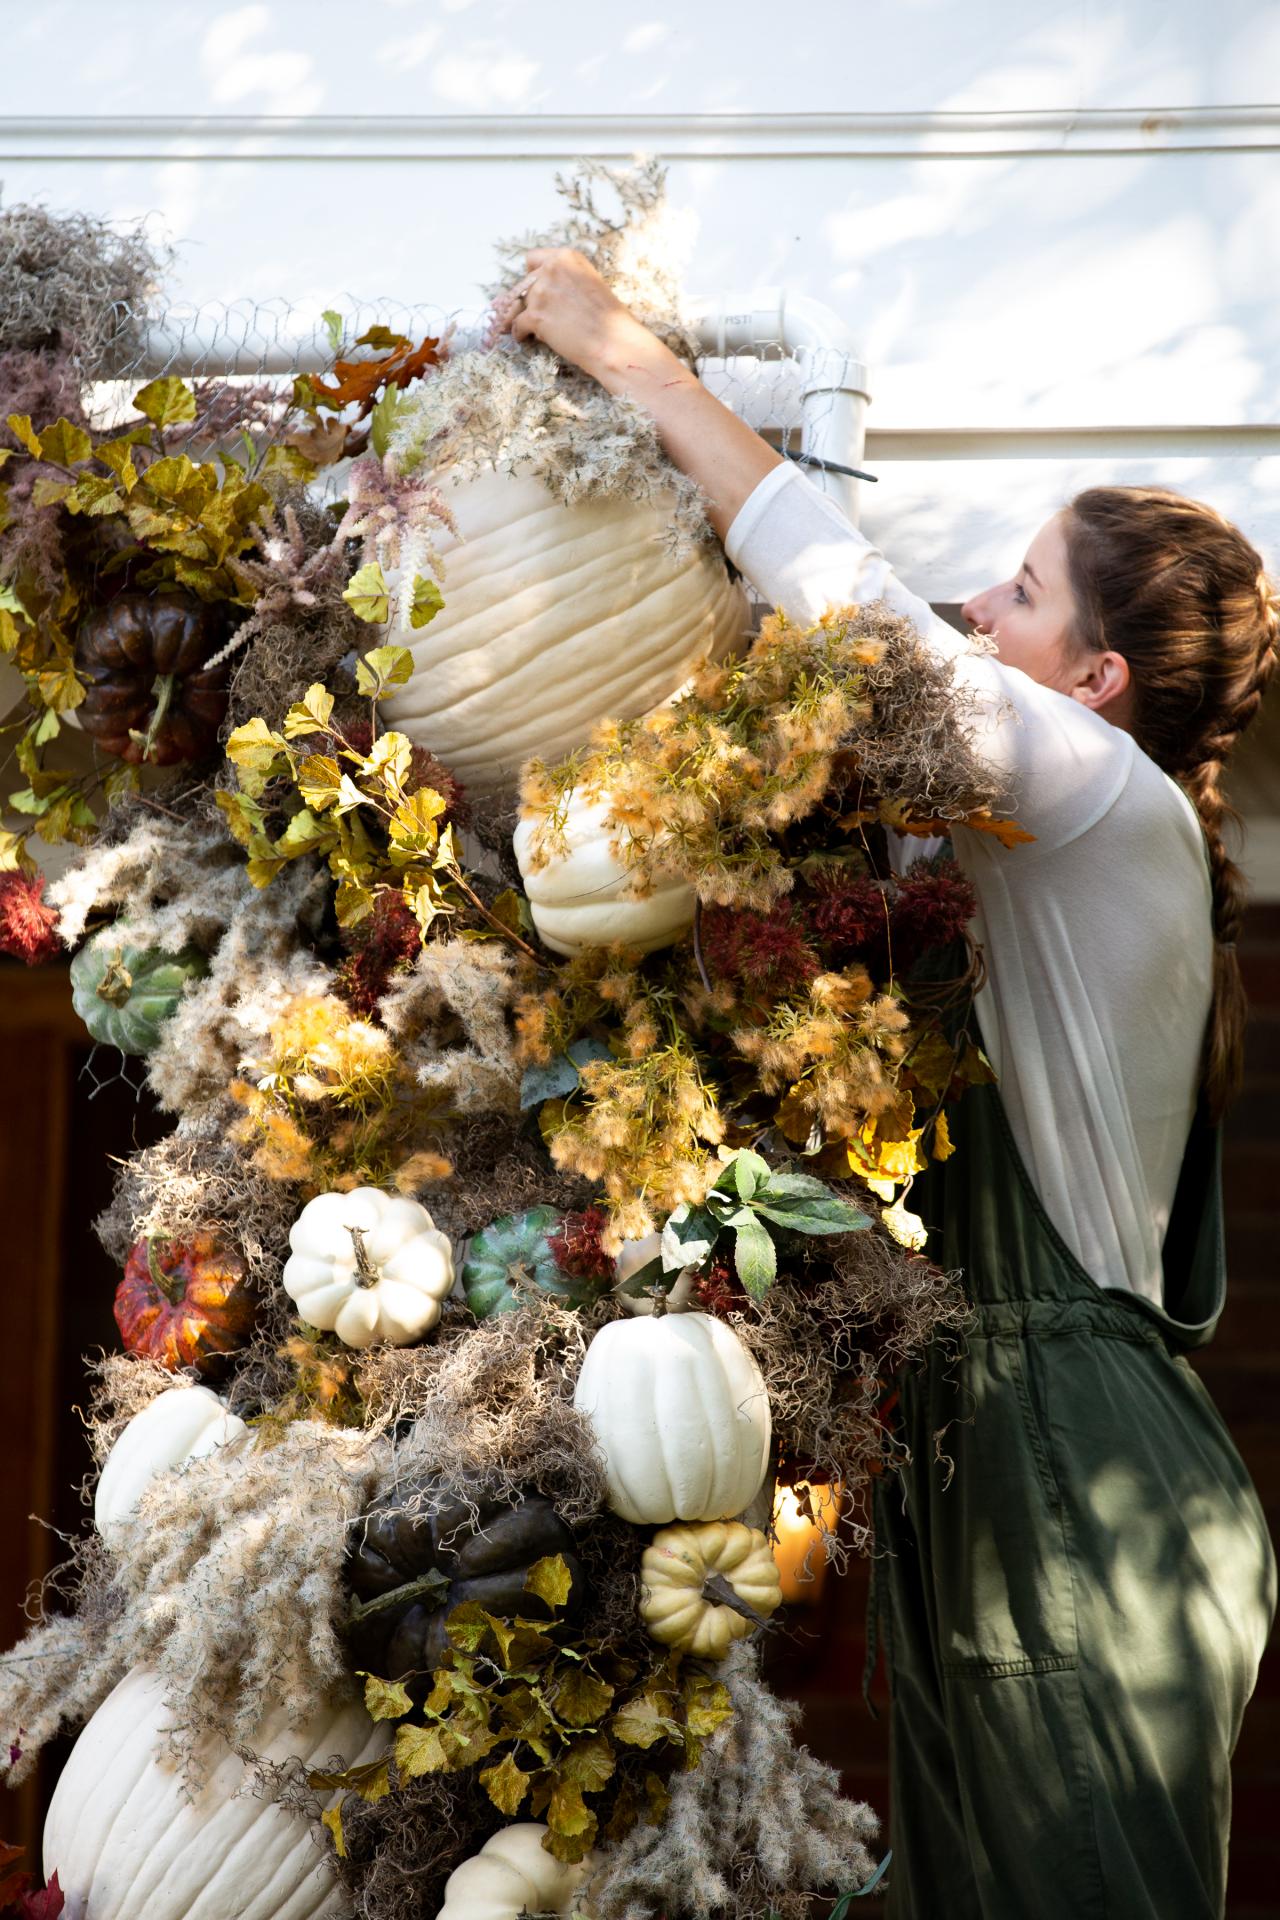
Attach Chicken Wire Panels
Attach each decor panel to the arch individually using zip ties for easy removal later (Image 1). Once attached, add a finished look by filling in any empty spots you see with more Spanish moss and faux foliage and placing large pumpkins around the bottom to cover the PVC frame (Image 2).

Cassidy Garcia, Styling by Jill Tennant Design

Cassidy Garcia, Styling by Jill Tennant Design
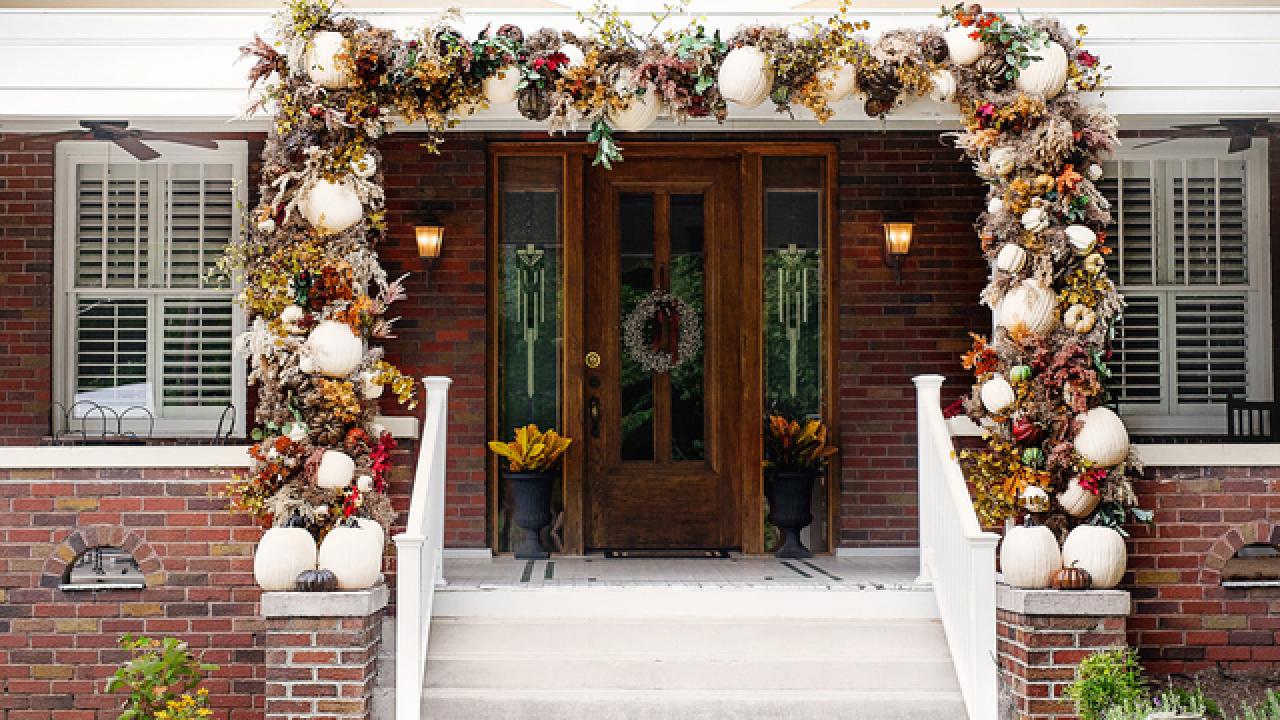
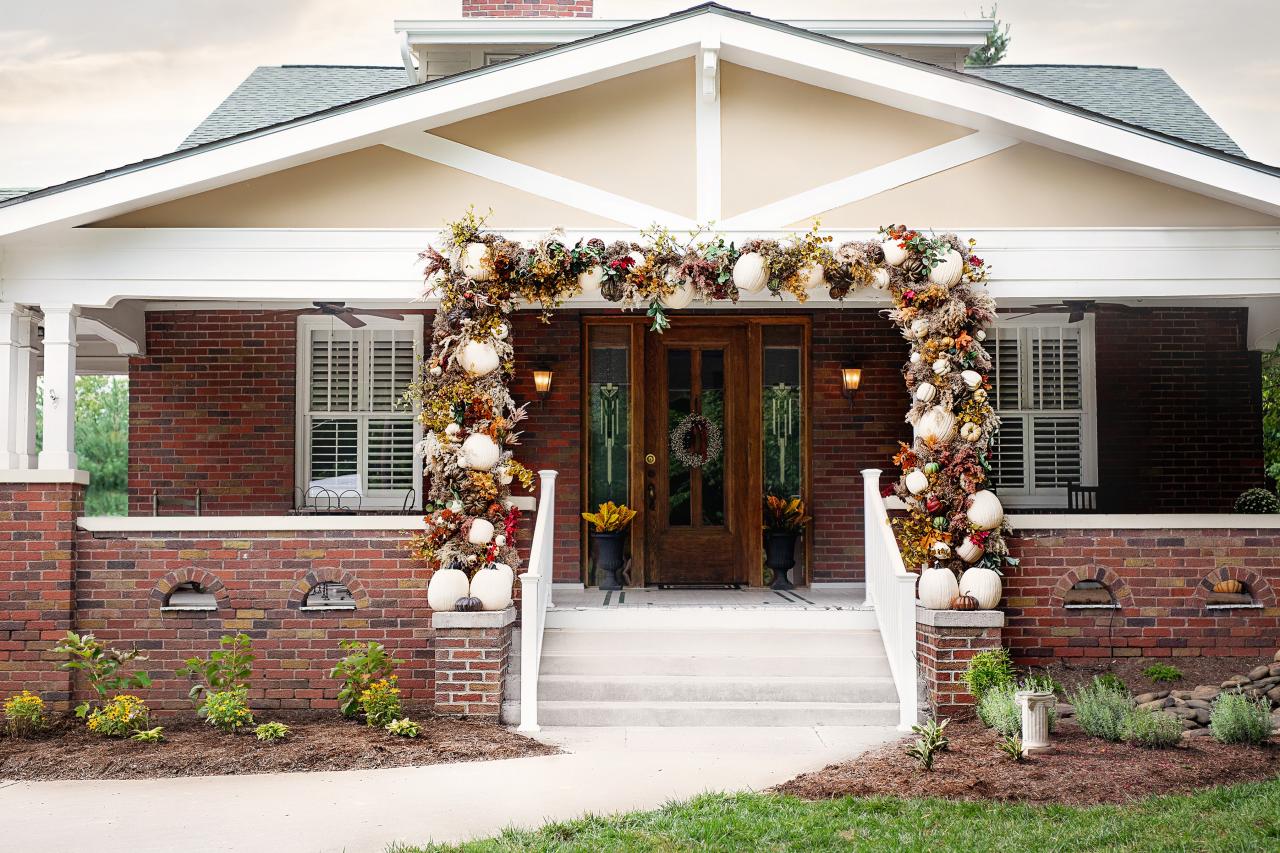
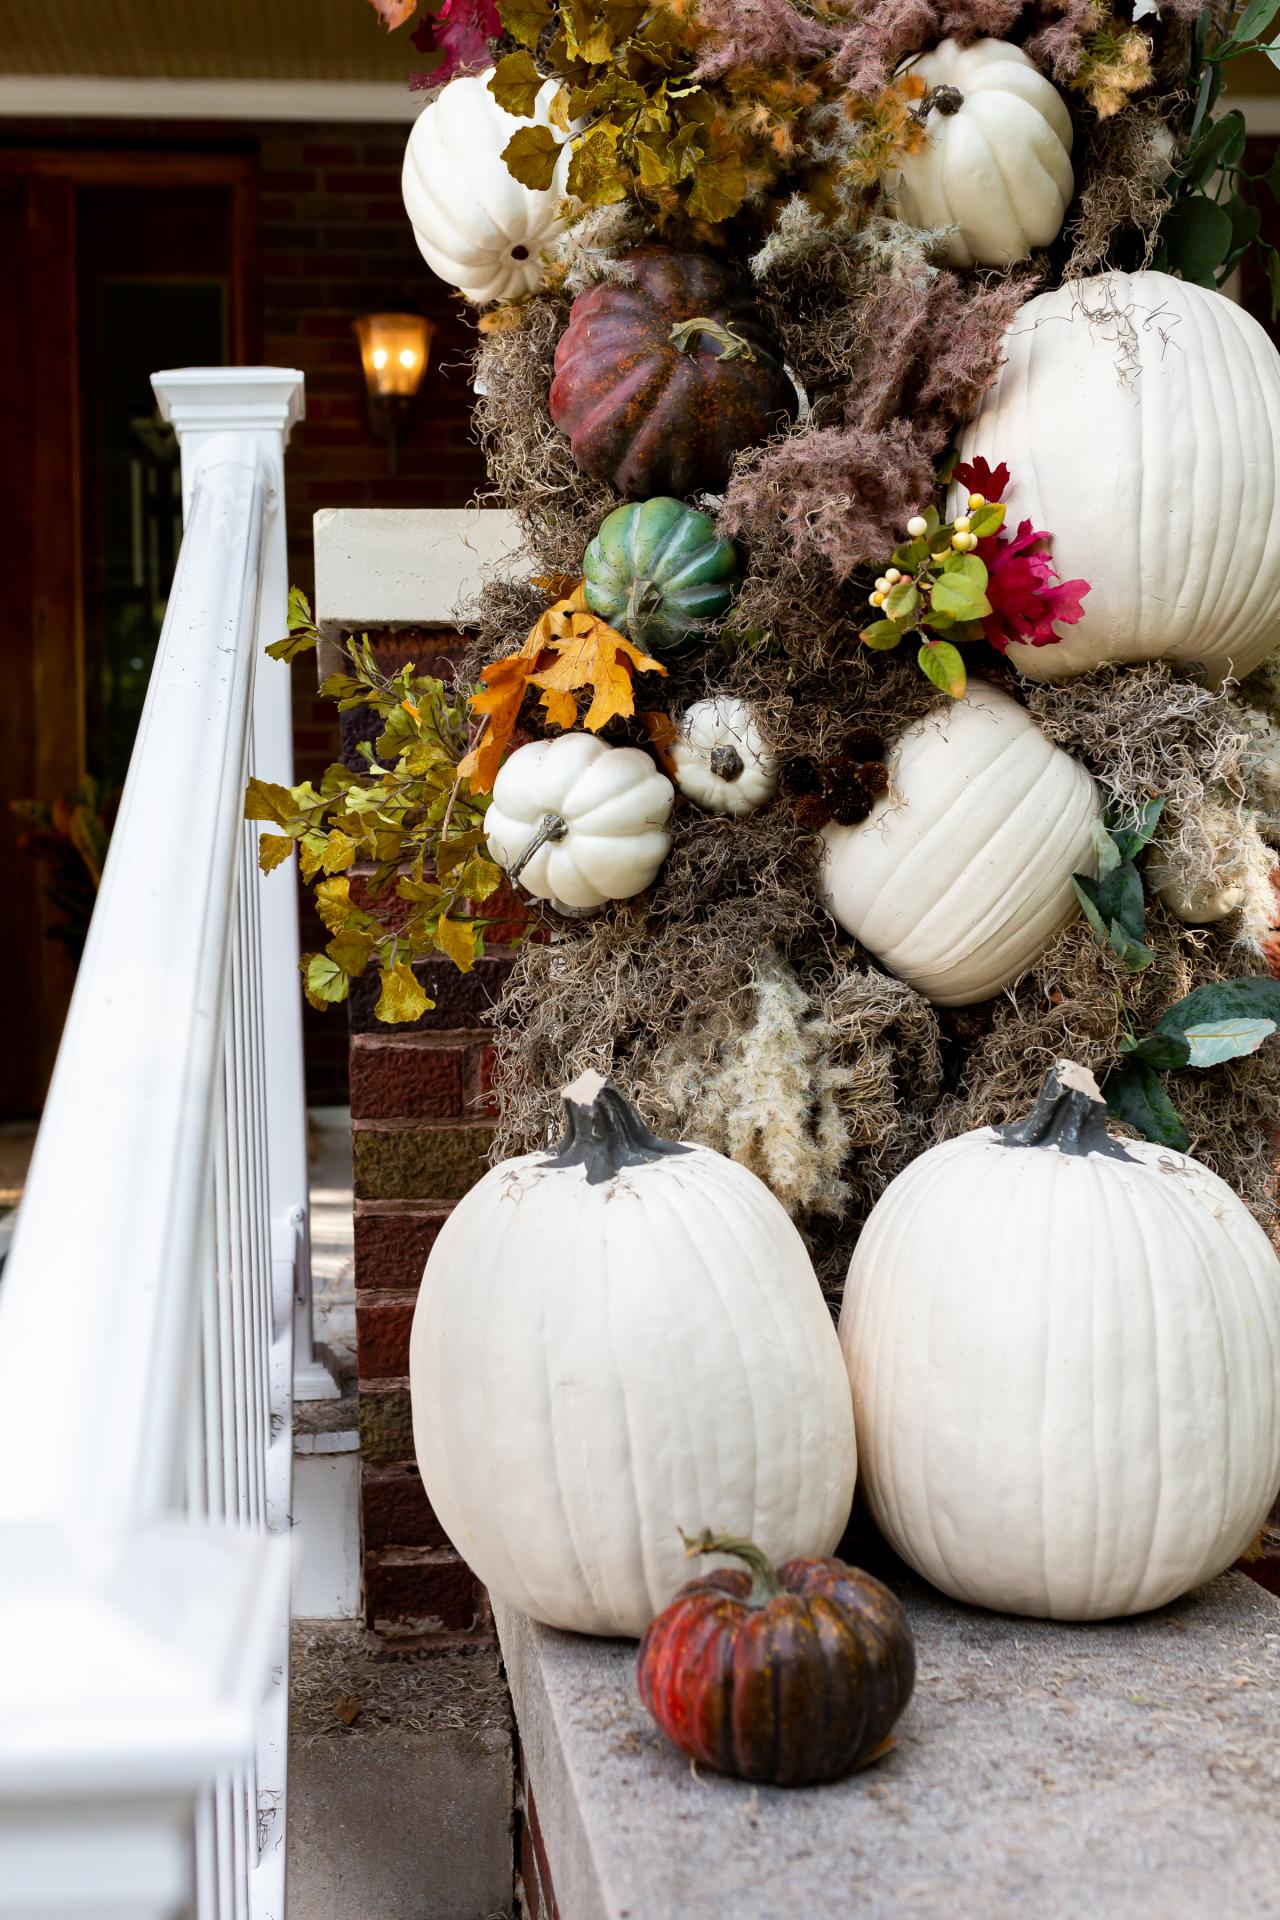
Admire Your Handiwork
Take a step back and take in the beauty of your fall-tastic, magazine-worthy porch.

Cassidy Garcia, Styling by Jill Tennant Design


