3 Gifts You Can Make With Dollar Store Finds
In a pinch? On a budget? Revamp these everyday dollar store items into thoughtful, quality gifts in no time.


Photo By: Additional Beauties + Headshot
Photo By: Jennie Andrews
Custom Gifts, Fast
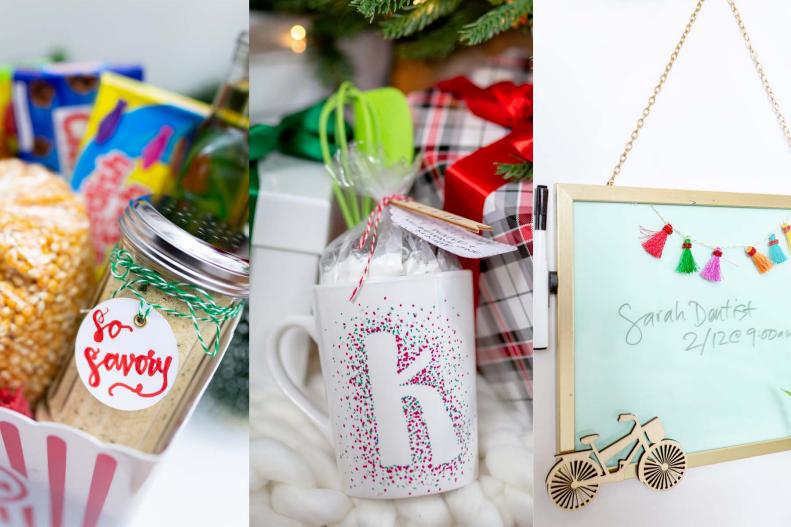
Turn dollar store items into gifts that wow with minimal time or money. We'll show you how to create the ultimate movie lovers pack with savory and sweet seasonings, make a mug cake gift set and upcycle a picture frame into a trendy dry-erase board.
Watch the Video: Last-Minute Dollar Store Gift Boxes
DIY Mug Cake
Create a monogrammed (dishwasher-safe!) mug that makes dozens of delicious, single-serving cakes for the sweet tooth in your life. You can pick up an assortment of mugs, kitchen tools and cake mix ingredients at the dollar store.
Watch the Video: Last-Minute Dollar Store Gift Boxes
Materials + Supplies
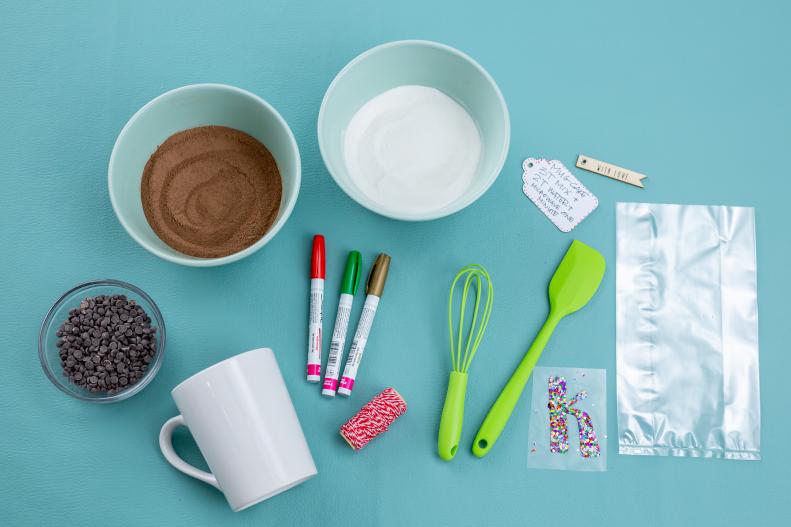
You will need: a mug, oil-based paint markers, a felt sticker or a vinyl letter, a mini whisk and spatula, a gift tag of choice, twine, a cellophane bag, angel food cake mix, devil’s food cake mix and chocolate morsels.
Watch the Video: Last-Minute Dollar Store Gift Boxes
Add Stencil or Sticker
First, clean and dry the mug. Then, place a felt sticker or vinyl letter onto your mug to use as the stencil for your design.
Watch the Video: Last-Minute Dollar Store Gift Boxes
Decorate
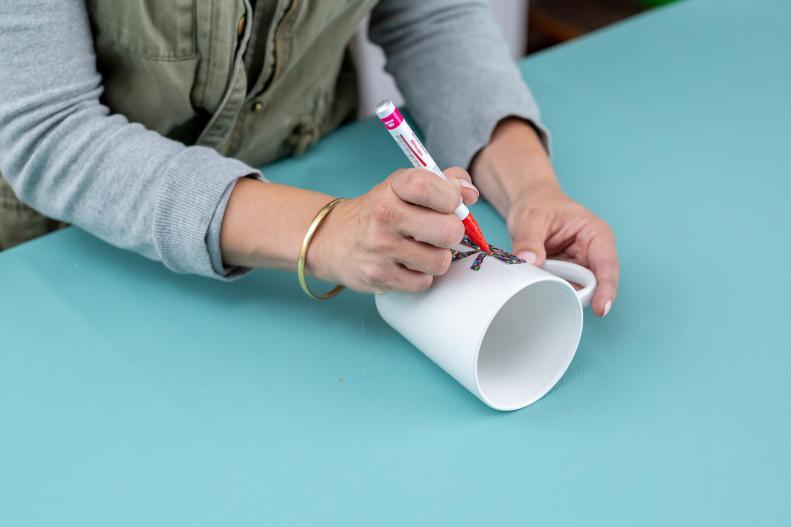
Using an oil-based paint marker in the color of your choice, begin making dots around the edge of the sticker. Think of this as a heavy outline to define the edges of the letter. Make the dots more sparse as you continue outward. If you use more than one color, let the first color dry completely before layering on the second color to avoid smudges. Pro tip: If you make any mistakes, use nail polish remover to fix it.
Watch the Video: Last-Minute Dollar Store Gift Boxes
Bake
Allow the design to dry completely, then peel the sticker off. Place the mug inside a cold oven and set it to 350 degrees F. Bake the mug for 45 minutes, then turn off the oven and let the mug cool completely inside the oven. Note: Paint colors may slightly change during baking; this is normal.
Watch the Video: Last-Minute Dollar Store Gift Boxes
Fill
Pour equal parts of the angel food cake mix and devil’s food cake mix into a cellophane bag. Top with roughly ¼ cup of chocolate morsels.
Watch the Video: Last-Minute Dollar Store Gift Boxes
Wrap
Using twine, attach a gift tag with the recipe: Combine 3 tablespoons of the cake mix and 2 tablespoons of water in the mug. Cook in a microwave for one minute on high.
Watch the Video: Last-Minute Dollar Store Gift Boxes
Add Accessories
For a final touch, tuck a mini whisk and spatula into the mug.
Watch: Watch: 2 Mug Cake Recipes
Movie Night Popcorn Pack
For the ultimate movie night, this popcorn pack is a must. Create savory or sweet popcorn seasonings to liven up their taste buds and top it off with popcorn kernels, candy and other theater essentials.
Watch the Video: Last-Minute Dollar Store Gift Boxes
Materials + Supplies
You will need two glass seasoning shakers, twine and gift tags. Our sweet seasoning uses light brown sugar as the base with a touch of cinnamon added. Our savory seasoning has a base of freshly grated parmesan with 2 tablespoons of garlic salt, 1 tablespoon of garlic powder and 1 tablespoon of dried parsley.
Watch the Video: Last-Minute Dollar Store Gift Boxes
Combine Ingredients
Add all ingredients for the sweet and savory seasonings into corresponding mixing bowls and combine thoroughly.
Watch the Video: Last-Minute Dollar Store Gift Boxes
Scoop Into Containers
Using a spoon, scoop the mix into glass spice containers.
Watch the Video: Last-Minute Dollar Store Gift Boxes
Add Gift Tags
Gift tag labels that have the ingredients listed on the back are the perfect finishing touch to the seasoning mix.
Watch the Video: Last-Minute Dollar Store Gift Boxes
Finish With Theater Essentials
With the seasonings complete, place them in your preferred container or basket (using shredded paper or basket filler as a base) with popcorn kernels, olive oil, candy and a movie or streaming gift card.
DIY Dry-Erase Board
Turn an 8" x 10" picture frame from the dollar store into an adorable dry-erase board with just a few embellishments.
Watch the Video: Last-Minute Dollar Store Gift Boxes
Materials + Supplies
You will need: an 8" x 10" picture frame, a dry erase marker, magnets, chain, two mini eye pins, tassels, scrap paper or a vinyl sheet and wood embellishments from your local craft store.
Watch the Video: Last-Minute Dollar Store Gift Boxes
Add Mini Eye Pins
Prepare the frame by carefully removing the glass and backing. Set aside. Turn the frame horizontally and screw in the mini eye pins 1 ½ inches from the top corners of the frame.
Watch the Video: Last-Minute Dollar Store Gift Boxes
Add Tassels
Set the frame down with the back facing you. Using hot glue, attach the string of tassels to the inside of the frame.
Watch the Video: Last-Minute Dollar Store Gift Boxes
Attach Magnet
Add a magnet to the side of the frame with hot glue. This is where you'll hang the dry-erase marker. If your dry-erase marker does not have a magnet attached, add one with hot glue.
Watch the Video: Last-Minute Dollar Store Gift Boxes
Connect Chain to Frame
Use needle-nose pliers secure a length of chain to the eye pins.
Watch the Video: Last-Minute Dollar Store Gift Boxes
Insert Glass and Decorative Paper
Replace the glass, then add a piece of scrapbook paper or vinyl color side down.
Watch the Video: Last-Minute Dollar Store Gift Boxes
Reinsert Backing
Reinsert any support backing or mats initially removed from the frame. Adding back in the support board helps keep the glass flush to the front of the frame. If you no longer have it or your frame didn’t come with one, you can use a piece of posterboard cut to size. Push the thin metal tabs back into place and the dry-erase board is ready to hang.
Love It? Try This: DIY This Calendar You Can Use Year After Year