How to Sew a Patch
Put a patch on it! Use patches to make repairs or add embellishments to your materials. See these simple steps for how to sew a patch by hand.

As an art, patchwork transcends generations and has been practiced for thousands of years. It's no surprise that it's still commonplace today, both as a simple way of covering large holes in fabric and as a way to add colorful embellishments to garments and housewares.

Emily Fazio
Sewing a patch can be done as an embellishment or, as in this case, to cover a hole in a piece of clothing.
Patches can be applied to any material. You can make your own patch using a scrap piece of fabric or purchase pre-made patches with convenient iron-on backing. Even if a patch is being applied for practicality, you can still use an embroidered patch as a way to express your interests and fandom. You can even custom order your own embroidered patches online.
You might say that choosing the patch is the hard part. Learning how to sew a patch into place is much easier.
Tools + Supplies
- item to be patched
- patch (iron-on or sew-on)
- straight pins
- sewing needle
- thread
- iron (for iron-on patches)
- scissors
- needle threader
1. Choose Your Patch
Consider where the hole in your garment is as you choose a patch. Some store-bought patches are stiff for added durability, making them great for heavier materials. Others may be soft, thinner and more flexible. These are more well-suited for soft fabrics like cotton and polyester. Some patches include iron-on adhesive.
You can make your own patch, too. A piece of scrap material is a great solution if you're looking for a custom shape, design or contrasting color when you repair or embellish your item. Considering all the options, when you're ready to add an embellishment or fix a hole in fabric, select a patch that works well for the type of fabric and the application.

Emily Fazio
Some patches, such as this star-shaped patch, come with an iron-on plastic backing. But, depending on how the patch will be used, you could even make your own patch from scrap material.
2. Iron or Pin the Patch
Affixing the patch to the fabric can be done two different ways:
- Use an iron to secure an iron-on backing. Place the iron-on patch on your material and then apply the heat of an iron for 30 seconds to melt the backing and attach the patch to its new home. It's still a good idea to put a few stitches around the edges of iron-on patches to prevent them from peeling away over time.
- Use straight pins to place a patch on the material. The straight pins will hold the patch in position while you work around the edges with needle and thread. They will prevent the patch from shifting during application.

Emily Fazio
An iron-on patch can be positioned securely with the heat of an iron, but it should still be handstitched along the sides.
3. Thread Your Needle and Begin Your Backstitch
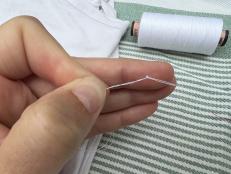
- Trim the thread. Cut a long piece of thread and put it through the hole in the needle. Using a needle threader makes it easier to get the end of the thread through a small needle hole.
- Knot the end of the thread. Align both ends of the thread and create a firm knot at the end. Making a knot is as easy as looping the end of the thread around your finger and then rolling the loop between your fingertips until it tangles into a knot. Tighten down on the knot and it should hold tight. Doubling the thread isn't necessary, but it is stronger for attaching thick patches. If you're patching a lightweight fabric, you might consider knotting only one tail of the thread so that the patchwork is more delicate.
- Initiate the stitch from the backside of the fabric. The backstitch starts on the backside of the fabric so that the knot in the thread will be hidden. Placing the needle just inside the edge of the patch (about 1/8 inch from the edge) guarantees that the first stitch will be hidden.
- Push the needle through the fabric and the patch. Pull the thread until the knot catches and is firmly in place against the backside of the fabric.

Emily Fazio
Secure the patch with a needle and thread.
4. Complete the First Stitch
- Place the needle at the edge of the patch. It's easy to disguise the stitches surrounding your patch if you place the needle at the very edge or just beneath the patch. If you put the needle at the edge but a mere millimeter outside the edge of the patch, it'll be visible once you've completed the stitching all around the patch. In some cases, this can be a decorative decision, especially if you're using a contrasting color thread. So, consider how you want your finished patch to look before you push the needle back through to the backside of the material.
- Push the needle through to the backside of the material. Pull the thread until it is taut.

Emily Fazio
It's easy to disguise the stitches surrounding your patch if you place the needle at the very edge or just beneath the patch.
5: Continue Around the Patch
- Repeat with additional stitches. Continue to loop the needle from the backside, through the patch and around to the frontside of the fabric.
- Keep in mind the spacing of your stitches. An iron-on patch will need fewer stitches than a custom patch, so you may find that they are only needed every 1/4 inch. Custom patches without the iron-on backing may need closer stitches to properly hold the edges of the patch.

Emily Fazio
When sewing a patch, keep in mind the spacing of your stiches. An iron-on patch will need fewer stitches than a custom patch.
6: Knot the Final Stitch
- Pull the thread back to the backside. Once you've worked the entire way around the patch, push the needle back to the backside of the fabric.
- Create a loose knot in the thread. Slide it towards the fabric along the underside of the patch and tighten the thread into a knot. Then, use the needle to create an additional two or three knots around the end stitch.
- Trim the tail of the thread with scissors.
- Check out your great patchwork!

Emily Fazio
Backside of the stitching for an iron-on patch.


