


How to Clean a Gas Stovetop
If your marathon cooking sessions have your gas range looking worse for wear, it’s time to hit pause and give it a good scrub down.

No matter how neglected or greasy you think your range might be, there’s hope. With a small investment in time and a little bit of persistence, you can get your stove back in peak condition and looking as good as new.

Derek R. Trimble
Tools and Materials Needed
- non-toxic degreaser
- medium-stiffness scrub brush
- toothbrush
- soft scouring pad
- paper towels
- glass cleaner
- razor blade
- Magic Eraser

Derek R. Trimble
Step 1: Before You Start, Make It Safe
The first thing you should always do before cleaning a gas appliance is to make sure that the surfaces are completely cool and the control knobs are switched to the off position (Image 1). If your model is equipped with a control lock, you should definitely take advantage of it before you start cleaning (Image 2). You’re going to be removing the burner guards and scrubbing your stovetop pretty vigorously, and it’s essential that the gas doesn’t come on while you’re working.
If you have an older style range with removable knobs, just make sure everything is switched to the off position and remove the knobs so you don’t accidentally bump them while you clean.

Derek R. Trimble

Derek R. Trimble
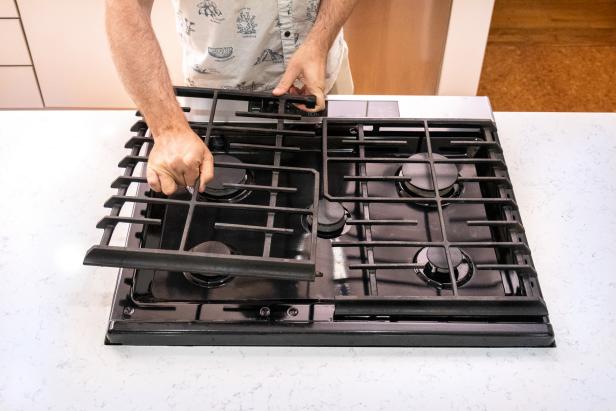
Step 2: Let the Disassembly Begin!
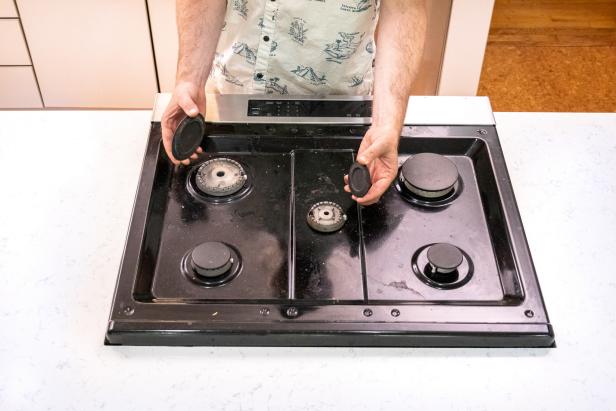
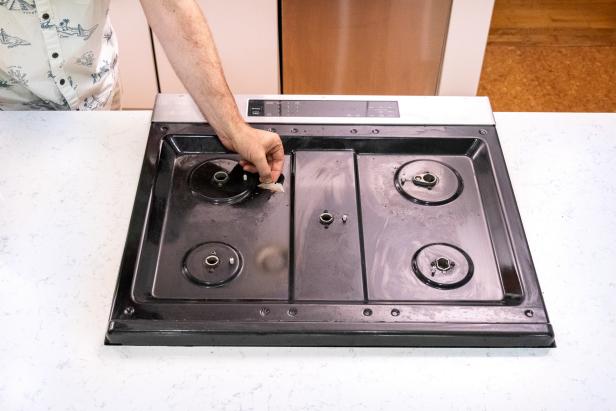
Your gas stove has a few basic parts that pop right off for easy cleaning: the stove grates on top, the burner caps and the burners themselves. Start by removing the stove grates, and then take a moment to wipe up any loose food particles that are hanging around (Image 1). Next, pull off all of the small caps that are protecting your burners (Image 2), followed by each of the burners themselves (Image 3). Set all of those items to the side on a couple of dish towels close to your sink; we’re going to deal with those later on.

Derek R. Trimble
Derek R. Trimble

Derek R. Trimble
Step 3: Degrease the Stove Grates
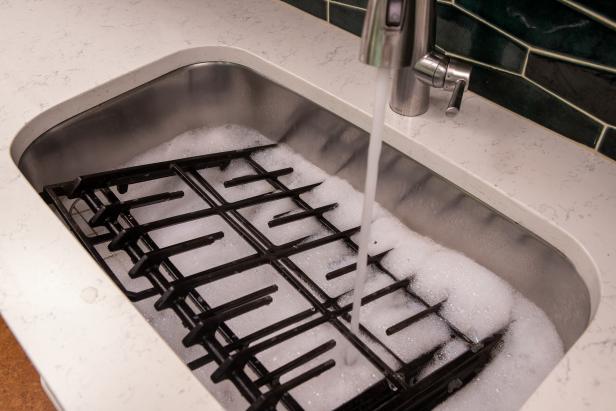
Place your stove grates in the sink and give everything a thorough soaking with a non-toxic degreaser (such as Simple Green or Krud Kutter). You can also use a concentrated dish detergent if you prefer; you might just have to scrub a little more. Leave everything to soak in the degreaser for about 15-20 minutes while you turn your attention to the stove surface.

Derek R. Trimble
Step 4: Degrease the Stovetop
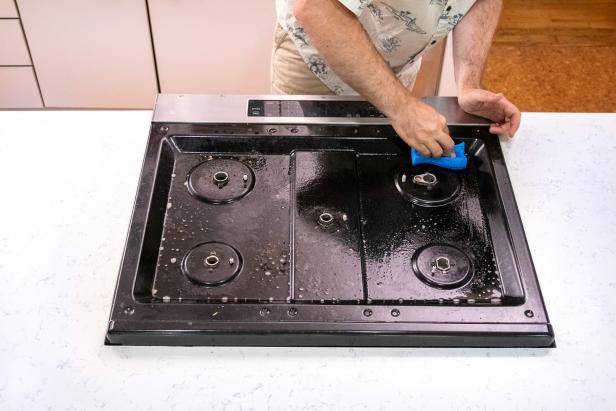
Give your stovetop a heavy spritzing of the same degreaser or liquid soap concentration and give it a few minutes to really penetrate the greasy buildup (Image 1). Use your soft scouring pad to break up any bits that are burned or stuck to the surface (Image 2). As you work, take a clean paper towel and routinely wipe down the stovetop and lift out all of the grease and grime (Image 3 and 4). Depending on your stove’s level of buildup, you may have to repeat the process of applying degreaser and scrubbing until your paper towels start coming up clean and free of any oil or grit.

Derek R. Trimble
Derek R. Trimble

Derek R. Trimble

Derek R. Trimble
Step 5: Combat the Baked-On Stuff
You’re likely to encounter a few places where the food is cooked on to the point where a sponge just won’t cut it. Or, you might find that there are a few little gummed up corners that are difficult to reach with your hands. For the hard-to-reach stuff, try a medium-stiff nylon scrub brush or an old toothbrush (Image 1). Before you really start scrubbing away, it’s a good idea to test your brush in a discreet spot on the stove to make sure it’s not going to scratch the surface. Work your brush along with some degreaser into all of the corners and around the igniters to loosen any grime.
For areas that seem like they’ve permanently bonded themselves to the surface forever, you can try using a fresh razor blade to peel up the grime. Be extremely careful if you go this route and make sure you don’t scrape the paint (Image 2). You just want to break up the surface of the burned bits so the degreaser can penetrate and loosen them up. Take your time and work gently. You might not get it 100 percent perfect, so don’t fixate on the one burned spot that won’t come off; sometimes in life it’s just good to let the little things go. Besides, we’ve got a trick further down that might help you cover up some of those blemishes.

Derek R. Trimble
Derek R. Trimble
Step 6: Give Everything a Final Polish
Once you’ve degreased and scrubbed everything, you’ll want to use some fresh paper towels and wipe off any excess degreaser. Wipe everything down until it’s dry, then using some glass cleaner and a Magic Eraser, give everything a final wipe down (Image 1 and 2). The Magic Eraser will lift off any small residual bits of grease and pick up any of the degreaser residue so it won’t leave a cloudy film on your stovetop. Once your Magic Eraser comes up clean (Image 3), you’re ready to move on to the next step.

Derek R. Trimble

Derek R. Trimble

Derek R. Trimble
Step 7: Now, About Those Parts You Removed
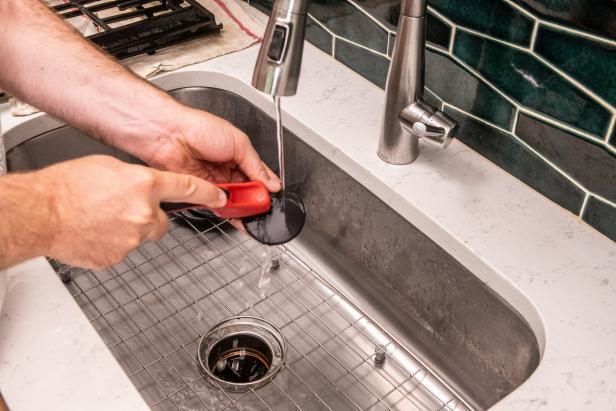
Now that your stove grates have had some time to marinate in the degreaser, you’ll want to give them a quick rinse with hot water to wash away the majority of the grease. After that, give the grates and your burner caps a good scrubbing with your nylon brush, and use a little soap or degreaser if you need to combat any difficult spots (Images 1 and 2).
When it comes to the burners themselves, we recommend washing those in hot water while giving them a gentle scrubbing with your nylon brush (Image 3 and 4). Don’t put any aggressive cleaners or solvents on your burners since they come in contact with your stove’s gas outlets. You don’t want any clogs or residual buildup that could cause ignition problems.
Once everything is clean, place your stove parts on a towel and let everything dry completely before you reassemble your stovetop.
Derek R. Trimble

Derek R. Trimble
Derek R. Trimble

Derek R. Trimble
Step 8: Reassemble and Add a Layer of Protection
Now that you’ve invested so much time getting your gas stove back into peak condition, it’s a good idea to consider adding a guard around the burners. When you’ve finished a marathon cooking session, it’ll be easier to wipe the guard down or simply replace it when the time comes. Additionally, if your stovetop is scorched beyond rescue, this is a great way to hide the unsightly surfaces.

Make sure to put your stove guard in place (and remove any stickers) before you put your burners on (Image 1). Then, reassemble your stove in the opposite order of disassembly. Start with replacing the burners (Image 2). Don’t worry if you’ve forgotten where they go; each one is unique to its particular location and will only fit its designated spot. Top your burners off with their caps and give every burner a quick test light (Image 3). Once you’re satisfied that everything is in working order, put the stove grates back on (Image 4), and you’re ready to cook!

Derek R. Trimble

Derek R. Trimble

Derek R. Trimble
Derek R. Trimble


