


How to Make a Rolling Power Tool Storage System
Easily store long power tools such as weed eaters, pole saws and leaf blowers off the ground and out of the way with this rolling storage system.

Shain Rievley

Materials Needed
- (8) 2x2 x 8' wood boards
- (3) 2x4 x 8' wood boards
- (2) 1/2” plywood boards
- (2) 1/4” plywood boards
- 1-1/4” exterior screws
- 2-1/2" exterior screws
- circular saw
- pocket hole jig system
- drill
- (2) clamps + larger trigger clamps
- speed square
- wood glue
- set of 4 locking casters + screws
- hex bit socket set
- paint
- paint roller and tray
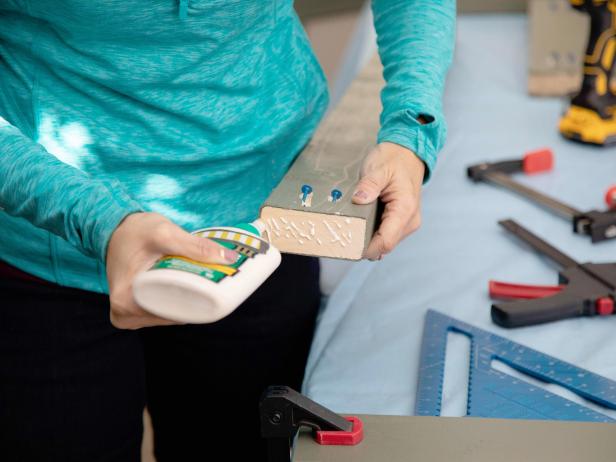
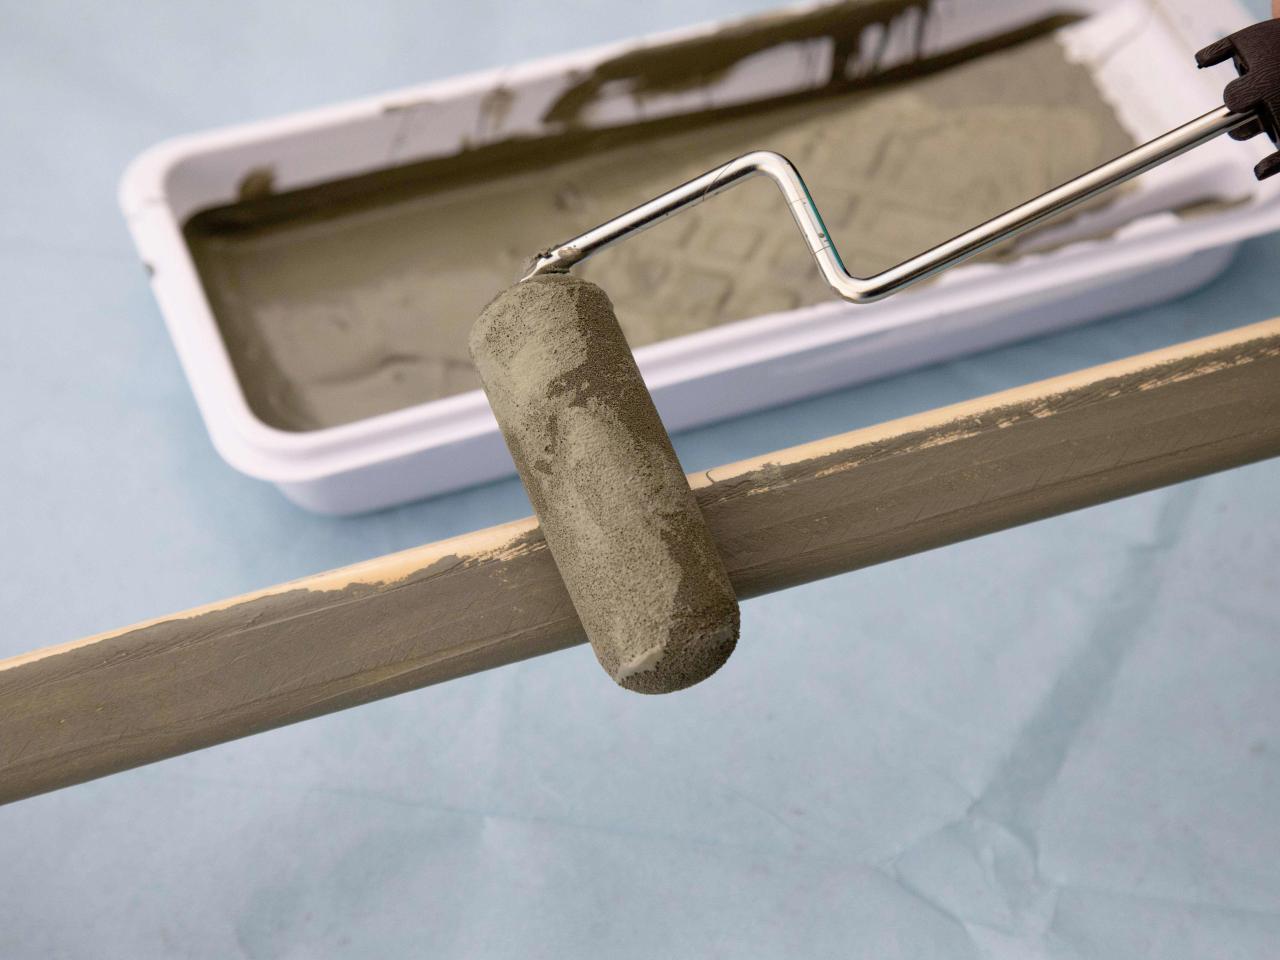
Paint
Because it would be difficult to reach every area of the shelves once assembled, paint all the wood pieces with high-quality, durable paint prior to assembly.

Shain Rievley
Create Base
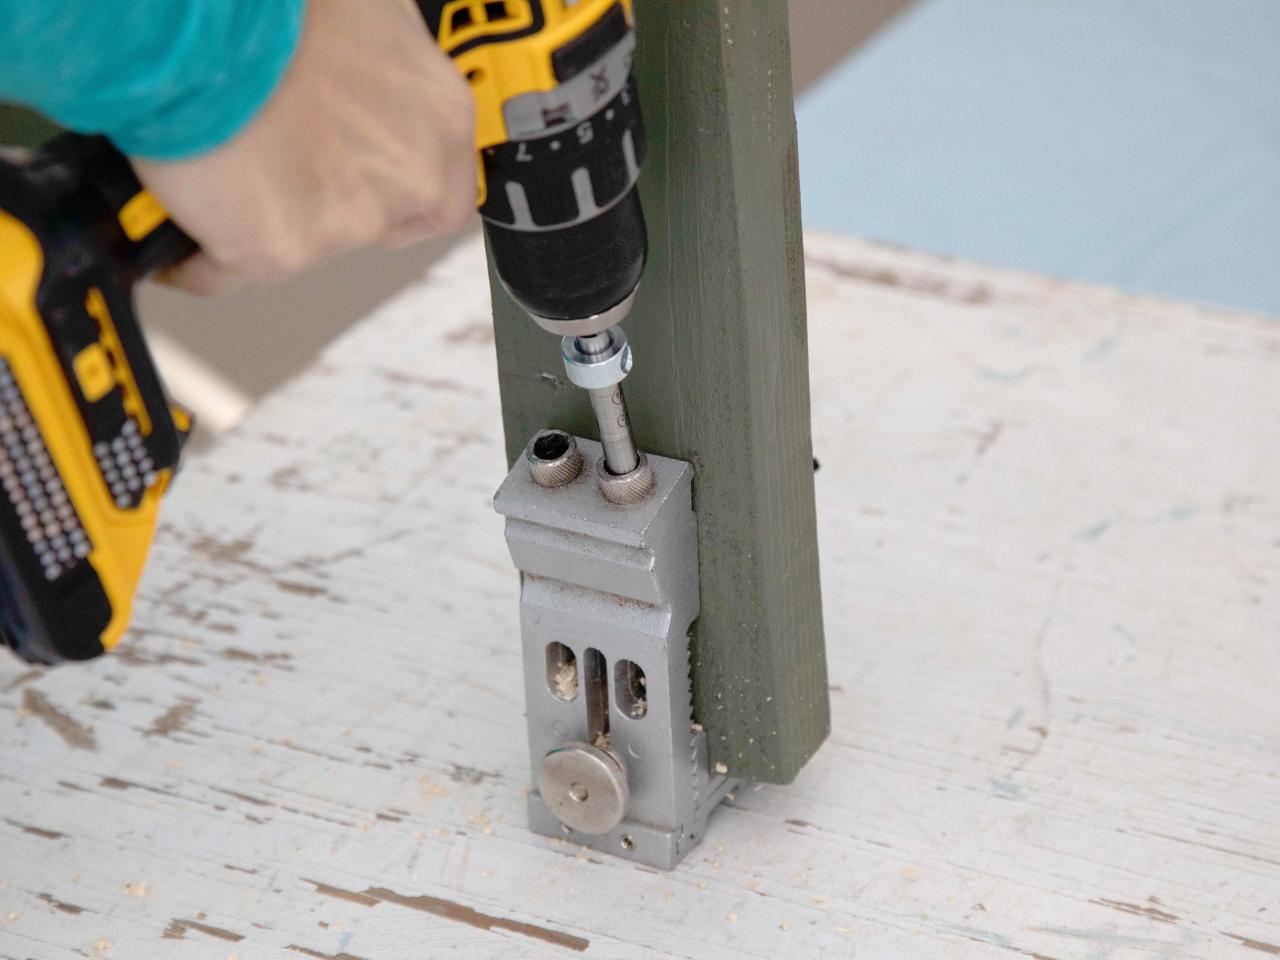
Cut the 2x4s to create two 53-inch pieces, two 24-inch pieces and three 17-inch pieces. Add pocket holes to the 53-inch pieces and the 17-inch pieces (Image 1). Next, add wood glue to the end of the 53-inch pieces (Image 2), and screw together the 53-inch pieces into the 24-inch pieces to form a rectangle, using a speed square in the corners to ensure the angles are square (Image 3). Add supports by attaching the 17-inch pieces to the inside of the rectangle with pocket hole screws (Image 4). Place one in the center and the other two 10 inches away from the center on each side. Pro Tip: Clamping the pieces to a work table will help keep the wood in place while drilling in the screws.

Shain Rievley
Shain Rievley

Shain Rievley

Shain Rievley
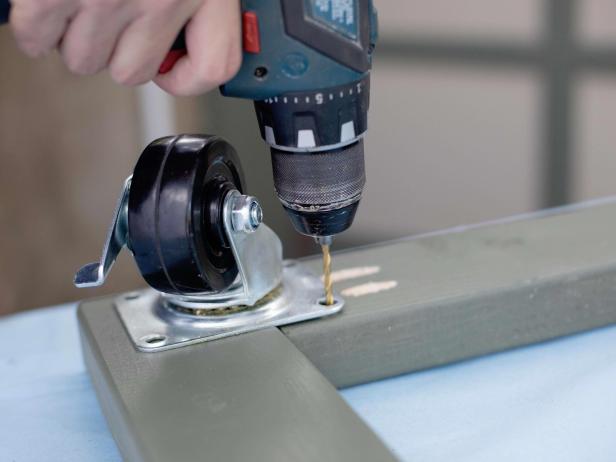
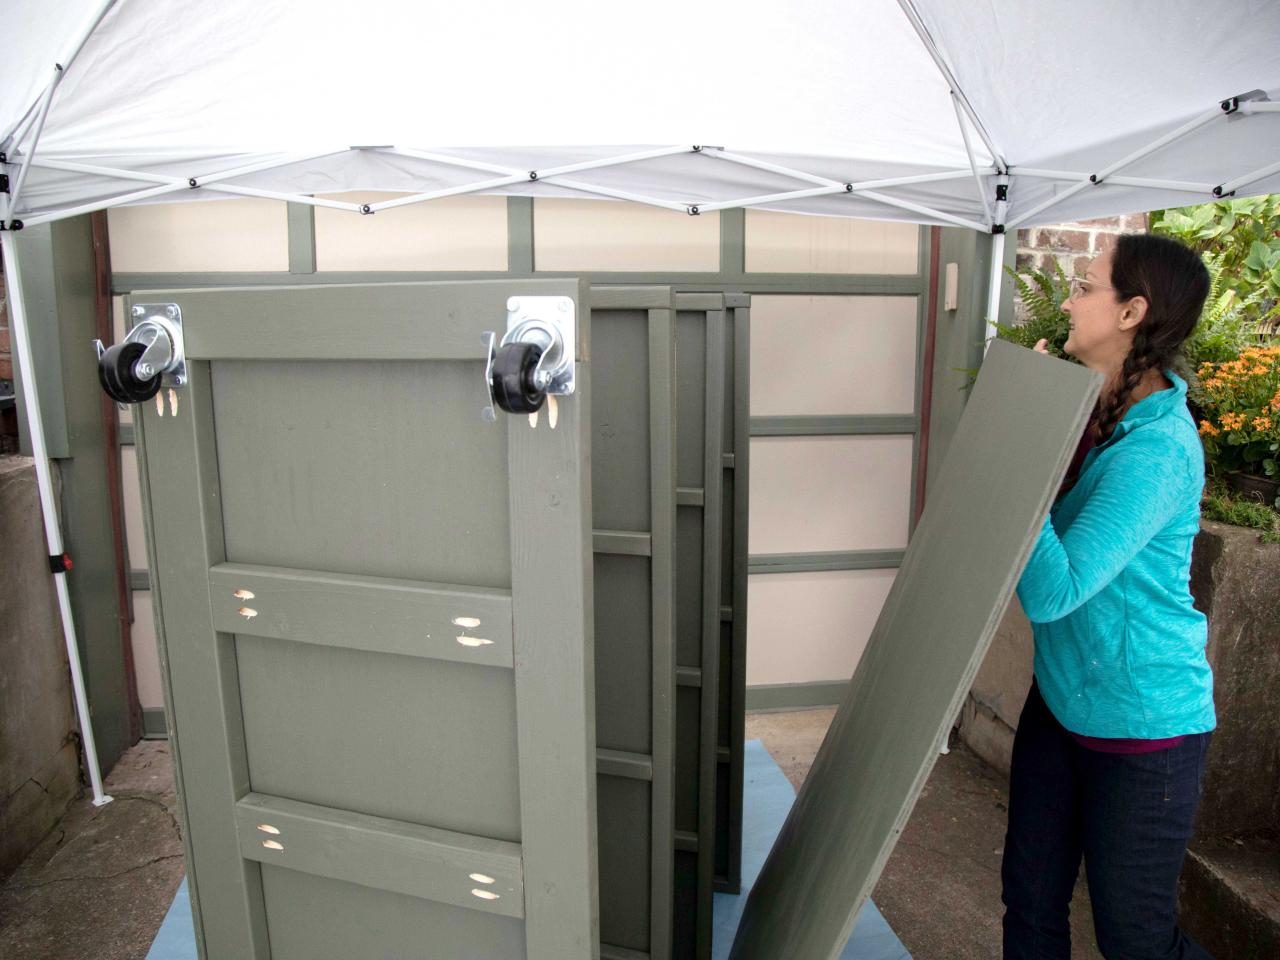
Add Casters
Attach 3-inch locking casters to each corner of the base with hex bolts (Images 1 & 2). This will give you the flexibility of moving the storage as needed. Remember to lock it in place when not in use.
Shain Rievley

Shain Rievley
Add Base Top
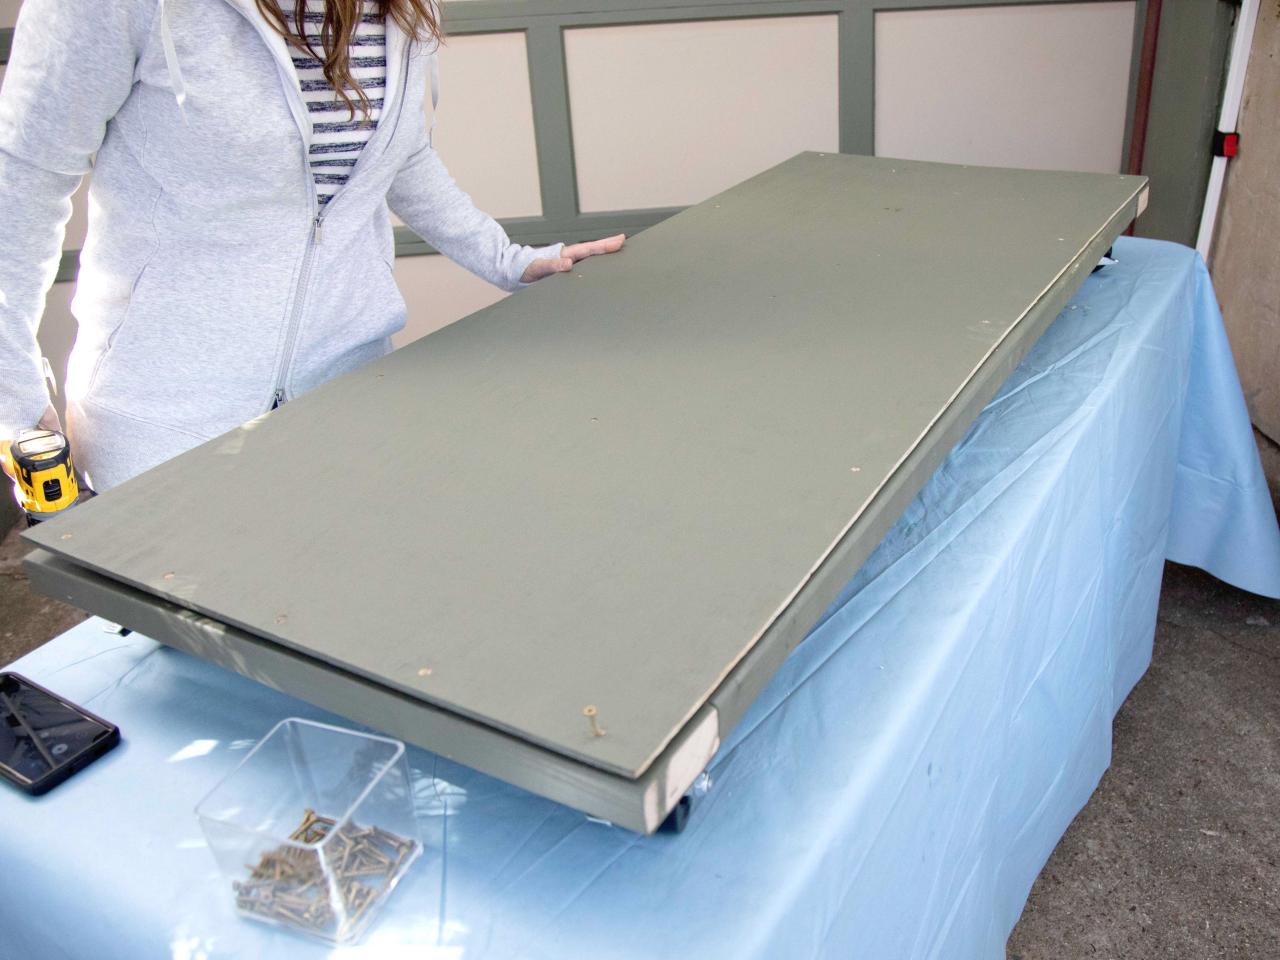
Flip the base over so the casters are now on the ground. Add a 1/4-inch-thick piece of plywood cut to 24 inches x 60 inches to the top. Secure in place with several 1-1/4-inch wood screws.

Shain Rievley
Create Shelves
Use the same process and measurements from the base to make the shelves but use 2x2 pieces of wood and attach everything with 2-1/2-inch screws — no pocket holes. Add a 1/4-inch-thick piece of plywood cut to 24 inches x 60 inches to the top. Secure in place with several 1-1/4-inch wood screws. Make three of these.

Shain Rievley
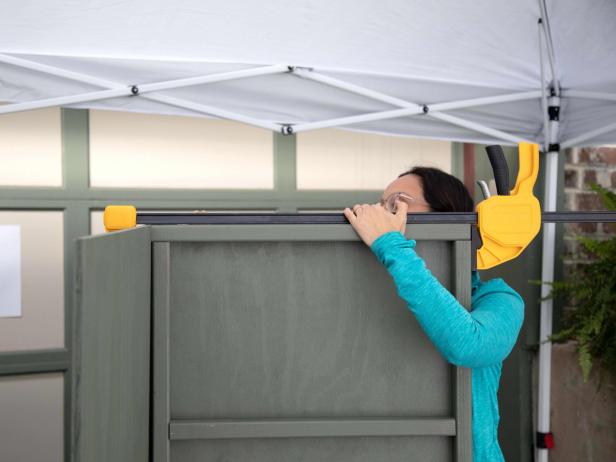
Attach Shelves
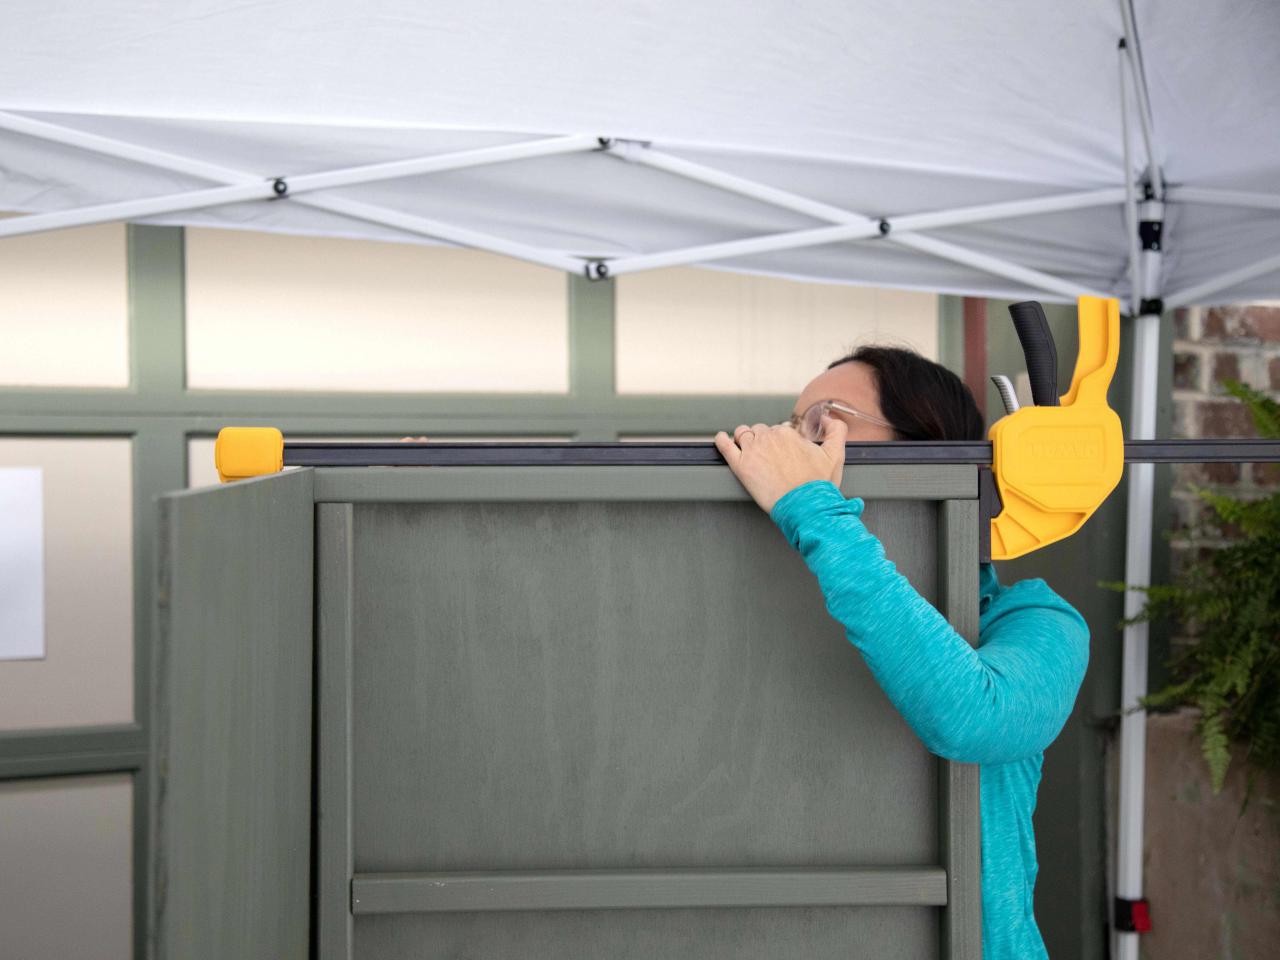
Cut a 1/2-inch-thick piece of plywood to 48 inches x 60 inches. Lay the plywood flat on a table. Add one of the shelves to the edge and clamp in place with a large 36-inch clamp, squaring up the angles with a speed square (Image 1). Add several 1-1/4-inch screws from the underside of the plywood into the top shelf. Remove it from the table and flip it on its side so it looks like an L shape (Image 2). Add the other two shelves every 14 inches (Image 3), holding in place with large clamps when screwing together (Image 4). The base will be the last piece at the bottom (Image 5).

Shain Rievley

Shain Rievley

Shain Rievley
Shain Rievley
Shain Rievley
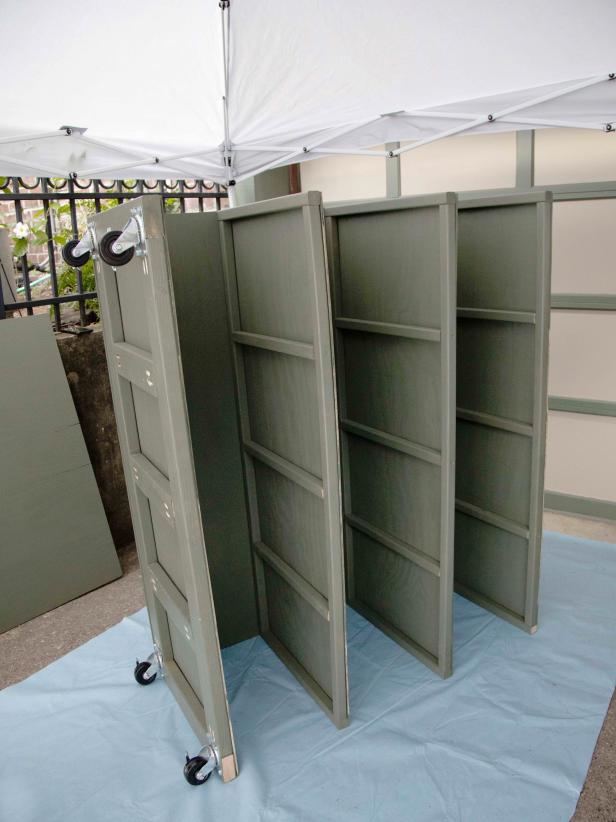
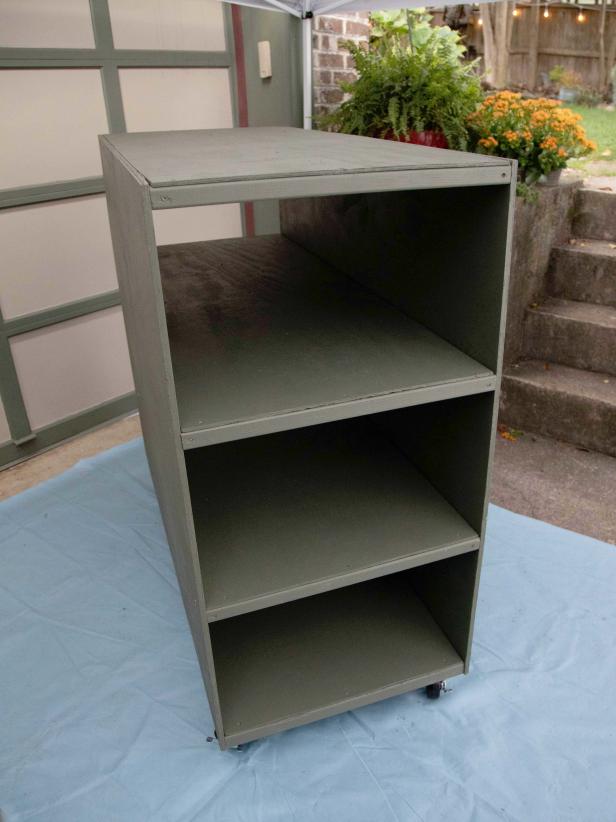
Finish
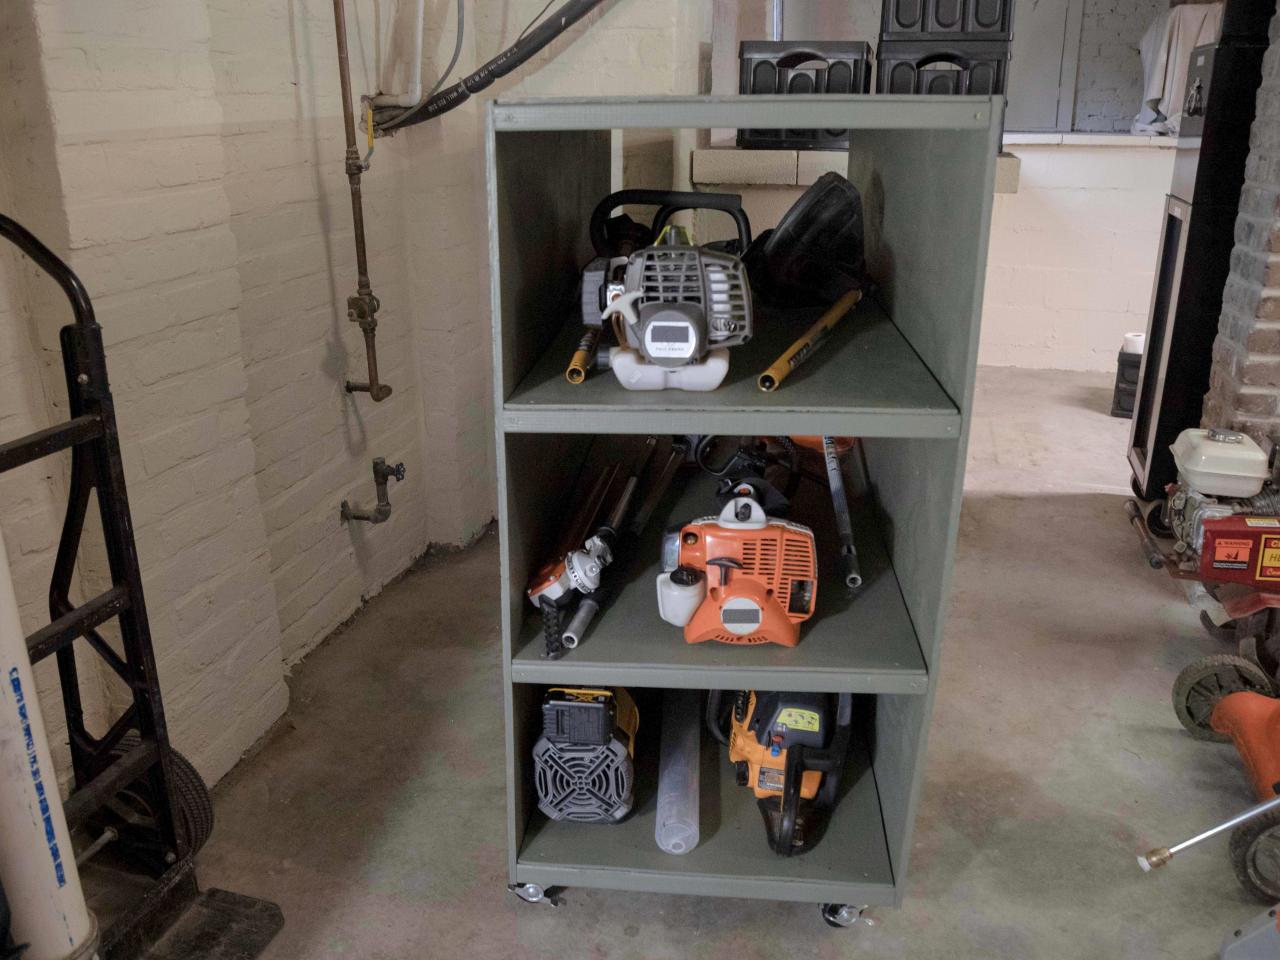
Add a second 1/2-inch-thick piece of plywood cut down to 48 inches x 60 inches to the exposed side of shelves (Image 1), and secure in place with screws. Grab a friend to help you flip the box upright so the casters are on the ground (Image 2). Fill the shelves with long power tools such as weed eaters, pole saws and leaf blowers (Image 3). Since both the front and back are open, these types of tools can easily be stored and removed.

Shain Rievley
Shain Rievley
Shain Rievley
More DIY Garage Storage Ideas to Try

DIY Two-Tiered Garage Storage Stand With Ramp
Double your garage or shed storage space with this two-tiered stand ideal for wheelbarrows and utility carts.

How to Build Oversized Garage Storage Cabinets
Say goodbye to clutter for good with the addition of these easy-to-assemble, extra-large garage cabinets.

How to Build Rolling Garage Storage Shelves
Custom garage storage can cost a pretty penny. Luckily, we’ve got the perfect DIY garage shelves project for you.


