


How to Remove a Stripped Screw
Keep all your projects moving and say goodbye to stripped screws once and for all with these helpful tips and tricks.

If you’re a self-professed DIYer, odds are you’ve found yourself face-to-face with the ultimate weekend project buzzkill: stripped screws. Whether you’re adjusting door hinges, repairing furniture or even working on your car, they are almost unavoidable. The problem is that most screws are made out of low-quality metal. When you pair low-quality metal with environmental effects such as rust, carbon build-up and other deterioration, the small screw heads don’t stand a chance against your power drill. Thankfully, there are plenty of ways to remove stripped screws without losing your cool.
Kamron Sanders
1. Use a Manual Screwdriver Instead of a Drill
This may seem counterintuitive but trust us. Before you further strip the screw, put down the drill and pick up a manual screwdriver. Though choosing the proper screwdriver head for the job can help ensure you don’t damage screws, an already-damaged screw can often be removed with a bigger or smaller screwdriver. Place the screwdriver in the screw head with a good amount of force and begin to twist. The manual screwdriver will make you more sensitive to when the screwdriver is beginning to slip and allow you to adjust. In many cases, the screw will come right out.

Kamron Sanders
2. Try a Flathead Screwdriver Too
If a Phillips head screwdriver doesn't move the screw, switch to a flathead screwdriver. A flathead may allow you to get the correct angle to move the screw. Use a flathead screwdriver that will fit completely into the Phillips-head hole.
3. Give It a Few Taps With a Hammer
A little tap goes a long way. Stubborn screws sometimes benefit from a few light hammer taps on the end of the screwdriver. The vibration helps break up any gunk under the surface and sets the screw free. This method is also good for embedding the screwdriver further into the damaged screw, aiding in its effectiveness.
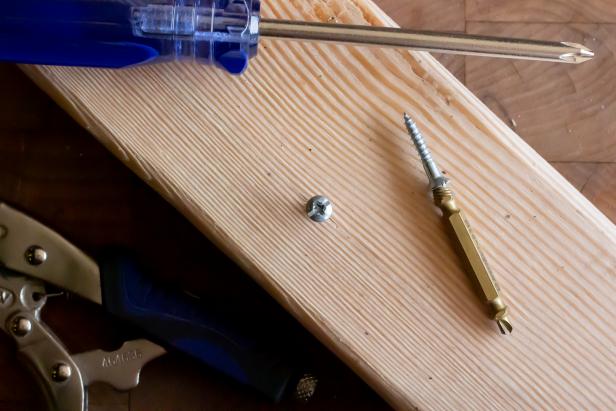
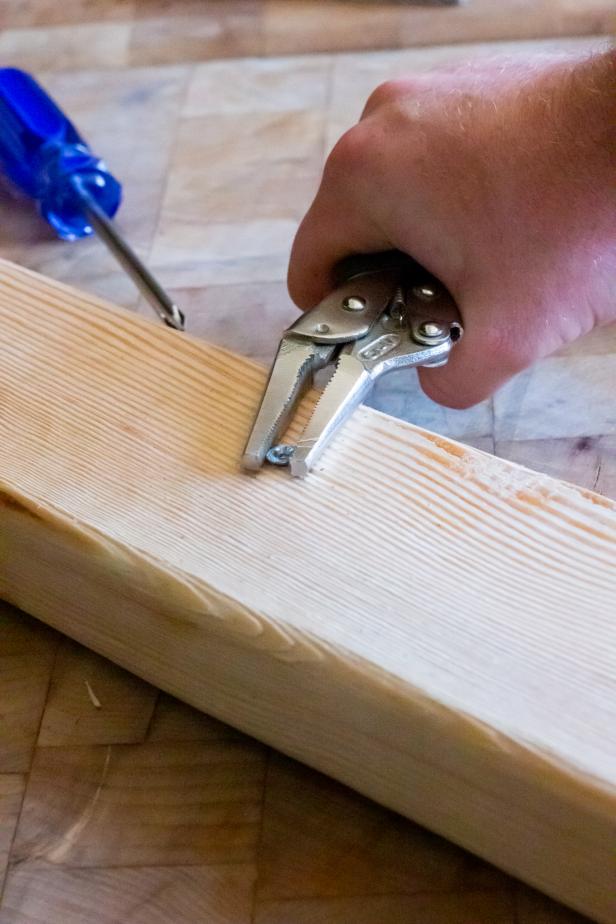
4. Pull It Out With Locking Pliers
If you managed to remove the screw partially before the metal finally gave way and rendered your screwdriver ineffective, you’re in luck. There is a quick and easy way to remove a partially removed screw using a pair of locking pliers. Simply adjust the pliers to firmly lock on the screw’s head and twist until it’s out. When using this method, be sure to place the plier’s teeth perpendicular to the screw’s head to maximize grip.
Kamron Sanders
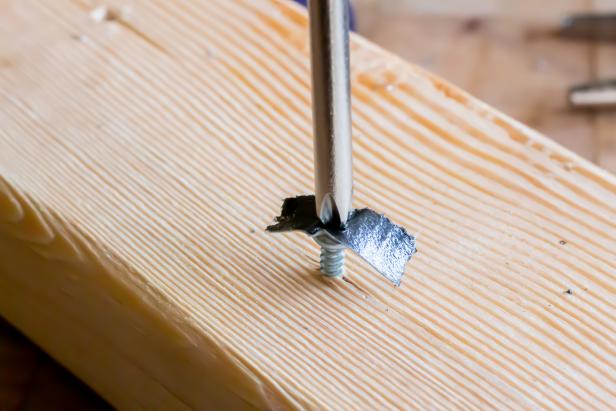
5. Use a Rubber Band for Grip
You’ve probably seen this trick before. Many times, all you need is a flexible barrier like a wide rubber band to make up the difference between the screwdriver and the damaged screw head (Image 1). This method can be very effective but tends to work best on small screws that aren’t under a lot of stress. If you don’t have a rubber band handy, try a small strip of duct tape (Image 2).

Kamron Sanders
Kamron Sanders
6. Increase Traction With Cleaning Supplies
If you don’t have a rubber band handy, try a piece of steel wool or an abrasive cleaning powder like Comet or Bar Keepers Friend. These aren’t meant to help you clean the screw head, just provide extra grip so you can get more traction between the screw and the screwdriver.
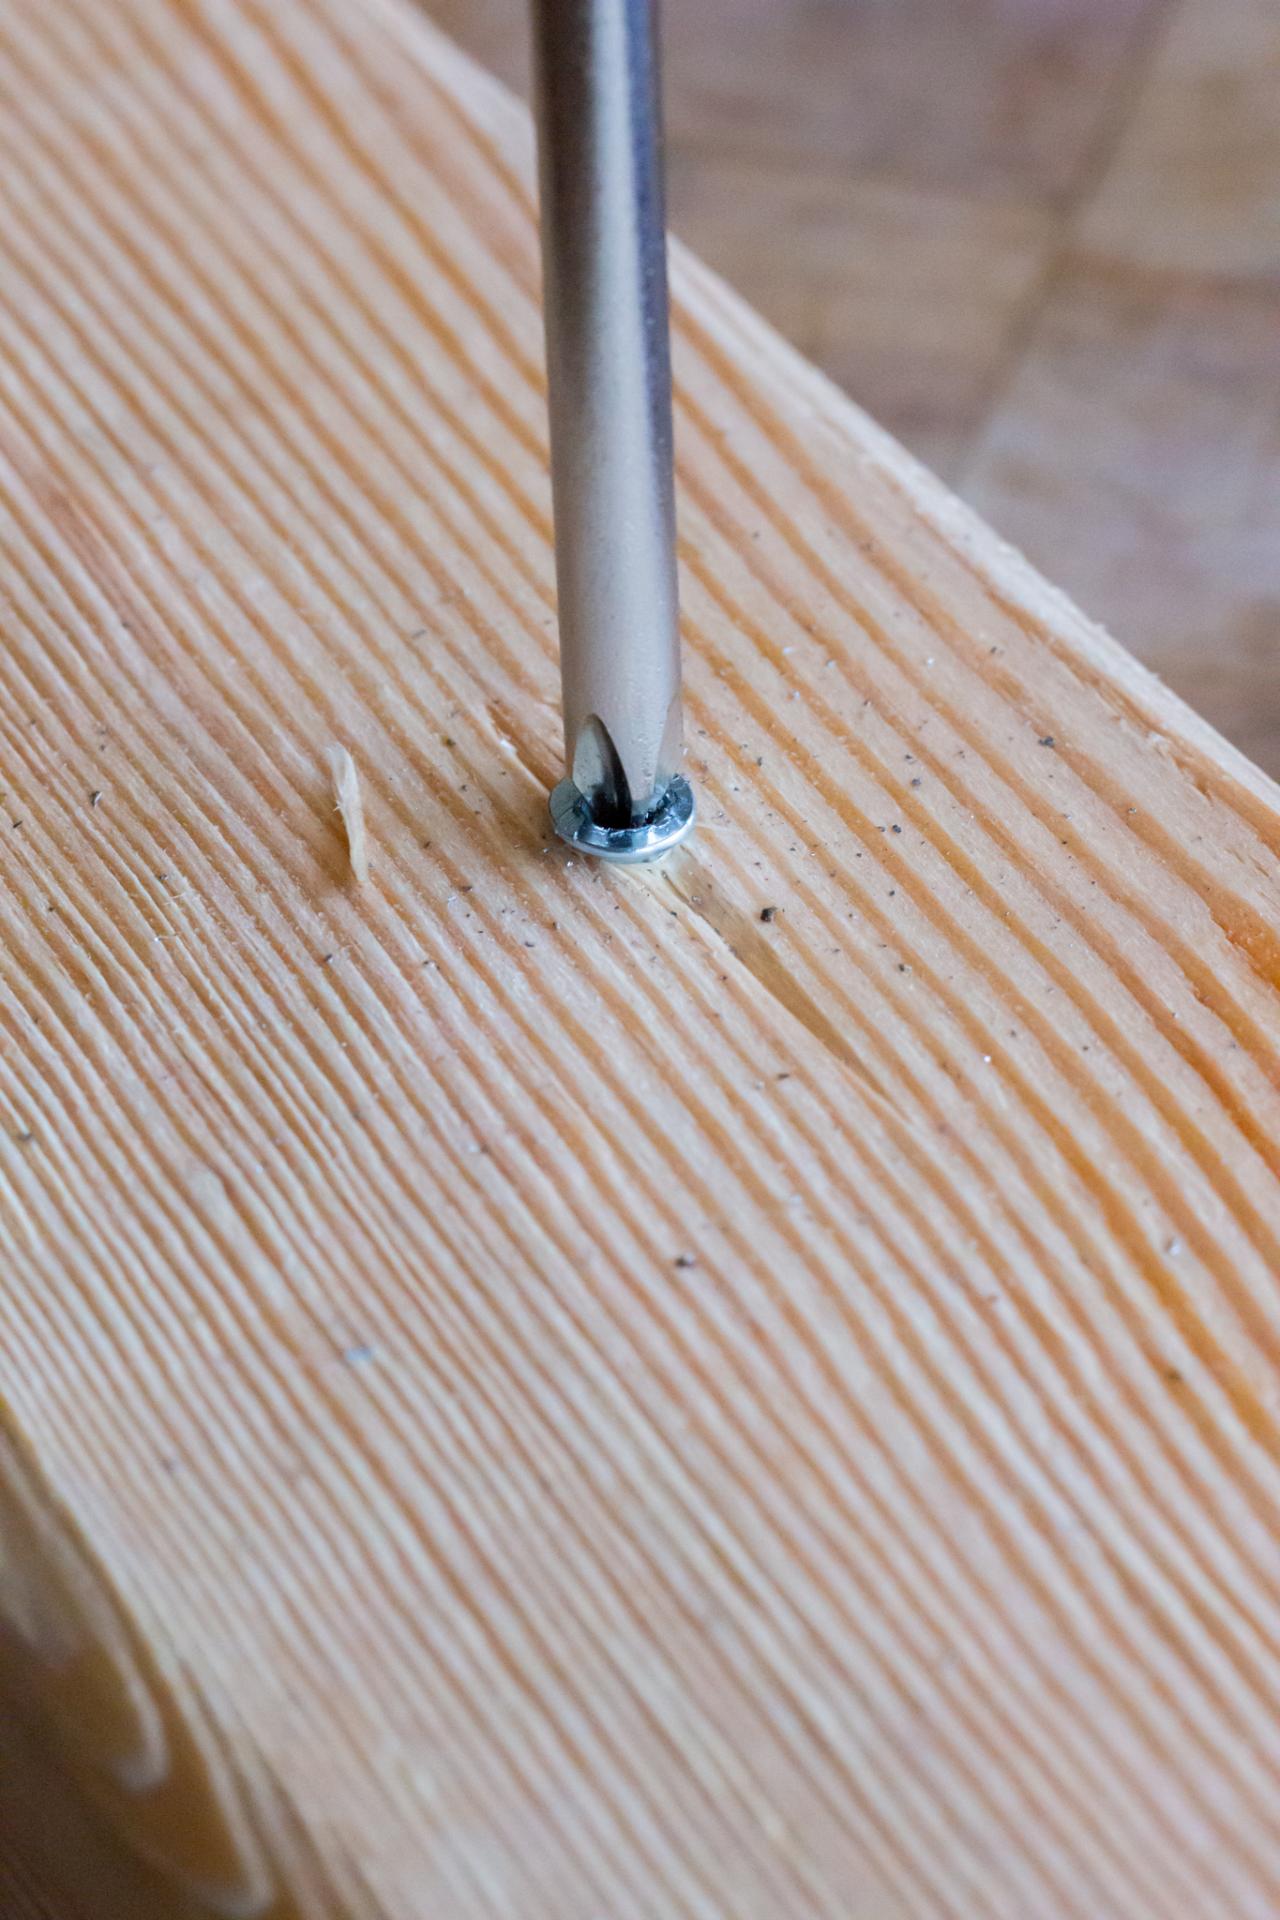
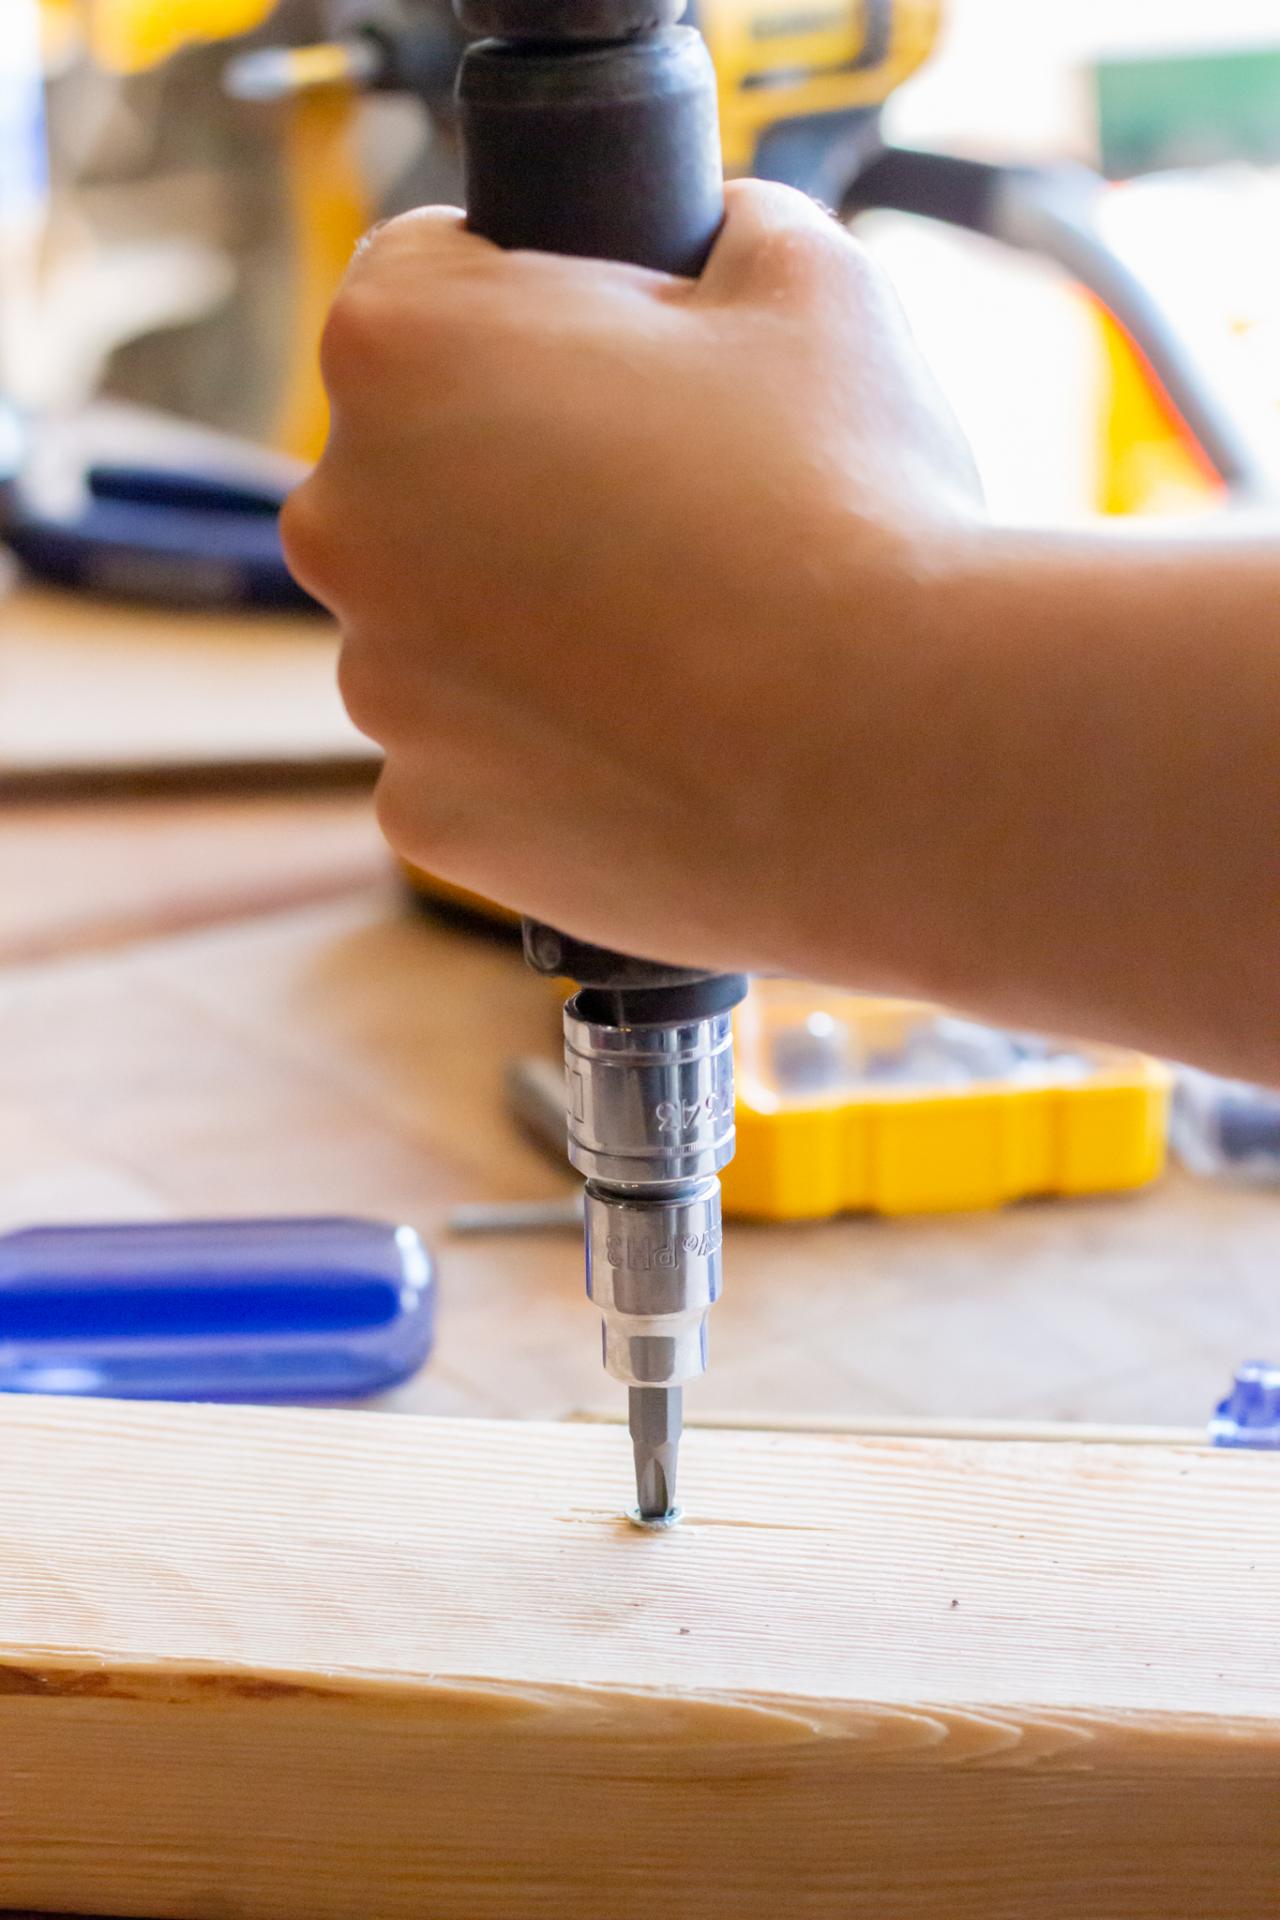
7. Try an Impact Screwdriver
Tough screws with a lot of rust and buildup can be nearly impossible to remove, and don’t even think about preserving the screw head. This problem is particularly common on machine screws in metal surfaces such as lawnmowers, boats or cars, but it can also be found around the house. The amount of force it takes to break the threads free from years of metal-on-metal weathering is far too much for the weak screw heads to handle. This scenario is perfect for an impact screwdriver (Image 1). This tool works by combining side-to-side force with downforce on the screw. Simply place the appropriate screwdriver head on the impact screwdriver, place it in the screw, and hit it with a hammer (Image 2). The compound motion of the impact driver will simultaneously twist the screw out, break free any buildup and further embed the screwdriver into the screw, thus avoiding further stripping of the screw.
Kamron Sanders

Kamron Sanders
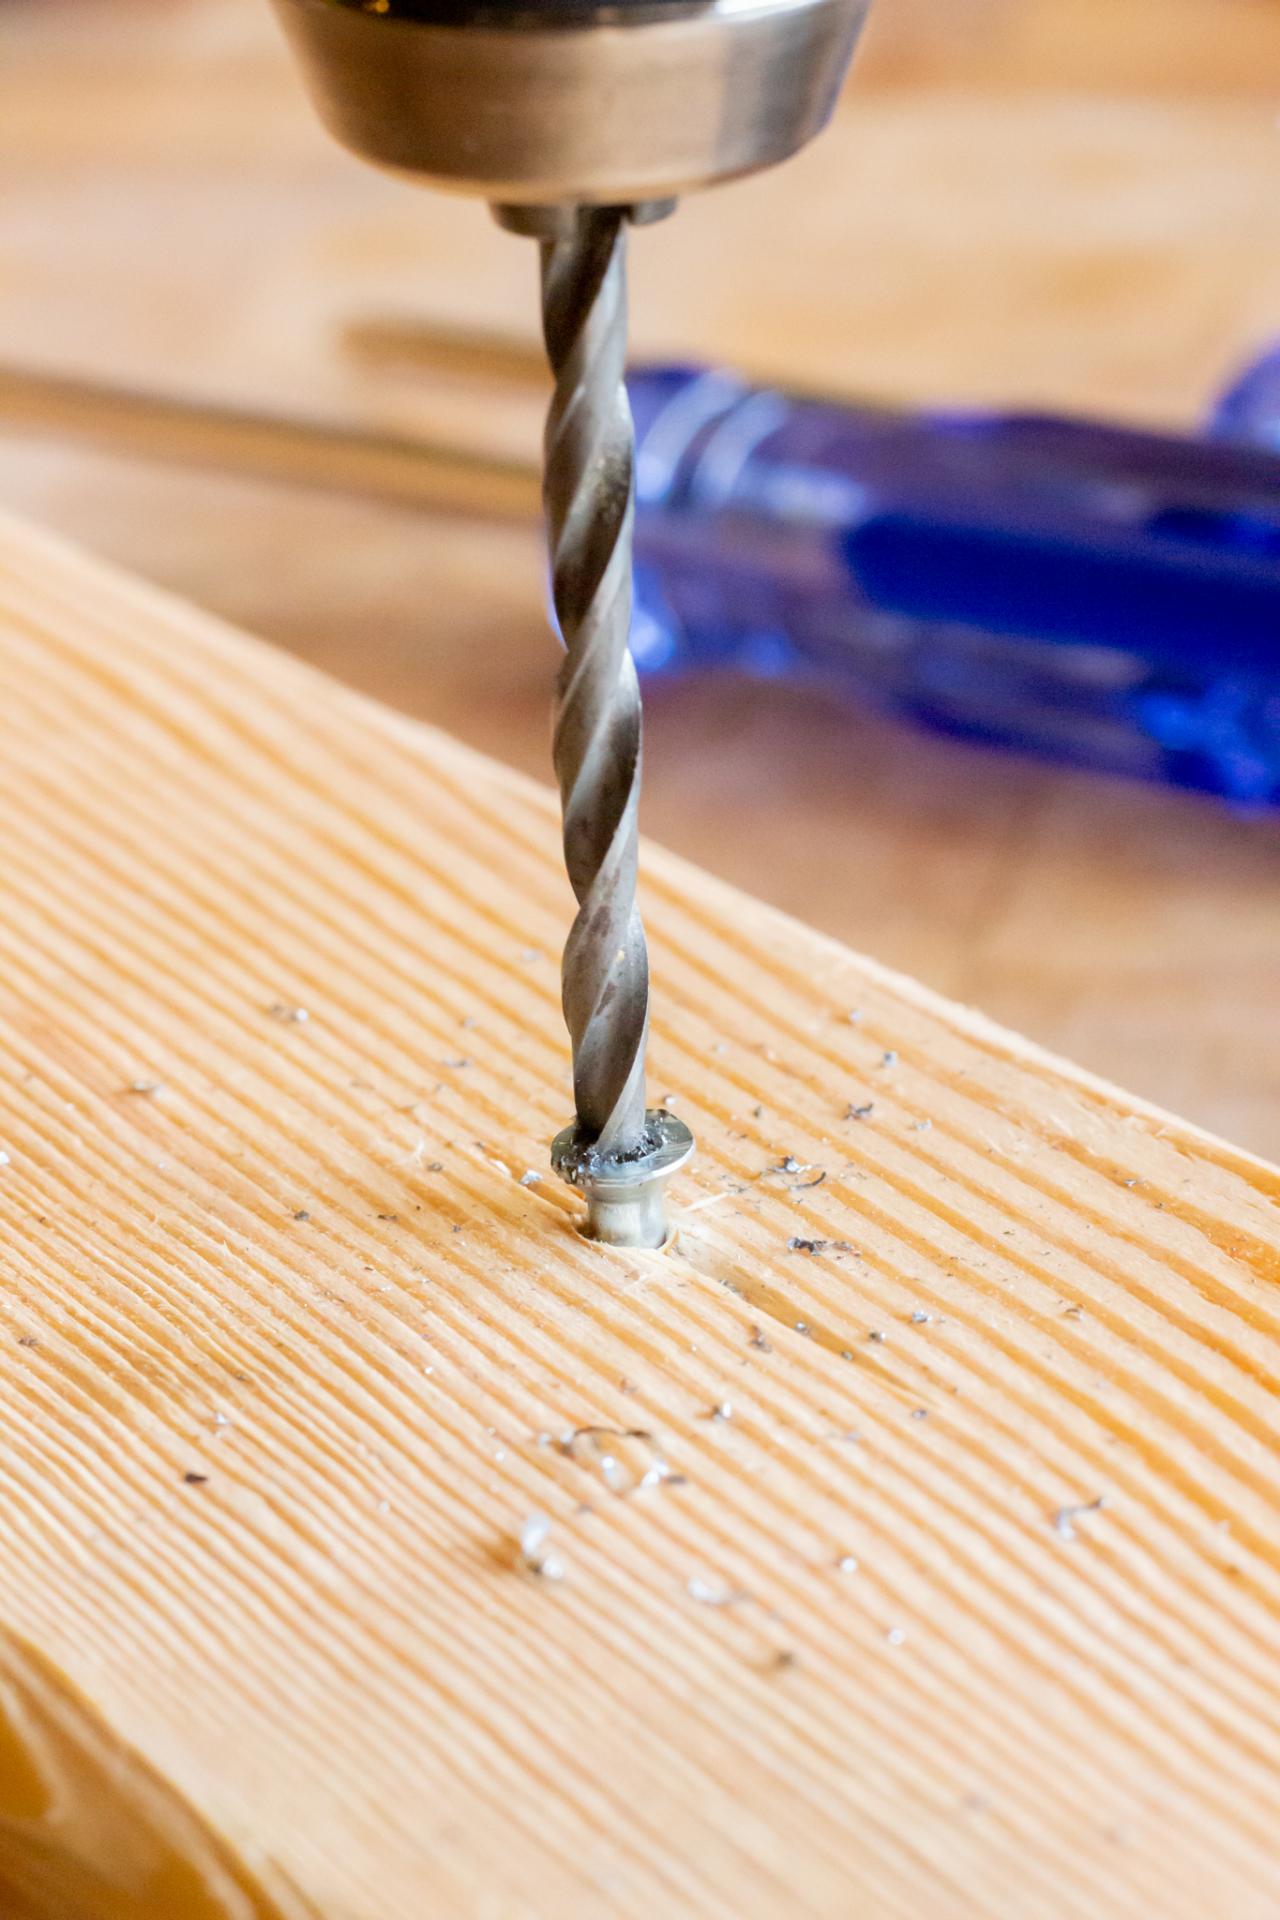
8. Reverse Drill
Once your screw’s head is beyond the help of a standard screwdriver, it’s time to get more creative. Sometimes, all it takes is a drill bit to remove a screw with no head left. Simply choose a drill bit that fits into the hole of the screw and begin drilling in reverse. The sharp edges of the drill bit will bite into the screw's soft metal, pulling the screw out in the process. If it doesn't work, opt for a larger drill bit and try again.

Kamron Sanders
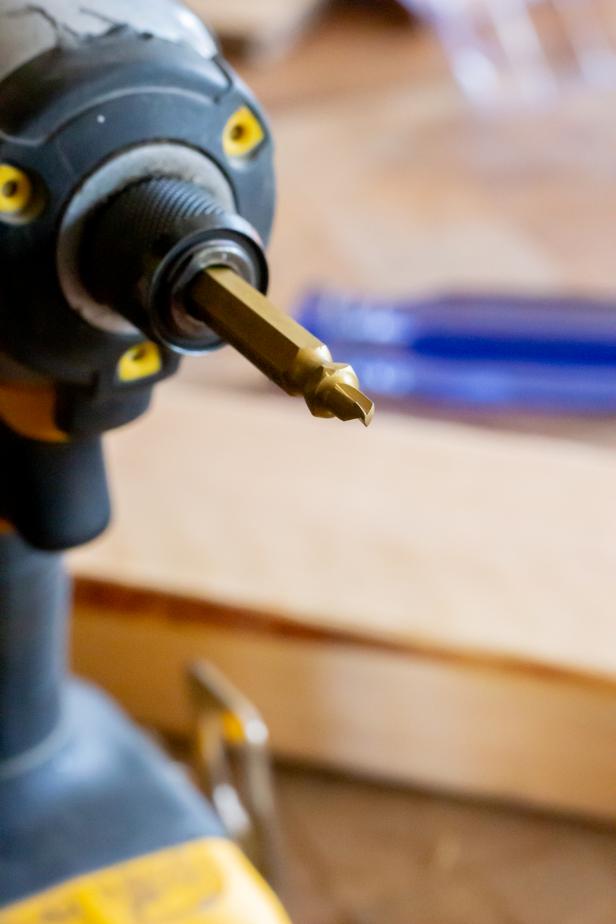
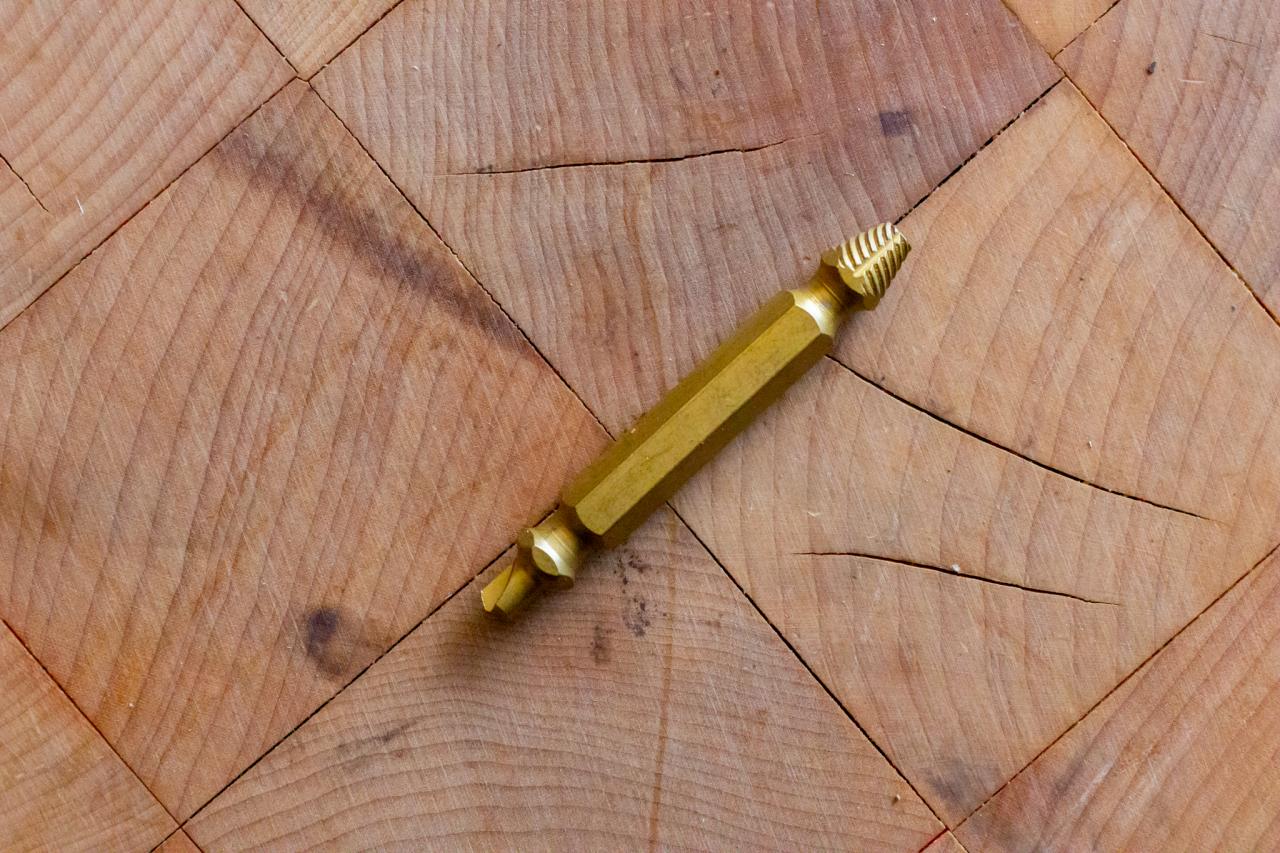
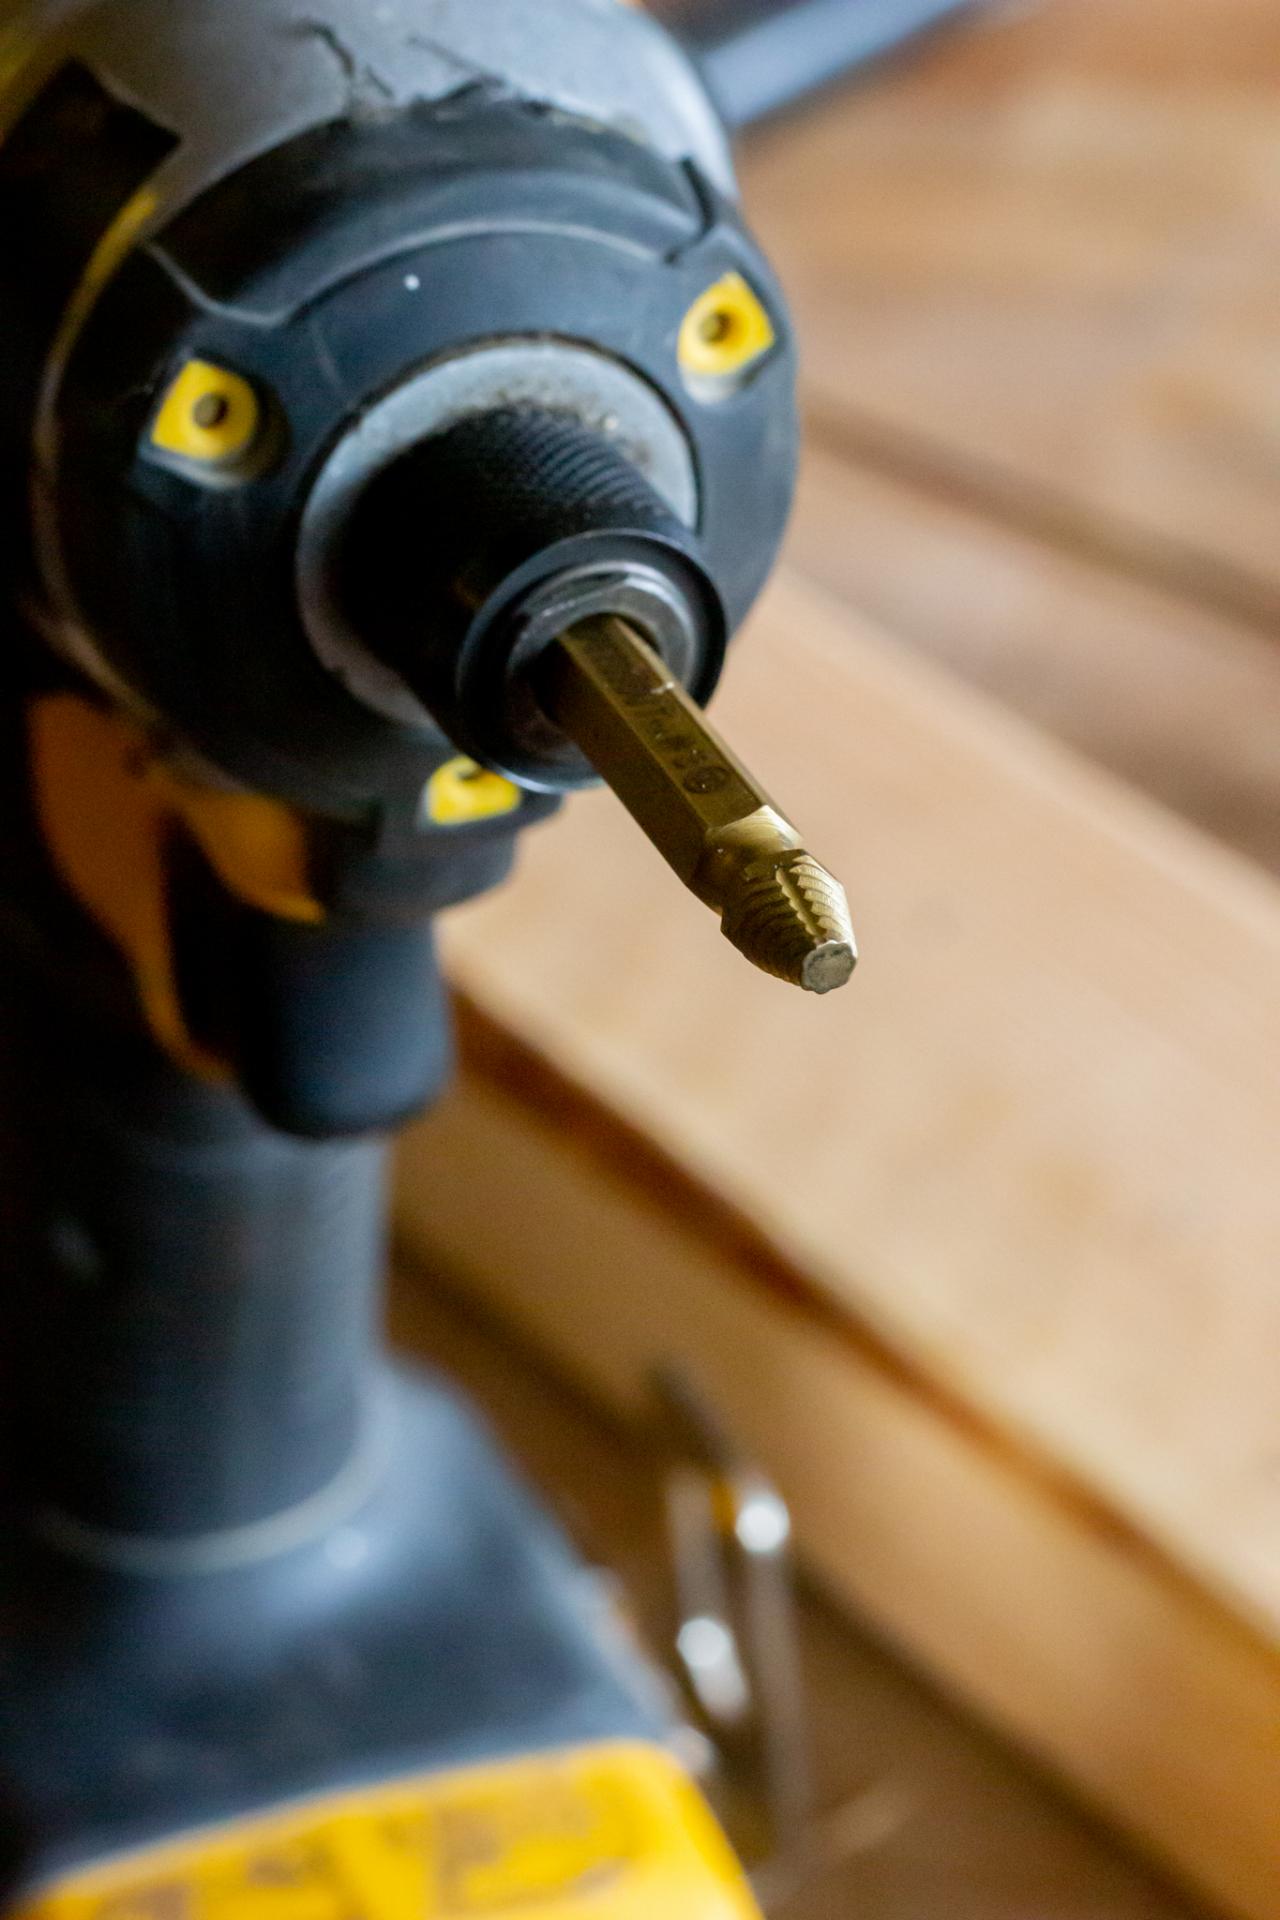
9. Stripped Screw Removal Tool
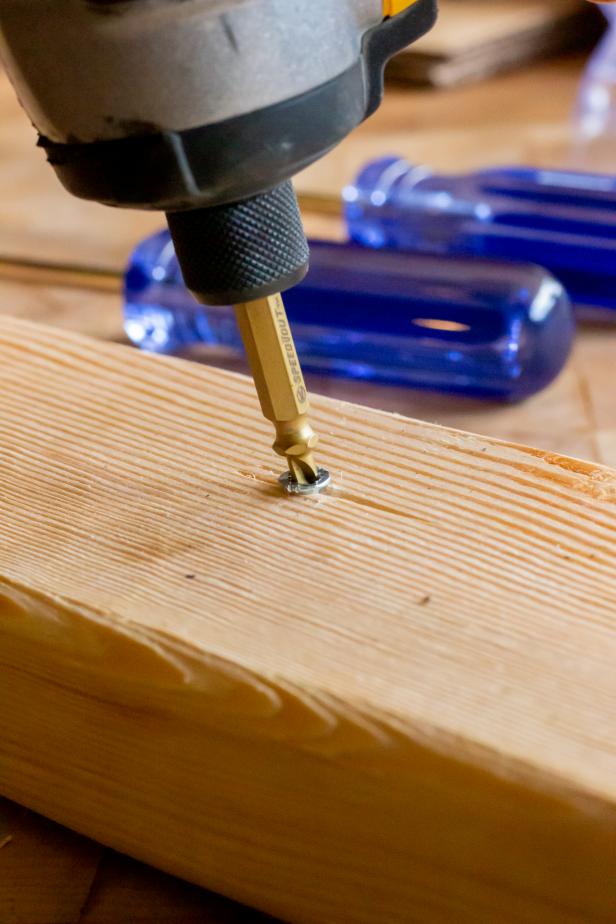
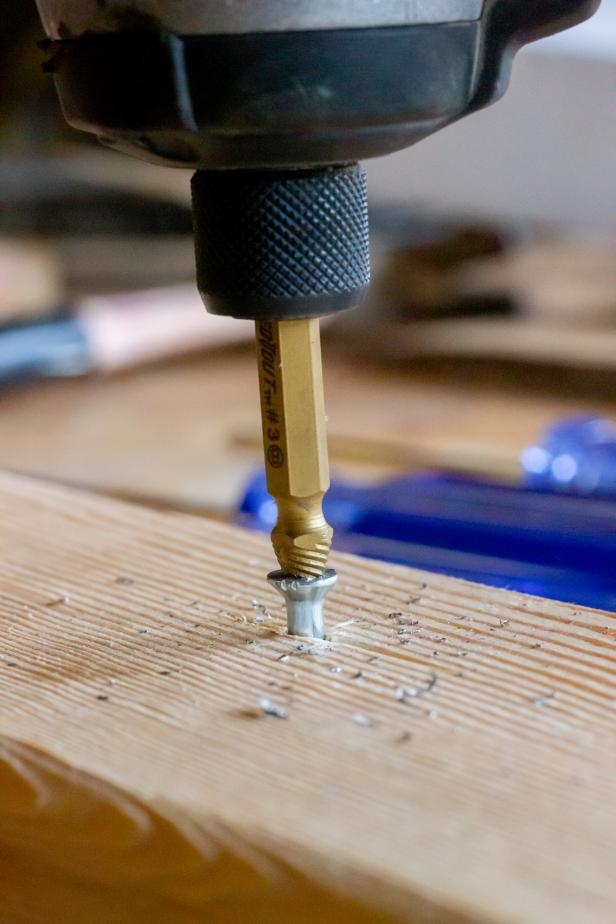
If you’ve exhausted all the methods on this list, it may be time to opt for a stripped screw removal tool (Image 1). This double-sided bit features a cutting side and a removal side and works with any drill or impact driver. Begin by placing the bit in your drill with the cutting side out (Image 2). With the drill in reverse, cut the damaged screw head until a clean hole is left (Image 3). Next, flip the bit around to the removal side and repeat the process (Images 4 and 5). The reverse threads on the tool will promptly grab the screw and remove it.
Pro Tip: If the screw you’re attempting to remove must be reused and cannot be replaced, this is not the method for you. Though highly effective, opt for a different method to avoid rendering the screw unusable.

Kamron Sanders
Kamron Sanders
Kamron Sanders

Kamron Sanders
Kamron Sanders

How to Use a Power Drill
Using a drill doesn't have to be intimidating — use this handy guide to learn about the different parts, how to use it and how to take care of it.


