


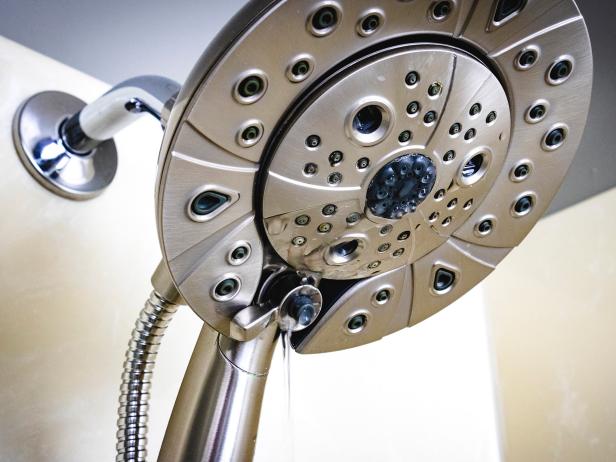
How to Fix a Leaky Showerhead
If your shower keeps dripping long after you’ve shut off the water, you’ve probably got a bad valve. It’s an easy repair you can do yourself in less than an hour.
Derek Trimble

The valve behind your shower's handle is the most frequent cause of dripping from the showerhead. And while it might seem like a daunting thing to replace, it's actually pretty easy to fix a leaky showerhead. The first step is to turn off the main water valve to the shower and then follow these easy steps.
Materials Needed
- screwdriver or Allen wrench
- rubber strap wrench
- replacement valve or new gaskets and grommets
- masking tape
Remove Trim Pieces

Derek Trimble

Derek Trimble

Derek Trimble

Derek Trimble

Derek Trimble
After you’ve turned off the water to your shower, you’ll need to remove the faucet handle. Depending on the manufacturer you’ll either pry this off with a small flat head screwdriver or you may have a small allen bolt holding the knob from underneath that you’ll need to unscrew. If it’s the latter, look for a tiny hole on the underside of the faucet handle. This shower has two controls (pressure and temperature) so there are a few more parts but the principle is the same. Next, unscrew the outer plate with a Phillip’s head screwdriver and set everything aside.
Remove Valve Collar

Derek Trimble
Derek Trimble
The next step is the easiest one, but it comes with a word of caution. You want to remove the shiny collar that rests over the valve just by pulling it by hand. However, the rubber gasket that’s underneath the collar needs to stay behind. It’s a good idea to roll this backward so it’s out of your way, but you’re going to need it when you put things back together.
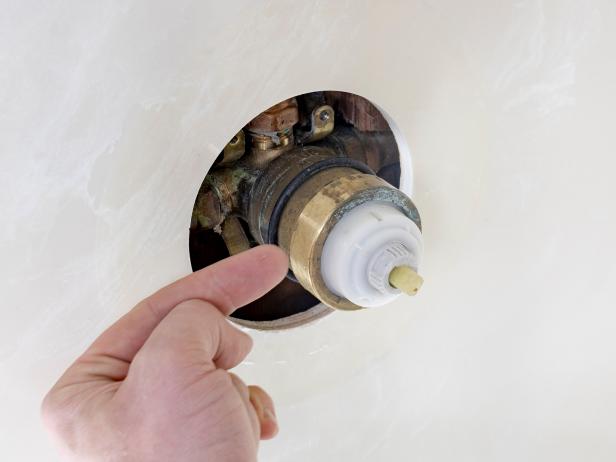
Gently Remove Valve Bushing

Derek Trimble
Now you should notice that there’s a large brass bushing that holds the valve in place. The best way to unscrew this is with a soft rubber strap wrench. This will keep you from marring the surface and it’s a safer and easier way to grip something wet and slippery. Tighten the strap around the bushing and crank it gently to the left. Be prepared for some water to come out, as there’s likely still a little pressure behind the valve. Do not unscrew the entire bushing all at once. Go slowly, let the water seep out and only take the bushing off. There are a few springs resting behind the valve and if you go too fast, everything is going to come flying out.
Removing Valve and Seals

Derek Trimble

Derek Trimble

Derek Trimble
Slowly remove the valve and use your flashlight to peek inside the valve body. You’ll see two holes for water; hot on the left and cold on the right. Make note of which side the hot water is on (stick a piece of masking tape on the shower wall if you’re forgetful) this will be important during your re-build. Each hole has a small gasket around it, and a set of grommets with springs set inside. The best tool for removing and installing these parts is a pencil. Stick your pencil in each hole and remove the grommets, then gently remove the outer gasket.
Replace or Rebuild? It's Up to You

Derek Trimble
At this point, you have a choice. If your valve looks to be in good condition, you can simply install new gaskets and grommets and put everything back together. It’s a good way to save money, but since you’ve done the work this far it’s probably best to replace the whole valve. This is also a good opportunity to change out your shower trim if you’re looking to update your shower faucet. No matter which option you choose, it’s a good idea to take your old valve to the plumbing supply store so that you can find the right parts. Make note of the brand and model number to make sure you get the right parts. Your shower won’t work if you install the wrong type of valve and remember that your valve is specific to your faucet brand. For example, if you have a Delta faucet, you're going to need a Delta valve.
Put it Back Together

Derek Trimble

Derek Trimble

Derek Trimble

Derek Trimble
No matter which option you choose, your installation is going to be the reverse of your disassembly. Start by seating the gasket, use your pencil to push the grommets and springs into the valve body holes, and press and hold the valve in place. Make sure you’ve got the side of the valve labeled HOT oriented in the correct position (usually to the left) and tighten the bushing by hand. Give the bushing one very gentle twist with the strap wrench and then turn on the water. You should be able to test everything by twisting the valve stem by hand. Test your hot and cold water, and make sure your drips have stopped before moving on to the last step. If your hot water isn’t working, you might have the valve installed in the wrong orientation. If your shower still drips, you might not have your gaskets seated all the way inside the valve body.
Re-Install Trim
Derek Trimble

Derek Trimble

Derek Trimble
Remember that big rubber gasket we left alone in step 2? Now you’re going to need to roll it forward until it rests behind the valve bushing. Take your valve collar and push it over the valve body so that it rolls over that gasket. This will keep any errant drips from going into the wall, so make sure that the gasket is UNDERNEATH the valve collar. Next, simply screw the wall plate in place and re-install your faucet handle and you're all set.


