


How to Build a Reclaimed Wood Office Desk
Learn how to build a basic desk using reclaimed dimension lumber and upcycled industrial legs.
To build our desk, we used reclaimed wood floor joists and a set of vintage, cast-iron table legs for the base. But you can easily make this desk using new lumber and table legs. Also optional is the shallow pencil drawer we added to the underside of our desk for a little extra storage. For the finish, we applied just a little paste wax to highlight the reclaimed wood's natural grain.

Darren Setlow Photography, LLC
Tools and Materials
- plunge router
- circular saw
- table saw
- orbital sander
- bench-top planer
- pipe clamps
- adjustable wrench
- drill and various sized bits
- 2" and 2-1/2' wood screws
- biscuit joiner and #20 biscuits
- tape measure
- framing square
- hammer and nail puller
- 15-gauge finish nailer and small air compressor
- 15-gauge 2" angled finish nails
- 22' of reclaimed 1x lumber
- reclaimed 2x8s, 6'-8' long
- 5/16" x 6" carriage bolts with nut and lock washer
- 24" adjustable cast iron table base legs
- type II wood glue
- furniture-grade paste wax
- safety glasses, dust mask, work gloves & ear plugs
- 13' of reclaimed 1x4 (optional for drawer)
- 12" drawer slides (optional for drawer)
- 1/2" plywood cut to 22-1/2" x 10-1/2" (optional for drawer)
Step 1: Gather Reclaimed Wood
Reclaimed wood has a surface and patina almost impossible to recreate. The good news is that one person's junk is another's treasure. If you know someone doing a major renovation on an older house, chances are you can find 2x6 rafters or 2x8 floor joists ready to be saved from the landfill. Architectural salvage and rural antique shops are also good sources for reclaimed wood. While we used reclaimed flooring, new wood could also be used.

Darren Setlow Photography, LLC
Step 2: Choose Table Legs
Adjustable cast-iron industrial bases can be found at antiques shops or ordered online for less than $100. Choose bases that measure at least 24 inches tall.

Darren Setlow Photography, LLC
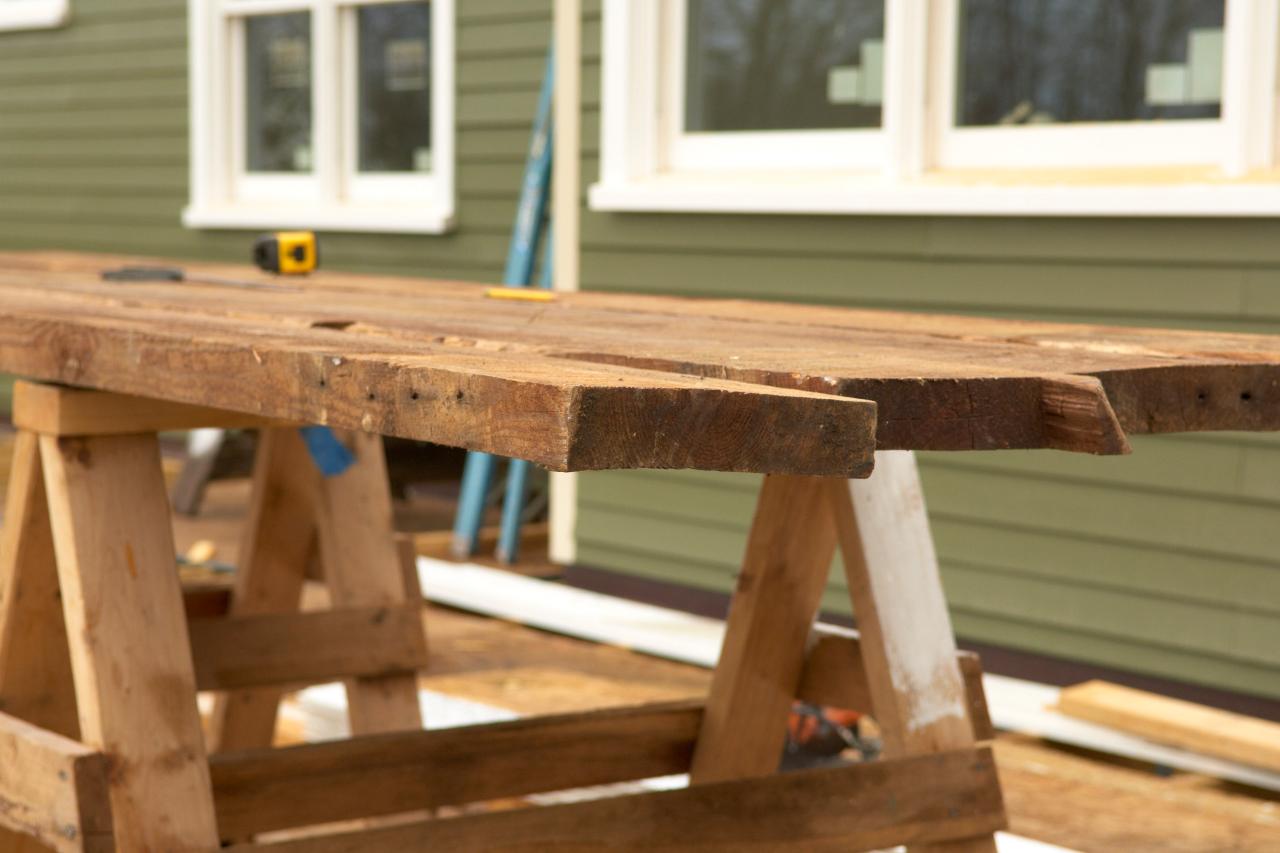
Step 3: Prepare Top Planks
Before starting, be sure the wood is completely dry. Material that's been sitting on a job site will likely have high interior moisture levels from rain. If the material came from a climate-controlled space, it's probably dry enough to use. Remember that if you are using floor joists, they existed in a space subject to high moisture levels — crawlspaces. When you move moist wood inside your house, it will dry out and change shape. This is not something you want after the table is done. The best way to dry your reclaimed wood is in a kiln. A local mill might be willing to dry the wood for you. Another option is to store the wood inside during the winter. In a heated building, the air movement, low winter humidity and heat will dry the wood for you. If you're going to do this, stack the wood with 1-inch spacers between layers.
Depending on the condition of the wood and type of finish you want for the top, sanding the board may be a viable option. However, there is a good chance that, due to moisture and time, your planks will be slightly cupped or twisted. The quickest way to correct this is with a tabletop planer. Though not incredibly expensive, it's not a common tool in most garages. You may be able to rent one or a local millwork shop might be willing to plane them down for a small fee.*
* Pro Tip: Due to the possibility of concealed nails and/or embedded dirt, some shops will decline this job due to the likelihood of dulling and damaging the blades on their tools. Be extra sure to pull all nails and punch through any with broken-off heads. A metal detector can be used to help locate nails embedded in the wood. Small tabletop planers have less expensive replacement blades. If all options fail, a wide-belt, handheld belt sander will work after joining the planks. Run the sander with the belt perpendicular to the plank joints and move it consistently back and forth parallel to the joint.
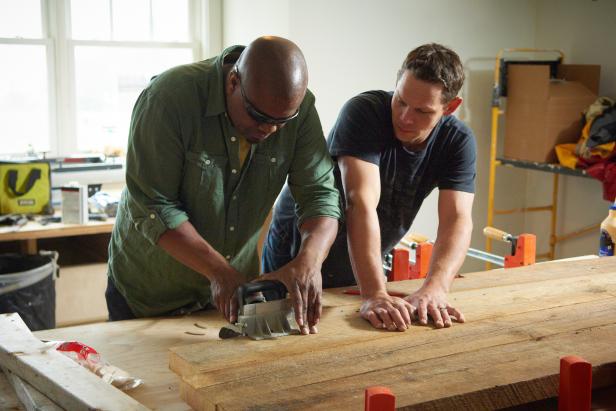
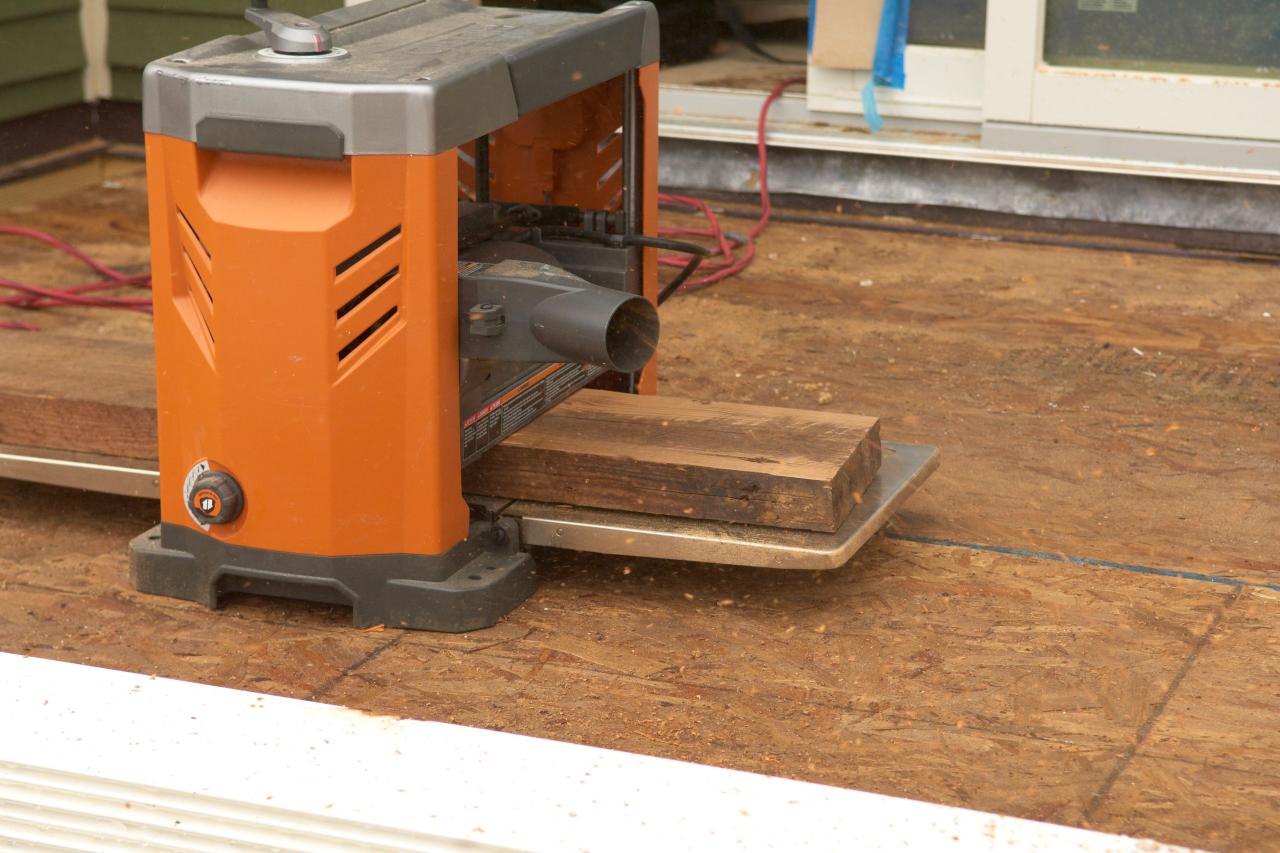
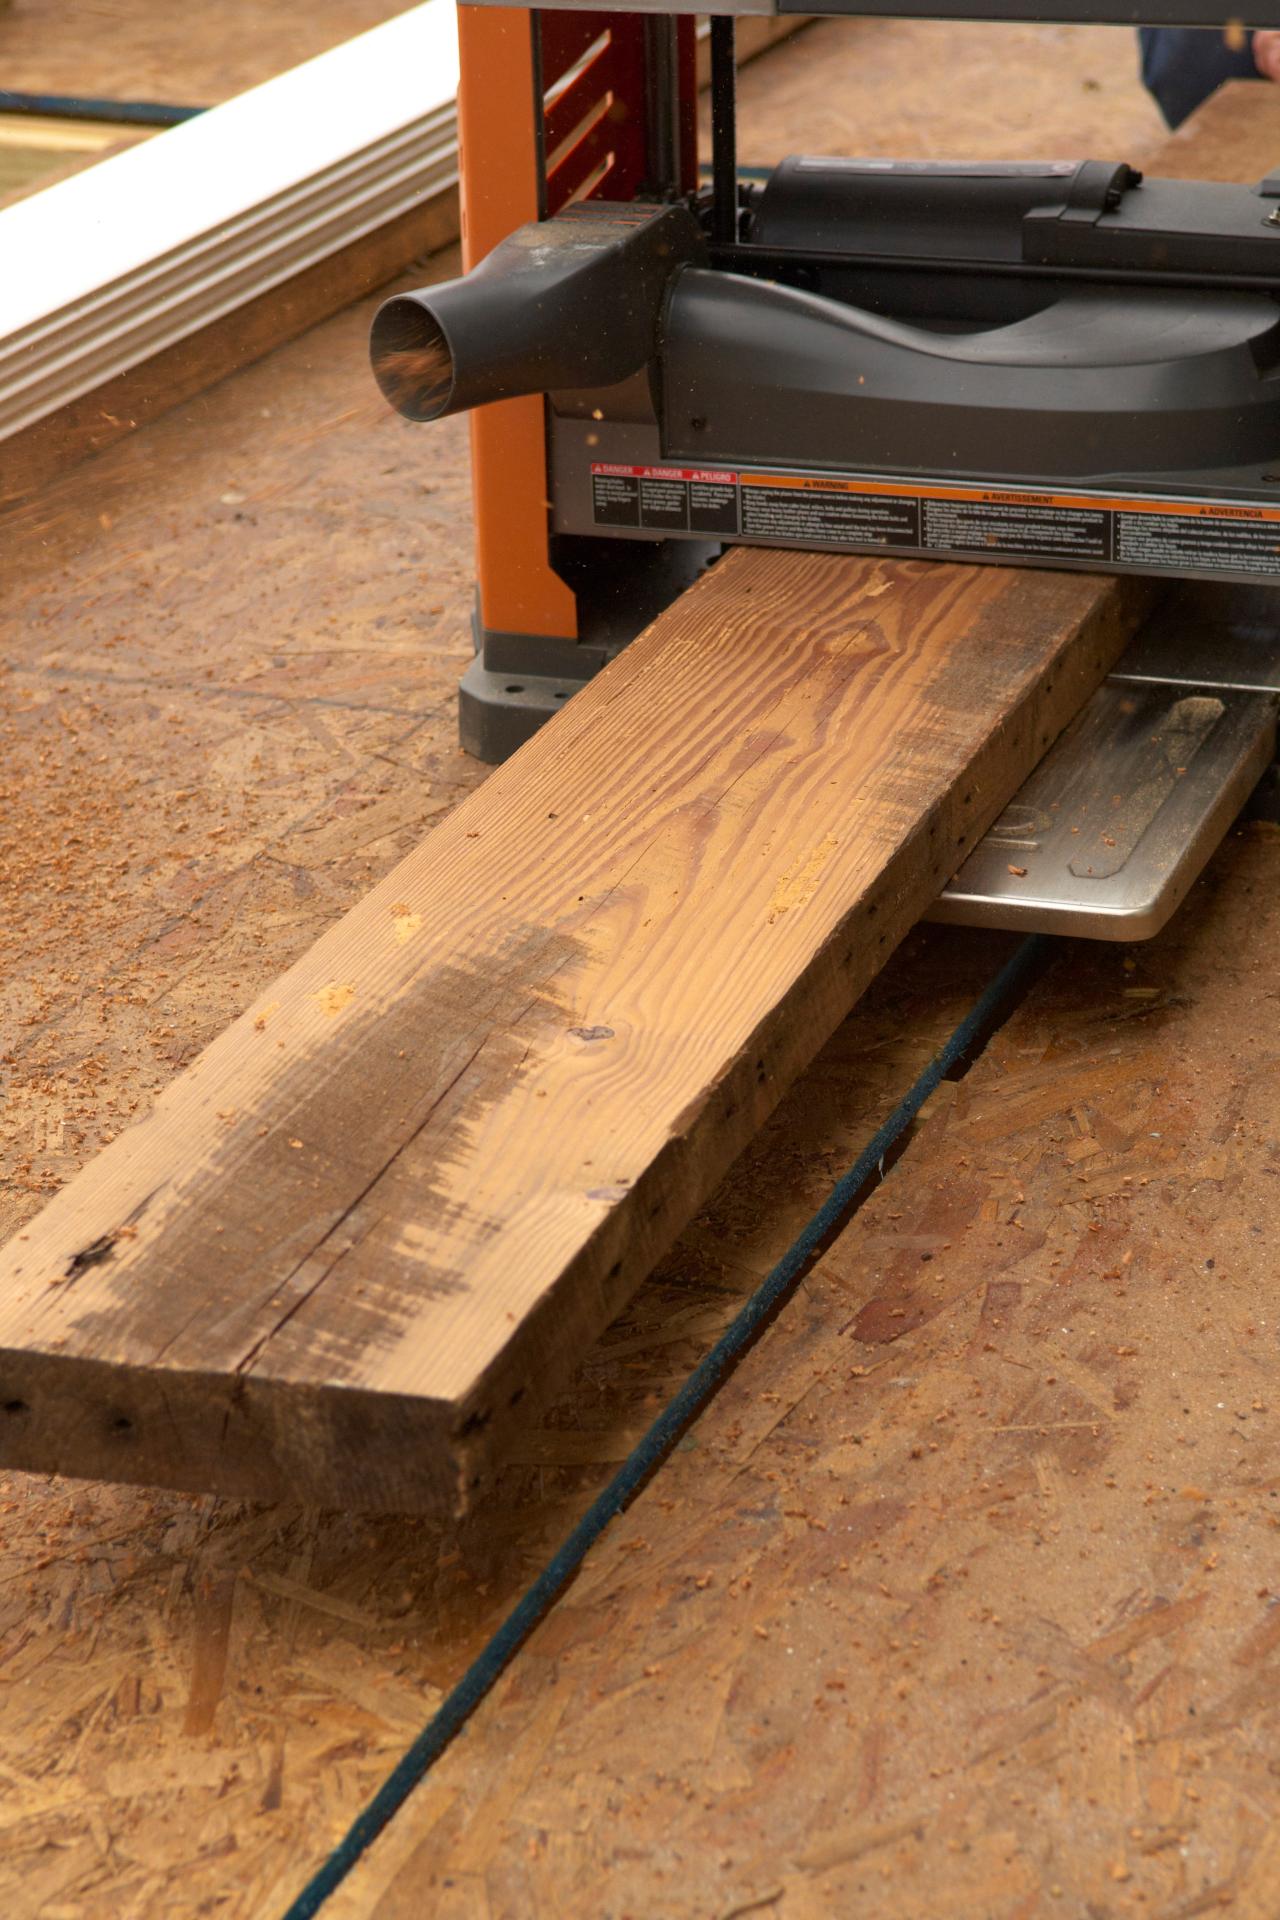
If you are using a tabletop planer (Images 1 & 2), start by checking for nails and excess dirt. Then rough cut the boards long to your finished dimension. Final cutting will be done after the planks are joined, so leave them at least 1 inch long. Run them through the planer, taking off a small amount at each pass.
You will need to manually adjust the depth of cut while the board is going through. This is important since the board will not be consistent in thickness (or twist) over its length. You, the board or the planer could sustain damage if you do not manually adjust it for a small cut at all times. Keep running the boards through until the blade has slightly touched all surfaces. Do not worry if the boards are a slightly different thickness (less than 1/8-inch difference); we'll fix that later. Next, run the boards through a table saw so that each side is parallel. Only take off enough so that the blade cuts along the entire edge. Each plank does not need to be the exact same width, only a consistent width along its length.

Darren Setlow Photography, LLC

Darren Setlow Photography, LLC
Step 4: Cut Biscuit Slots
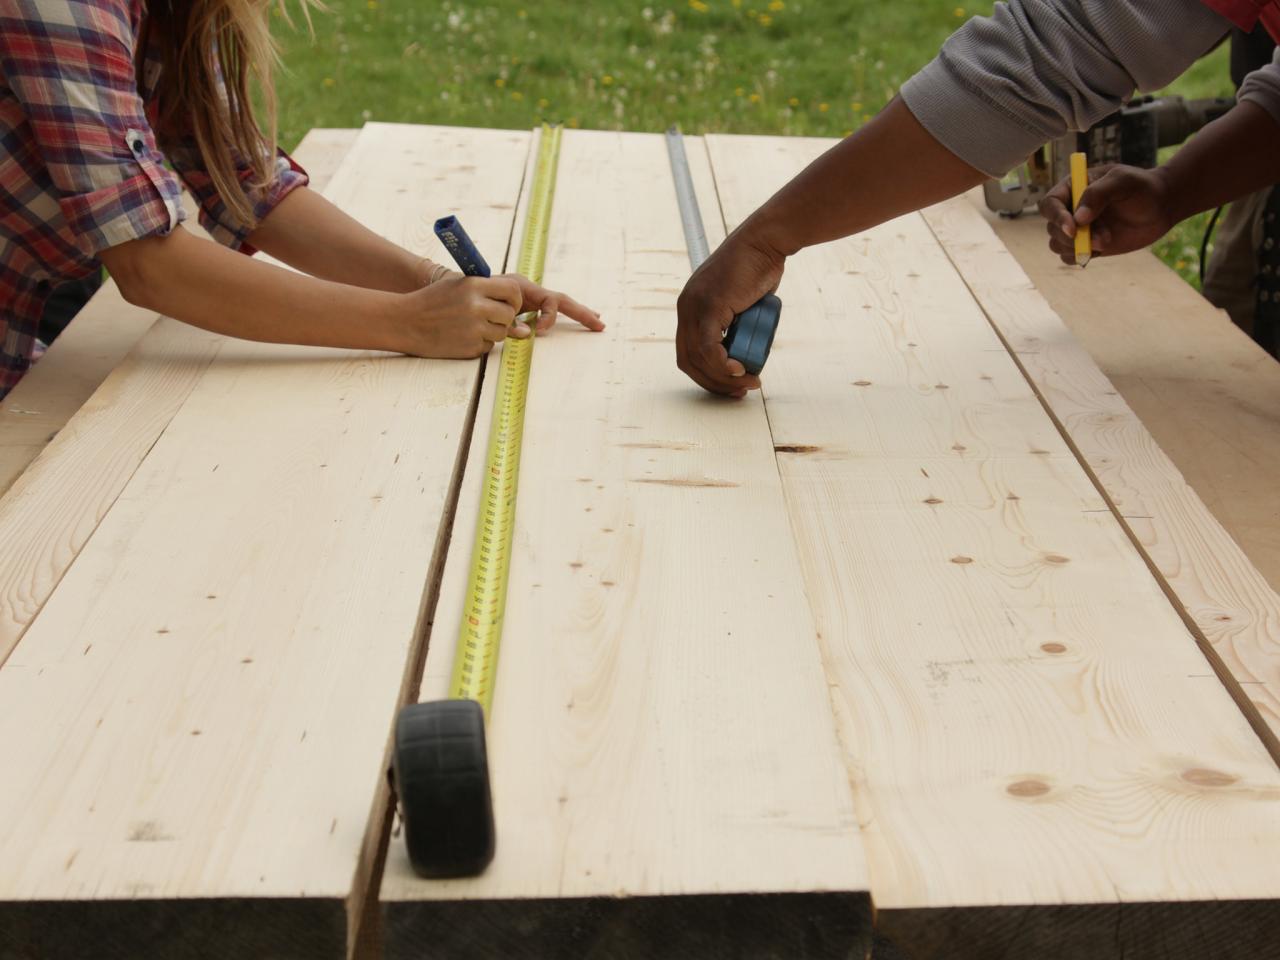
Set biscuit joiner depth to #20. Lay the four best planks out on a flat surface and arrange them in the final position. With a pencil and working across two boards at a time, make a mark every 8 inches along the seam of two boards (Image 1). After marks are made, use the joiner to cut the biscuit slots at each location (Image 2). Align the reference mark on the tool and hold the top plate firmly flat against the board. In one smooth motion, plunge the tool until it hits the stop.
Note: Do not cut joints on outside edges of the first and last board (the outside boards).

Darren Setlow Photography, LLC
Darren Setlow Photography, LLC
Step 5: Assemble Tabletop
After all the slots are cut (Image 1), stand each board on end (Image 2) and coat the edge of the jointed side with wood glue.
Next, coat the biscuits with glue. Insert biscuits in one side only of each board, then insert glued biscuits in the empty joint of the next board (Images 3 & 4). Assemble planks in order until the top is complete. Don't worry about small gaps. Next, carefully lay the top down and attach pipe clamps at roughly 1-inch intervals. Slowly tighten each pipe clamp in a consistent fashion until the gaps disappear.* Small amounts of glue can be removed when dry (Image 5); scrape up any puddled glue with a plastic putty knife. To minimize sanding later, avoid working glue into the top of the wood. Let the top set overnight.
*Pro Tip: Do not over-tighten the pipe clamps, as the top will eventually bow. Clamp a cross piece of 2x4 (perpendicular to the planks) before fully tightening the clamps to keep planks flat during the drying process.
Once the top is dry, remove the clamps from the top and check for relative flatness to the assembly. Use a small handheld planer or razor to remove any dried glue. Mark each end a 1/2 inch in from the shortest board and make a clean perpendicular crosscut.

Darren Setlow Photography, LLC

Darren Setlow Photography, LLC

Darren Setlow Photography, LLC

Darren Setlow Photography, LLC

Darren Setlow Photography, LLC
Step 6: Prepare the Leg Base
Cut the remaining 2x8 into four equal pieces roughly 2 feet long. These will be used to create the base to attach the legs to the underside of the tabletop.
Bevel the edges of two pieces at 45 degrees with a circular saw. Flip over the tabletop and, if the tabletop boards are relatively flat (remember the biscuit joiner ensured the tops would line up), attach the base supports directly to the tabletop using 2-1/2-inch screws. Then stack the beveled pieces on top of the unbeveled pieces and secure with 2-1/2-inch screws (the beveled pieces will be on the bottom when the desk is right-side up). Another option if you're looking for a more secure assembly is to recess the unbeveled pieces into the underside of the tabletop. To do this, use a plunge-router to create the recessed pocket. Do this roughly 1 foot in from each side. Mark the location by squaring the board and tracing around the perimeter. Plunge route 1/4 inch at both locations (Image 1). Coat the recessed pocket with a thin layer of wood glue. Tack this piece in place with 2-1/2-inch finish nails (Image 2). Then attached the beveled pieces on top of the unbeveled pieces (Image 3).

Darren Setlow Photography, LLC

Darren Setlow Photography, LLC

Darren Setlow Photography, LLC
Step 7: Mount the Leg Base and Legs
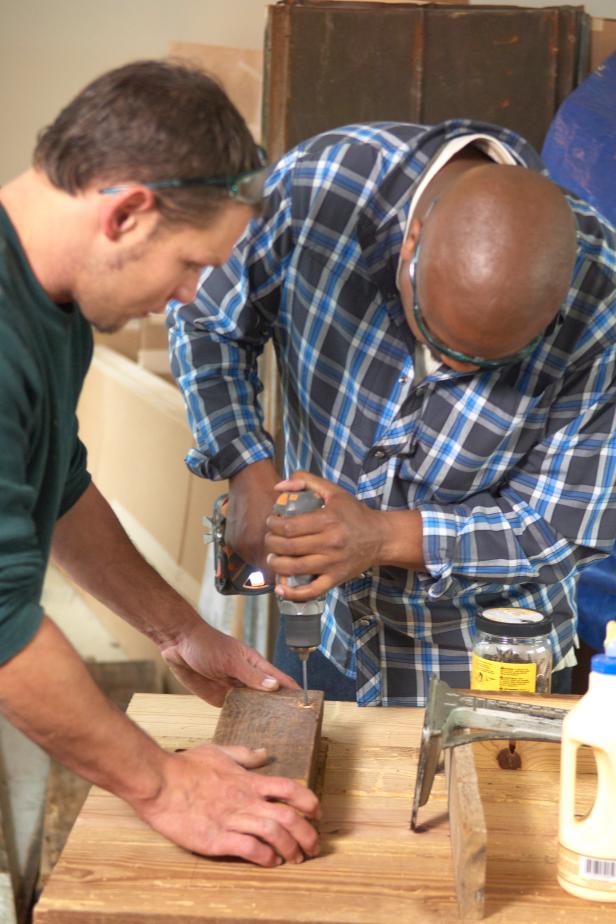
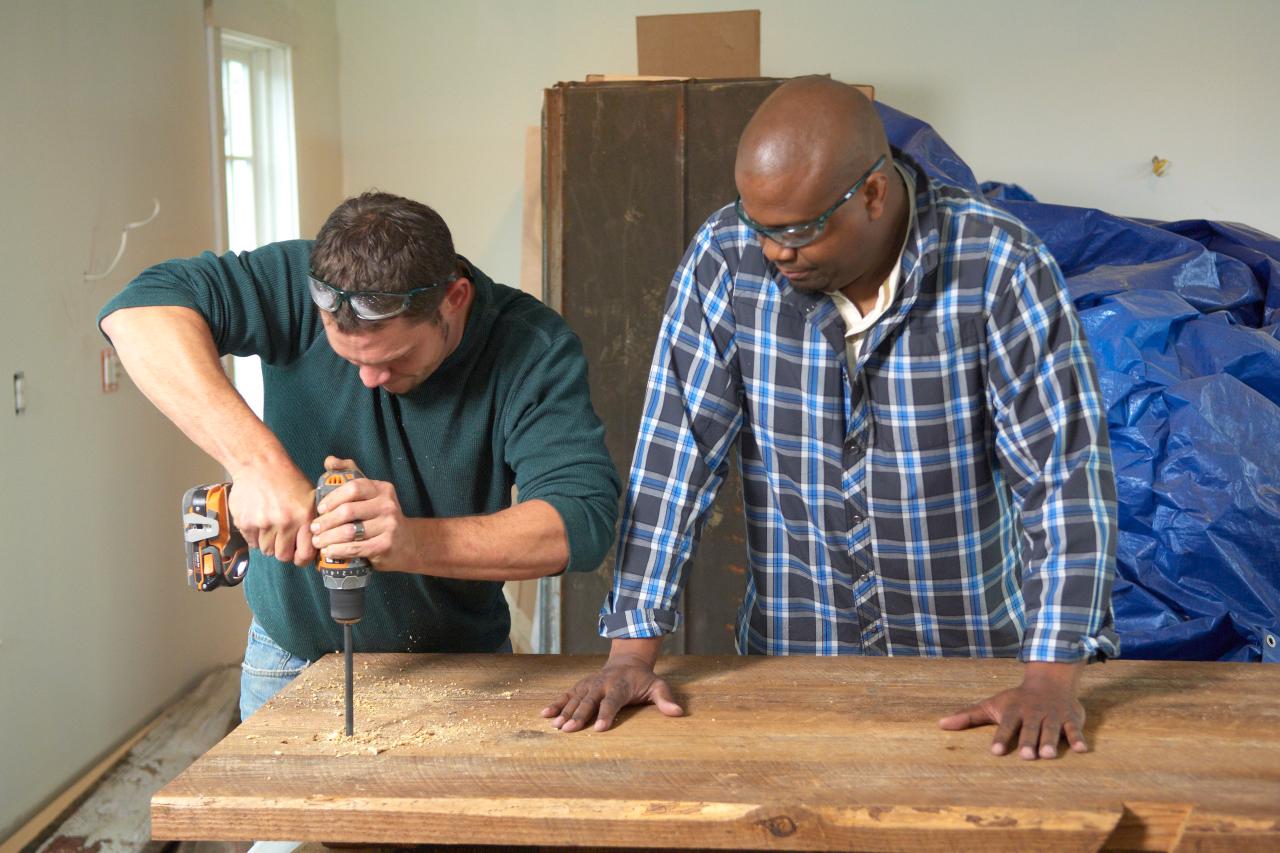
Center the metal table legs on the base support and mark the center of the mounting holes. Using a long pilot bit, drill perpendicular to the board and through the top (Image 1). Choose carriage bolts that are 1/16 inch smaller than the mounting holes for the legs. Using a bit 1/16 inch larger than the carriage bolts, drill down through the pilot holes (Image 2). Install the legs (Image 3) and loosely tighten the carriage bolt nuts (Image 4). Ask a helper to hold the top while you tighten each nut. Only tighten until the top of the carriage bolt slightly pulls into the top.
Darren Setlow Photography, LLC

Darren Setlow Photography, LLC

Darren Setlow Photography, LLC

Darren Setlow Photography, LLC
Step 8: Finish the Top
If you wish to cover the end grain on the sides of the tabletop, rip down a reclaimed 1x to create edge banding. Square cut the ends of the 1x and then attach it using wood glue and 15-gauge finish nails. Sand the top or leave as is. To accentuate the existing wood tone, apply clear furniture wax or polyurethane.

Darren Setlow Photography, LLC
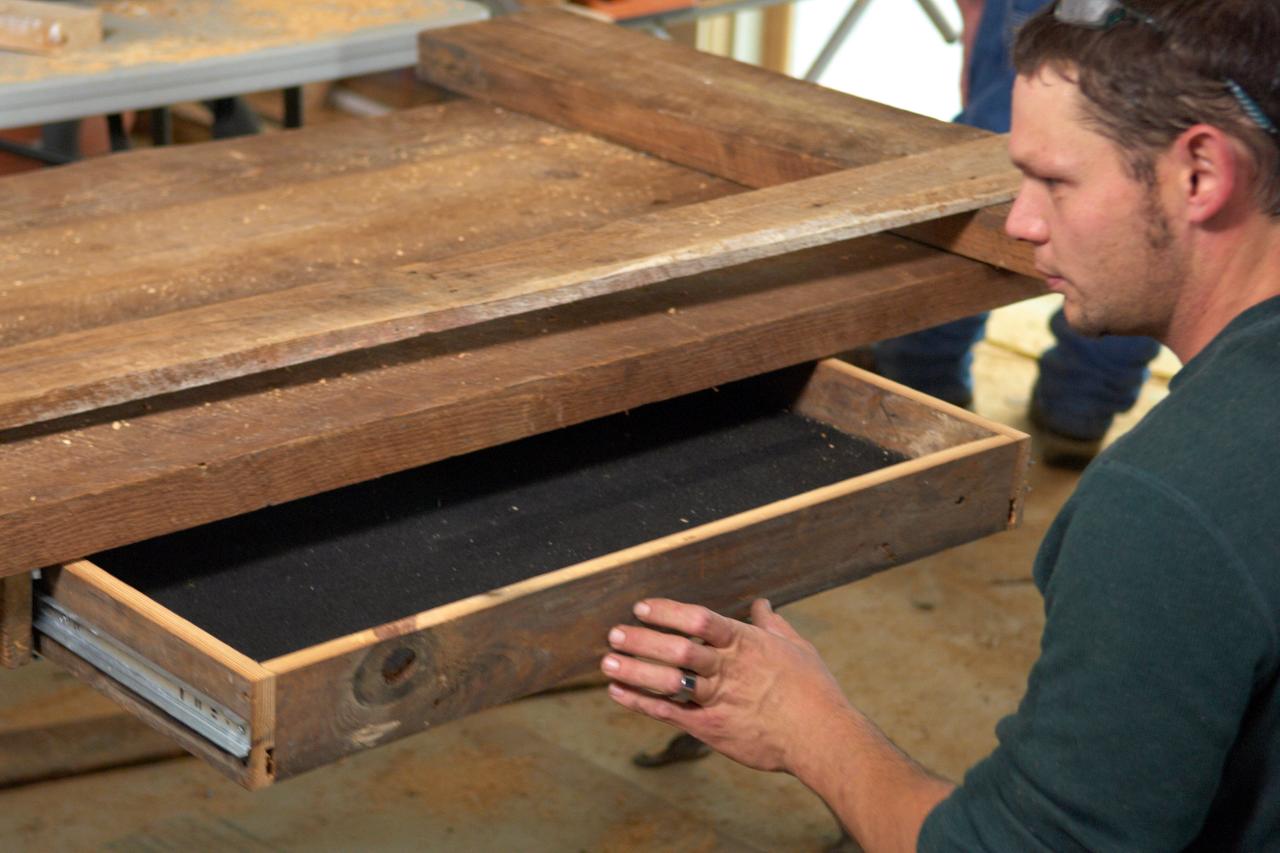
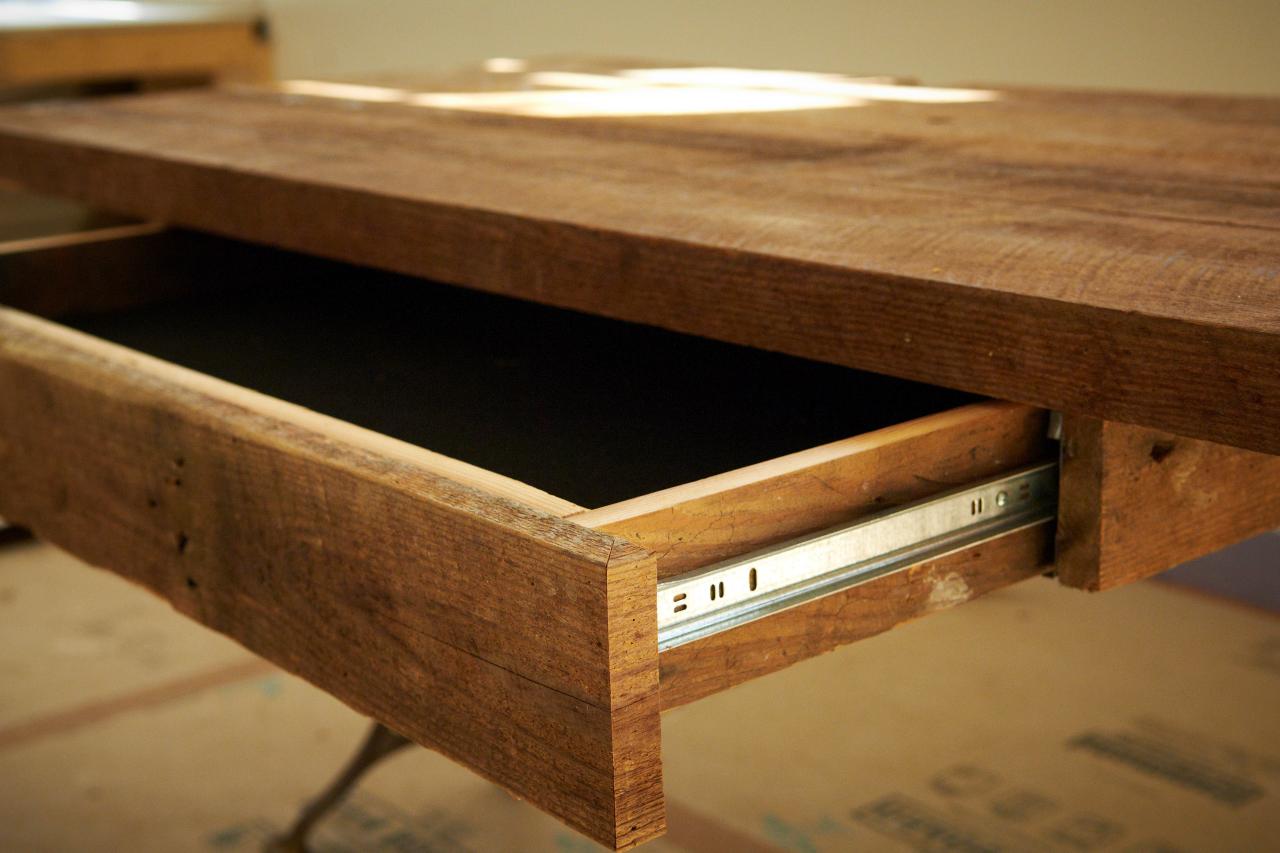
Step 9: Make Desk Drawer (Optional)
Approximately 13 feet of reclaimed 1x4 will be needed to create a 24" x 12" drawer box and the drawer frame (Images 1 & 2).
Start by making the drawer box. Cut two pieces to 22-1/2 inches and two pieces to 12 feet. For the bottom of the drawer, cut a piece of 1/2-inch plywood to 22-1/2" x 10-1/2". Fasten all four drawer box sides to the drawer bottom using wood glue and 15-gauge finish nails. For the drawer’s face frame, cut a piece of 1x4 to 28 inches. Center this piece to the front of the drawer box and attach it using wood glue and finish nails. (The face frame should overhang the box by a couple of inches on each side.) Install the 12-inch drawer slide hardware to each side of the box.
To make the drawer frame, cut two 1x4s to 14 inches for the sides. Attach the second side of the drawer-slide hardware to these pieces then insert the drawer box and double-check that slides work properly. Next, cut a 1x4 to be the back of the drawer frame; measure the full width of the back of the drawer box including the sides of the frame (it should be about 24 inches).
Remove the drawer box from the two side pieces of the frame. Use wood glue and finish nails to attach the back of the drawer frame to the sides of the drawer frame. Again, you may want to double-check that the drawer box fits properly in the frame before you attach the frame to the underside of the desk. Flip the desk over and align the drawer frame so the sides are 1 inch back from the edge and centered on the long side of the desktop (Image 3). Attach the drawer frame to the using wood glue and 2-inch screws. Toenail the screws through the outside of the drawer frame and onto the underside of the desk.

Darren Setlow Photography, LLC

Darren Setlow Photography, LLC

Darren Setlow Photography, LLC


