


Space-Enhancing Office Desk
Take advantage of a hard-to-use corner or simply double down on space with this L-shaped DIY office desk.


The days of working from your much-too-short coffee table and uncomfortable kitchen table are over. Have a place for all your stuff and add an interesting furniture piece as well with this DIY desk. Not only does it bring order to your office, wherever it’s located, but it can also act as an accent piece to your home. It's the best of both worlds.
Materials Needed
- (2) 2x2 x 8’ pine boards
- 4x8 sheet of 3/4” stain-grade maple plywood
- 2” brad nails
- brad nailer
- tack cloth
- 220-grit sandpaper
- orbital sander
- wood glue
- pre-stain wood conditioner
- stain
- varnish
- (4) 2” heavy duty corner braces + hardware
- (4) 1” corner braces + hardware
- (4) 8” corner braces
- wood filler
- putty knife
- (8) #8 3” wood screws
- (4) #8 2” wood screws
- (16) #10 3/4” inch wood screws
- iron
- maple edge banding
- utility knife
- drill
- interior white paint
- paint brush
- square
Cut Wood
Using a circular saw, follow the cut guide, below, to cut out your plywood pieces. The only wood outsourced beyond the plywood sheet are the support legs. For these, cut the 2x2s into two 22-inch pieces and two 24-3/4-inch pieces.

RTR Media
Pro Tip: When cutting with a circular saw, you’re faced with the decision to cut left of the line, right of the line or on the line. Because you’re obtaining all your pieces from one plywood sheet, we recommend cutting on your line for consistency. It may seem like the difference would be negligible, but it can save lots of frustration in the long run.
Make Leg Frame
Once your pieces are cut, make a frame by placing the two 22-inch pieces on the top and bottom and the two 24-3/4-inch pieces on the sides. Attach with wood glue and 3-inch wood screws. Take time to pre-drill the holes to keep the wood from splitting and aid with easier alignment.
Assemble Cubby
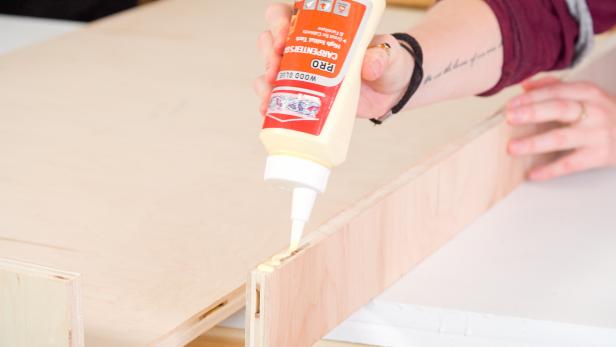
Using wood glue and 2-inch brad nails, carefully begin to put the puzzle pieces together starting with your desk cubby (Image 1). Take the 23-1/2-inch by 48-inch board and place it face-up on your work table. Attach the two 23-1/2-inch by 3-inch boards to the sides and the 46-1/2-inch by 3-inch board to the back. Before attaching the cubby to the desk’s top, place the 2-inch corner braces inside the lower corners of the cubby. Place the 1-inch L-braces at the front (Image 2).
RTR Media

RTR Media
Attach Cubby to Top
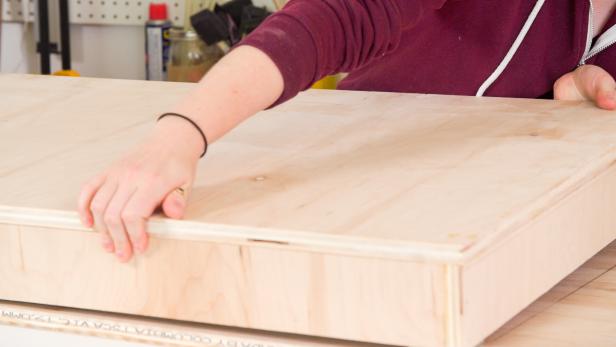
Once the cubby is complete and secured with hardware, place it on top of the upside-down L-shaped desktop and trace the top inside corners and back wall with a pencil (Image 1). Pull the cubby back off and attach the 2-inch corner braces to the desktop using the pencil lines as your corner guides. Add wood glue to the top lip of the cubby and attach to the desktop. The hardware should fit perfectly in place inside. Secure top with clamps and 2” brad nails. Attach any remaining hardware screws by reaching your arm in and screwing them into place with a screwdriver (Image 2).
RTR Media

RTR Media
Attach Plywood Legs
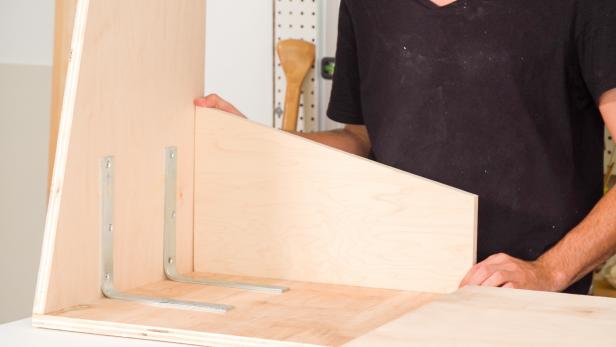
Attach the two leg pieces to the side opposite the cubby using wood glue (Image 1). Add two large 8-inch L-braces to each leg to add extra security. To screw in the L-braces, you’re going to use 3/4-inch wood screws. Use a square to ensure the legs are being attached at a perfect 90-degree angle (Image 2). You may need to bend the 8-inch brackets a tad to help make this happen. Once the L braces are in place, finish securing both legs using 2-inch brad nails from the top of your desk. Take the remaining, smaller pieces of plywood and add them to the back corners on the small edge of the tabletop (Image 3). Again, secure with 2” brad nails and wood glue from the top of the desk.

RTR Media

RTR Media
RTR Media
Attach Pine Legs
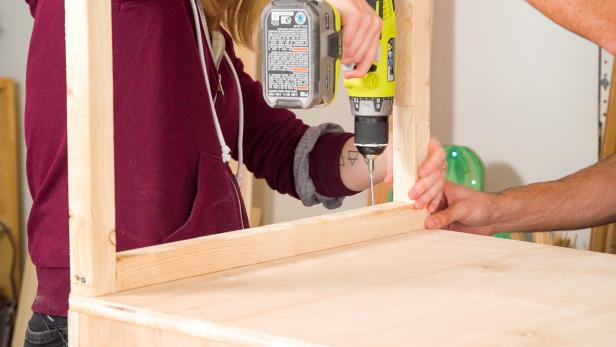
Attach the 2x2 square frame to the other side of the table. This time, secure with wood glue and four 2-inch wood screws (Image 1). To give the legs extra stability, secure four 1-inch L-braces along the inside of the frame (Image 2). Add wood filler to fill in any holes or imperfections on the desktop using a putty knife. Let dry. Once dry, sand the table using 220-grit paper, removing any excess wood filler and rough edges.
RTR Media

RTR Media
Add Edge Banding
To give this desk a more professional look, all you need is an iron. Take the maple edge banding and simply iron it onto the exposed plywood edges of your desk (Images 1, 2). Line up one edge of the banding to the edges of your desk. Use a utility knife to remove any exposed elements of the banding.

RTR Media

RTR Media
RTR Media
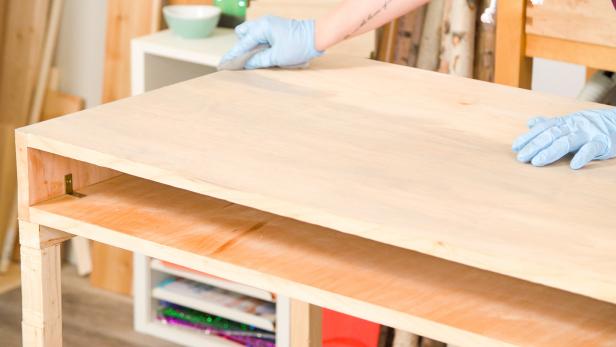
Stain Desk
Prep your table for staining with a pre-stain wood conditioner (Image 1). This will ensure the stain applies evenly without blotches. Once the pre-stain is dry, stain the desk using your desired stain and a cotton rag (Image 2).

RTR Media
RTR Media
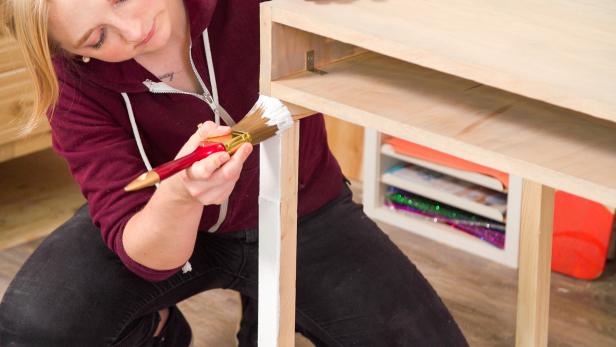
Paint Pine Legs
While the stain is drying, you can paint the 2x2 leg frame or simply stain it the same color. We chose a white interior paint to give the piece a modern look.
RTR Media
Finish Desk
Once the stain has fully dried, apply a water-based polyurethane finish to the desk following the manufacturer’s instructions. This will ensure the desk is durable and long-lasting. Once dry, you’re ready to take on the world with your brand new, vintage-inspired desk.

RTR Media


