


How to Make Kid-Friendly Chalkboard End Tables


Chalkboard paint is fun for kids, but the results can be messy. Preserve their art and protect furniture by adding easy-to-remove acrylic panels. Go from architectural drawings to creative kids' artwork at a moment's notice!
Materials Needed:
- wooden cube end tables
- orbital sander
- sanding pads
- 1 quart of primer
- 1 quart of chalkboard paint for every 4 tables
- mini roller handle
- mini roller sleeve
- paint pan
- drop cloth
- chalkboard paint
- drill or screw gun
- stainless steel screws
- stainless steel rivet washers
- full sheets or precut panels of 1/8" acrylic sheeting
- utility knife
- colored chalk
- white chalk
- damp cloth
- straight edge
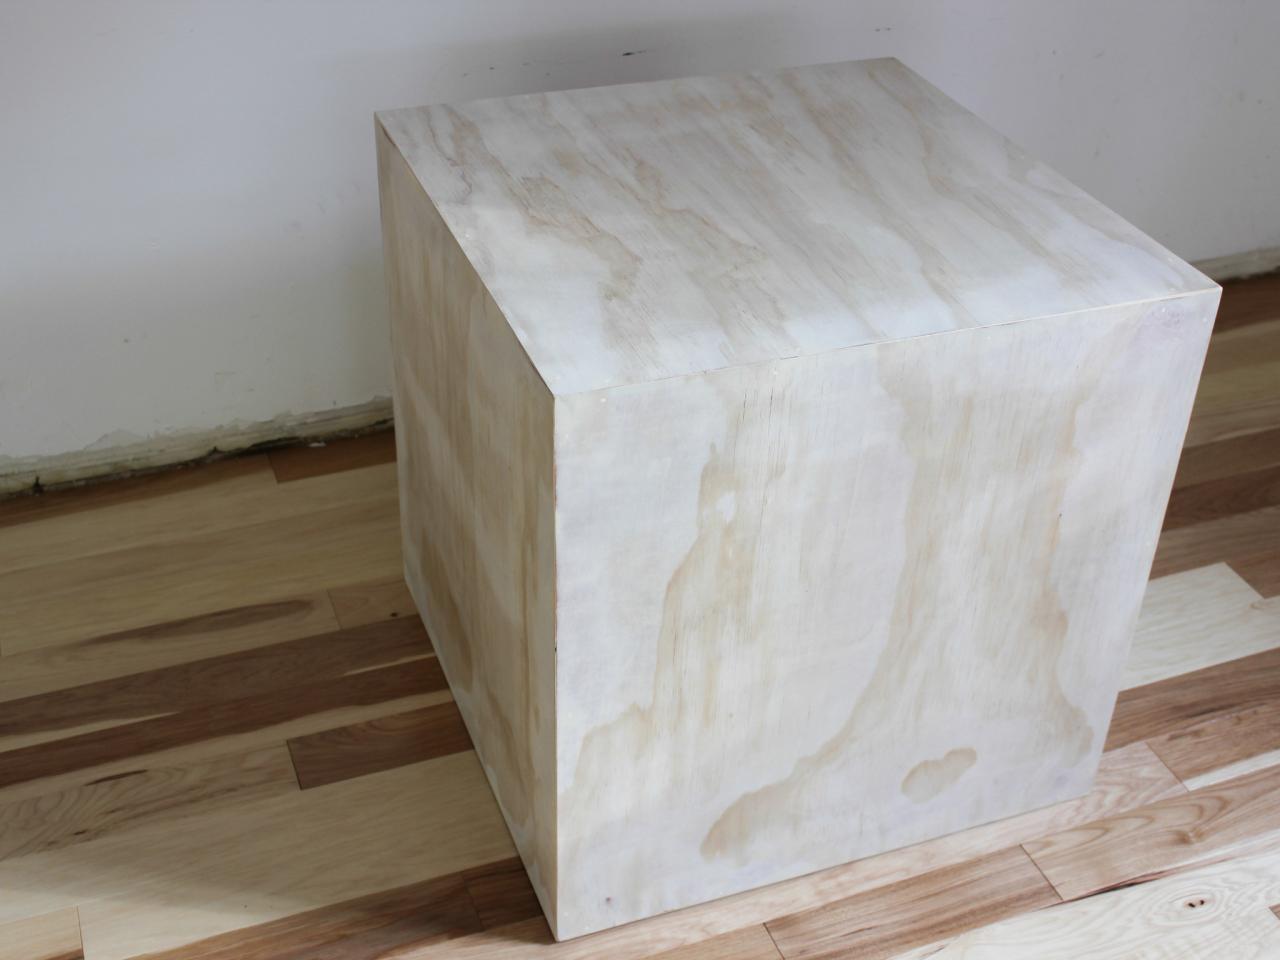
Choose the Proper-Size Table
Wooden cube end tables can be found at many big-box furniture retail stores. When searching for the proper cube end table for your family room or living room, it’s important to take sofa dimensions into consideration. Smaller, streamlined sofas work well with cube end tables between 18" and 20" in size. Bulkier sofas with generous depths are best suited for tables sized between 20" and 24".

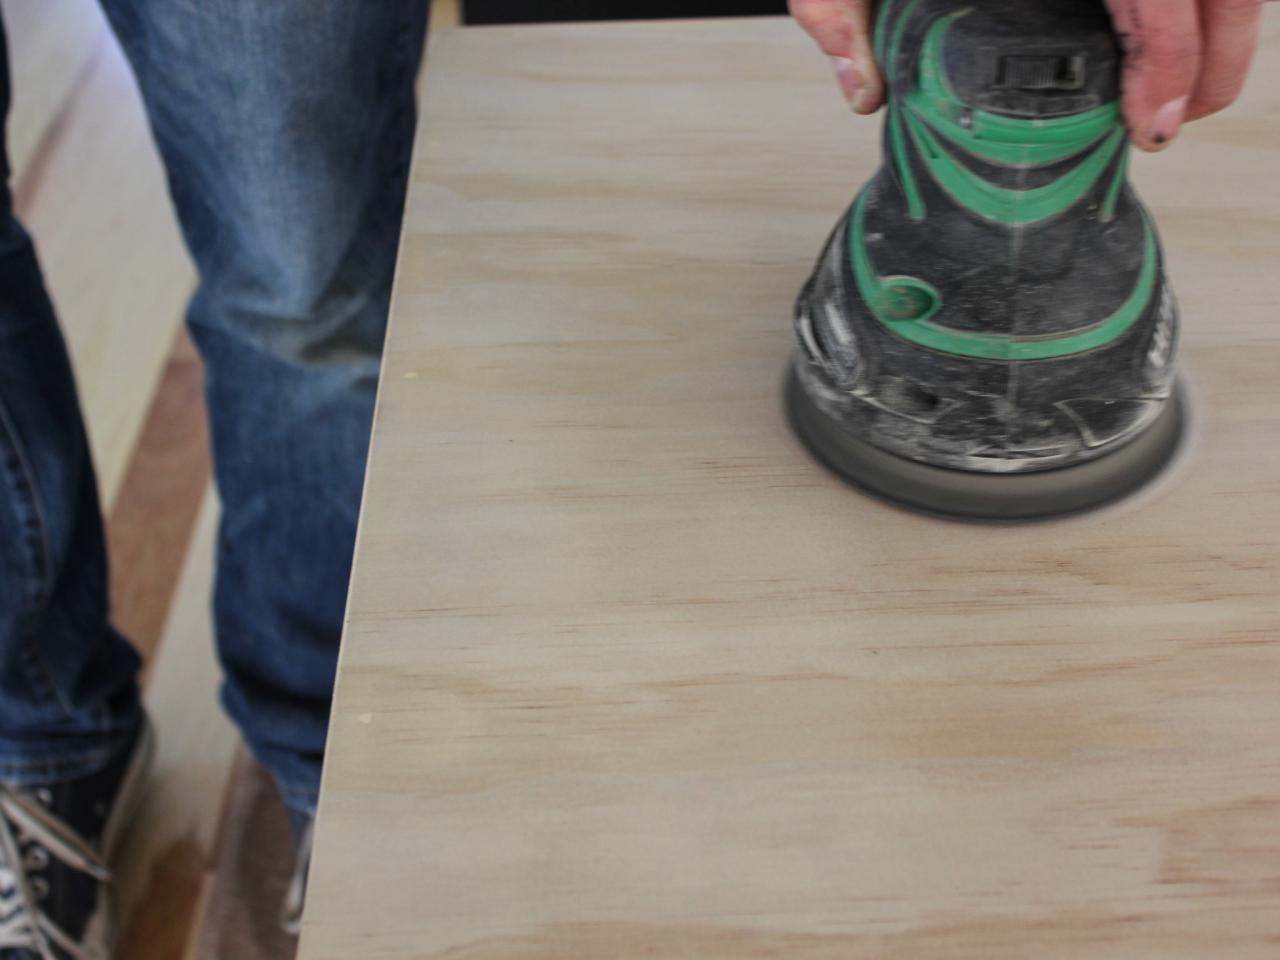
Sand Existing Finish
To ensure the best painted finish possible, it's important to rough up the wooden surface of the table and strip away its existing finish. To do this, use the orbital sander, moving back and forth along the four sides and the top of the table in a slow, steady and controlled manner. Once sanding is complete, wipe away dust using damp cloth.

Prime Surface
In order for the chalkboard paint to bond correctly to the wood, it’s important to use primer. Pour can of primer into paint pan, then add an even coat around all four sides and top using mini roller.

Add Chalkboard Paint
Approximately two hours after the primer is dry to the touch, add two even coats of chalkboard paint to the sides and top of the table using a mini roller.

Air Out and Cure
Once chalkboard paint is dry to the touch, allow it to cure overnight by keeping it in an open, well-ventilated area.
Note: If chalk is used on a chalkboard paint-covered surface before the paint has cured, the chalk will permanently streak the surface of the table.

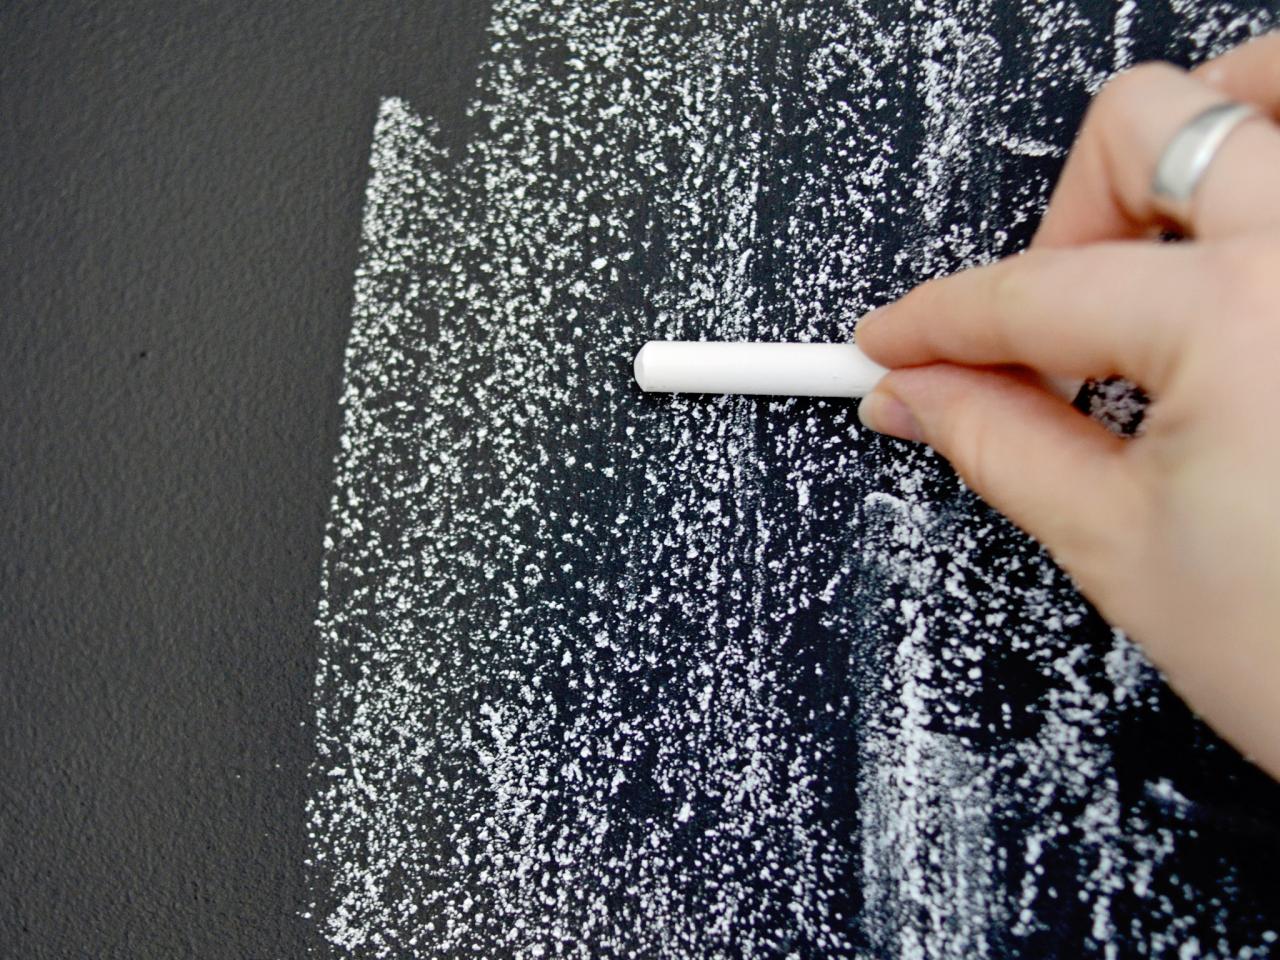
Season Chalkboard
It's important to season the chalkboard surface prior to use. This prevents writing from being "burned into" the surface. To season the chalkboard, hold a piece of chalk flat lengthwise against the wall and cover the entire surface.
Tip: Wipe with a dry paper towel for a smeary, vintage look or with a wet cloth for a cleaner look.

How to Season a DIY Chalkboard Wall
Once paint has fully dried on the walls and switch plates, reinstall switch plate covers. It's important to season the chalkboard surface prior to use. This prevents writing from being "burned into" the surface. To season the chalkboard, hold a piece of chalk flat lengthwise against the wall and cover the entire surface.

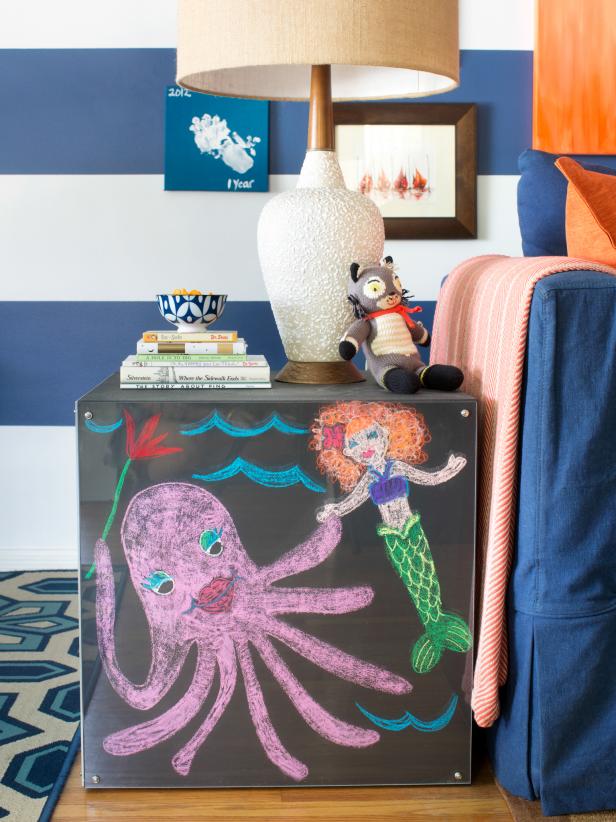
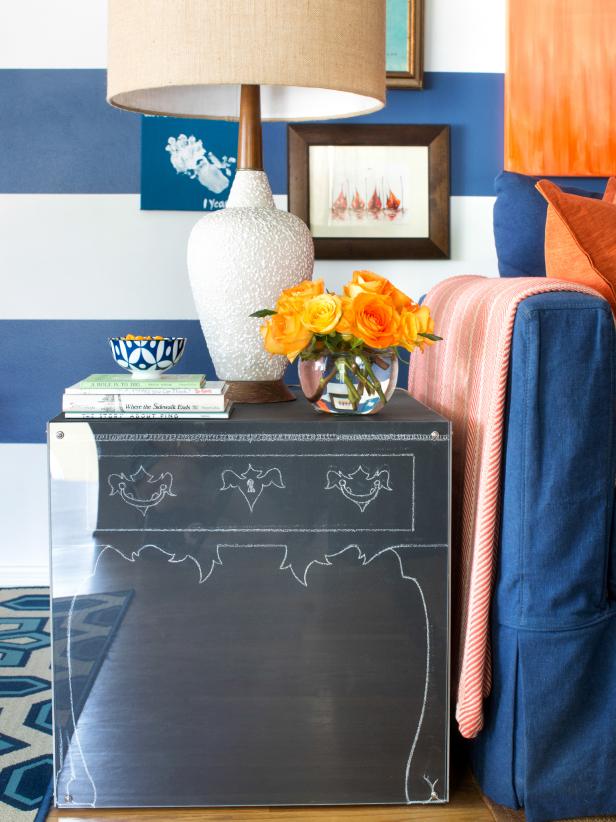
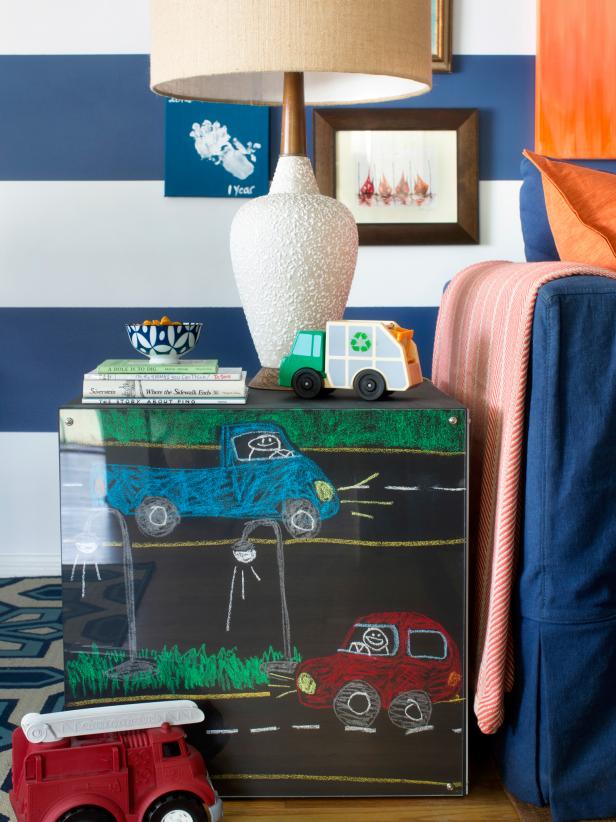
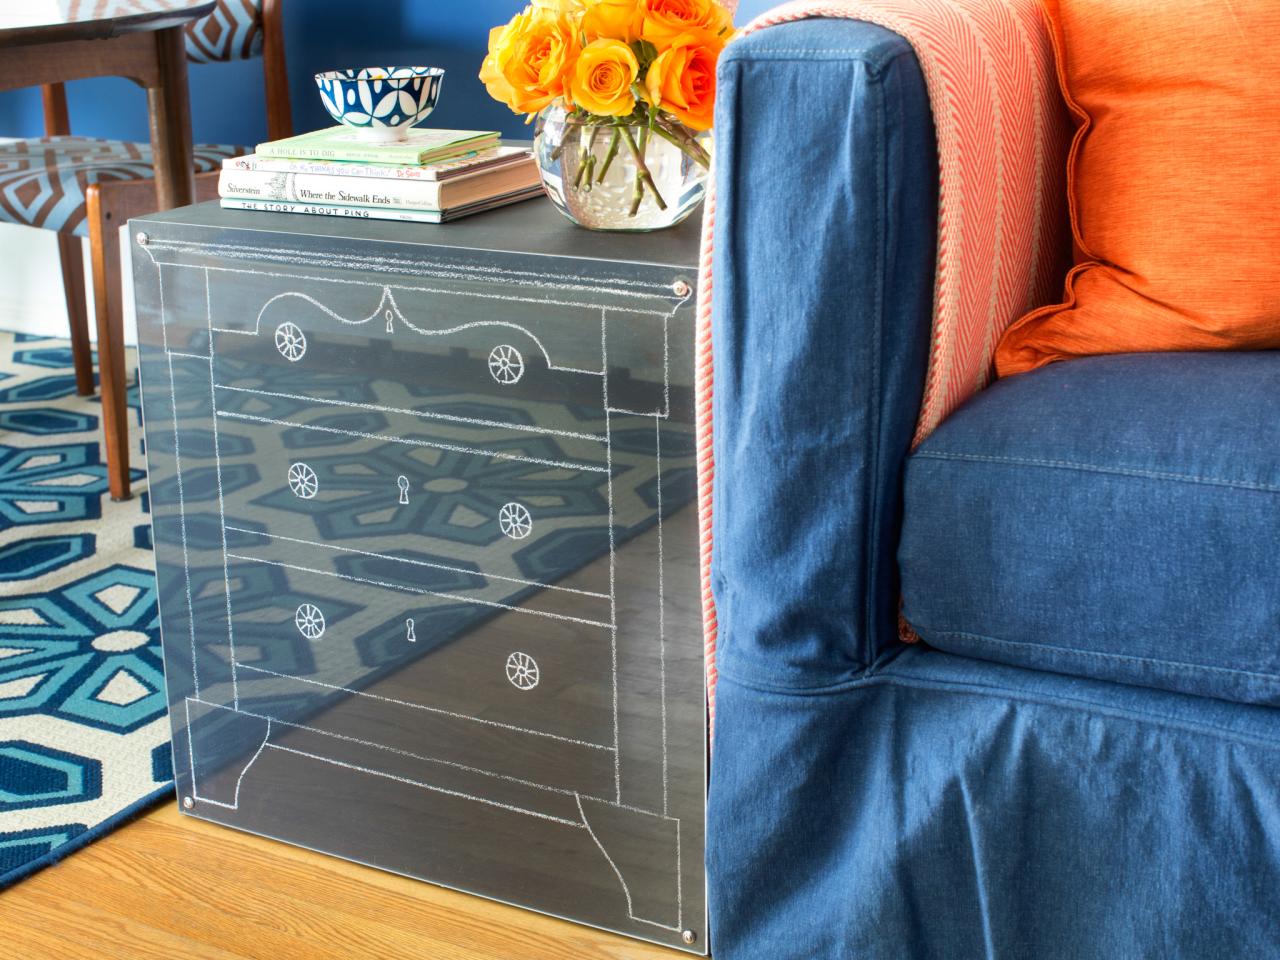
Create Artwork
Here’s where the fun comes in! First, decide what kind of design or artistic statement you want to make with your table. Here, we chose a modern architectural drawing. Next, mark up the surface of the table with white or colored chalk.

Pre-Drill Holes and Attach Acrylic Panels
Using a drill bit, pre-drill holes for hardware approximately 3” in from the edges of all four corners. The key to ensuring your chalked markings remain on the tables and not on your clothes or furniture is protecting them with 1/8” acrylic sheeting. Acrylic sheeting can be picked up at your local home improvement store intact or precut. If intact, you’ll need to cut it to size using a utility knife and a straight edge. Homeowners interested in having the panels pre-cut will need to budget accordingly as home improvement stores charge a per-cut fee to do it for you. Hold acrylic panel in place, add washers and screws, then secure tightly with drill.

Change Your Design Anytime!
When you're ready for new artwork, use a drill or screwdriver to remove the washers, screws and acrylic panels. Then just screw them back into place when you're ready to preserve your newest masterpiece.


