


Streamlined Kitchen Cabinet Makeover


Materials Needed:
- flat kitchen cabinet door fronts
- wood glue
- half-round decorative molding
- miter saw
- HVLP paint sprayer
- gallon of primer
- gallon of high-gloss porch and deck paint
- sheet plastic
- drill and drill bit
- door pulls
- painters' tape
- marker
- drill or screw driver
Prepare Door Fronts
Identify each cabinet and its corresponding door with painters' tape marked with the same number. Remove cabinet door fronts and existing hardware then wipe with a damp cloth to assure clean surface. Choose a partially covered, well-ventilated outdoor space then cover floor and walls with sheet plastic. Lay door fronts flat on ground or against wall.

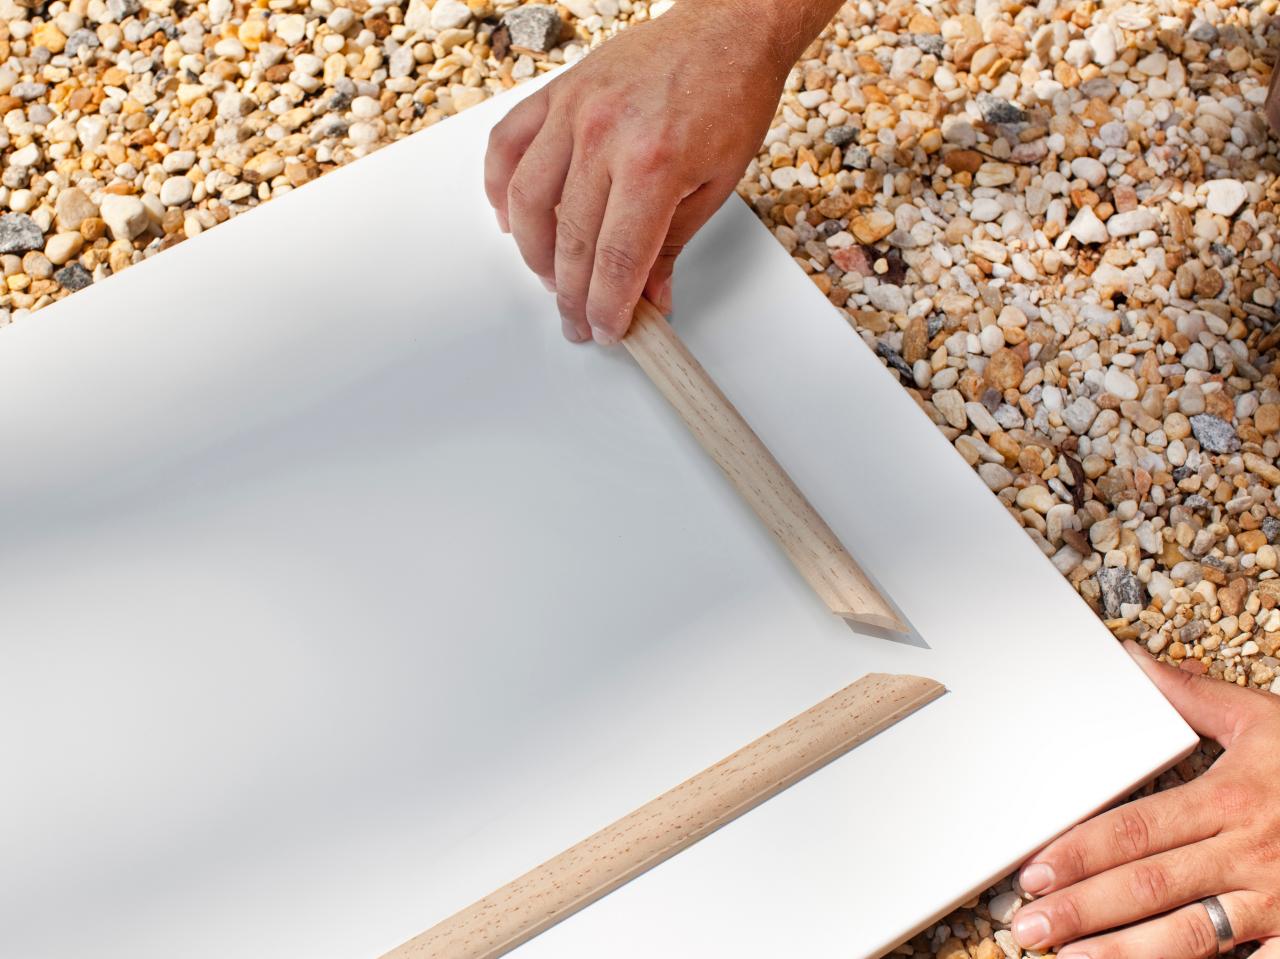
Add Decorative Molding
Using a miter saw, cut decorative molding to size, then miter edges. Add wood glue to back of molding, pressing each piece in its place. Once glue has dried, caulk inside and outside edges of molding.

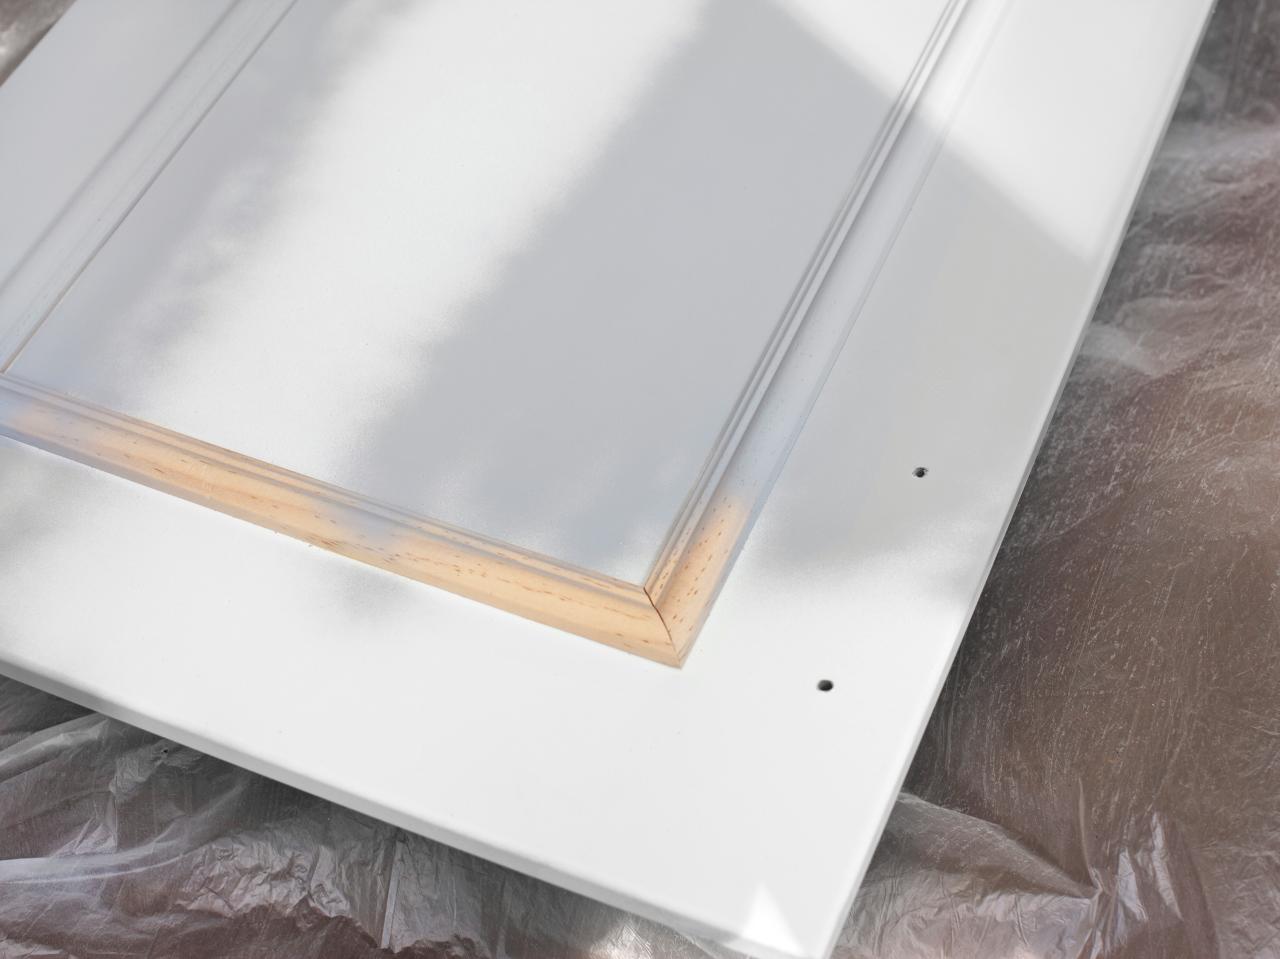
Create Holes for Hardware
Mark off screw holes for the door pulls then drill through back of the cabinet door.
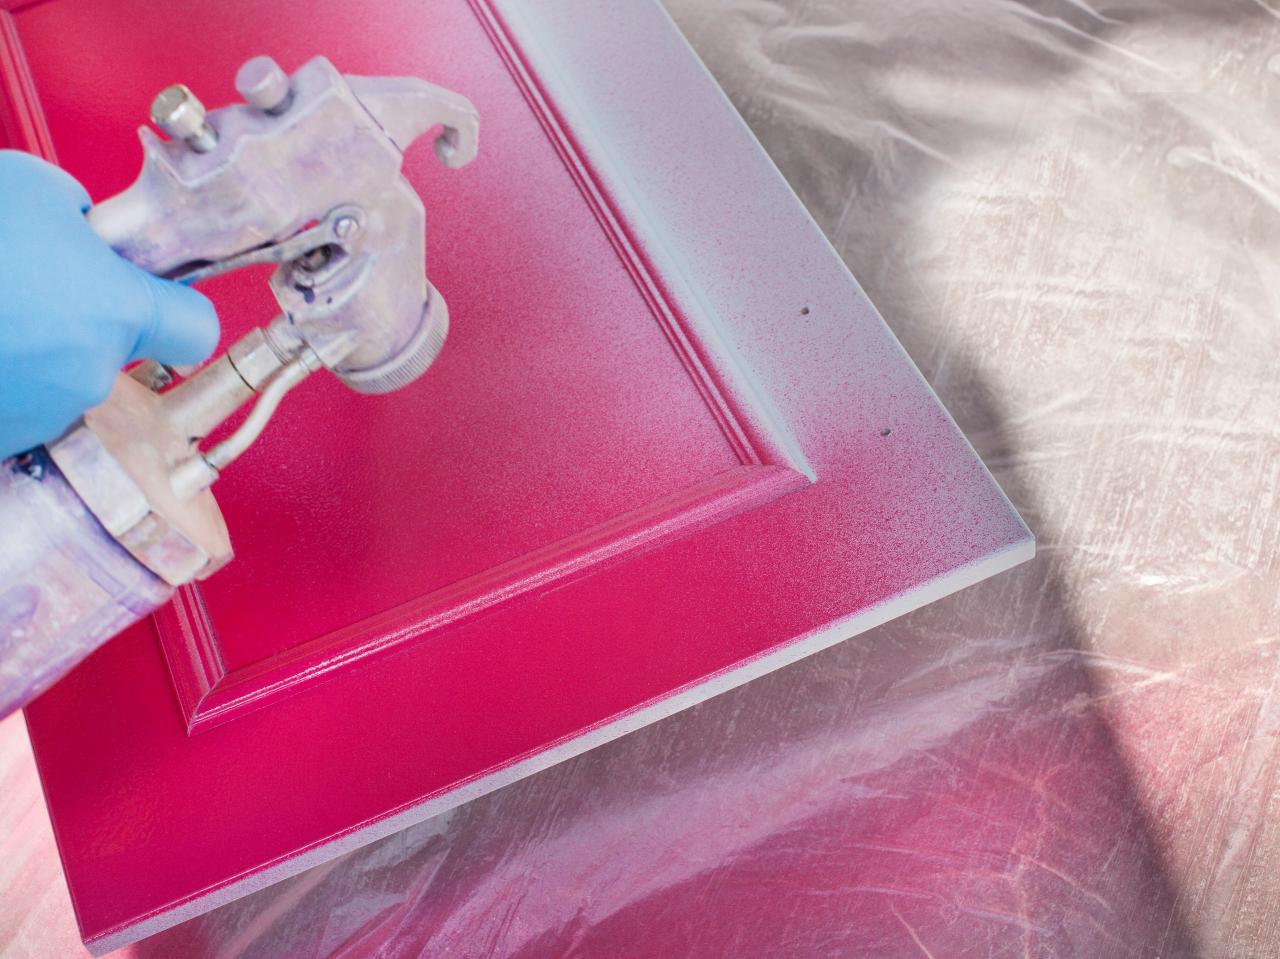
Prime Surface
Load primer into HVLP sprayer. With sprayer held six inches from surface, spray base coat with a controlled and steady motion. Allow over an hour for primer to fully dry.

Spray on Porch and Deck Paint
After base coat is dry to the touch, load porch and deck paint into HVLP sprayer. With sprayer held six inches from surface, spray finish coat with controlled, steady motion. Allow several hours for finish coat to dry. If coat appears uneven once dry, add a second coat of porch and deck paint to assure a professional finish.

Attach Doors and Hardware
Referring to numbered strips of painters' tape, re-attach each door front to its corresponding cabinet with a drill or screwdriver. Add new or existing hardware by screwing through pre-drilled holes.


