


Easy Kitchen Update: DIY Wood-Burned Utensils
Wood burning is a great way to dress up bamboo kitchen tools: It won't wash off, gets better with age and can create one-of-a-kind designs. Upgrade your utensils in an afternoon with a little DIY elbow grease.

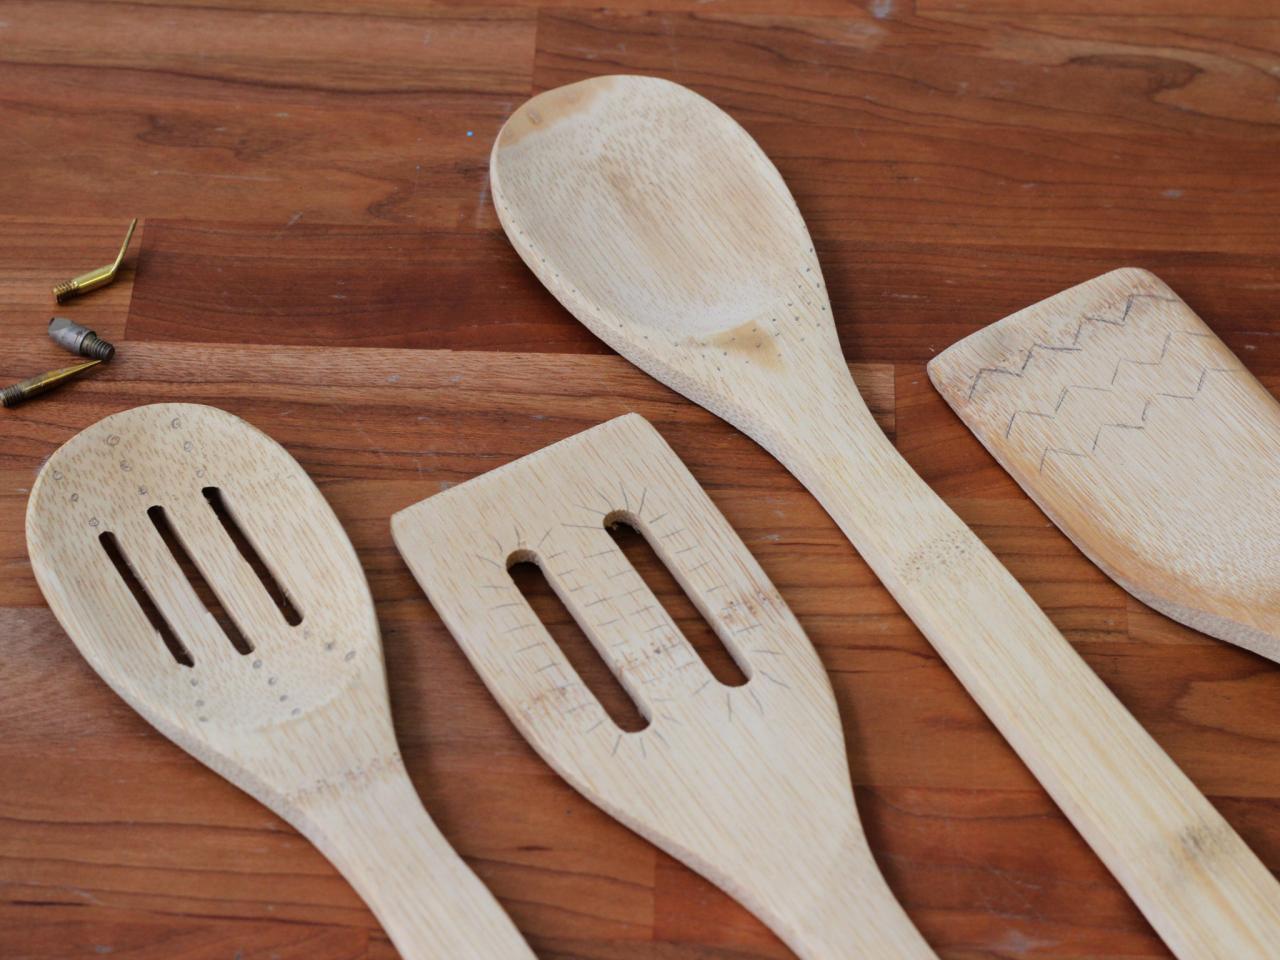
Wood-Burned Kitchen Utensils
Wood burning is a great way to dress up bamboo kitchen tools: It won't wash off, gets better with age and can create one-of-a-kind designs. Upgrade your utensils in an afternoon with a little DIY elbow grease.

Materials Needed:
- bamboo kitchen tools
- wood burning kit
- pencil

Wood-Burned Kitchen Utensils: Materials
All you need to make wood-burned utensils are bamboo kitchen tools, a wood-burning kit and a pencil.
Plan Your Design
Lightly pencil in your designs on the wooden tools. I like to follow the curves, edges and details of the spoons with simple geometric shapes like stripes and dots.

Wood-Burned Kitchen Utensils: Plan Design
Lightly pencil in your designs on the wooden tools. I like to follow the curves, edges and details of the spoons with simple geometric shapes like stripes and dots.
Burn Your Design
Heat up your wood burner with the rounded tip screwed in. When hot, start burning in your design. The longer you hold the wood burner on one spot, the darker your design will be. You can also go over a design a few times to make it darker.

Wood-Burned Kitchen Utensils: Burn Your Design
Heat up your wood burner with the rounded tip screwed in. When hot, start burning in your design. The longer you hold the wood burner on one spot, the darker your design will be. You can also go over a design a few times to make it darker.
Let Cool
After your spoons cool down, they are ready to use. Dishwasher safe!

Wood-Burned Kitchen Utensils
Wood burning is a great way to dress up bamboo kitchen tools: It won't wash off, gets better with age and can create one-of-a-kind designs. Upgrade your utensils in an afternoon with a little DIY elbow grease.


