


How to Create a Painted Kids' Room Monogram

Materials Needed:
- letters printed to size
- graphite/transfer paper
- painters' tape
- size 8 blunt-tipped lettering brush
- paint in colors of your choice
- pencil
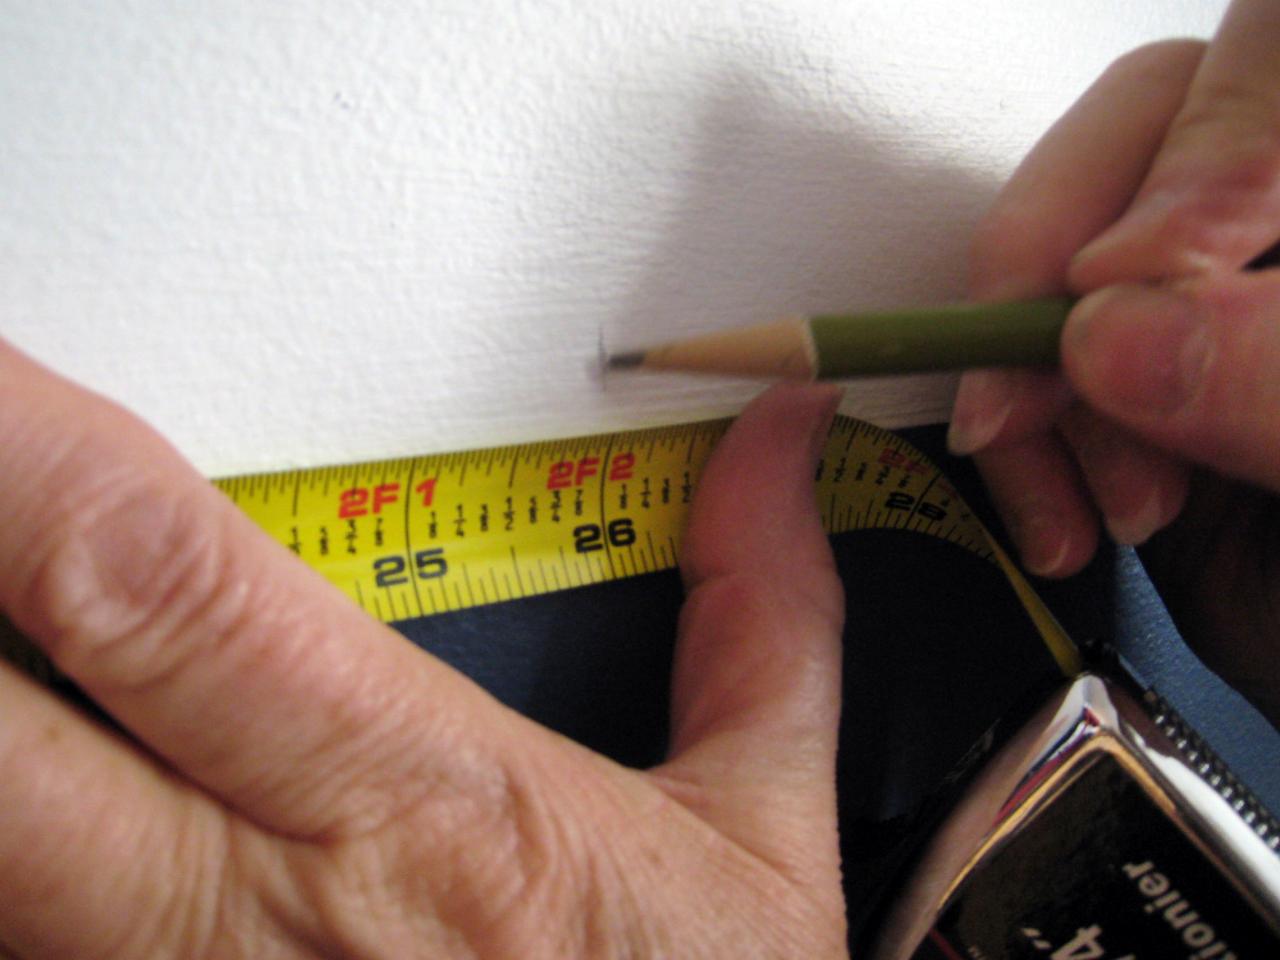
- measuring tape
- white hi-polymer plastic eraser
Create Letters and Prep Wall
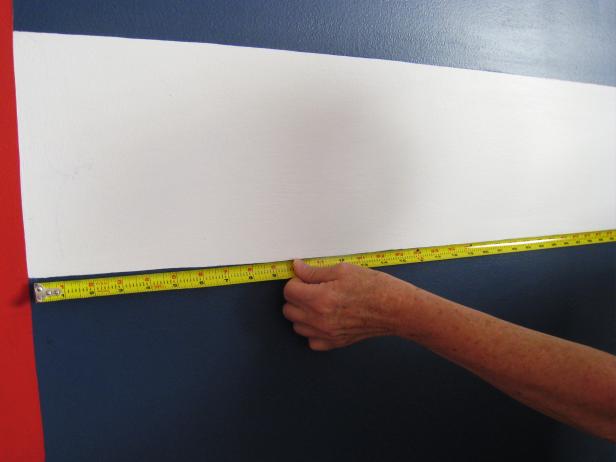
Decide on the monogram's letter size and font; print each letter onto standard printer paper. Measure wall area where letters will be painted; mark the center to help with placement. Tip: Give the monogram more graphic impact by placing the letters within a painted design; we chose to do a striped effect with painters' tape and red, white and navy latex wall paint.

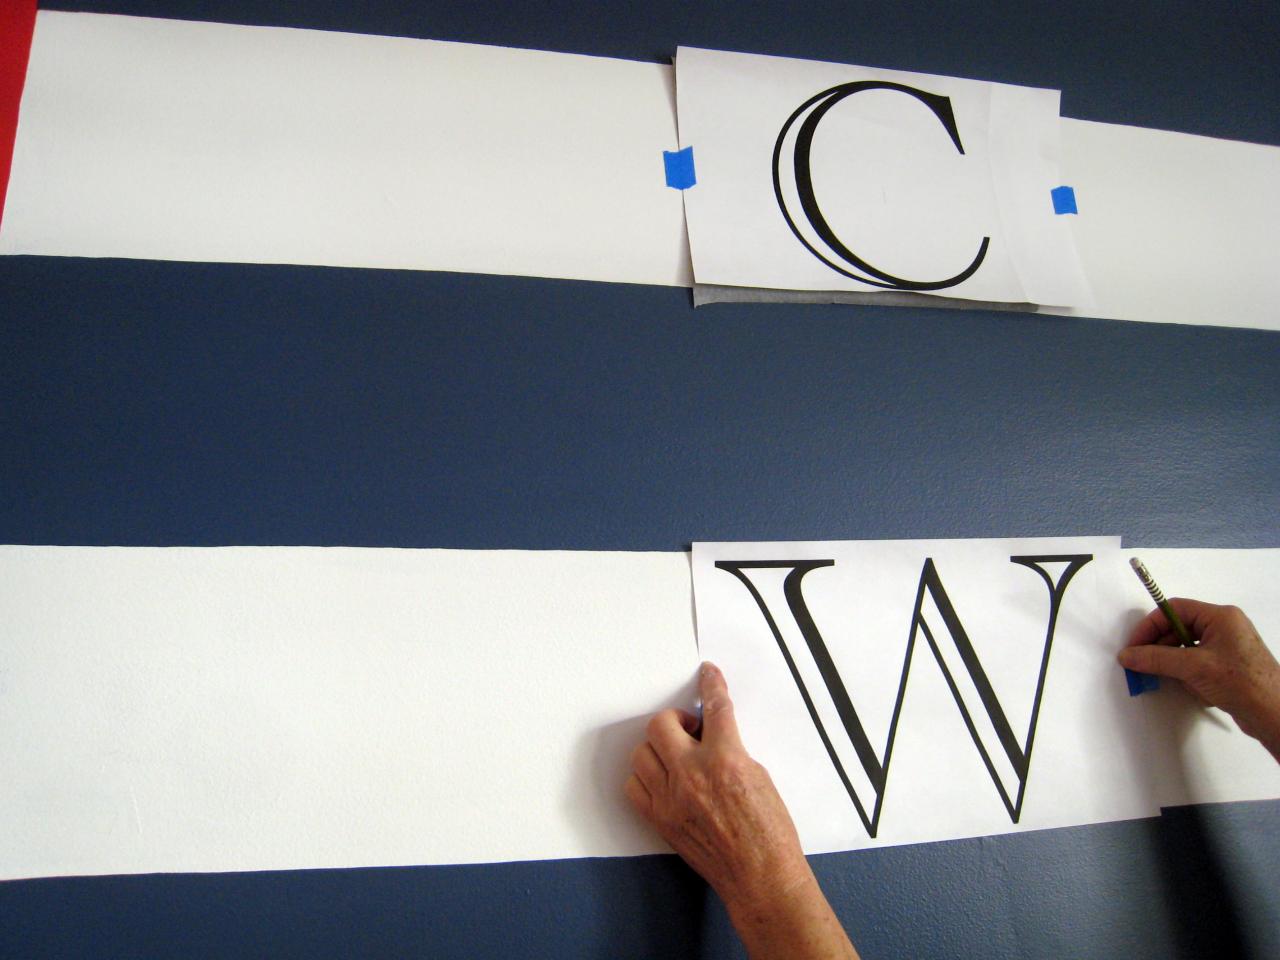
Attach Letters to Wall
Use painters' tape to temporarily position letters on wall.

Trace Letters
Once you're happy with the letters' placement, slide graphite/tracing paper behind each letter. Using a pencil, trace each letter's outline. Tip: The graphite is easily rubbed onto the wall so be careful not to press down too hard on areas that you don't intend to transfer.

Check Tracing
Pull the printed page and graphite paper away to reveal the letters' outline on the wall. If necessary, retrace any areas that didn't transfer or are smudged.

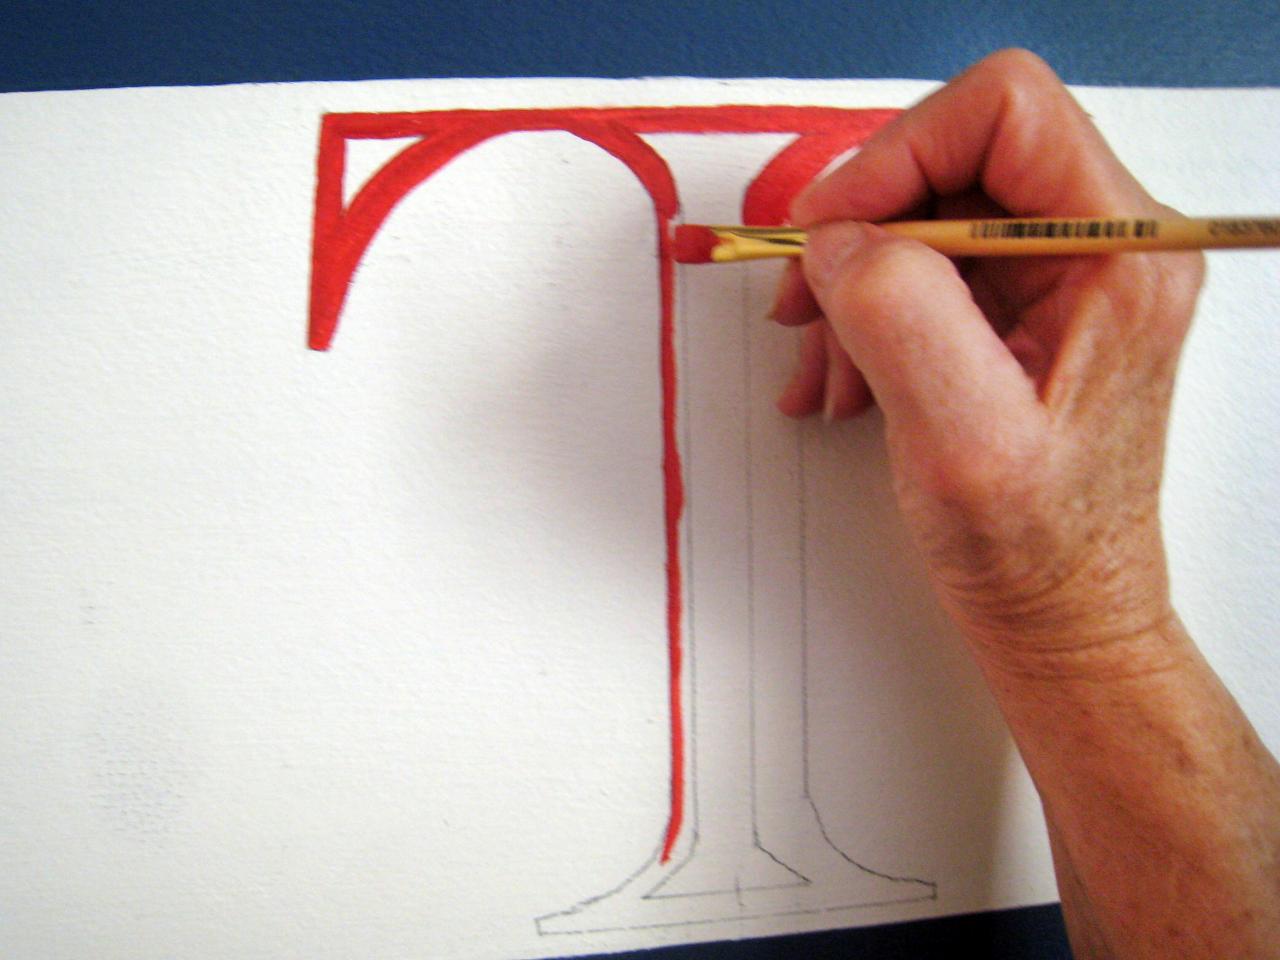
Paint Over Outlines
Fill in each letter's outline with latex paint. The blunt-tip lettering brush we recommend can be used flatly to get a wide line or on its side for a thinner, detail line. After paint has dried, clean up any stray pencil lines or graphite smudges with the white eraser.


