


How to Make a Video Game Station
Build a video gaming station for a child or teen's bedroom with all of necessary conveniences for hours of play.


Build a Video Game Station
Create a video game station with all the necessary conveniences.
Photo by: Sam Henderson
Sam Henderson
Materials Needed:
- (2) 1"x12"x8' boards
- (1) 1"x8"x6' board
- (1) 3/4"x4'x4' plywood board
- saw
- sander and sandpaper
- 3/4" birch veneer trim
- iron
- paint or stain/sealer as desired
- (4) 3/4" galvanized caps
- (6) 3/4" galvanized pipes, 5 inches
- (8) 3/4" galvanized 3 socket T's
- (4) 3/4" galvanized pipes, 8 inches
- (2) 3/4" galvanized pipes, 36 inches
- (4) 3/4" galvanized pipes, 18 inches
- (1) 3/4" galvanized pipe, 24 inches
- (2) 3/4" galvanized pipes, 60 inches
- (2) 3/4" galvanized elbows, 90 degrees
- (3) 3/4" galvanized rail supports
- (6) 3/4" galvanized hooks
- (9) 3/4" galvanized straight couplings
- (4) 3/4" galvanized offset flanges
- (10) 3/4" galvanized floor flanges
- screwdriver
- drill
- 1-1/8" drill bit
- 3/4" wood screws
- (2) 3" PVC caps
- (2) 1" bolts with washers and nuts
- spray paint as desired
- allen wrench
Cut List:
- (3) 1”x12”x48"
- (1) 1”x8”x34"
- (1) 3/4”x24”x48”
- (1) 1”x8”x7-1/4"
Prepare the Wood

Sam Henderson
Create a video game station with all the necessary conveniences.

Sam Henderson
Create a video game station with all the necessary conveniences.

Sam Henderson
Create a video game station with all the necessary conveniences.
Build a Video Game Station
Create a video game station with all the necessary conveniences.
Photo By: Sam Henderson
Build a Video Game Station
Create a video game station with all the necessary conveniences.
Photo By: Sam Henderson
Build a Video Game Station
Create a video game station with all the necessary conveniences.
Photo By: Sam Henderson
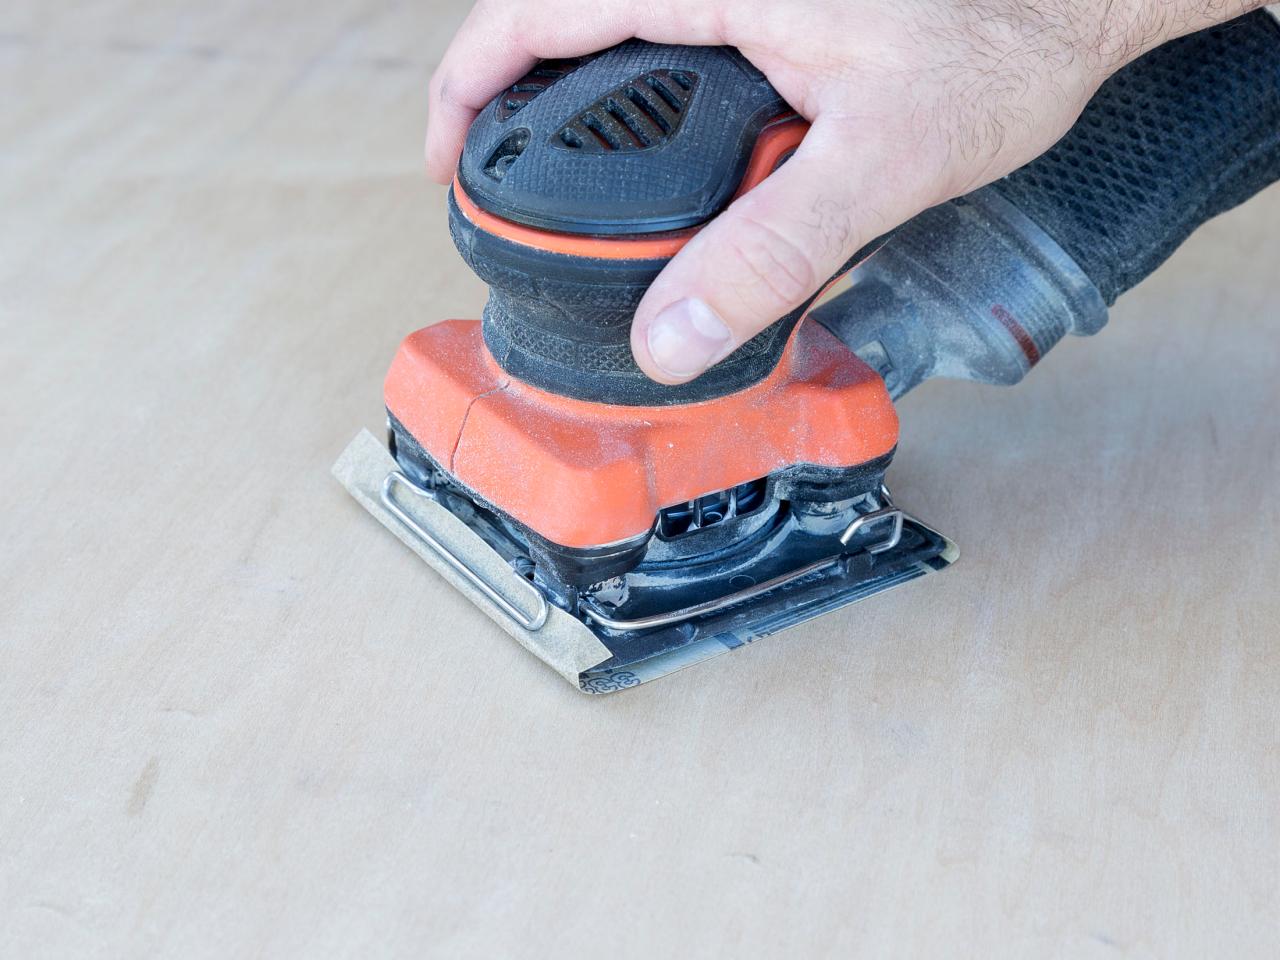
Cut the pieces according to the cut list. (Image 1) Sand them smooth and remove sharp edges except for the plywood tabletop. (Image 2) On the three 1”x12”x48” boards mark a spot at 5-1/4” from the end and 5-5/8” from the side on both ends of the boards. Use that spot as the center point to drill holes with the 1-1/8” drill bit.
Add veneer trim to the raw, layered edges of the plywood. (Image 3) Trim away excess and sand the edges smooth. Paint or stain/seal as desired. Allow to dry completely before proceeding.
Build the Base

Sam Henderson
Create a video game station with all the necessary conveniences.

Sam Henderson
Create a video game station with all the necessary conveniences.
Build a Video Game Station
Create a video game station with all the necessary conveniences.
Photo By: Sam Henderson
Build a Video Game Station
Create a video game station with all the necessary conveniences.
Photo By: Sam Henderson
Put caps on 4 of the 3/4” galvanized 5” pipes. Add T’s to the top of each of the 5” pipes. Add 8" pipes to the side socket of each of the T’s. Place two of the 8” pipes end to end and attach them to another T in the middle. Repeat for the other two 8” pipes. Add two offset flanges to one of the 36” pipes. Insert the pipe between the two open sockets between the 8” pipes. Attach the 1”x10”x34” board to the offset flanges, placing the flanges about 5 inches from the ends and centered between the two long edges. Tilt the board to about 60 degrees and secure the flanges to create the foot rest. (Image 1) On the open sockets of the T’s on the 5” pipes, add the 18” pipes. Top the 18” pipes with floor flanges and secure the floor flanges to the bottom of the 24”x48” plywood tabletop. (Image 2)
Add the Supports

Build a Video Game Station
Create a video game station with all the necessary conveniences.
Photo by: Sam Henderson
Sam Henderson
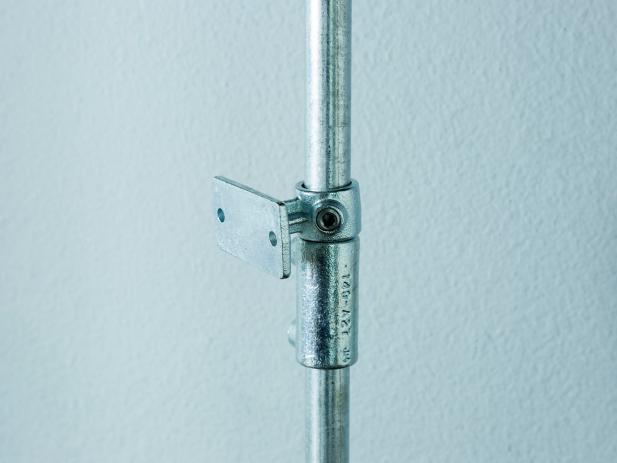
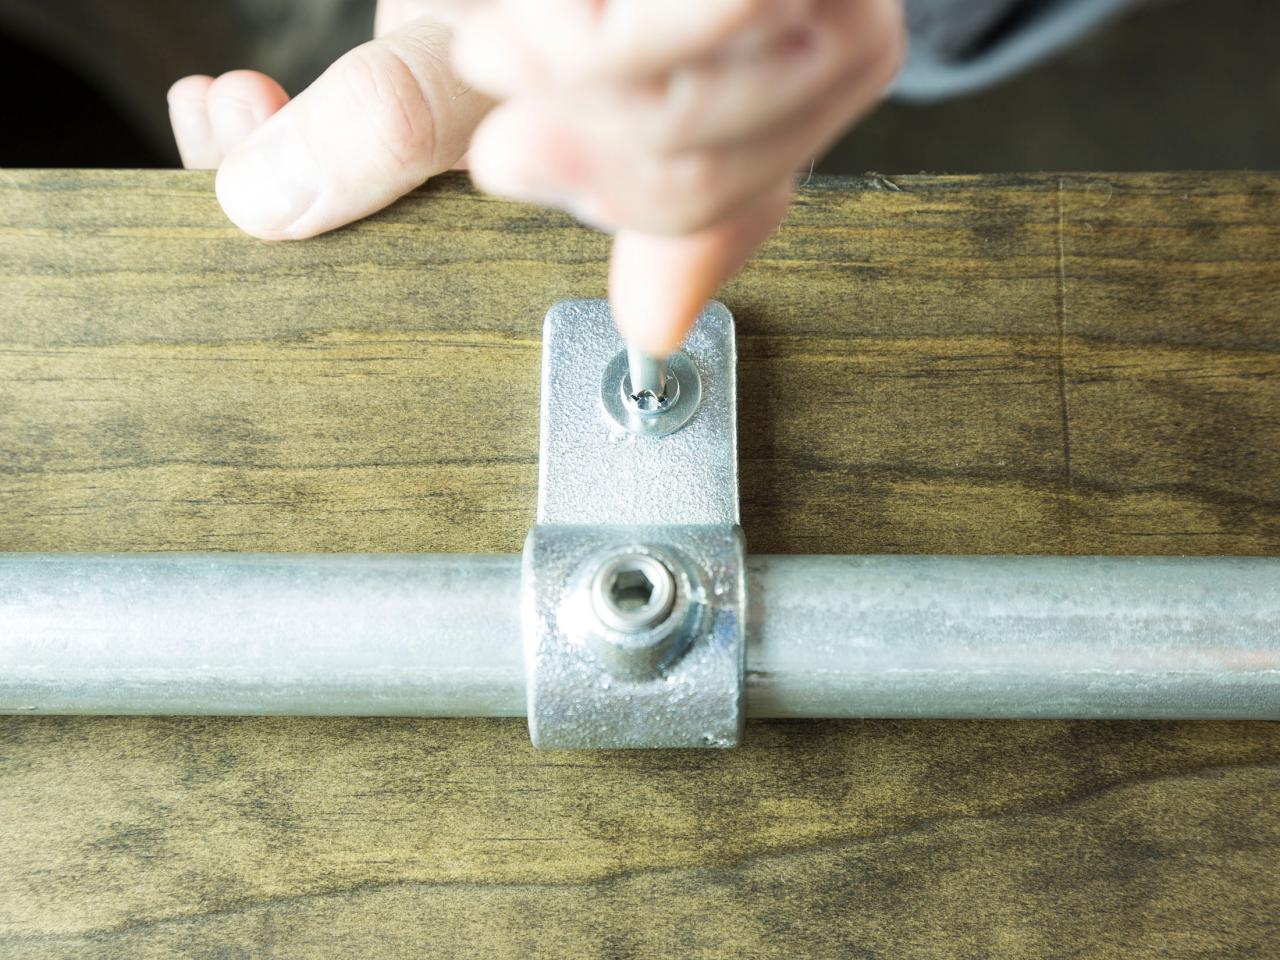
Make a mark on the table top 5-1/4” from the end and 5-5/8” from the back side of the tabletop on both sides. Center a floor flange over each spot and screw them into place. Add the 60” pipes and secure. Add an offset flange to both pipes. Add a hook to one of the pipes for hanging a headset. Add a straight coupling to both of the pipes. Add a straight coupling and a rail support to the 24” pipe. Add a floor flange to both ends of the 24” pipe. Place the 24” apparatus 4 inches from the back and centered between the sides. Secure in place. Place one of the shelves over the pipes through the holes. Rest it on the 24” pipe with the flange. Adjust the straight couplings on the 60” pipes to make the shelf level and secure them. Attach the floor flange at the top of the 24” pipe to the bottom of the shelf.
Make the Controller Hooks

Build a Video Game Station
Create a video game station with all the necessary conveniences.
Photo by: Sam Henderson
Sam Henderson
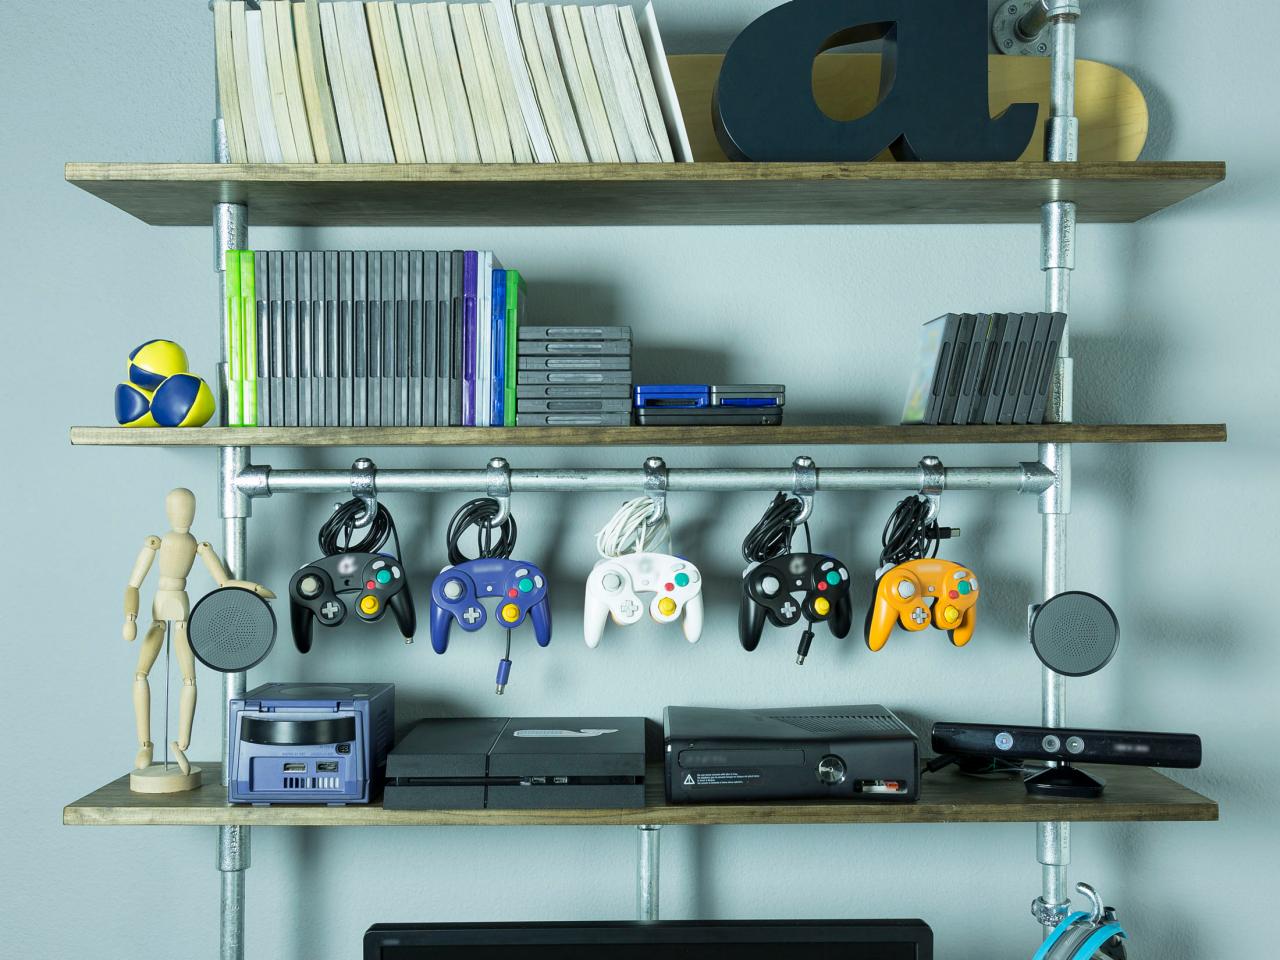
Add rail supports for the speakers to the 60” pipes and secure them in place about 4 inches from the top of the shelf below. Add hooks to the 36” pipe and secure them. Add 3 socket T’s to the ends of the 36” pipe and add it to the 60” pipes. Secure it in place. Add another shelf and secure it in place by adding straight couplings to both sides.
Finish the Construction

Sam Henderson
Create a video game station with all the necessary conveniences.

Sam Henderson
Create a video game station with all the necessary conveniences.
Build a Video Game Station
Create a video game station with all the necessary conveniences.
Photo By: Sam Henderson
Build a Video Game Station
Create a video game station with all the necessary conveniences.
Photo By: Sam Henderson
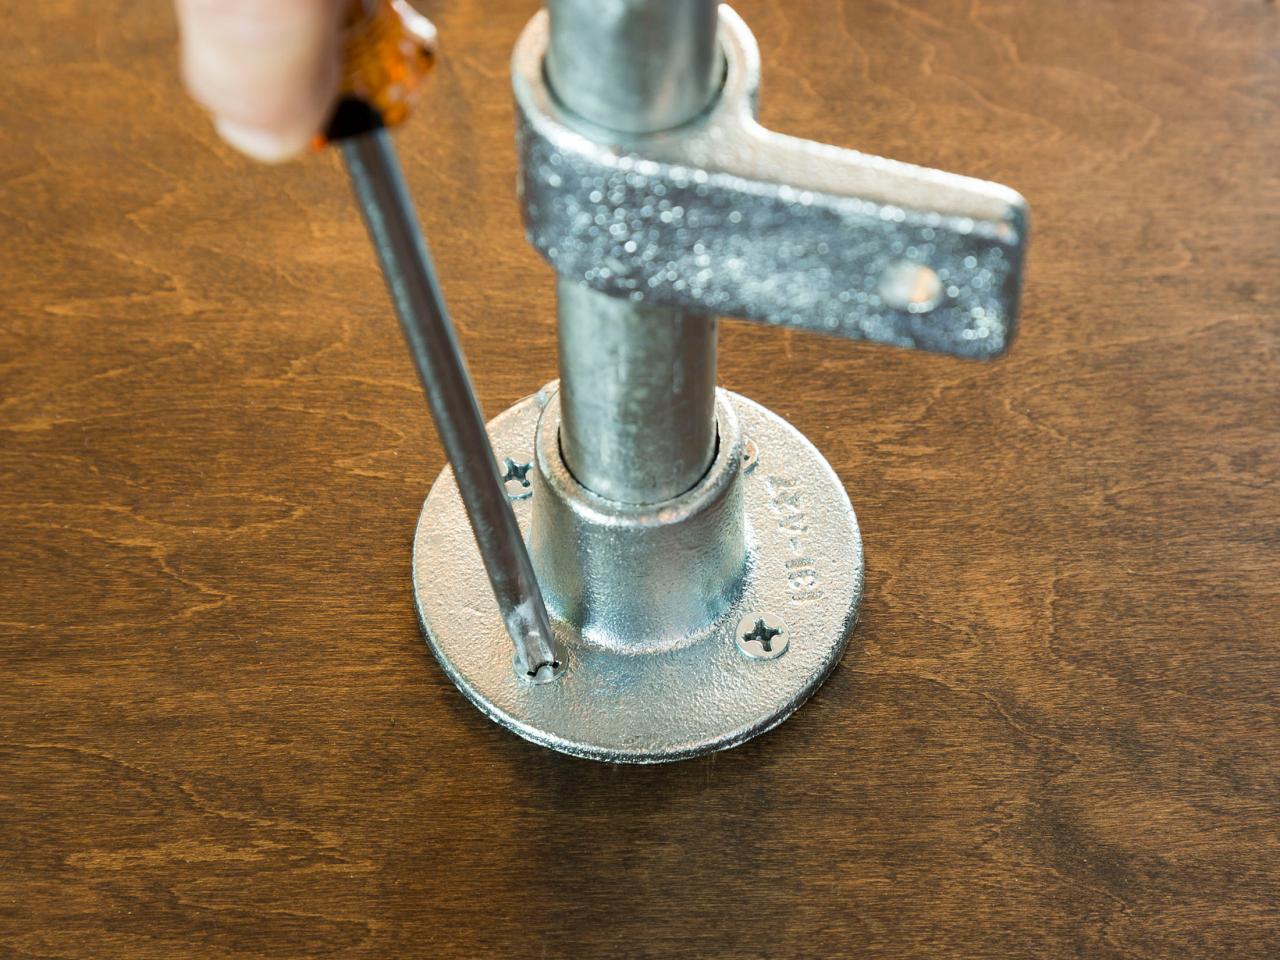
Add another straight coupling to each of the 60” pipes with the top of the couplings about 10” from the top of the shelf below. Level the shelf, adjusting the couplings, then secure the couplings in place. Add another shelf and top with couplings to secure it. (Image 1) At the top of the 60” pipes add an elbow to each side. Attach a 5” pipe and then a floor flange to each elbow. Attach the floor flange to the wall with screws to secure. (Image 2)
Add the Final Touches

Sam Henderson
Create a video game station with all the necessary conveniences.

Sam Henderson
Create a video game station with all the necessary conveniences.
Sam Henderson
Create a video game station with all the necessary conveniences.

Sam Henderson
Create a video game station with all the necessary conveniences.
Build a Video Game Station
Create a video game station with all the necessary conveniences.
Photo By: Sam Henderson
Build a Video Game Station
Create a video game station with all the necessary conveniences.
Photo By: Sam Henderson
Build a Video Game Station
Create a video game station with all the necessary conveniences.
Photo By: Sam Henderson
Build a Video Game Station
Create a video game station with all the necessary conveniences.
Photo By: Sam Henderson
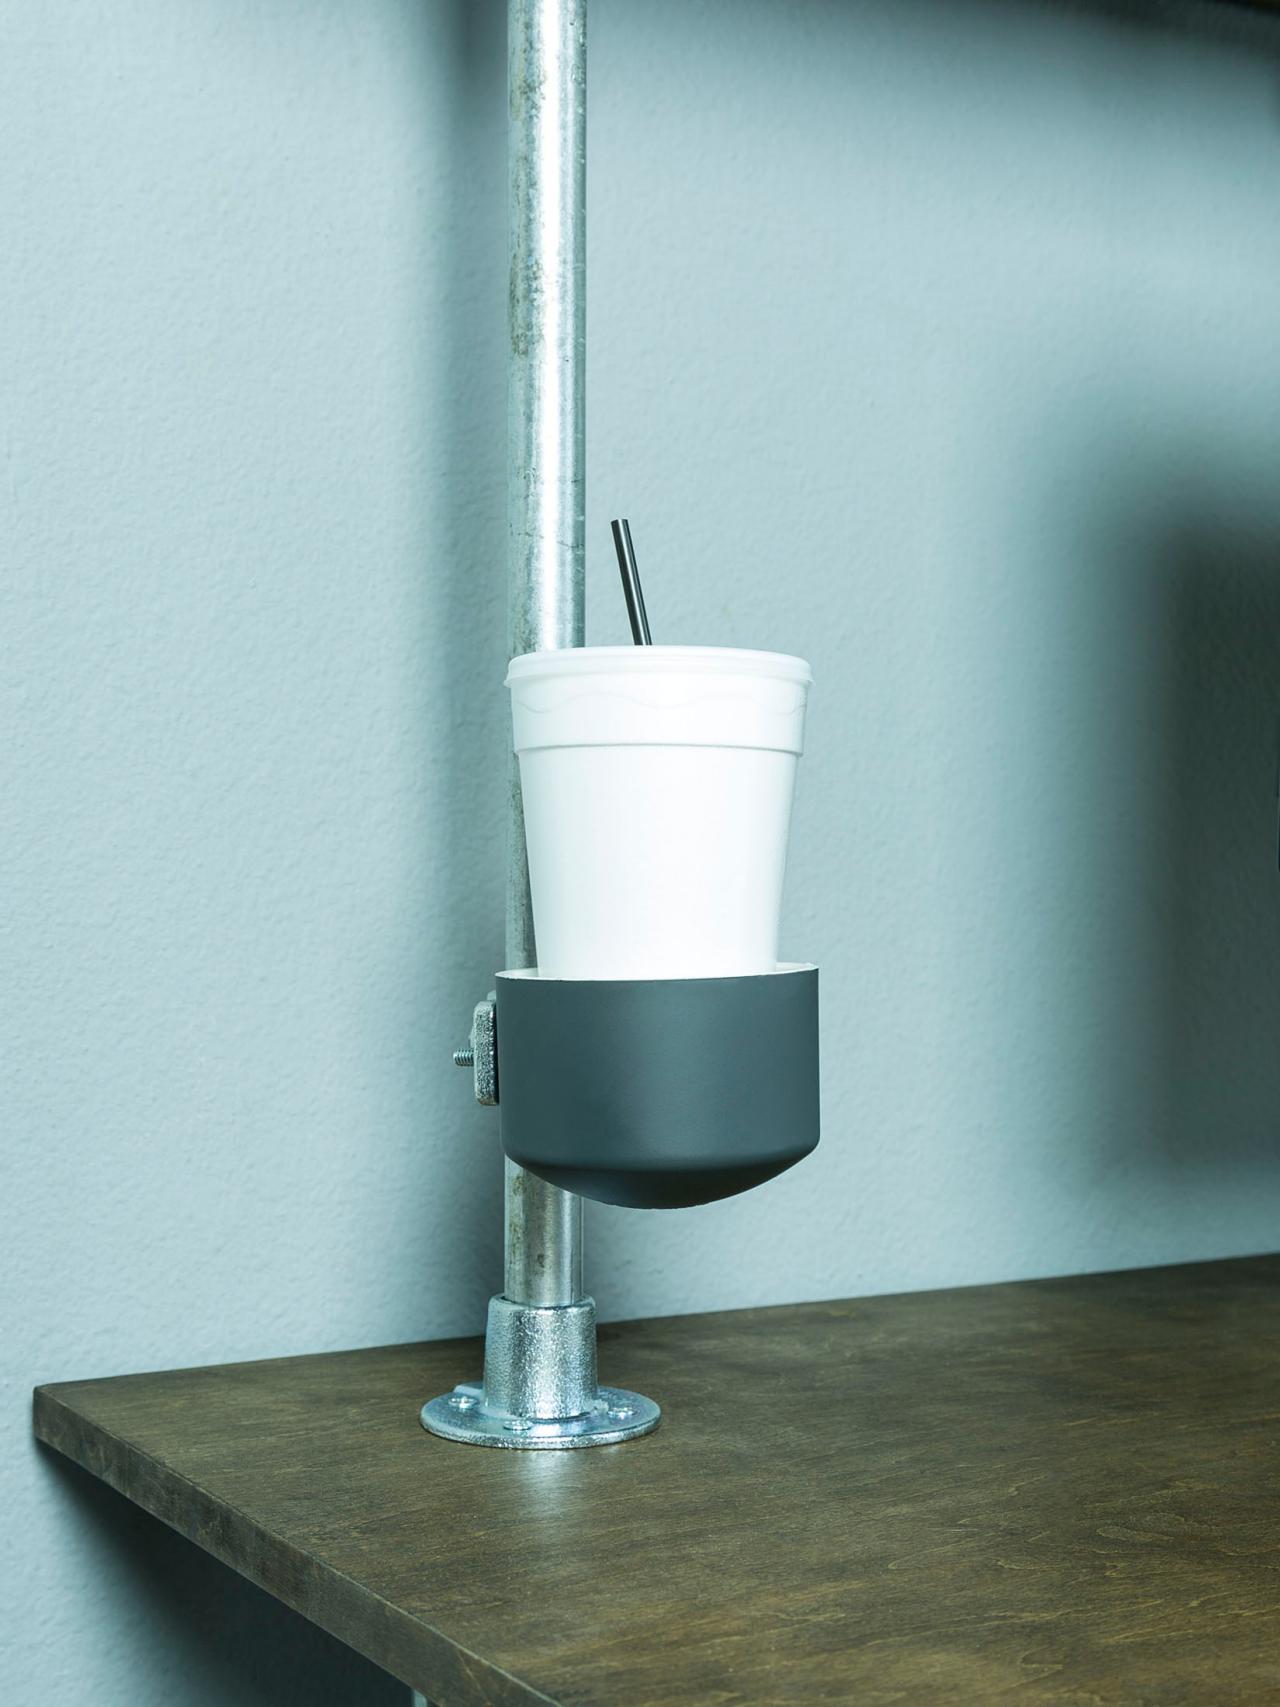
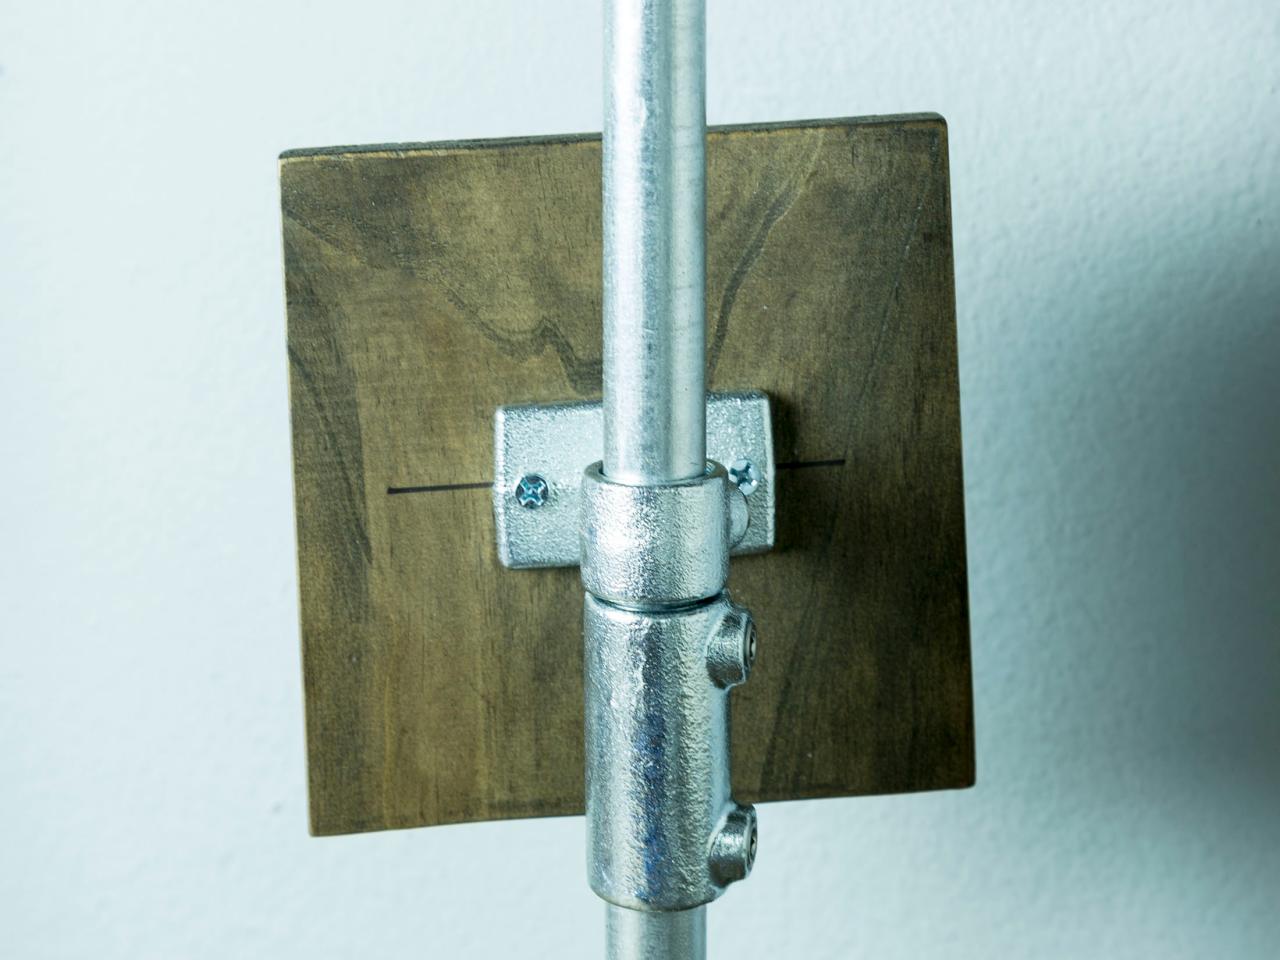
Drill a 1/4” hole in the side of the PVC caps. Paint as desired. Use a bolt with washers and nuts to attach the PVC caps to the offset flanges near the tabletop. (Image 1) Adjust the offset flange to position the bottom of the cupholder about 4 inches from the tabletop. (Image 2) Secure the straight coupling below the rail support on the 24" center pole, but do not secure the rail support. (Image 3) Attach the 1”x8”x7-1/4” board to the rail support. (Image 4) Leave the rail support loose so the monitor can swivel. Add monitor mounting hardware to the 1”x8”x7-1/4” board and then add the monitor. Attach speakers to the rail supports under the controller hooks with Velcro.

Build a Video Game Station
Create a video game station with all the necessary conveniences.
Photo by: Sam Henderson
Sam Henderson


