


How to Make a Carpenter Bee Trap
Build a carpenter bee trap that will put an end to the carpenter bees' destructive doings.


Spotted hovering along deck rails or under house eaves, an all too familiar pest returns in the spring. Often mistaken for bumble bees, carpenter bees can be distinguished by their smooth and shiny-black abdomens. Although the males have no stingers, they aggressively patrol the area around their nests as the females busily prepare their favorite nesting spots. It’s those nests that make the carpenter bee a true pest for homeowners.
The handiwork of these illustrious borers becomes more and more apparent through late spring when you can find holes in houses, decks, patio furniture or chicken coops. Carpenter bees seek out bare wood or even treated wood that has been softened though weathering. The preferred nesting location for the carpenter bee is deep inside that exposed wood. The female bees chew holes roughly half an inch wide into the wood and produce tunnels three to four inches deep under the surface in which to lay their eggs.
The bees create cells within those tunnels, each containing eggs and a packet of gathered pollen on which hatching bees can feed. Offspring will stay in these cells until next spring when they emerge, ready to repeat the cycle.
Left to their own devices, populations will rise and the unsightly holes left in siding, decks or other wood structures will multiply exponentially as new bees emerge. If your garage is starting to resemble Swiss cheese, steps can be taken to put an end to a troublesome carpenter bee occupation.
A fresh coat of paint on exterior wood structures is a good deterrent from new construction. Barring that, repeated treatment of exposed wood using an appropriate insecticide will help reduce an existing adult population and discourage further damage.

How to Keep Carpenter Bees Away
These big bees chew holes in your fence, deck and outbuildlings, but they're pollinators. Here's how to manage carpenter bees, along with some reasons why you should consider co-existing with them.
Existing nesting holes must be destroyed and sealed. Using a piece of flexible wire, thread the wire down the holes — piercing the egg cells of the existing nests — and then spray an insecticide into the holes. Once spraying is complete, plug the holes to prevent further occupation. Although male carpenter bees cannot sting, females may defend if provoked and care should be taken when approaching active nests.
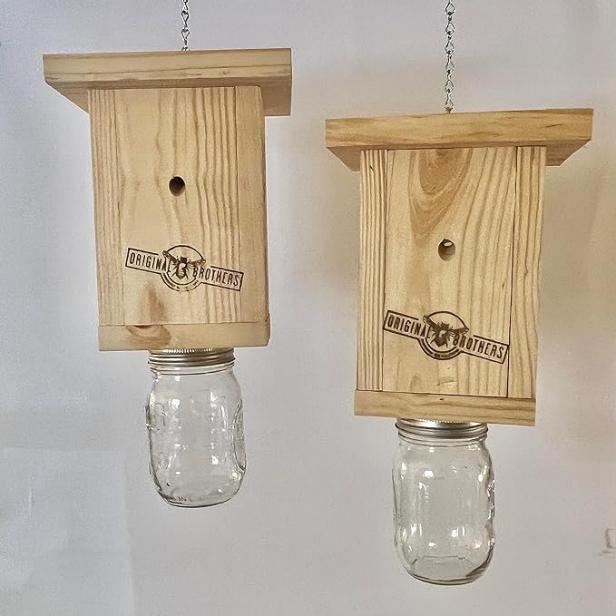
How Carpenter Bee Traps Work
There are plenty of DIY carpenter bee trap designs found online. Some are better than others, but most are based on the same principles. Appealing to carpenter bees, half inch holes are drilled into a wood box at an upward angle that prevents direct sunlight from shining in. A clear, tapered bottle is attached to a hole in the bottom of the box. Once the carpenter bees have entered the box, the hole at the bottom of the box is the obvious exit. Once trapped, the tapered shape of the bottle prevents them from escaping — pretty darn clever and every bee trapped is one less hole chewed into the gazebo next year.
See these step-by-step instructions on building a simple carpenter bee trap.
DIY Carpenter Bee Trap Tools + Supplies
- 3/4" thick cedar or soft pine, 4-1/2" wide and at least 5' long
- 20-ounce clear plastic soda bottle
- nails or wood screws
- hook for hanging trap
- miter or hand saw
- 1/2" drill bit
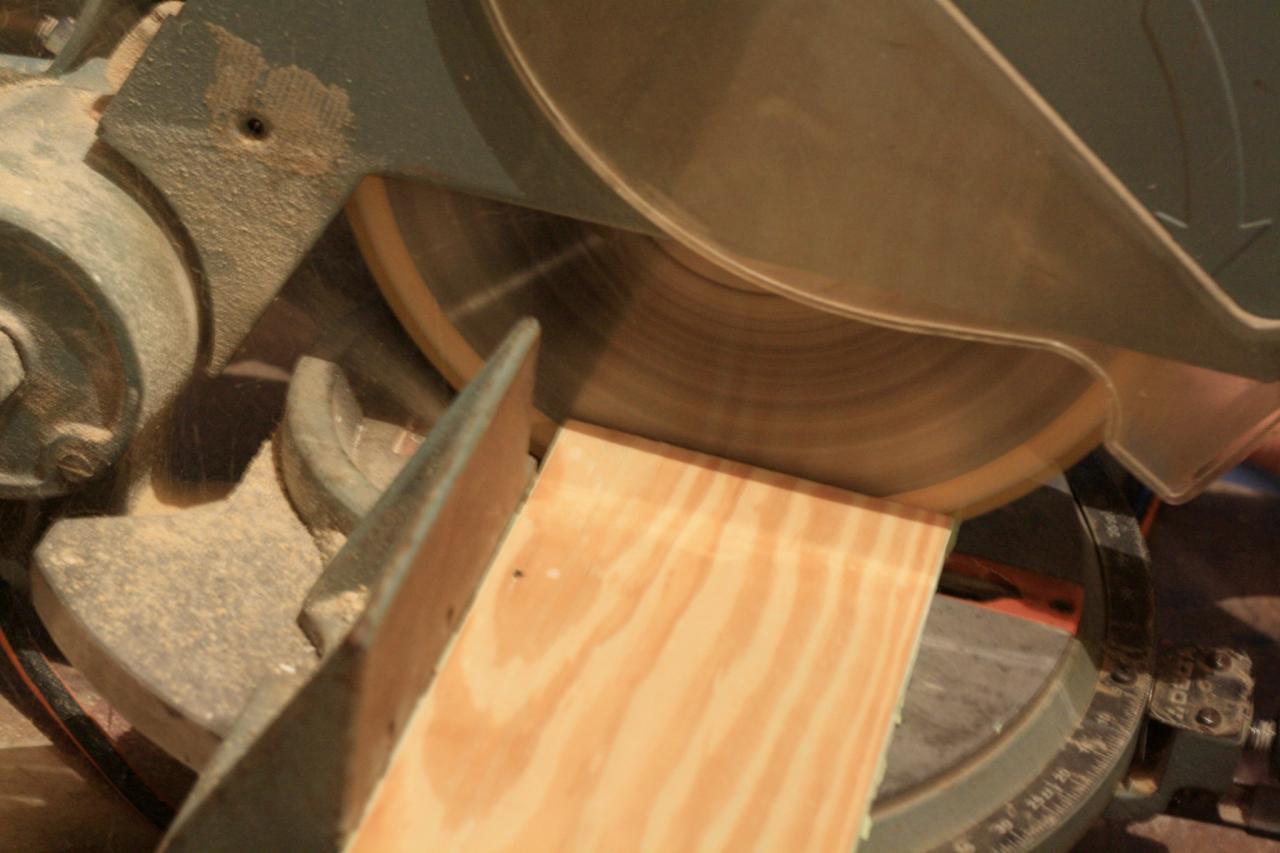
1. Cut Wood Pieces for Carpenter Bee Trap
Find an untreated 3/4-inch-thick cedar or soft pine plank that's 4-1/2 inches wide and at least 5 feet long (scrap wood is just fine for this project). Other materials required include a 20-ounce clear plastic soda bottle (with cap) and nails or screws for trap assembly. Use a miter or hand saw to cut the following lengths: four 8-inch lengths (sides), two 7-inch lengths (roof) and one 6-inch length (bottom).

Photo credit: Mick Telkamp
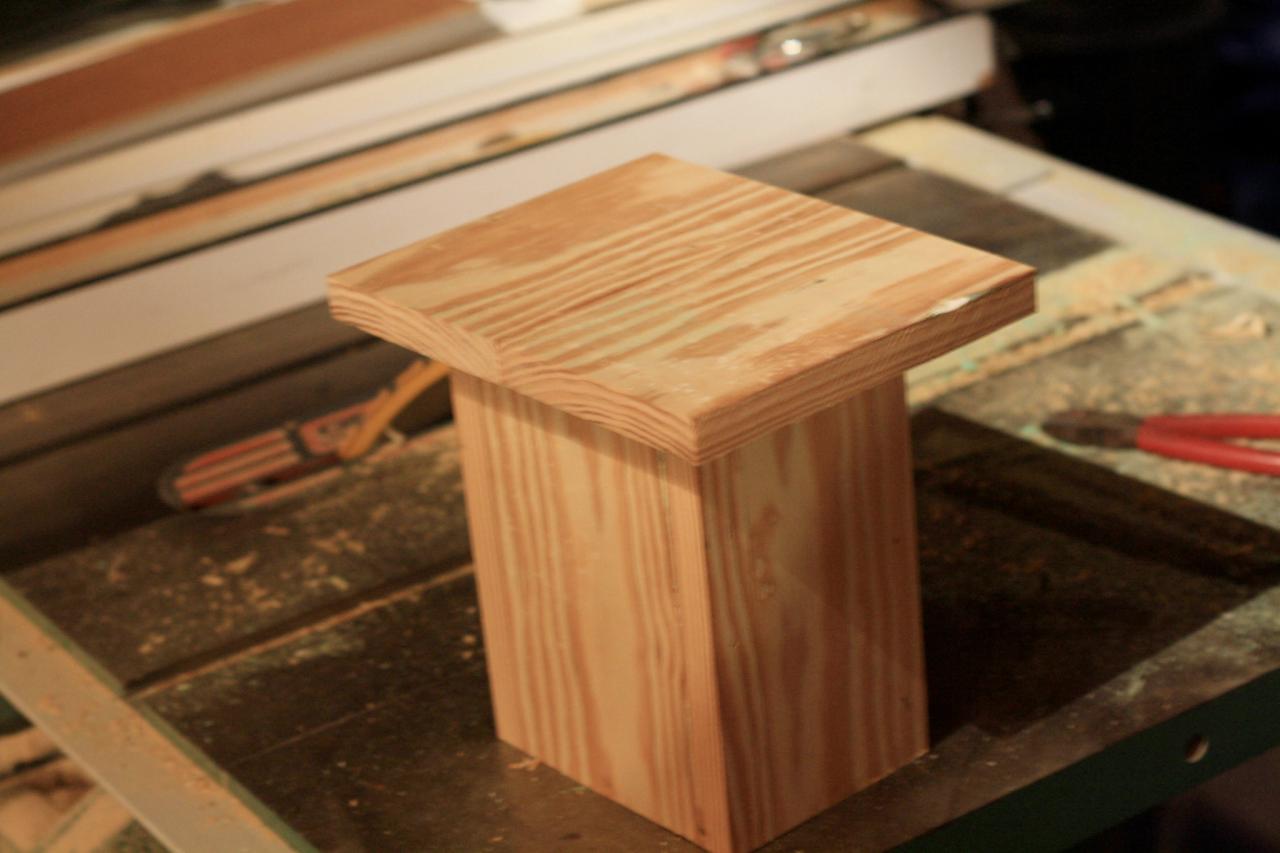
2. Assemble Sides of Trap
Assemble the sides using nails or screws to attach along edges.

Photo credit: Mick Telkamp
3. Attach Roof Panels
Lay the two roof panels side by side on top. Center and attach with nails or screws.

Photo credit: Mick Telkamp
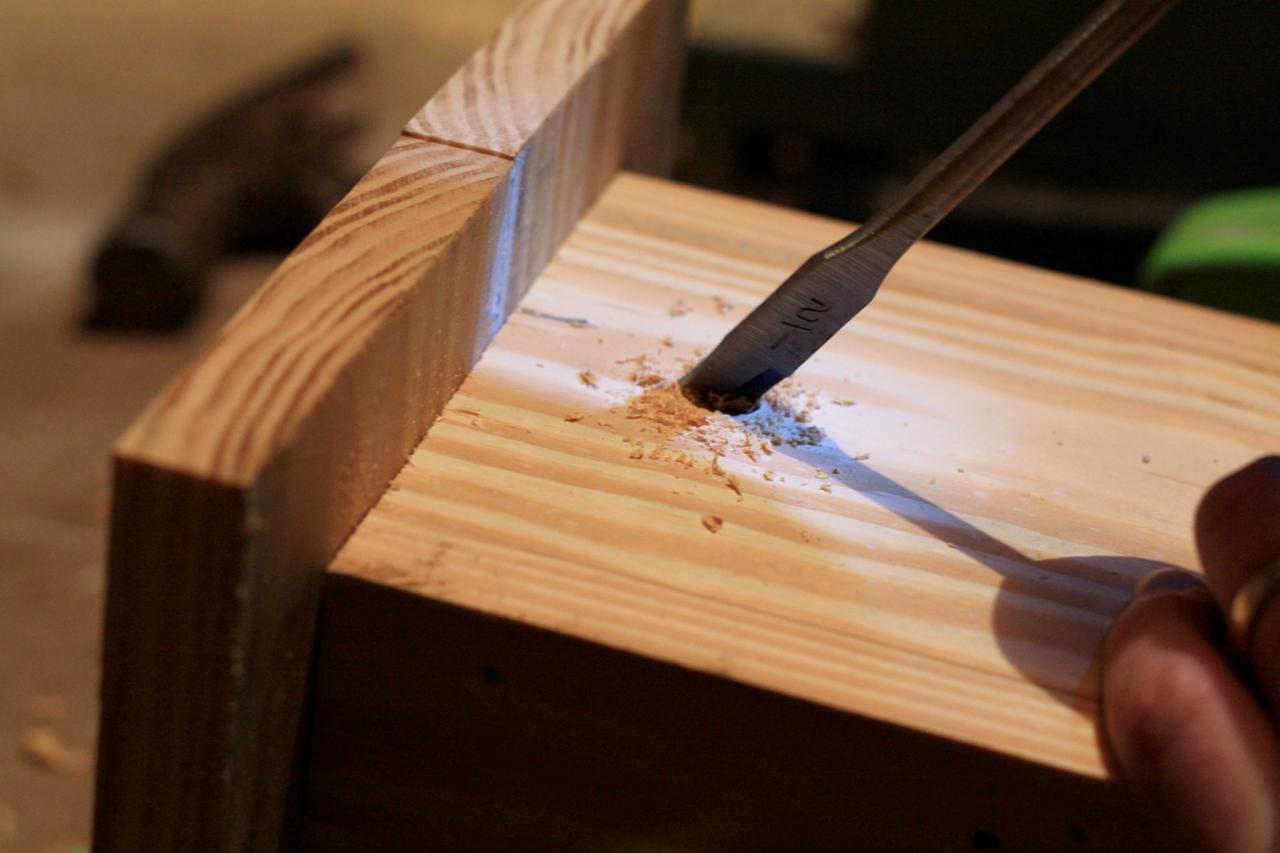
4. Drill Entry Holes
Drill 1/2-inch holes into three sides of the trap roughly 1-1/2 inch from the roof. Holes should be angled upward at least 45 degrees to prevent sunlight from shining in. These are the holes through which the bees enter the trap.

Photo credit: Mick Telkamp
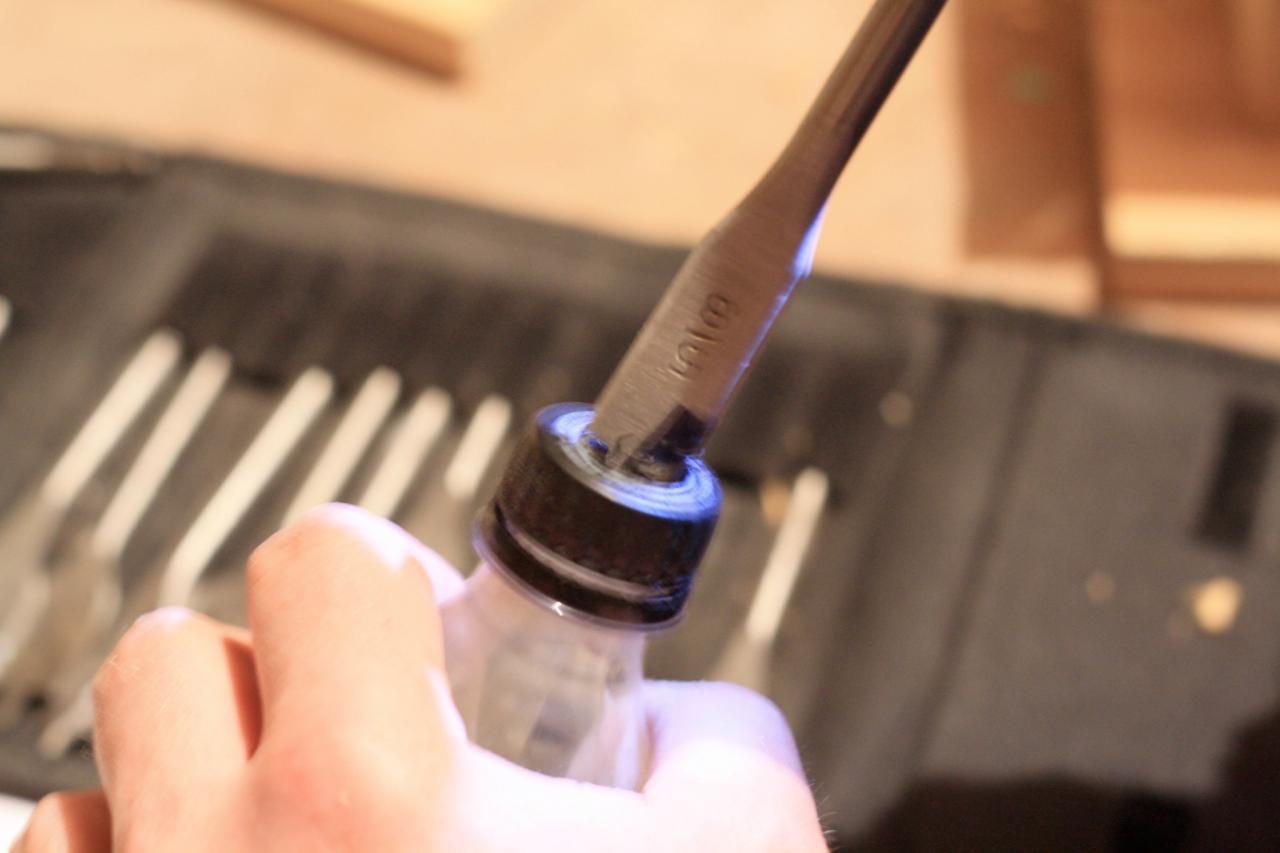
5. Drill Out Bottle Cap
Drill out the top of the bottle cap using a 1/2-inch or 9/16-inch drill bit, taking care to avoid damaging threads.

Photo credit: Mick Telkamp
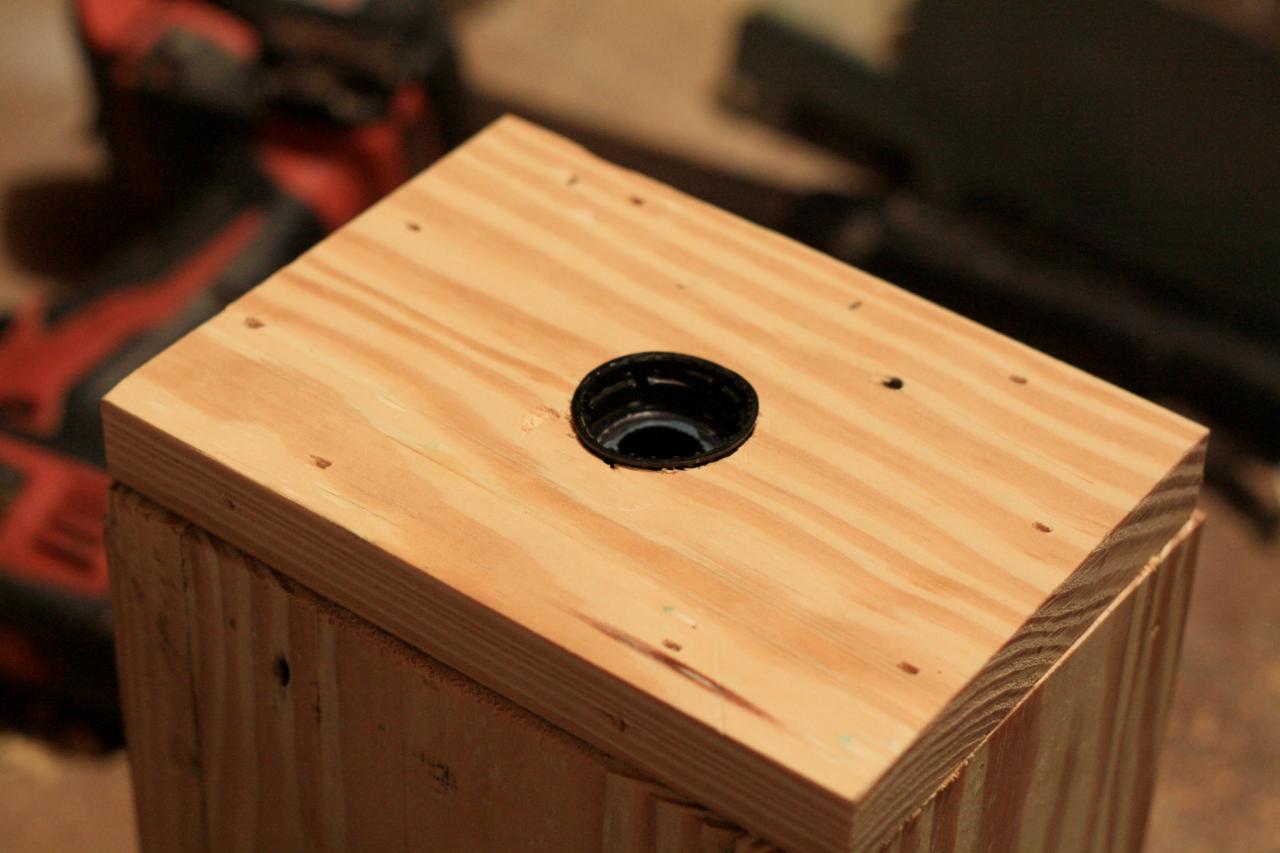
6. Drill Hole in Bottom Panel
In the bottom panel of the trap (not yet attached), drill a hole the diameter of the bottle cap (usually 1-1/8 inch).

Photo credit: Mick Telkamp
7. Fit Bottle Cap Into Bottom Panel
Gently tap the bottle cap into the hole in the bottom panel of the trap. It should fit securely without adhesive, but glue may be used if a snug fit is not achieved.

Photo credit: Mick Telkamp
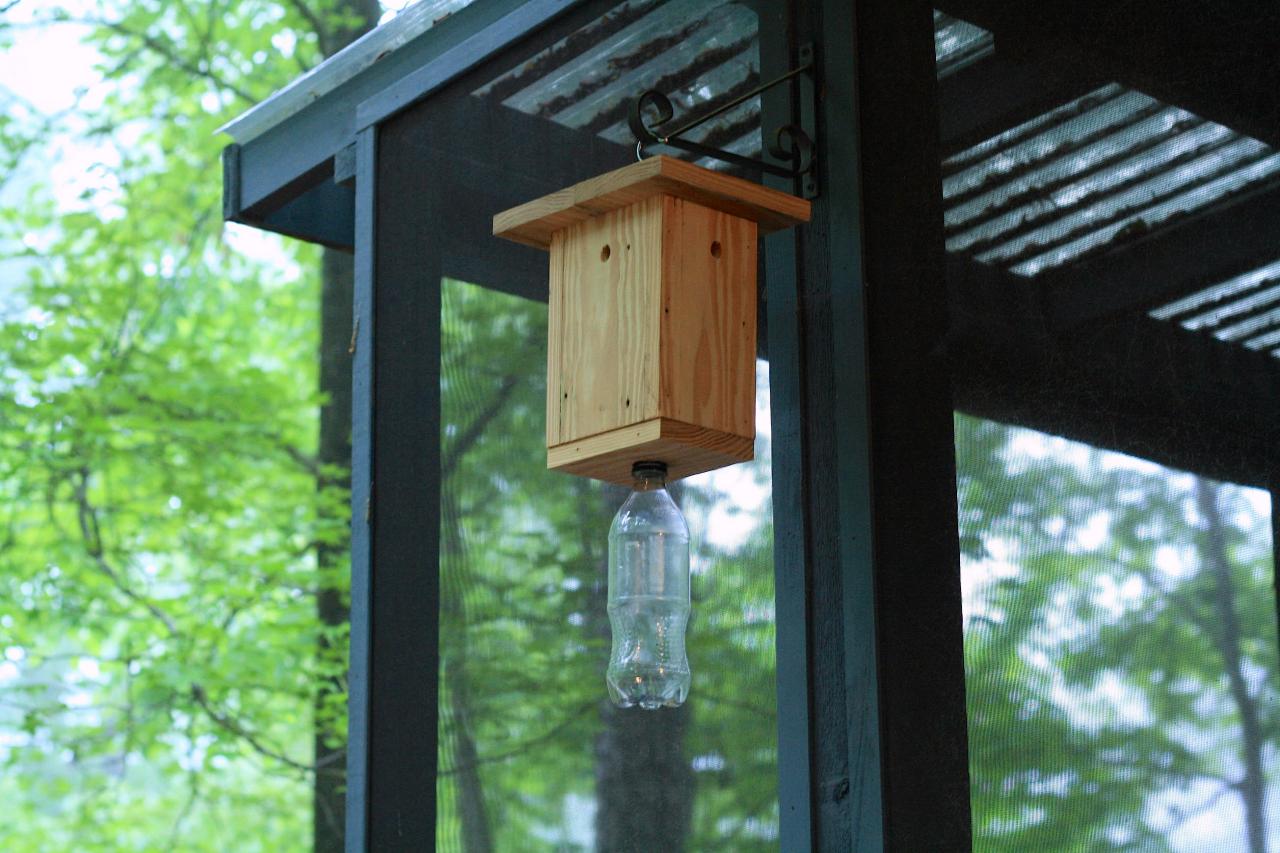
8. Attach Bottom Panel and Hang Trap
Attach bottom panel to trap using nails or screws. Add a hook or string to the top for hanging purposes and thread bottle on to trap bottom. Hang securely along fascia in an area where carpenter bees have been seen previously. When trap is full, the bottle may be discarded and replaced.

Photo credit: Mick Telkamp


