


How to Build a Retractable Canopy
Control the shade by making your own DIY retractable canopy. Open it up to create a shady retreat or close it to let the sun in.

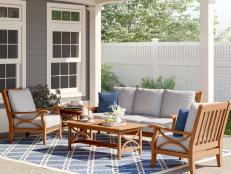
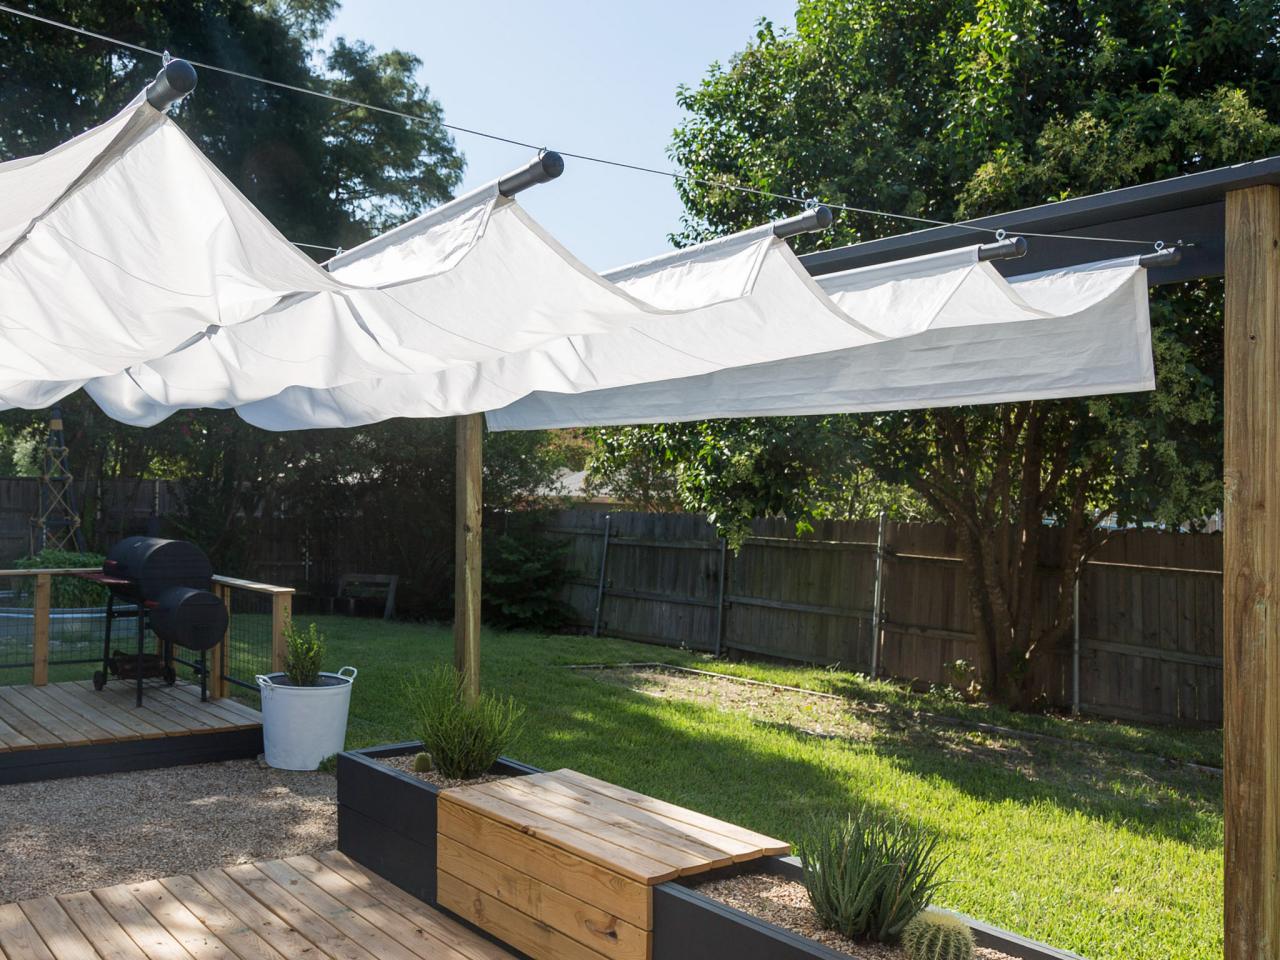
Make a Retractable Canopy
See our detailed instructions on how to build a DIY canopy for your patio.

Photo by: Sam Henderson
Sam Henderson
See our detailed instructions on how to build a DIY canopy for your patio.
Materials Needed:
- (8) 1" diameter PVC pipes, 10' long
- drill and small drill bit
- measuring tape
- marker
- (16) 1" PVC slip-on caps
- spray paint
- drop cloth
- 15-1/2 yards sailcloth
- 3 spools white outdoor polyester thread
- sewing machine
- scissors or rotary cutter
- (40) #8 eye screws
- (2) 4"x4"x8' posts
- (6) carriage bolts, washers and nuts
- long 1/4" drill bit
- (1) 2"x10"x12' plank
- (1) 2"x8"x12' plank
- (24) 3-1/2" wood screws
- paint or stain/sealer as desired
- paint roller and pan
- (10) #6 eye screws
- 90' 3/32" wire cable rope
- (5) turnbuckles with 1 eye screw and 1 hook
- (10) 3/32" cable ferrules
- swagging tool
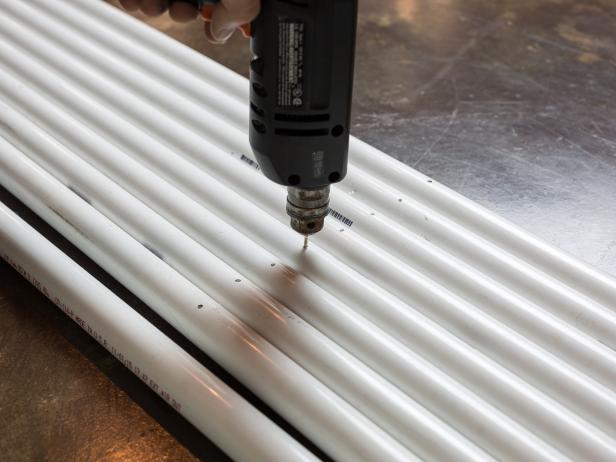
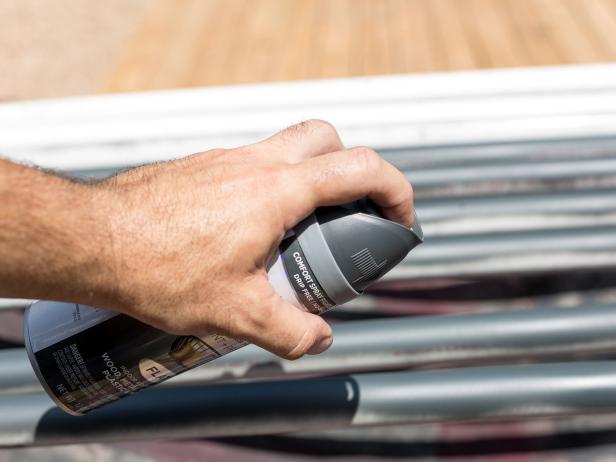
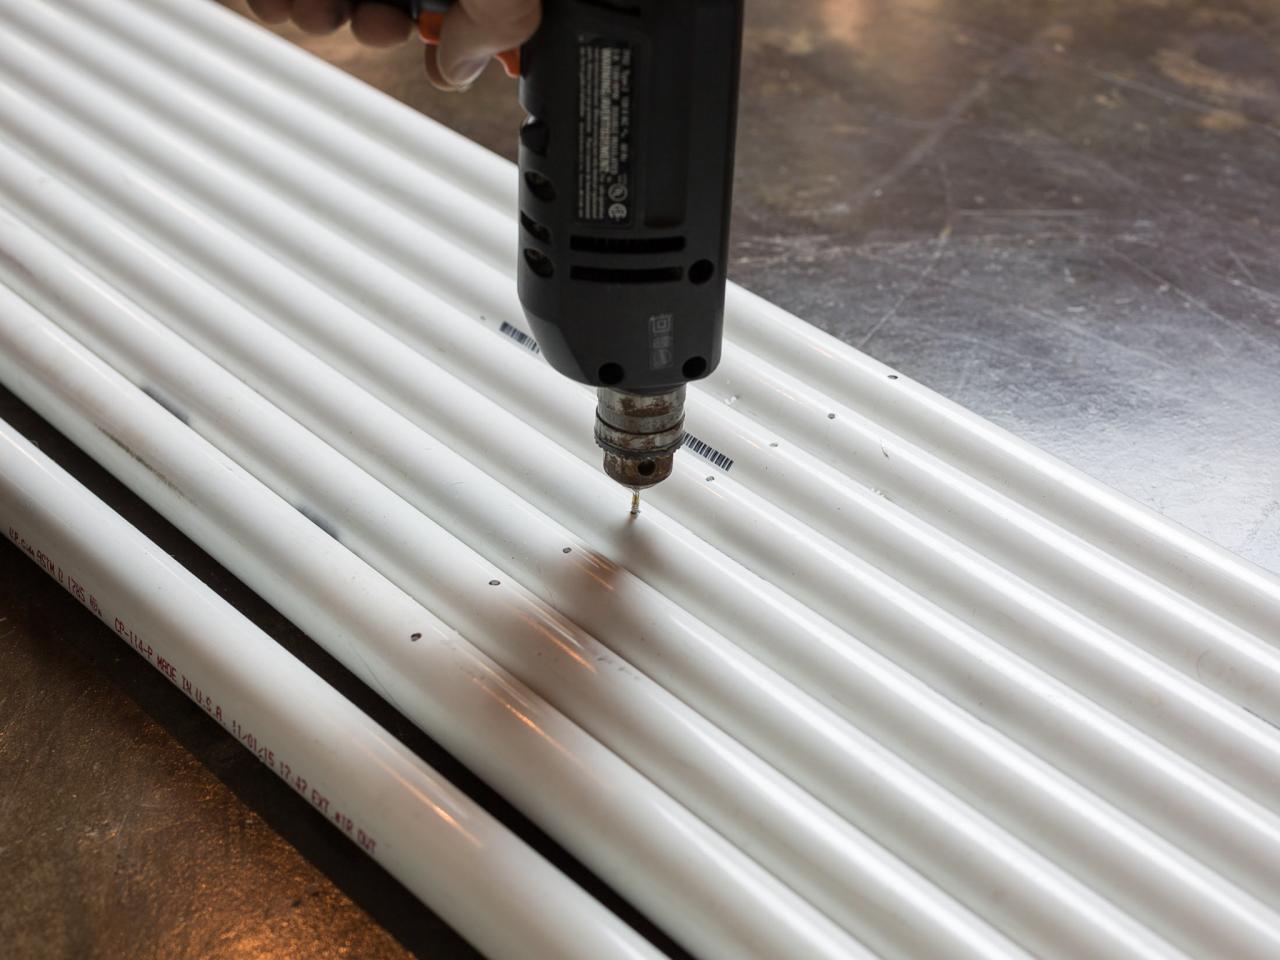
1. Prepare the Rods
Lay the PVC on a large flat surface. With a marker, mark spots at 1-1/4”, 30-3/4”, 60-1/4”, 89-3/4”, and 119-1/4” evenly lined up on the top of each pipe. Pre-drill a hole at each of these spots with a drill bit slightly smaller than the #8 eye screws. (Image 1) Paint the rods and the caps with spray paint. (Image 2) Set aside to dry completely.
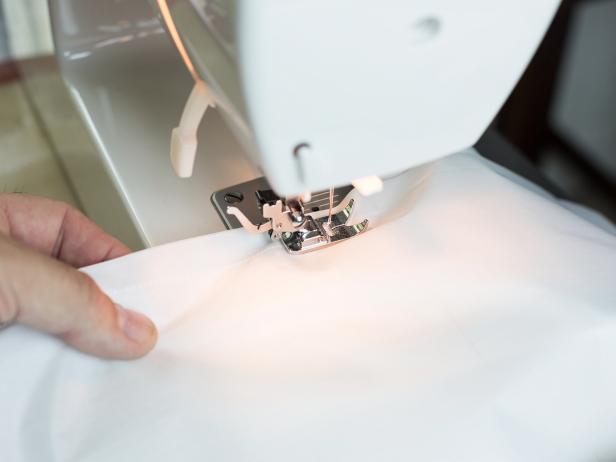
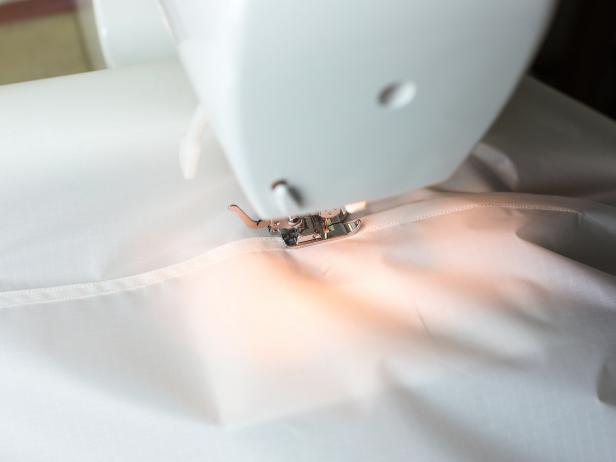
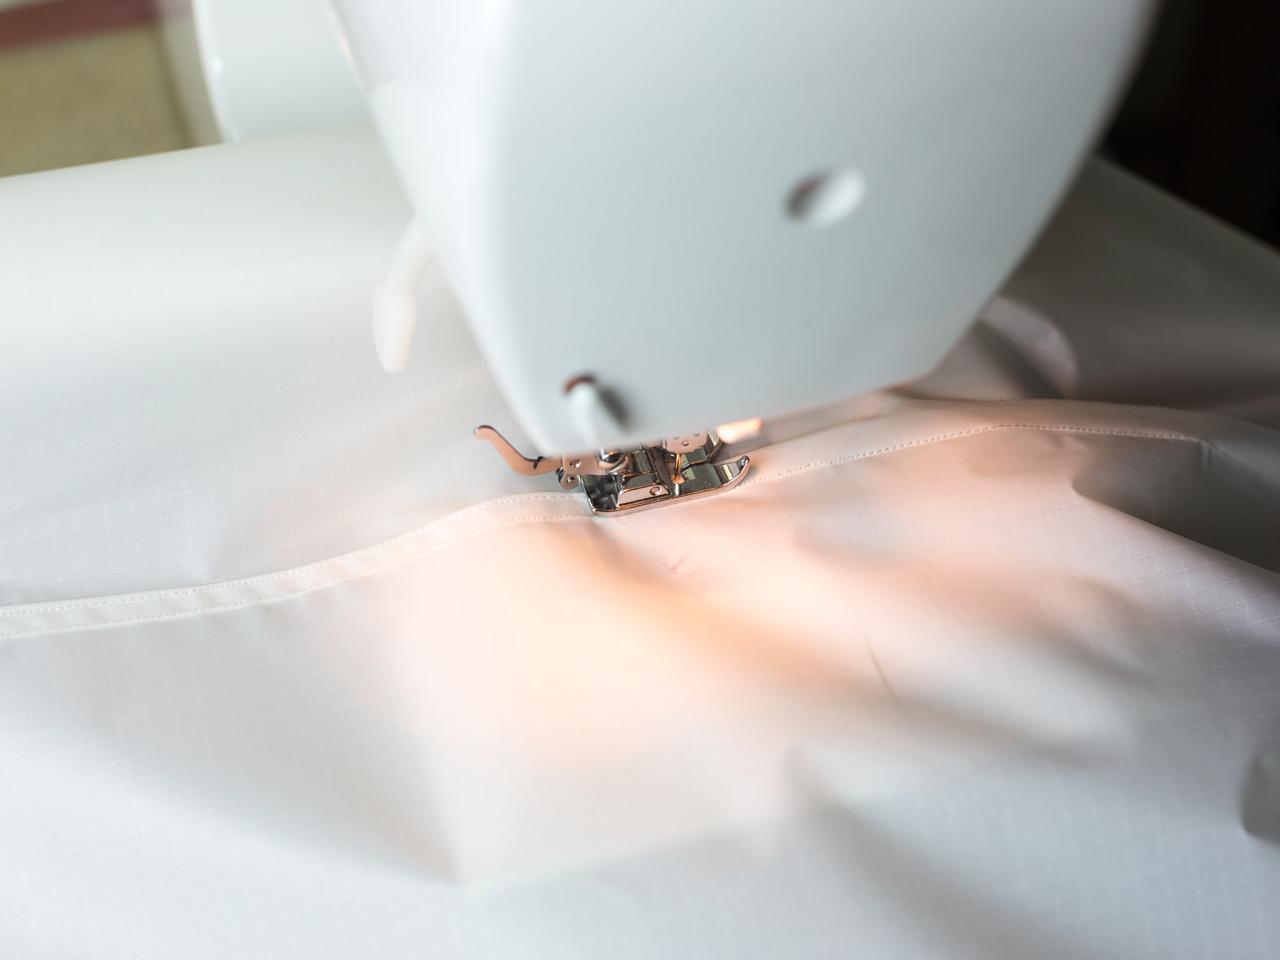
2. Sew the Shade
Cut the fabric to 4 panels of 10’4”. With the remaining fabric, cut 32 pieces that are 4-1/2” wide and 27” long. Set aside.
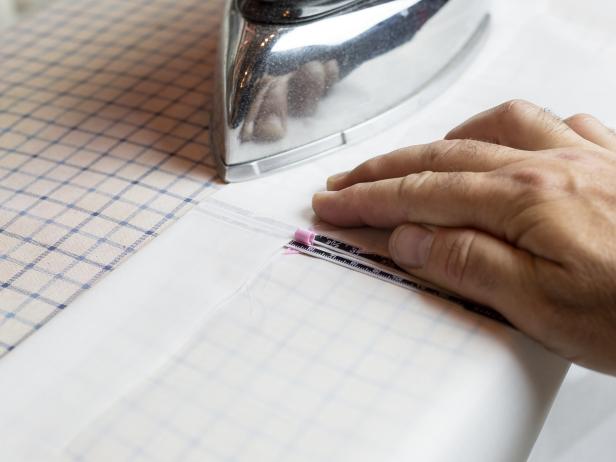
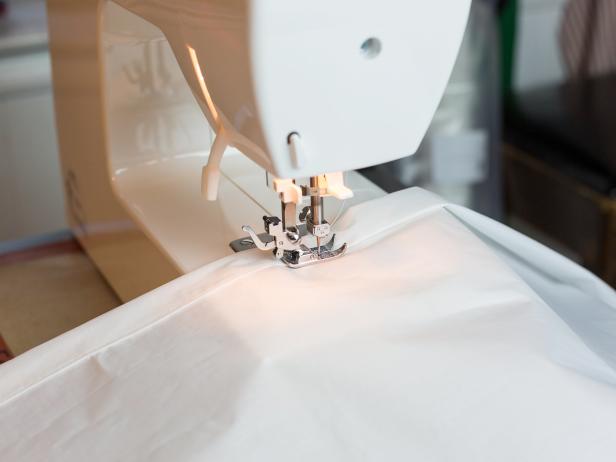
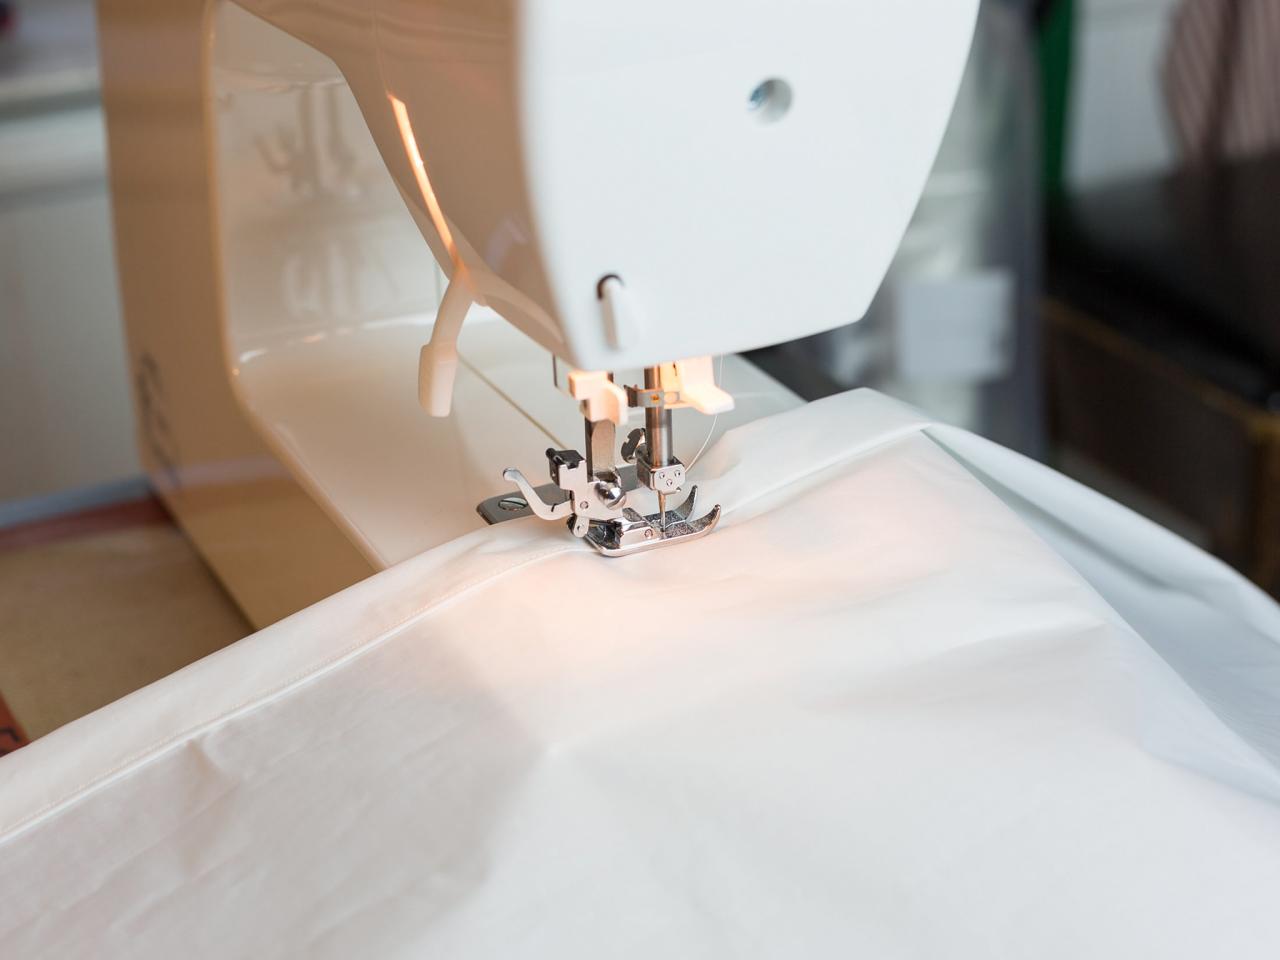
Sew two of the long panels together with a 1/2” seam allowance. (Image 1) Double the seam allowance over and pin it in place. Top stitch the folded fabric very close to the edge. (Image 2) Add the remaining two panels in the same manner. Tip: To get the fabric to fit through your machine and better control it as you sew, roll up each side and keep the rolls in place with binder clips or clothespins. Cut a 14-3/4” inch strip from one of the outside panels and attach it to the edge of the opposite panel in the same manner as the other panels. Fold over 2” on the two long sides of the sewn fabric shade. (Image 3) Fold this flap inside itself to create a 1” hem. Pin and sew it in place. (Image 4) Fold over 2” on the two short sides of the sewn fabric. Fold this flap inside itself to create a 1” hem. Pin and sew it in place, backstitching at the start and end of each hem. The result should be a 1" hem around the perimeter of the fabric shade.
3. Add Rods to the Shade
Spread the fabric shade out on a flat surface, one section at a time. With a pencil, make a line 3/4” from the center on both sides of each long, top-stitched seam. The result should be two lines, 1-1/2” apart, with the seam in the center. Fold long seam to long seam and crease the fold. Use this fold as your guide to make 2 lines, 1-1/2” apart with the crease in the center. These lines will be your guide for the rod pockets.
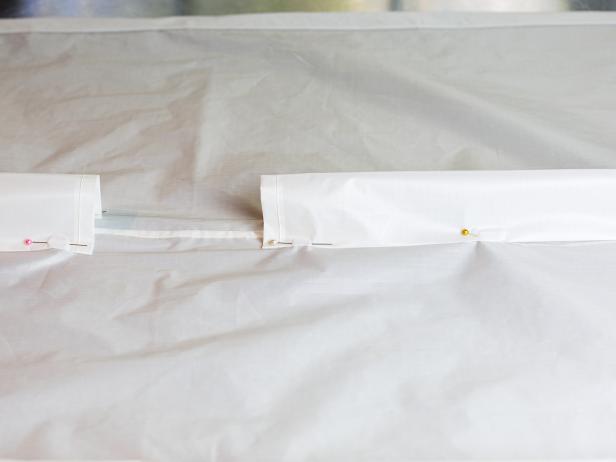
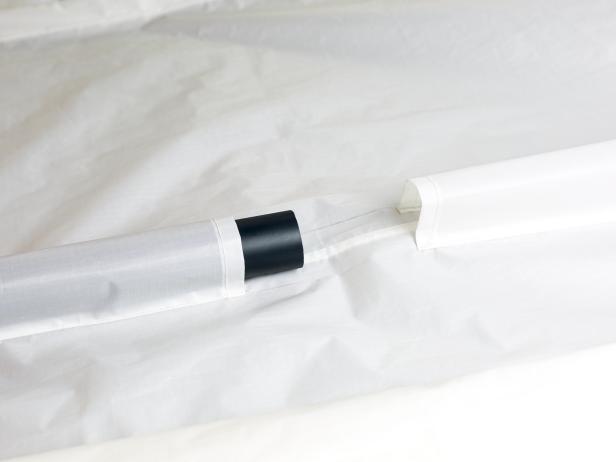
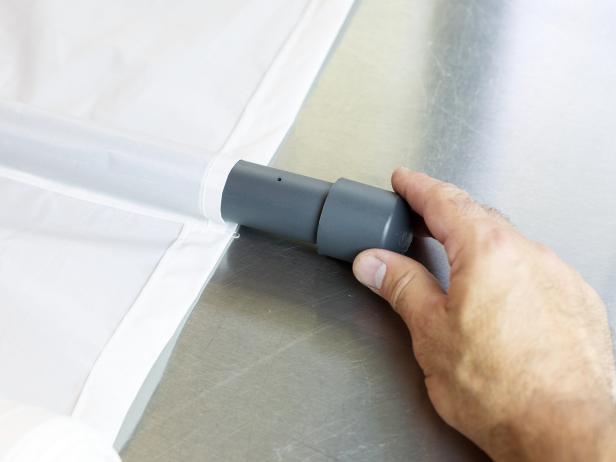
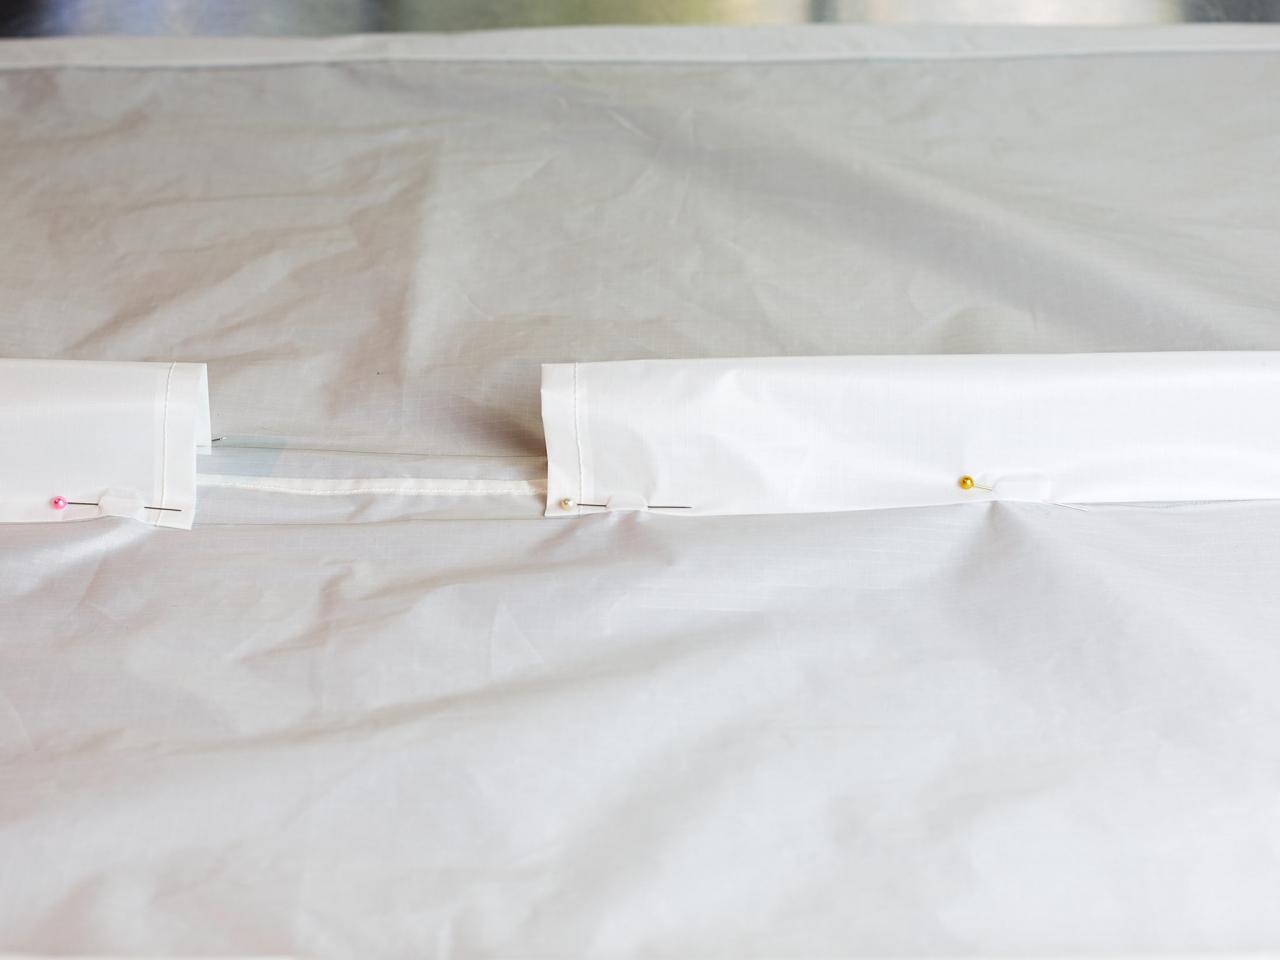
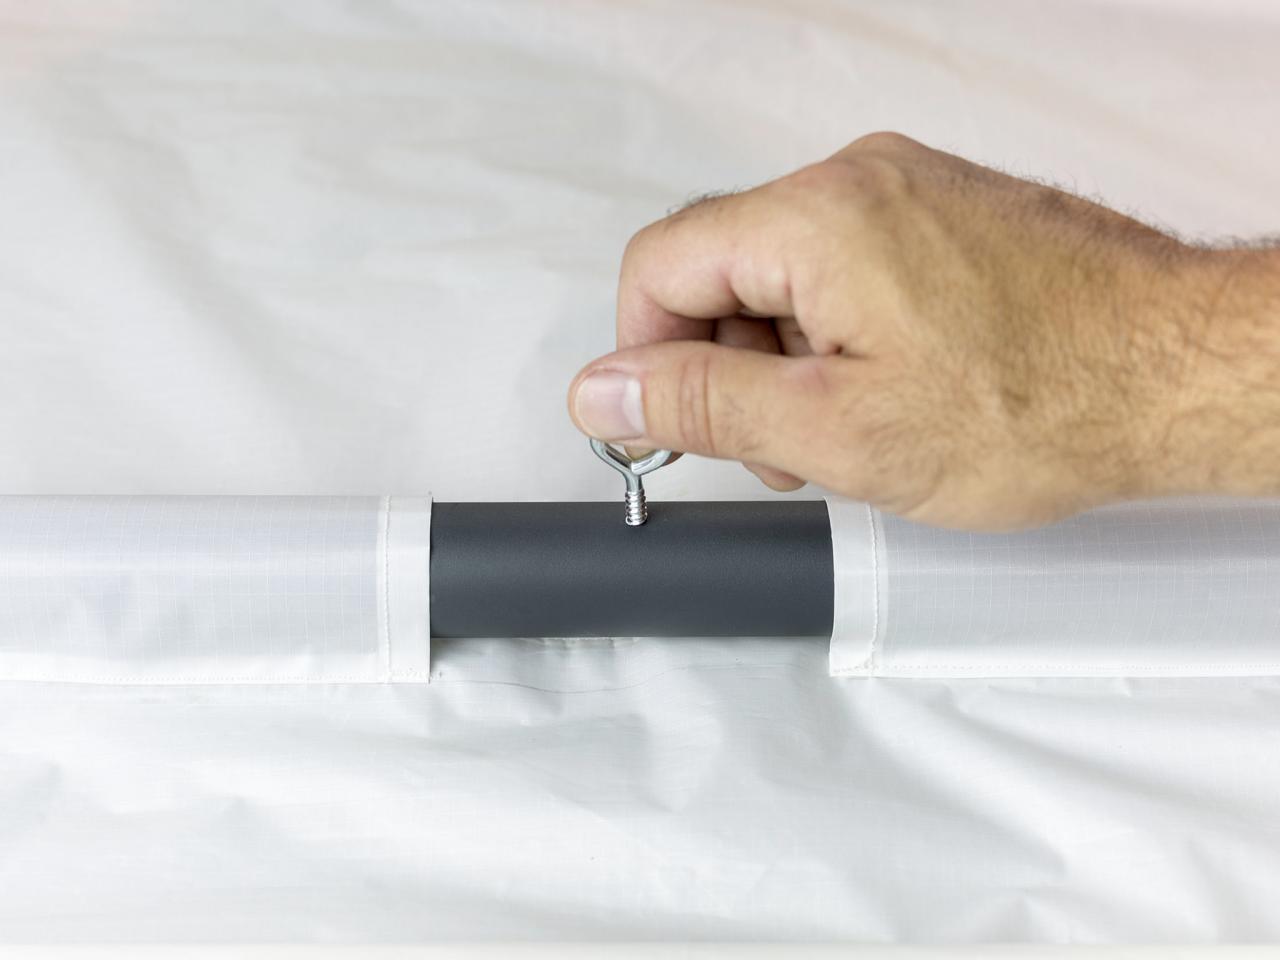
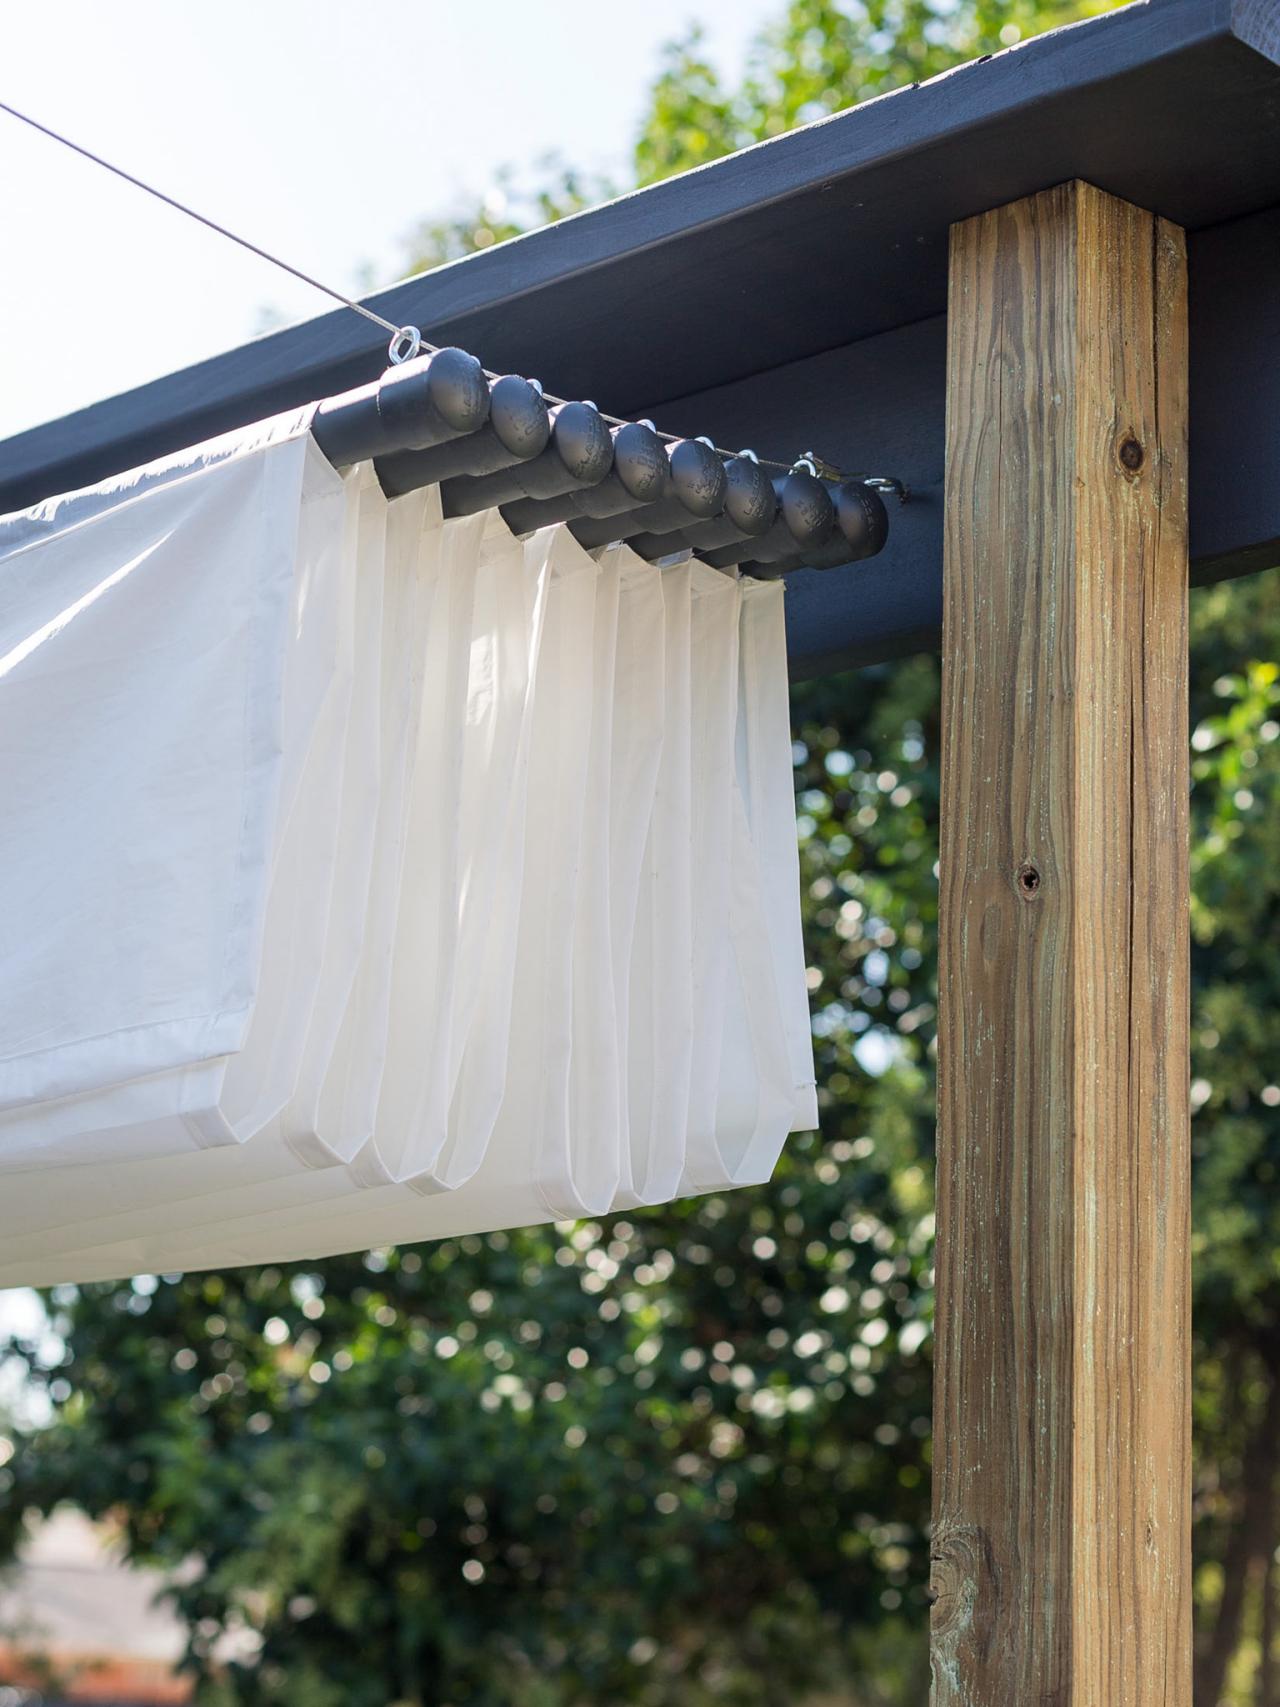
On the 32 pieces of fabric that are 4-1/2”x27”, fold over each short end 1/2”. press or crease in place. Stitch each fold in place. Fold over 1/4” on each of the long edges. Pin four of the pieces to the fabric shade with the long edges lined up with the lines you made. (Image 1) The pieces should all be 4” apart with the two outside pieces lining up flush with the edges of the shade hem. Sew the pockets in place, back stitching at the start and end of each pocket. Repeat for the other 7 lines and 28 pocket pieces. Cut away all excess threads. Insert a rod into each row of pockets. (Image 2) Put eye screws in each of the 40 holes with the metal sides of the holes running parallel with the rods. (Image 3) Add the caps to the ends of the rods. (Image 4)

4. Build the Support
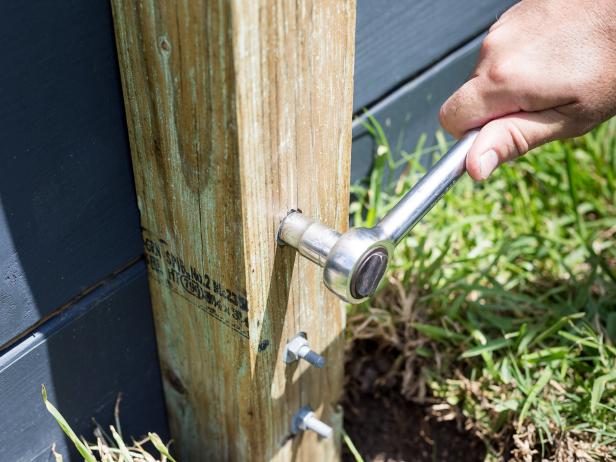
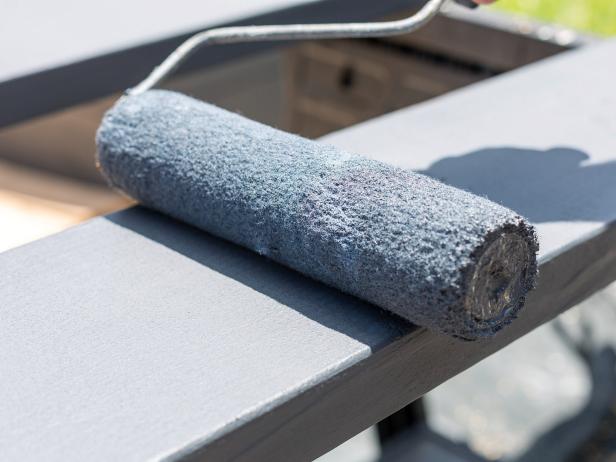
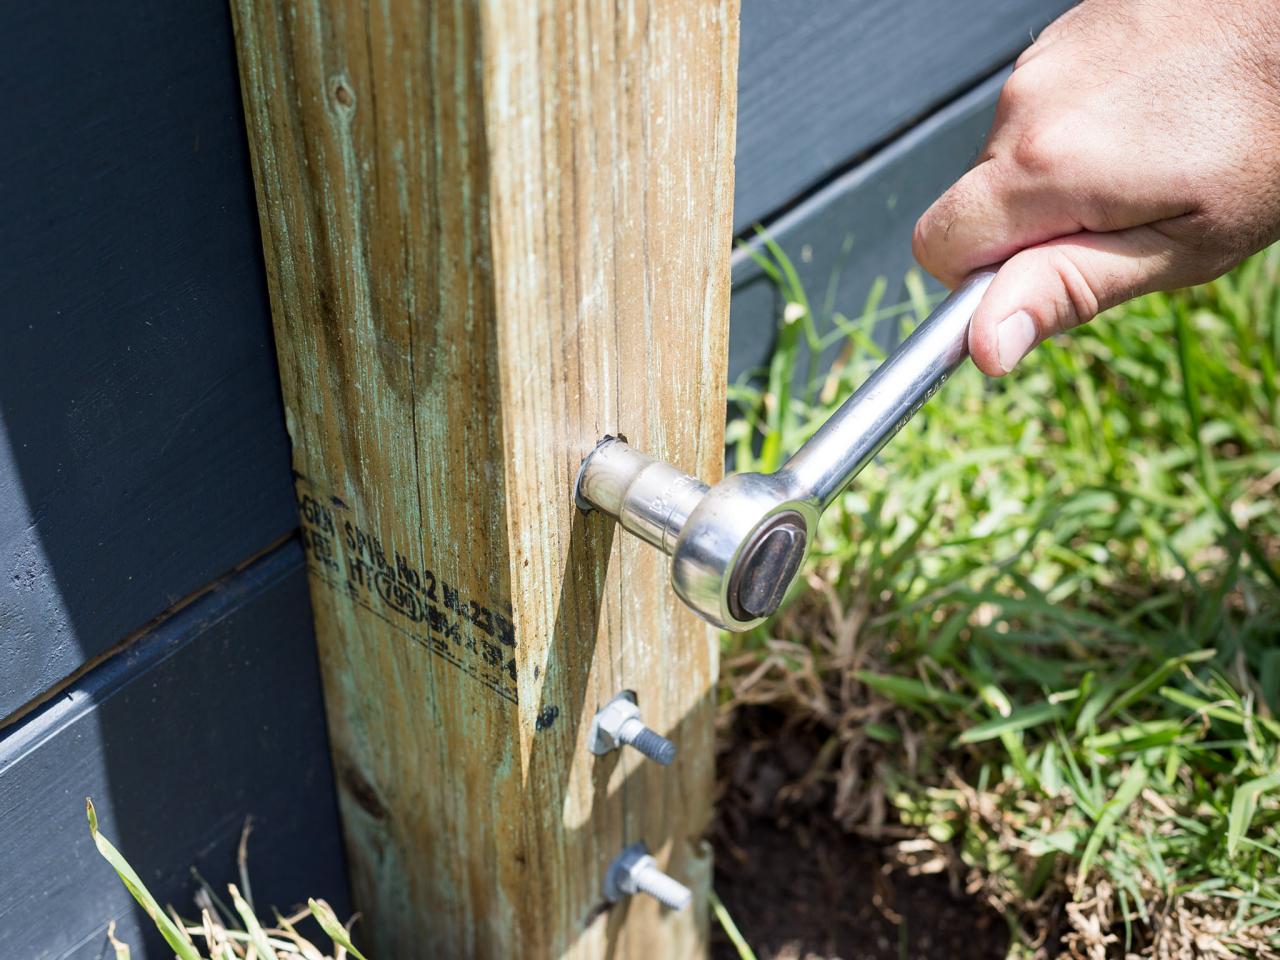
Attach the 4”x4”x8’ posts to an existing solid structure which is firmly attached to the ground. Alternatively, you can use a 10’ post and sink 2 feet in concrete in the ground. Drill three holes for carriage bolts through the structure spaced at least 4 inches apart. Space the posts 10 feet 6 inches apart. Insert the carriage bolts and secure tightly with a washer and nut. (Image 1). Stain and seal or paint the support pieces as desired. (Image 2) Place the 2”x10”x12’ board on top of the posts. It should be centered front to back and side to side over the posts. Secure the board to the top of the posts with four 3-1/2” screws. (Image 3). Add the 2”x8”x12’ plank to the back of the post with the edge butted up against the bottom of the 2”x10”x12’ board and the ends flush. Use four 3-1/2” wood screws on each end to secure the 2”x8”x12’ plank to the posts. Further secure the 8” board to the 10” board by adding screws through the top of the 10” board into the edge of the 8” board below, spaced about every 1-1/2 feet apart.

5. Install the DIY Canopy
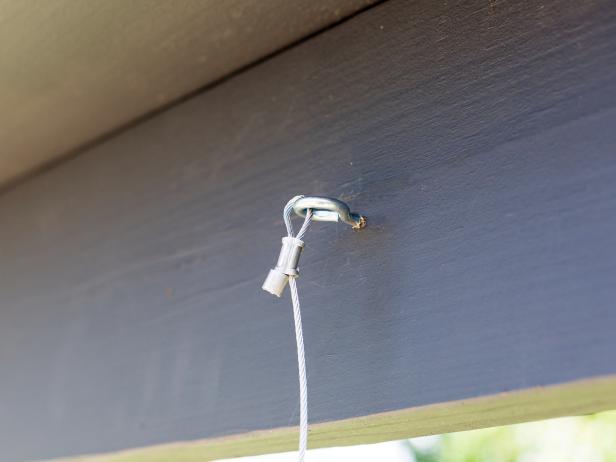
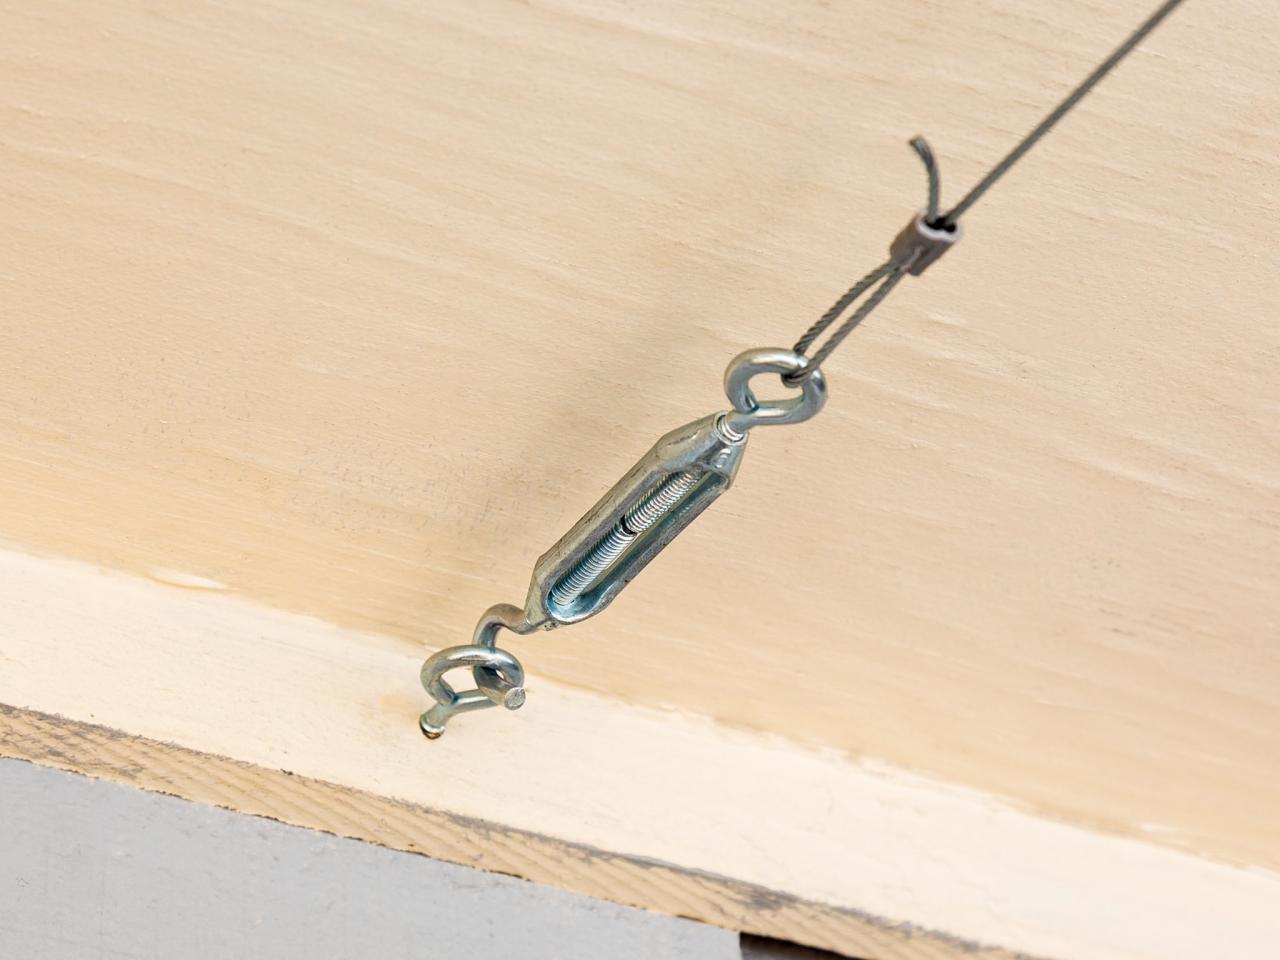
Determine the center point between the two posts on the front of the 2”x8”x12’ back board. Mark this spot with a marker 4 inches from the top. Mark two more spots on both sides of the center point, spaced 29-1/2 inches apart. Mark these same spots on the corresponding structure where the cables will be attached. Measure carefully to ensure that the cables will be in a straight line. Pre-drill small holes at each of the spots and attach #6 eye screws in each of the 10 holes with the eye parallel to the ground. (Image 1) Cut cable into 5 pieces 18’ long. Attach one end of each of the cables to the eye screws on the back board using a ferrule and swagging tool to secure it. (Image 2) Thread the cables through the eye screws on the rods. Open the turnbuckles up as much as possible and hang them on the eye screws attached to the house or corresponding structure. With help, lift the shade and rods while you attach the opposite end of the cable to the eye of the turnbuckle with a ferrule, pulling as tight as possible. Repeat for the remaining 4 cables. Turn the turnbuckles to remove the slack. (Image 3)


Additional notes:
*The materials for this shade are very light. If you use heavier materials, further structural support may be required.
*The construction of the support and installation of the shade will require at least two people.
*Sailcloth is lightweight, very durable, weather-friendly, and can generally be found in 60 inch widths. All of the measurements for this project were for a shade that is 10 feet long and 17 feet wide. If your distance or the width of your fabric is different, adjustments will be necessary.


