


Make a Planter With Crystals

Image courtesy of Gentl and Hyers
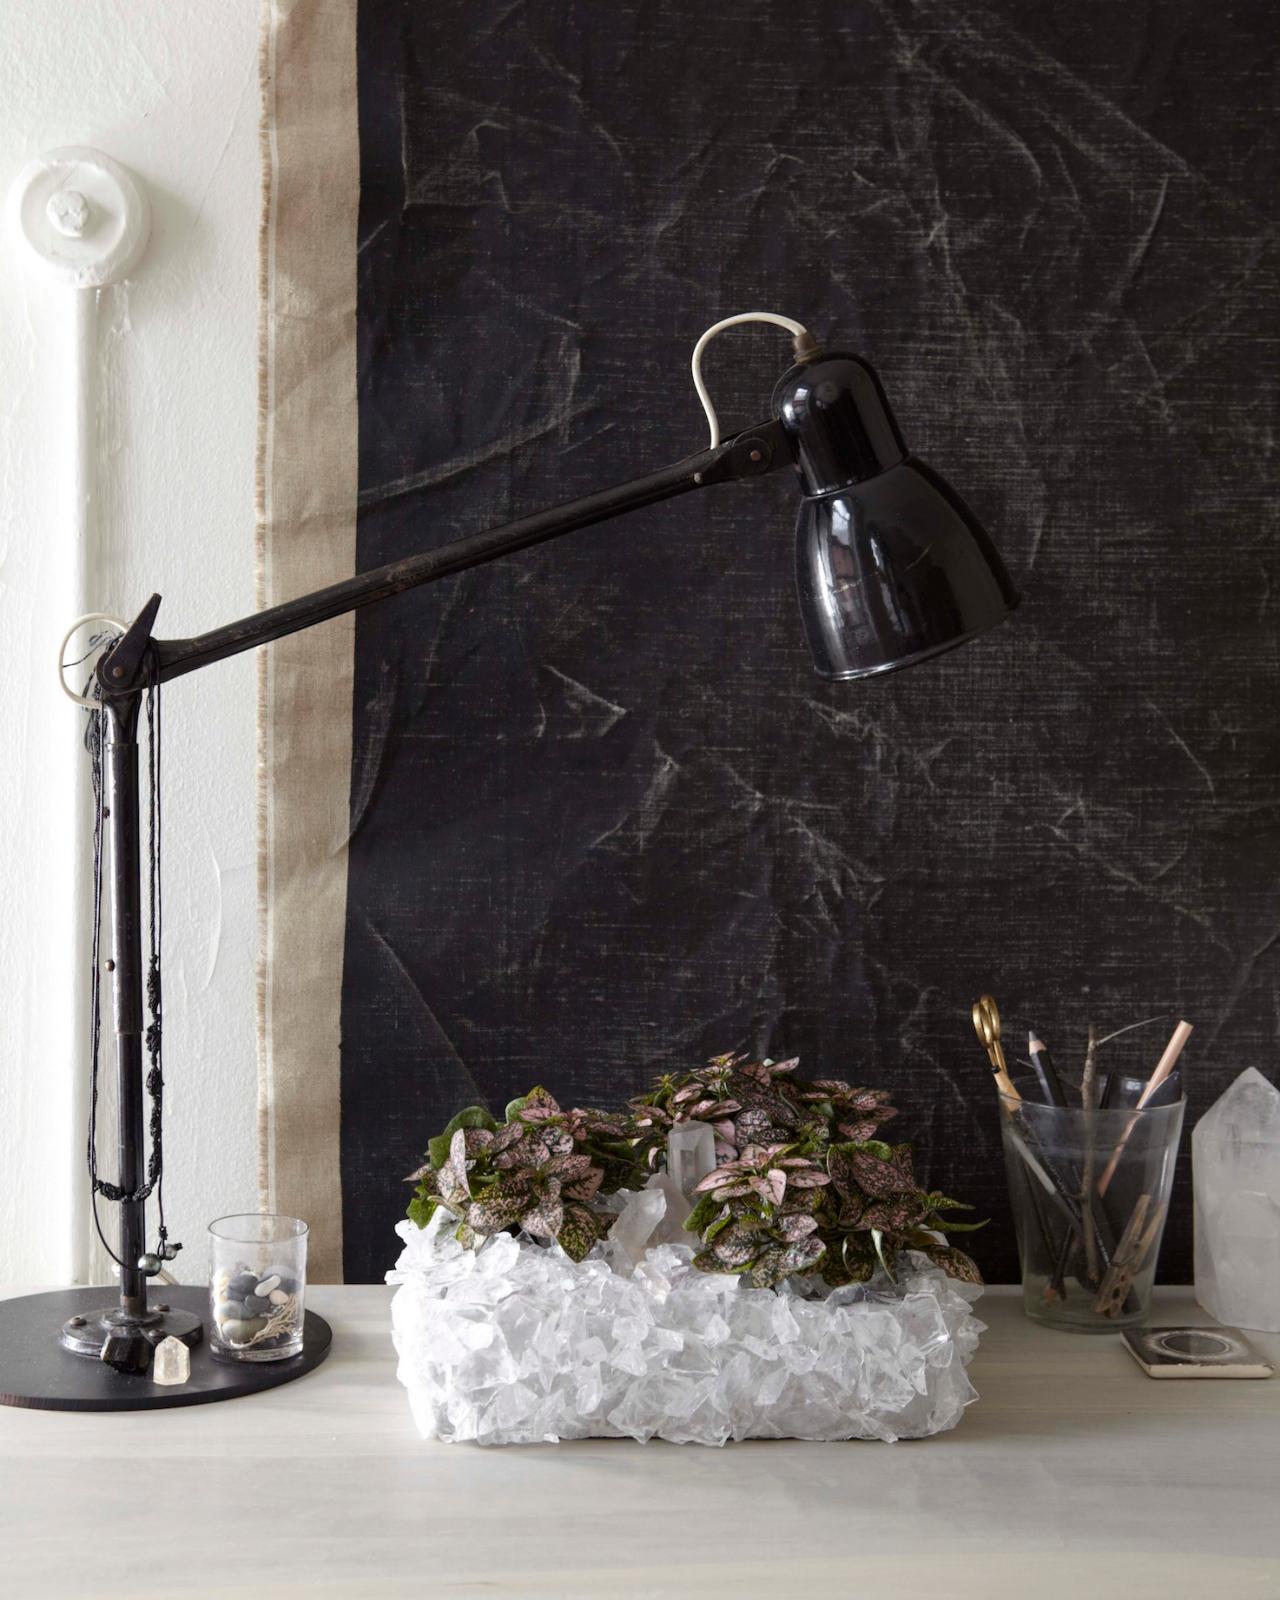
Terra cotta pots are fine for everyday wear, but houseplants like to dress up every now and then just like everyone else. In his new book Bring the Outdoors In, Shane Powers makes a crystal-encrusted planter that rocks in more ways than one.
"I was inspired by the great garden grottoes of 16th-century Italy and France, which featured shells and faux geological compositions," Powers says. "I wanted to bring their outdoor beauty inside."
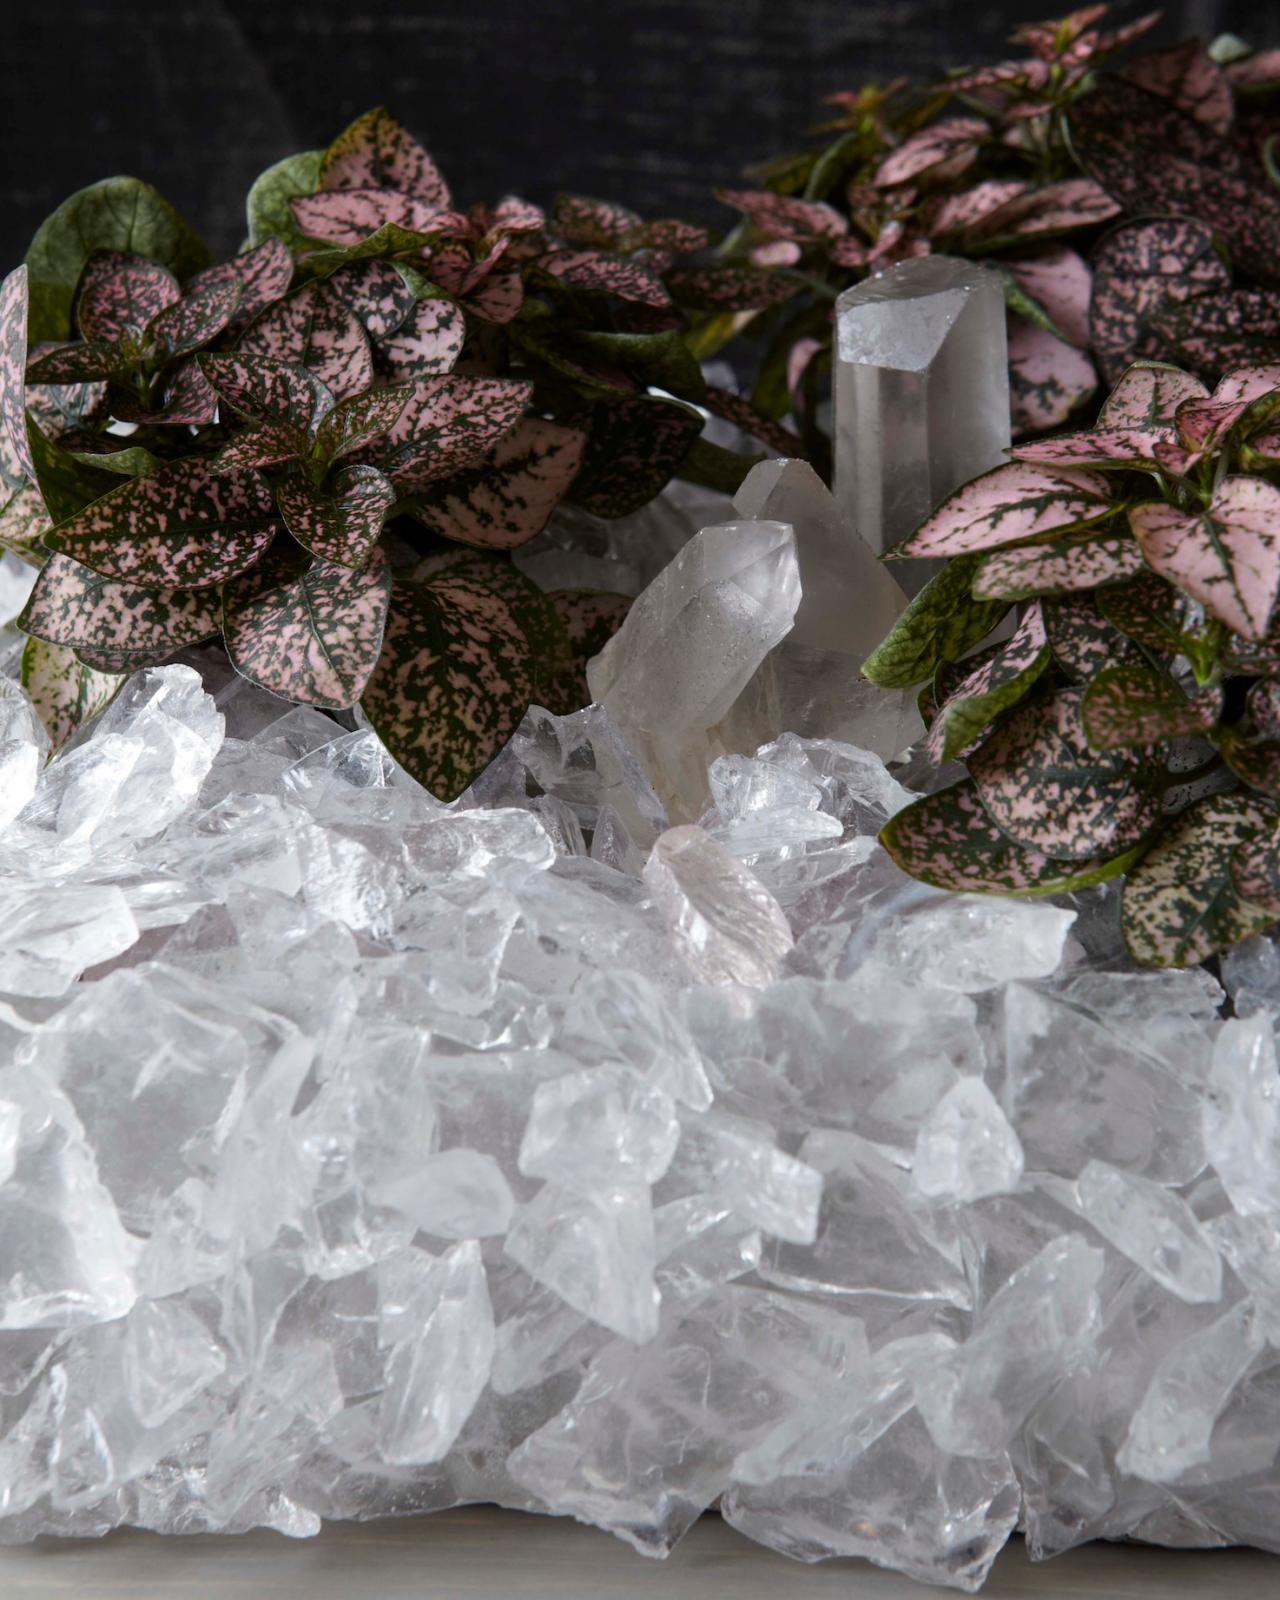
Powers pairs his crystal planter with Hypoestes phyllostachya, or polka-dot plants, found in most garden centers. "I prefer the pink variety, which has radical patterning on its leaves," Powers says. "It's a more unusual alternative to green foliage."

Crystal-Encrusted Planter
Materials:
- 10-inch-square-by-2¾-inch-high cement or ceramic planter
- Sobo craft glue
- 3½-pound jar of clear sea glass crystals (1¹∕8-inch-size pieces) for planter exterior
- Towel
- 5 cups of gravel for drainage
- Activated horticultural carbon
- Peat moss–based potting soil
- 3 pink Hypoestes phyllostachya (polka‑dot plants)
- Spoon
Additional Optional Groundcover Decorations*
- 3½-pound jar of clear sea glass crystals (1¹∕8-inch-size pieces)
- 3½ pound of light pink sea glass crystals (1¹∕8-inch-size pieces)
- 1 or 2 larger decorative crystals
*These are the smallest amounts available for these items, but you will not use the entire quantity. Save the extras for other projects.
Assembly:
- Working on one side of the planter at a time, glue the clear glass crystals to the outer walls and allow each side to dry before moving on to the next. To begin, stand the planter on one of its sides (the sea glass will adhere better on a flat surface). Working from the base up to the top edge, begin gluing the clear glass crystals to the exterior, fitting irregular pieces into place as you go. Once the side is completely covered, fill in with smaller pieces and be sure to also place some pieces around the top edge of the planter. Allow it to dry about 3 hours.
- Create a base to hold the planter upright for further gluing by scrunching up a towel. Place the planter securely on the towel, and continue the process of gluing and drying each side until all four are covered. You can place the towel and planter inside a bin or box to hold the planter upright while it is drying.
- Once the planter is covered with crystals, prepare it for planting. Place a ¾-inch layer of gravel in the bottom, then a thin layer of the horticultural carbon. Add enough soil to be able to anchor the roots of the plants; you may raise the soil level slightly above the rim of the container to gain more root space. Position the plants in the soil in a non-symmetrical triangular arrangement, leaving enough room to see a little bit of soil in between them. Once the plants are in place, fill in with additional soil.
- Create a decorative ground cover using the materials of your choice. Alternate patches of clear and pink sea glass until the entire surface of the soil is covered in a rich layer of texture. A spoon is helpful when placing glass pieces in awkward-to-reach spots between plants and foliage. Finish with a couple of standing crystals if desired.

Care:
- Place your completed planter where it will get plenty of light, but out of direct sun. Filtered light from a south- or west-facing window is ideal. Leaves on the polka-dot plant may turn to solid green in low light. These tropical natives enjoy being grouped together as it helps maintain their humidity levels.
- To water, you’ll need to gently move away a small area of the decorative ground cover near the stem bases, and add water with an eyedropper or small spoon; this will help preserve the decorative ground cover arrangement. Keep the soil lightly moist, taking care not to over-water. If the leaves begin to yellow, the soil is too soggy.
- To maintain the small bushy scale of the polka-dot plant, pinch off taller stems to encourage lower stems to branch out. Purple flowers may appear and should be pinched off because they will deplete the foliage and cause the plant to deteriorate after they have bloomed.
- Fertilize with a liquid fertilizer once a month.
- The plants will eventually outgrow the planter; replace them with younger plants or you can root plants from stem cuttings of the originals.


