


How to Use a Power Drill
Using a drill doesn't have to be intimidating — use this handy guide to learn about the different parts, how to use it and how to take care of it.


Cassidy Garcia
Despite growing up with a handy mom, renovating two old houses with Husband, and being a designer at HGTV for years, I have somehow managed to avoid learning how to use a drill. It’s not that this skill wouldn’t have come in handy hundreds of times in the past. I’ve just always found power tools to be a bit intimidating. So, when I was asked what skill I most wanted to learn from my mother, the answer was easy — how to use a power drill. My mom gave me a rundown of all the basics that I'm going to share with you. Keep reading to learn the different parts, how to use it and how to take care of it.
Drill Parts

Cassidy Garcia

Cassidy Garcia
There are two types of drills. My mom prefers one that plugs in and uses a chuck key to tighten the bit into place. I’m cordless all the way!
There are three main parts to a drill. The trigger is what actually makes the bit turn, and it’s in the corner right where your index finger rests. In this same area, you'll see a switch that tells your drill to move forward or in reverse. These look different depending on the type of drill you’re using, so find it before you put a bit in. The chuck is what actually holds the bit in place. Be sure the power is disengaged before adding drill bits to the chuck.
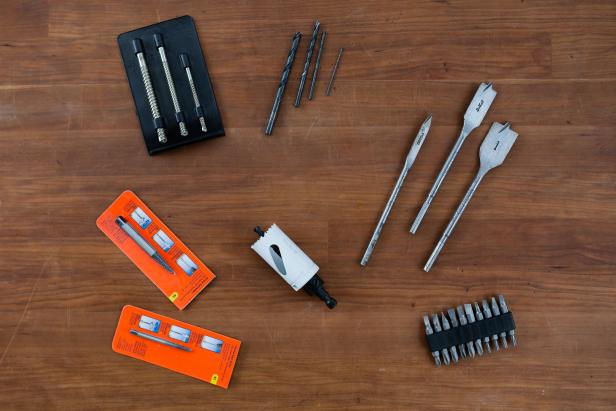
Types of Drill Bits
There are so many different types of drill bits. The ones pictured are from my mom’s collection.
Cassidy Garcia
- Regular bits are great for wood or PVC.
- Masonry bits are for drilling through hard materials like concrete, brick, and stone. The tip is flat and a little bit wider to help the drill really get a grip on those extra hard surfaces.
- Spade bits drill holes that don’t need to go all the way through the wood. For instance, you may not want your screws to show. In that case, you could sink a screw by using a spade bit to drill down a little, inserting your screw, then covering it.
- Hole saw is self-explanatory. A drill bit in the center gets things started, then a tube with saw teeth surrounding the bit makes the hole.
- Screwdriver bits can really speed up jobs around the house.
- Screw extractors are when you’re stuck in a real jam. You’ve stripped the screw, and you can’t get it in or out. It has two ends. The burnisher cleans out your trouble. Then, you can use the extractor to take it out. Note: My mother would like to point out that her screw extractors are still in their packaging.
Pick the Right Bit

Cassidy Garcia
Pick a bit that’s smaller than the screw for your project, and insert your bit into the chuck. Turn the chuck to lock it. Or, if you’re using one like my mom's, turn the chuck key in the side to lock the bit in place.
Get to Drilling
Cassidy Garcia

Cassidy Garcia
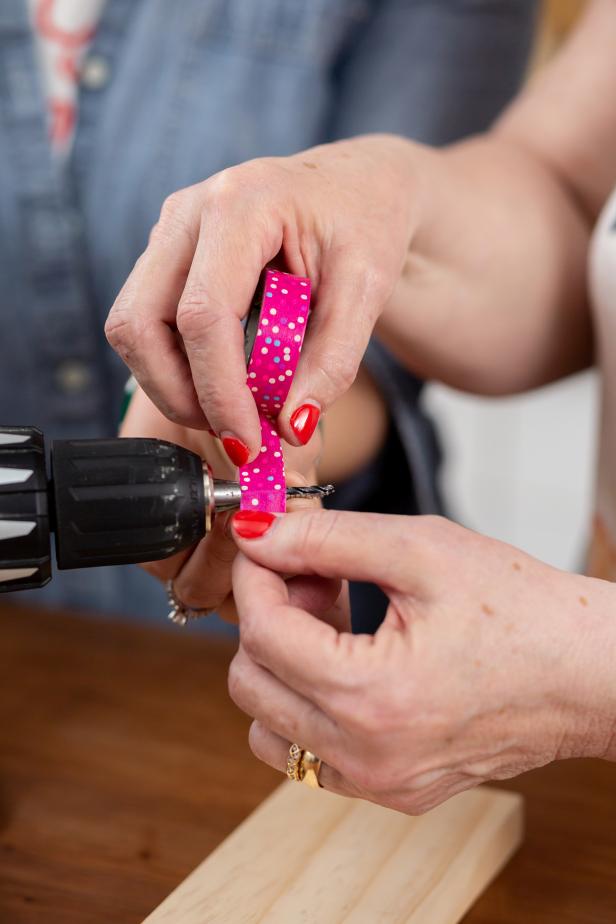
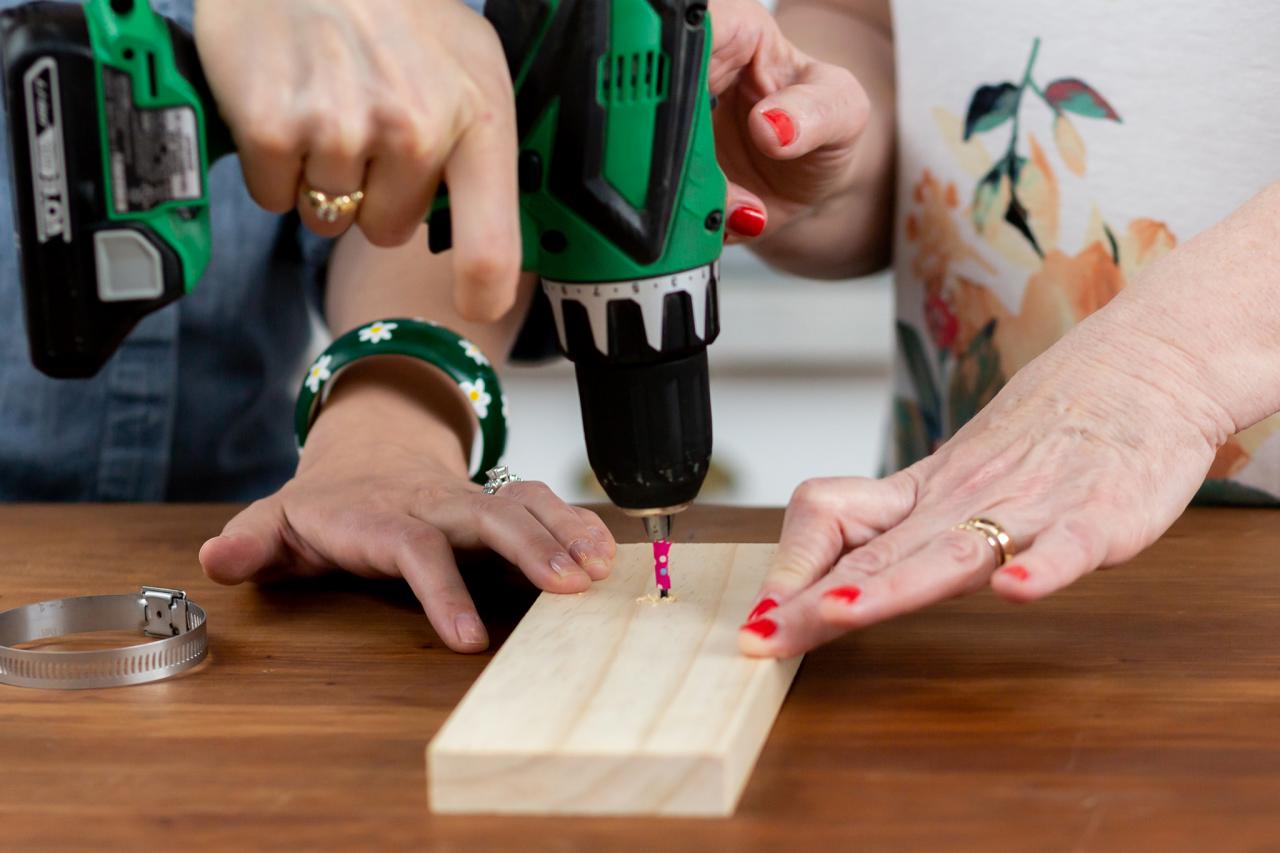
You don’t want to drill in too deep. A good tip here is to mark your desired depth with painter's or washi tape (Image 1). Measure and mark where you want to drill. Drill a pilot hole at the mark (Image 2). Put your drill in reverse to pull it out. Repeat the drilling steps to insert a screw.
Taking Care of Your Drill

Cassidy Garcia
As with any DIY project, it’s important to take care of your tools. Spray an all-purpose oil on a towel, and wipe down your tools after each project. It won’t just keep your shop clean, it will increase the life of your tools.


