


How to Paint a Dresser to Look Like a Stack of Suitcases
Jen Crider, author of Amazing Furniture Makeovers, shares instructions on how to transform a plain dresser into a stack of charming vintage luggage.

We just love this revamp of an old chest of drawers from Jen Crider. We're smitten on it because it is an easy project that makes a big design statement. Don't be intimidated to try this, it doesn't have to be perfect, they're supposed to look like well-worn vintage suitcases. Try decoupaging some postcards or vintage landmark stickers on the suitcases. Crider does not recommend using gold hardware with brass screws because brass screws break very easily. Save yourself the frustration and stick to silver screws or other hard metals, but avoid brass.
Tools and Materials
We've listed the products that were used for this project, but feel free to use the color and type of paint you wish.
- wood filler (Elmer’s ProBond wood filler)
- small scraper
- 220-grit sandpaper
- paintbrushes
- small detail paintbrush
- yardstick
- brown, black and silver Sharpie markers
- black and brown furniture wax (Annie Sloan’s black and dark brown wax)
- furniture wax (Annie Sloan’s clear wax)
- lint-free cloths
- black or dark gray paint (Annie Sloan Chalk Paint in Graphite)
- off-white paint, light blue paint, brown paint and dark gray paint (Annie Sloan Chalk Paint in Old Ochre, Duck Egg, Honfleur and French Linen)
- beige paint, blue paint, light gray paint and white paint (Annie Sloan Chalk Paint in Country Grey, Napoleonic Blue, Paris Grey and Pure White)
- power driver/drill and a 3⁄16” drill bit
- leather handle pulls and black luggage handles
- drawbolt latches in nickel
- 1” silver screws
- hammer upholstery tacks
Step 1: Prep

Clean the dresser and make any needed repairs. This dresser was pretty solid, the top just needed to be sanded.
Step 2: Fill Holes

Remove the drawers and the hardware. Fill the holes with wood filler and a scraper. When the filler is dry, sand it smooth.
Step 3: Apply Base Coat

Paint the body of the dresser with three coats of black or dark gray paint.
Step 4: Apply Wax

Apply black wax all over the piece with a lint-free cloth. Work in small sections, rubbing it in and making sure you have even coverage. Remember that wax takes about 30 days to fully cure.
Step 5: Paint Top Drawer
Paint the top drawer in off-white. Stencil the grain sack stripes in taupe. Use a yardstick and a Sharpie to draw a brown line across the drawer to simulate where a suitcase would open. Use a small paintbrush and brown paint to make the line a little thicker. Measure, mark and drill new holes for the leather pulls.
Step 6: Paint Top Drawer
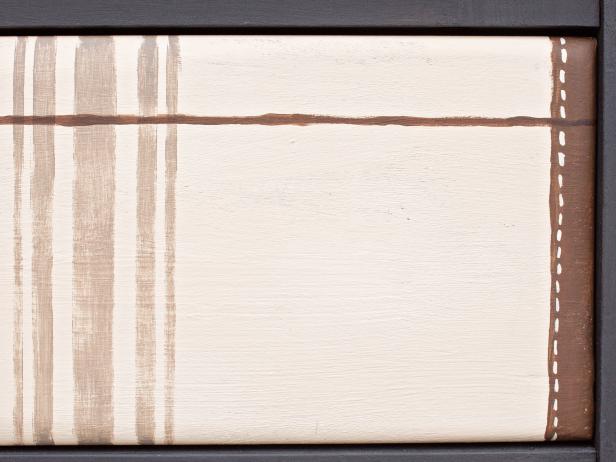
Mark off the left and right sides and paint them in brown. Use a small detail brush to make little dashes that look like stitches. Wax the drawer with clear wax. Finally, install the new pulls.
Step 7: Paint Second Drawer

Paint the second drawer in light blue. Measure and mark off two strips for “straps” and paint them in off-white (just make sure they’re wider than the latches you’re going to use). Use a yardstick to draw a line across with a silver Sharpie, and use a small paintbrush to make the line thicker with dark gray paint. Also use this color to make curves at the corners, paint the left and right sides and then paint stitches on the straps. Protect the drawer with clear wax.
Step 8: Add Handle to Second Drawer

Install a black luggage handle as a drawer pull and nickel drawbolt latches over the “straps” with 1” silver screws.
Step 9: Paint Third Drawer

Paint the third drawer in beige, and then paint a 1-1/2" border around the drawer with brown paint. Use the grain sack stripe stencil again, but this time with blue paint. Go back and fill in the little space between the outer lines with paint so you’re just left with three equal stripes.
Step 10: Paint Third Drawer

Use a yardstick and a brown Sharpie to draw a line across the drawer to simulate where a suitcase would open. Make the line thicker using brown paint and a small detail paintbrush. Wipe brown wax all over the drawer to make it look aged. Hammer brown upholstery tacks around the border.
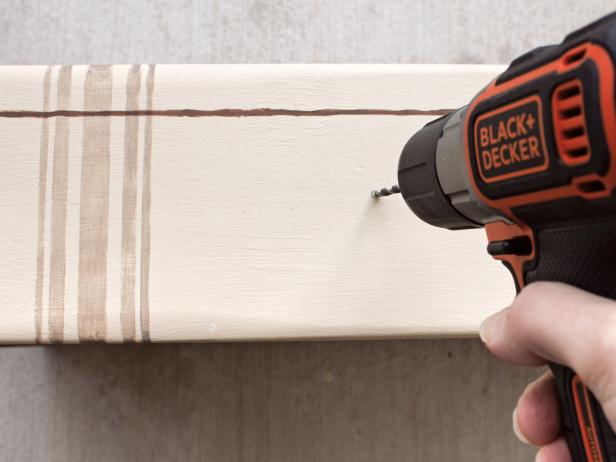
Step 11: Add Handle to Third Drawer
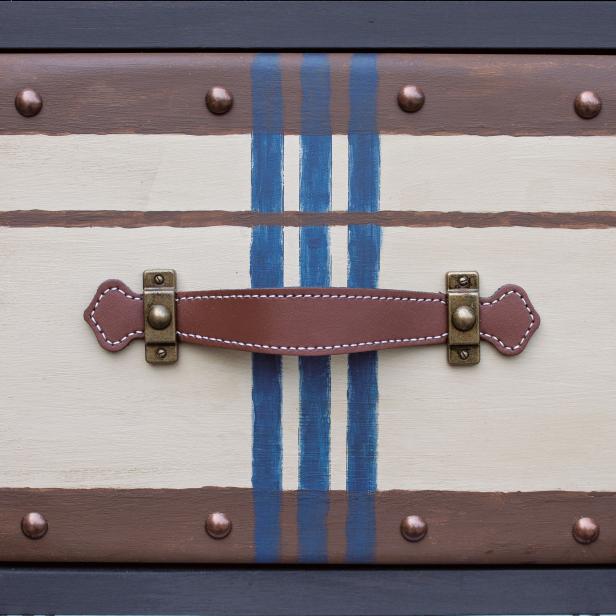
Measure, mark and drill holes for the leather pull handle.
Step 12: Paint Fourth Drawer

Paint the bottom drawer in light gray. Repeat the steps that you followed to transform the previous drawers: Use black or dark gray paint to make straps, use the feed sack stencil to make stripes, and use a yardstick and black Sharpie to draw a line across the drawer. Paint stitches on the straps with white paint. Wax this drawer with clear wax.
Finally, install a black luggage pull and silver latches over the “straps” with 1” silver screws.


