


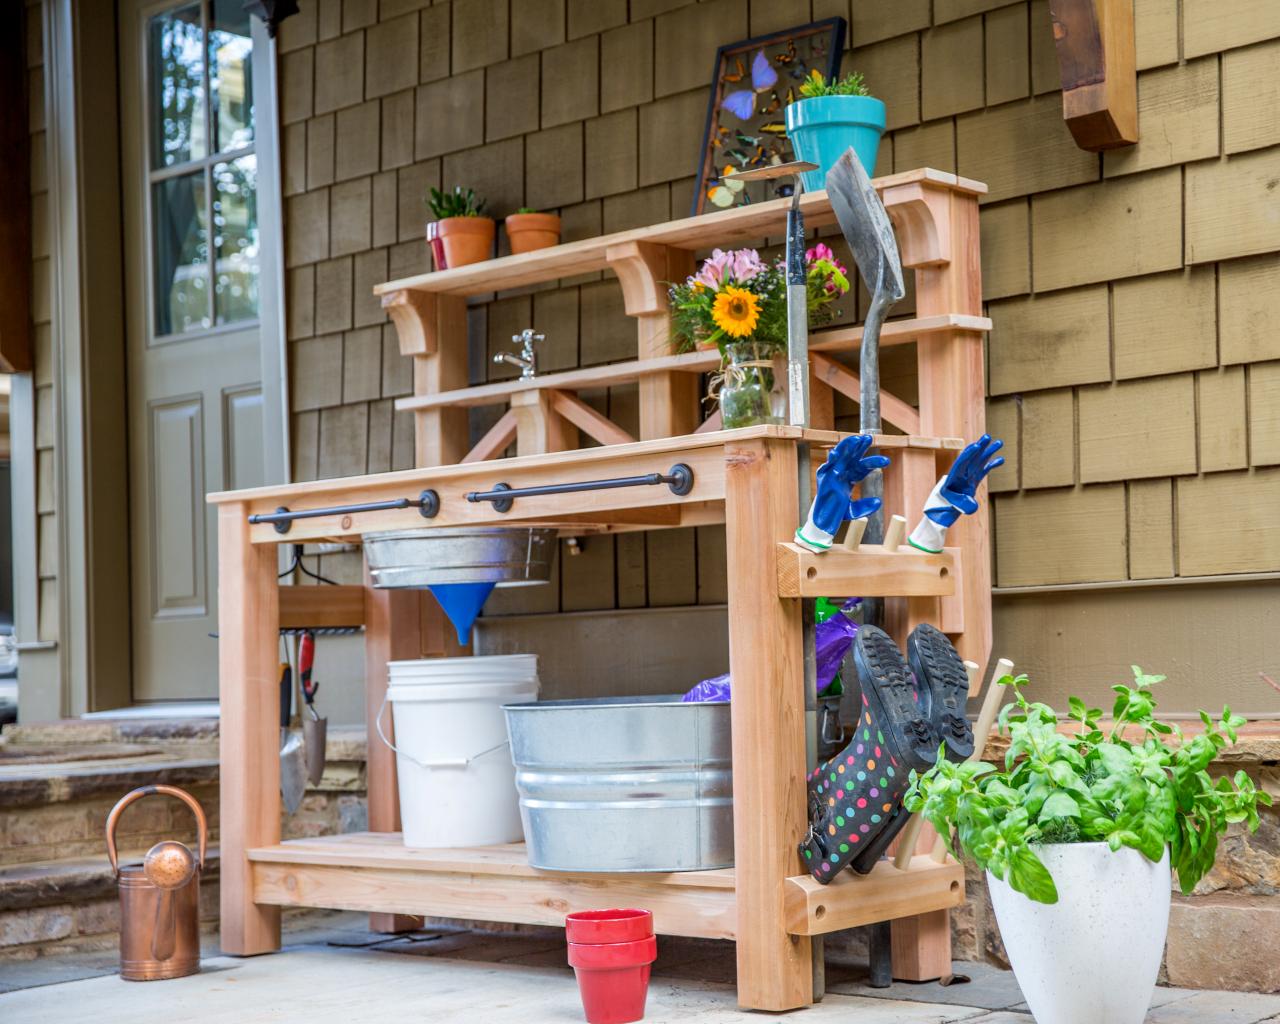
How to Make a Gardener's Potting Bench
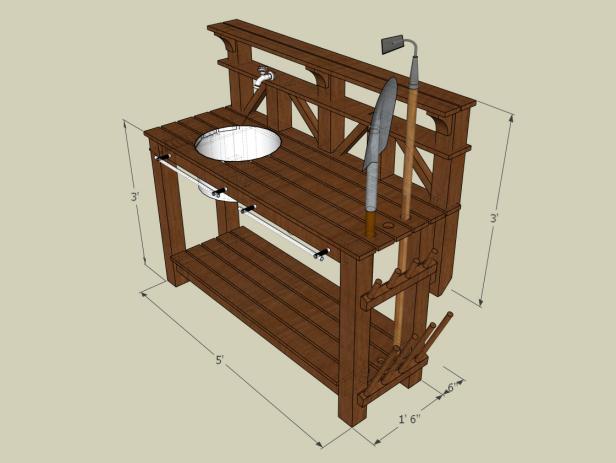
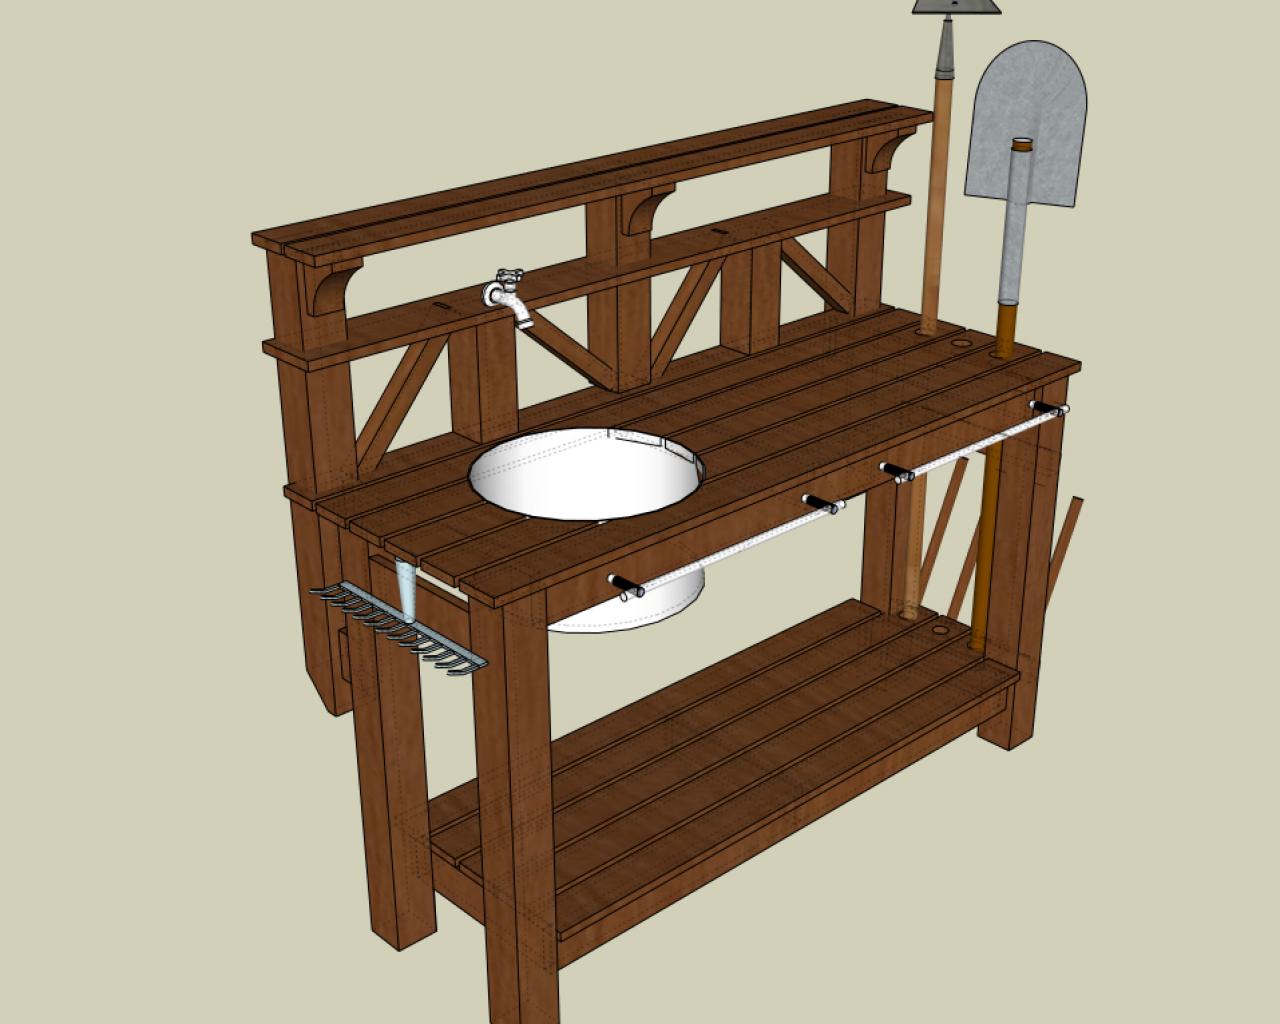
Learn how to build a custom work table for your gardening and outdoor chores. We outfitted this bench with a dry sink, tool storage and plenty of shelving.


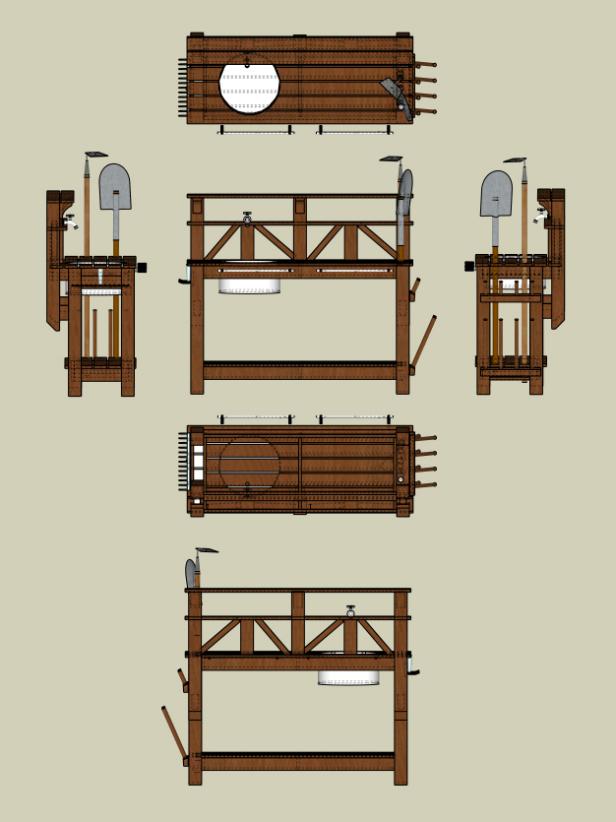
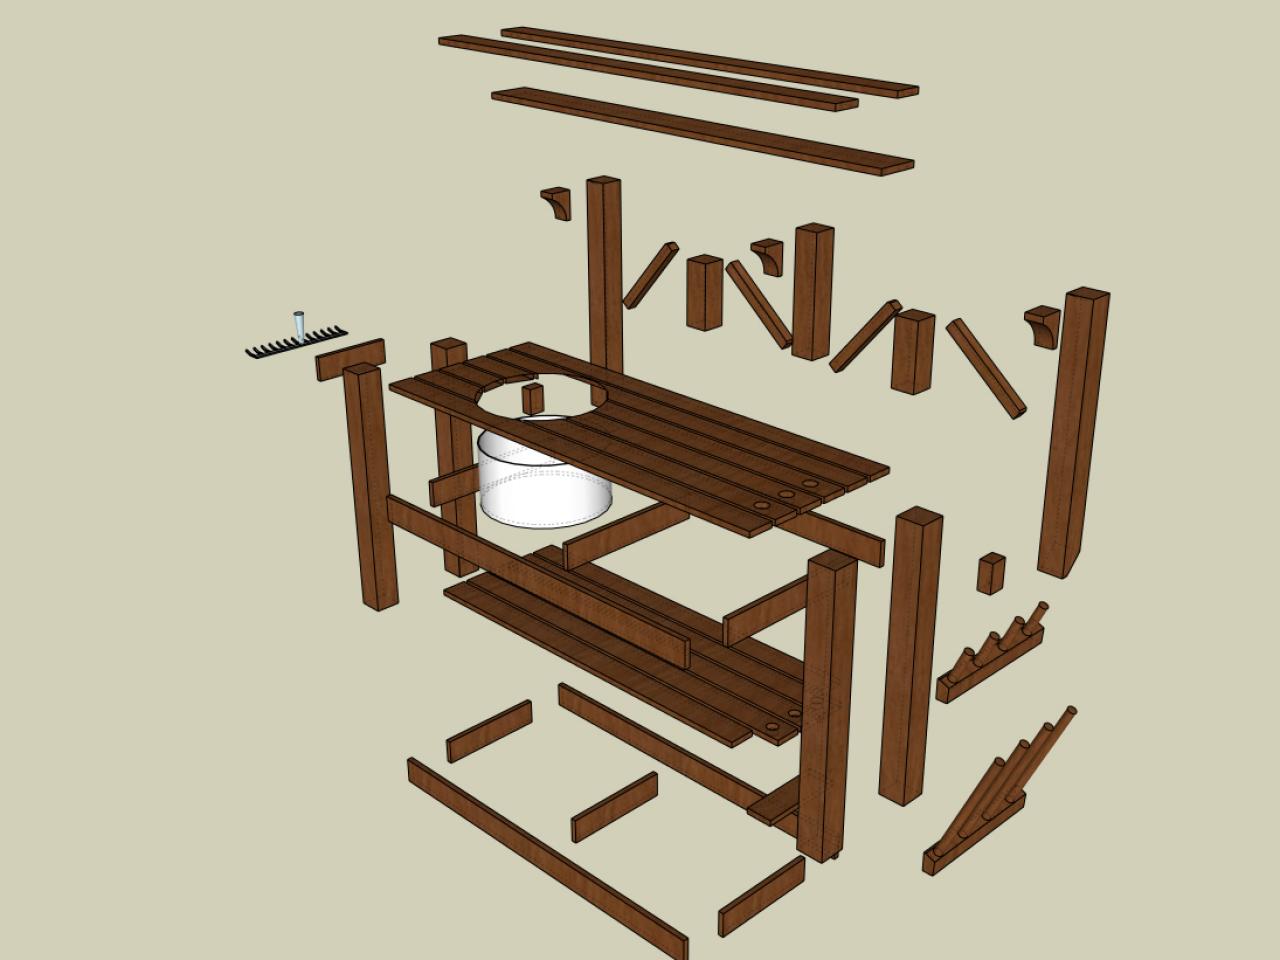
Project Plans

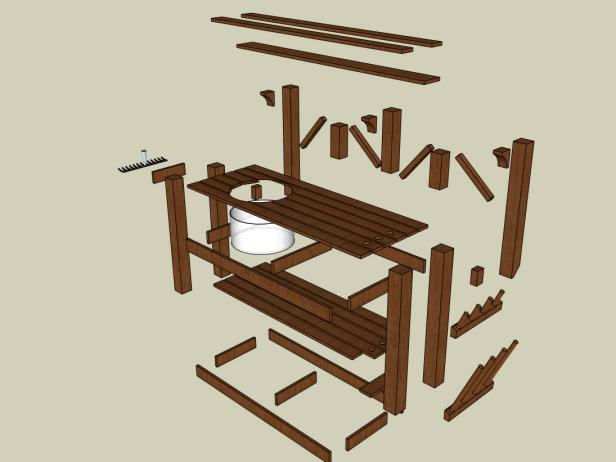
Cut List
Piece (A) - (4) 1x4 cedar front and back rails @ 4’ 5”
Piece (B) - (3) 1x4 cedar cross rails for bottom frame @ 1’ 3”
Piece (C) - (3) 1x4 cedar cross rails for top frame @ 1’ 9”
Piece (D) - (4) 4x4 cedar posts @ 35-1/4”
Piece (E) - (4) 1x4 cedar support @ 1’ 3/4” to short side of miters
Piece (F) - (2) 1x4 cedar support @ 11”
Piece (G) - (5) 1x4 cedar bottom shelf slats @ 5’
Piece (H) - (5) 1x4 cedar counter slats @ 5’ 2”
Piece (I) - (1) 1x6 cedar counter slat (rear slat) @ 5’ 2”
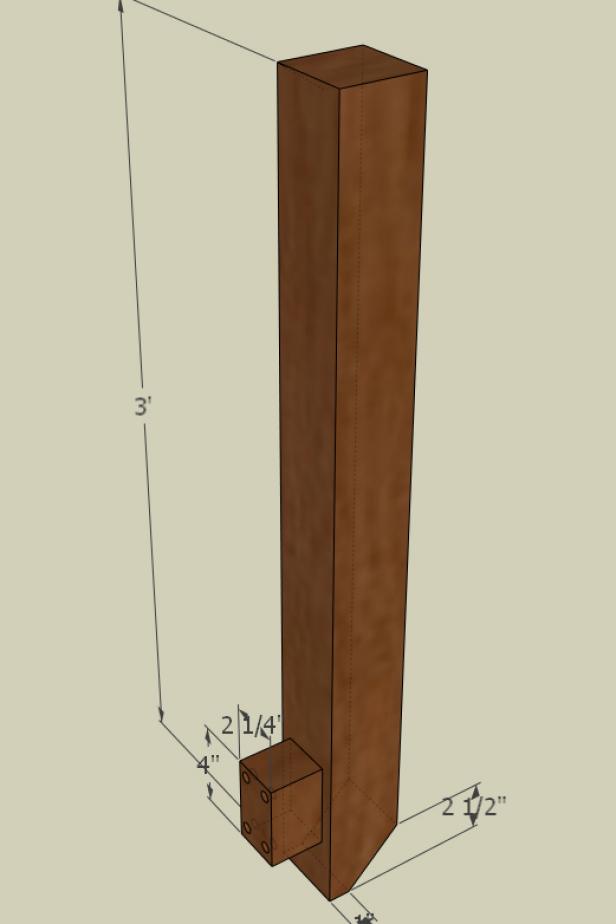
Piece (J) - (2) 4x4 cedar post back supports with chamfer @ 3’
Piece (K) - (2) 4” x 2-1/4” x 3” cedar block spacer
Piece (L) - (1) 4x4 cedar center shelf post @ 18"
Piece (M) - (2) 4x4 cedar back lower shelf support @ 8-1/4”
Piece (N) - (1) 1x6 cedar mid shelf @ 5’ 2”
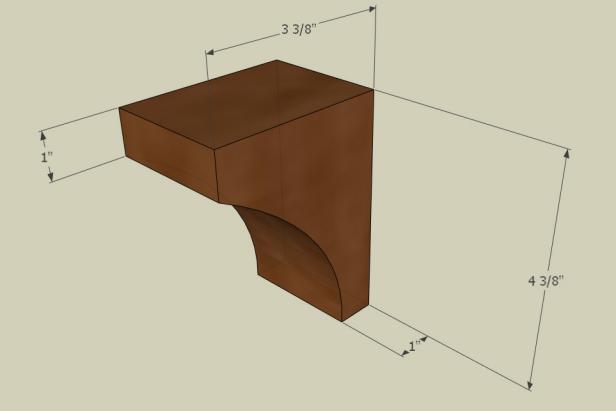
Piece (O) - (3) 4x4 cedar corbels
Piece (P) - (2) 1x4 cedar top shelf slats @ 5’ 2”
Piece (Q) - (4) 2x2 cedar diagonal decorative bars (cut from 4x4 scraps)
Piece (R) - (2) angled boot and glove support made (cut from 4x4 scraps)
Piece (S) - (4) 1” dowel @ 15”
Piece (T) - (4) 1” dowel @ 6” (can cut at different lengths if desired)
Piece (U) - (1) 1x4 side mount rail @ 1’ 4-1/2”
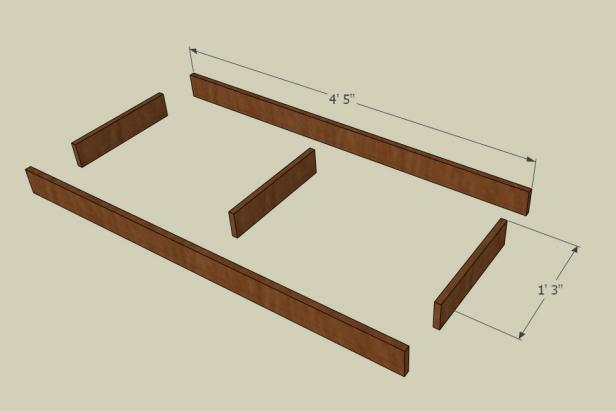
Step 1: Make Bottom Frame
Cut out Pieces (A), (B) and (C). Create the bottom frame with two Piece (A)s and three Piece (B)s. Glue and nail together as shown.

Step 2: Build Top Frame
Create the top frame (countertop) with two Piece (A)s and three Piece (C)s. Glue and nail together as shown.

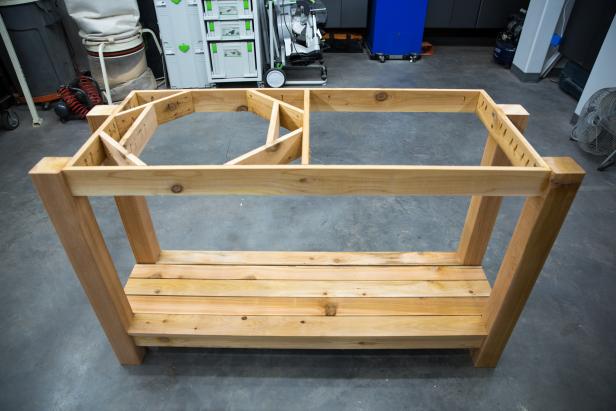
Step 3: Sink Supports
Add support structures for the sink with four Piece (E)s and two Piece (F)s. Glue and nail as shown. Ensure that the spacing between the Piece (F)s are greater than 15” apart for sink clearance.


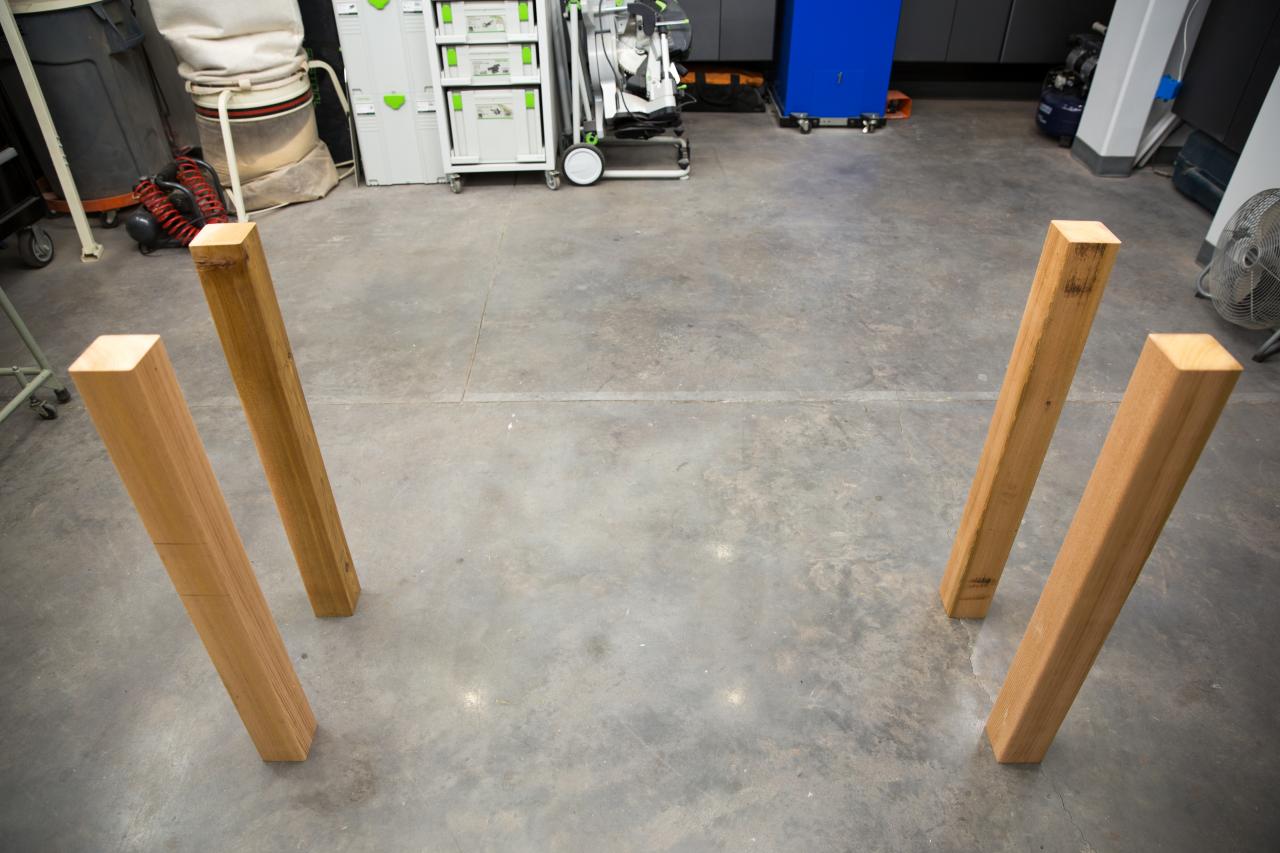
Step 4: 4x4 Support Legs
Cut four Piece (D)s to make the support legs.

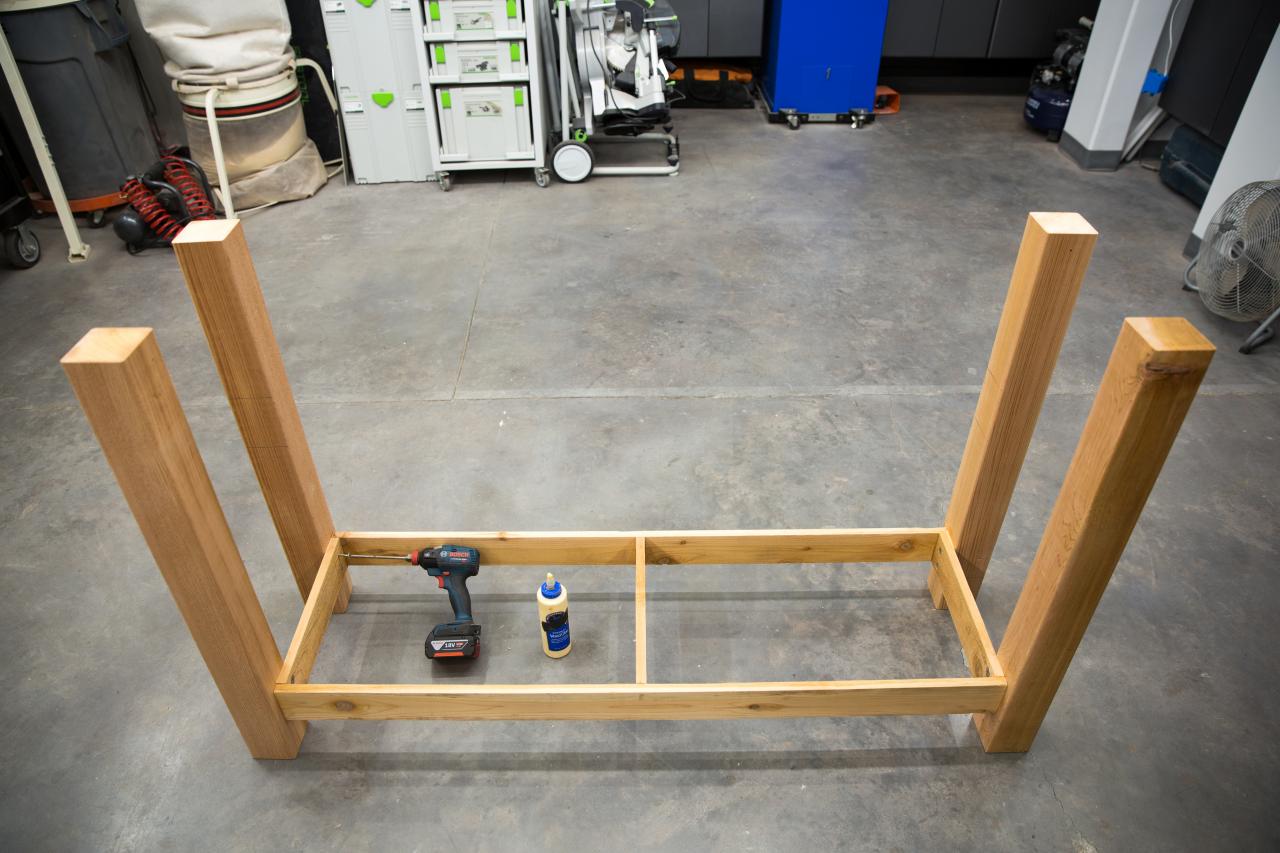
Step 5: Attach Bottom Frame to Legs
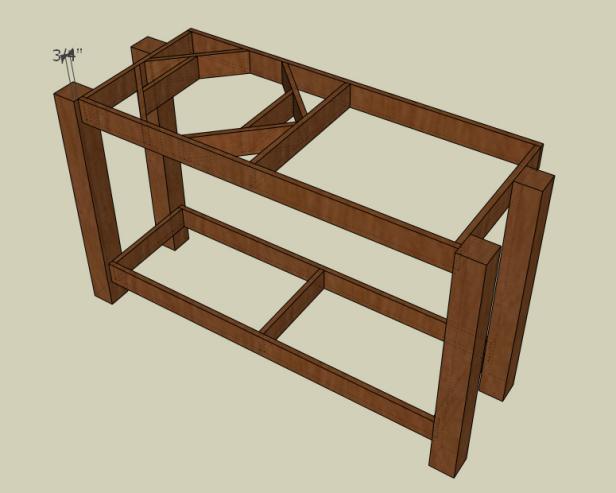
Attach the bottom frame assembly to the four legs with 4” of clearance from the floor. Ensure the legs protrude out wider than the frame 3/4” as shown.


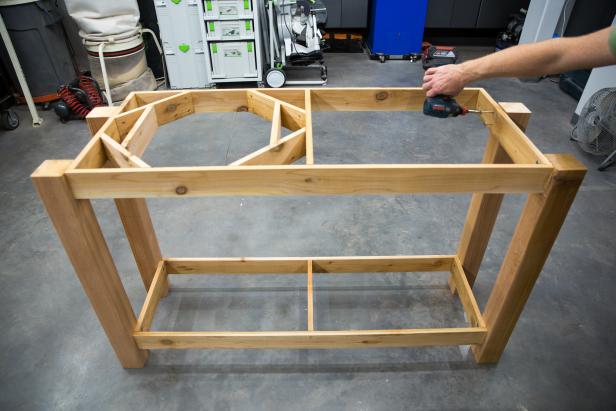
Step 6: Attach Countertop to Legs
Attach the top frame assembly to the four legs. Make the assembly flush to the top of the legs. Ensure the legs protrude out wider than the frame 3/4” on one side. It should align with the bottom frame on the front side.
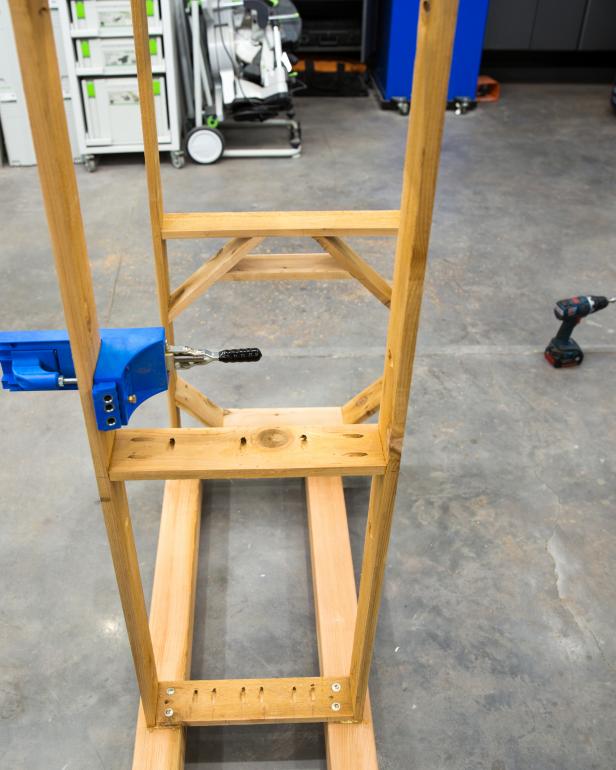
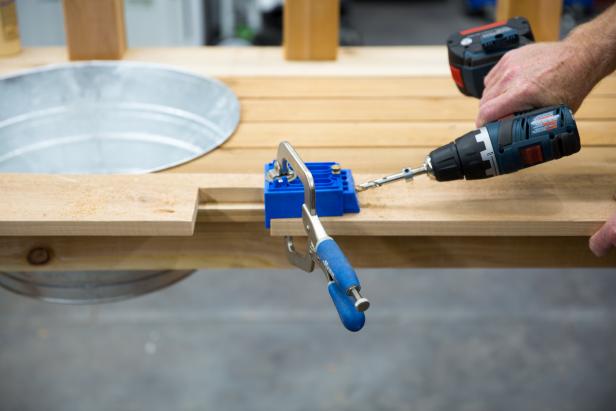
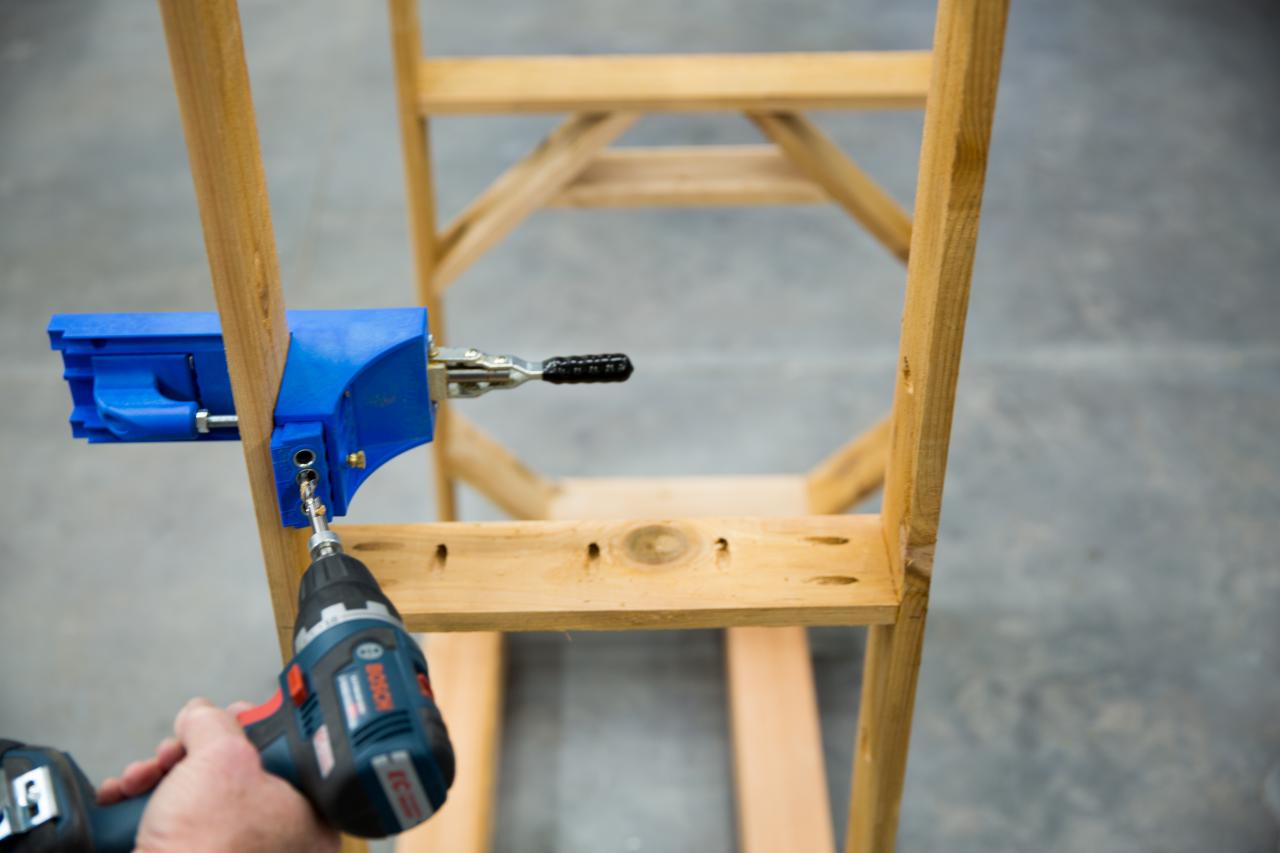
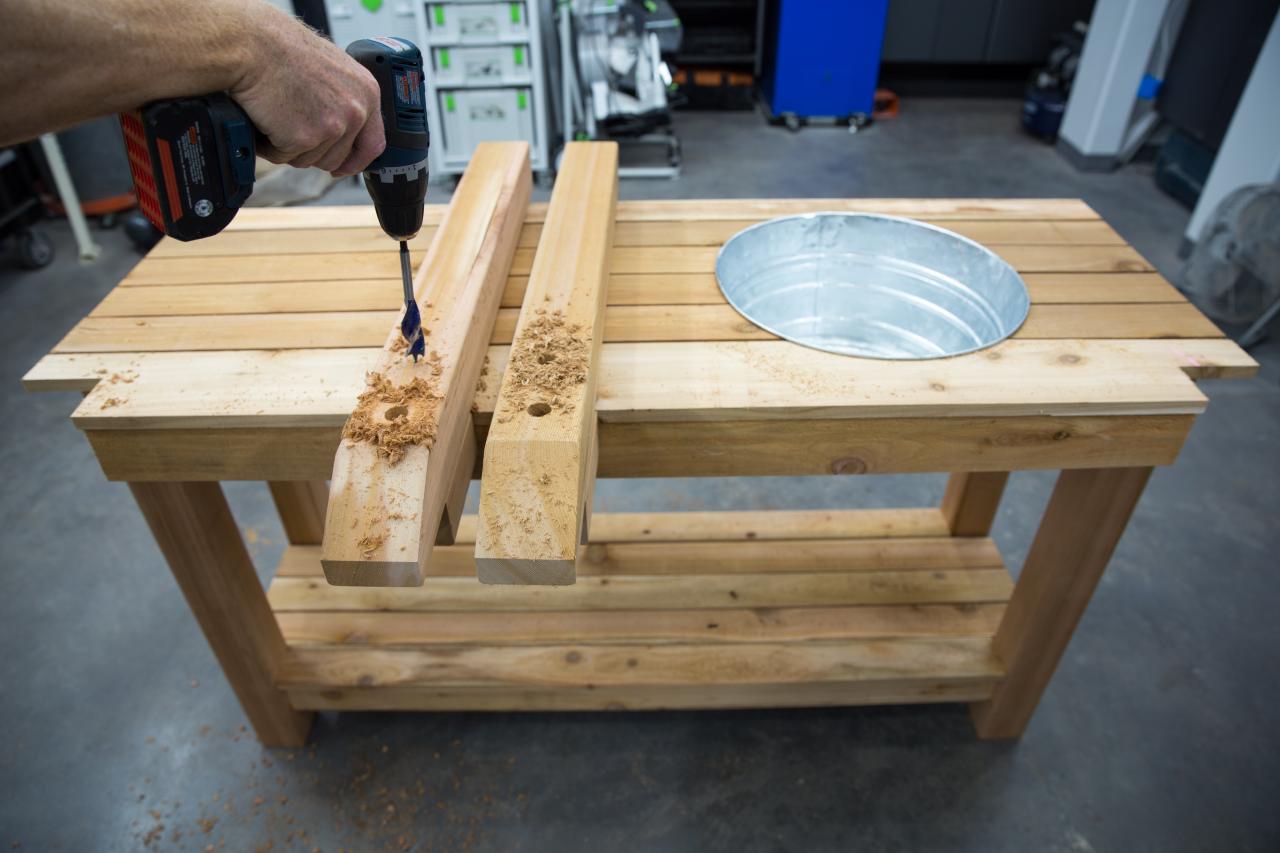
Step 7: Drill Pocket Holes
If you’re using a pocket-hole jig, drill pocket holes on rails in order to fasten the shelf boards. Counterbore the (G) and (H) Pieces. An optional way to fasten it is by using a nail gun from the top surface.

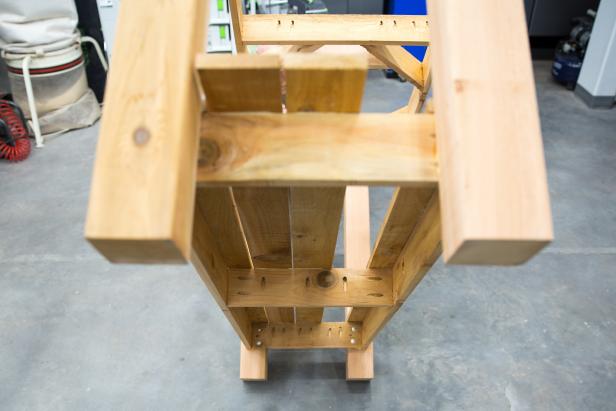
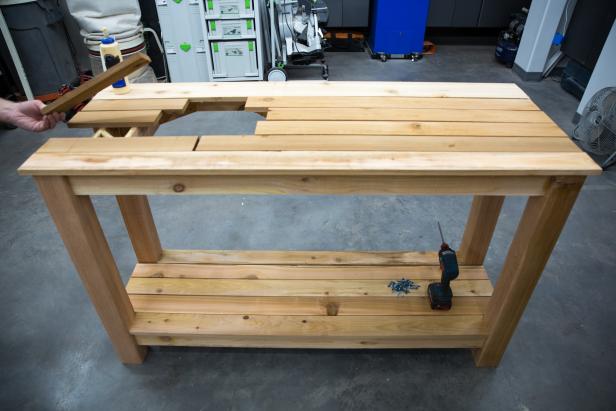
Step 8: Lay Slats on Bottom Frame
Attach five Piece (G)s with pocket screws or nails, leaving a 1/4" spacing in between each board. Cut the front and back slats to fit snuggly between corner posts.
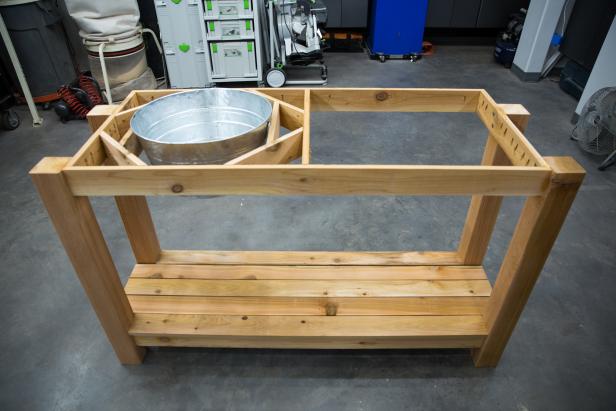
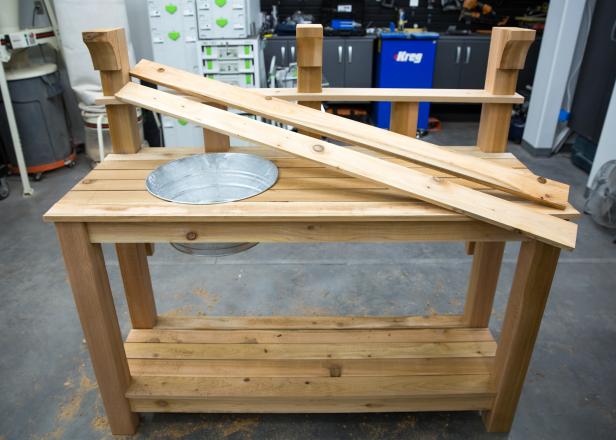
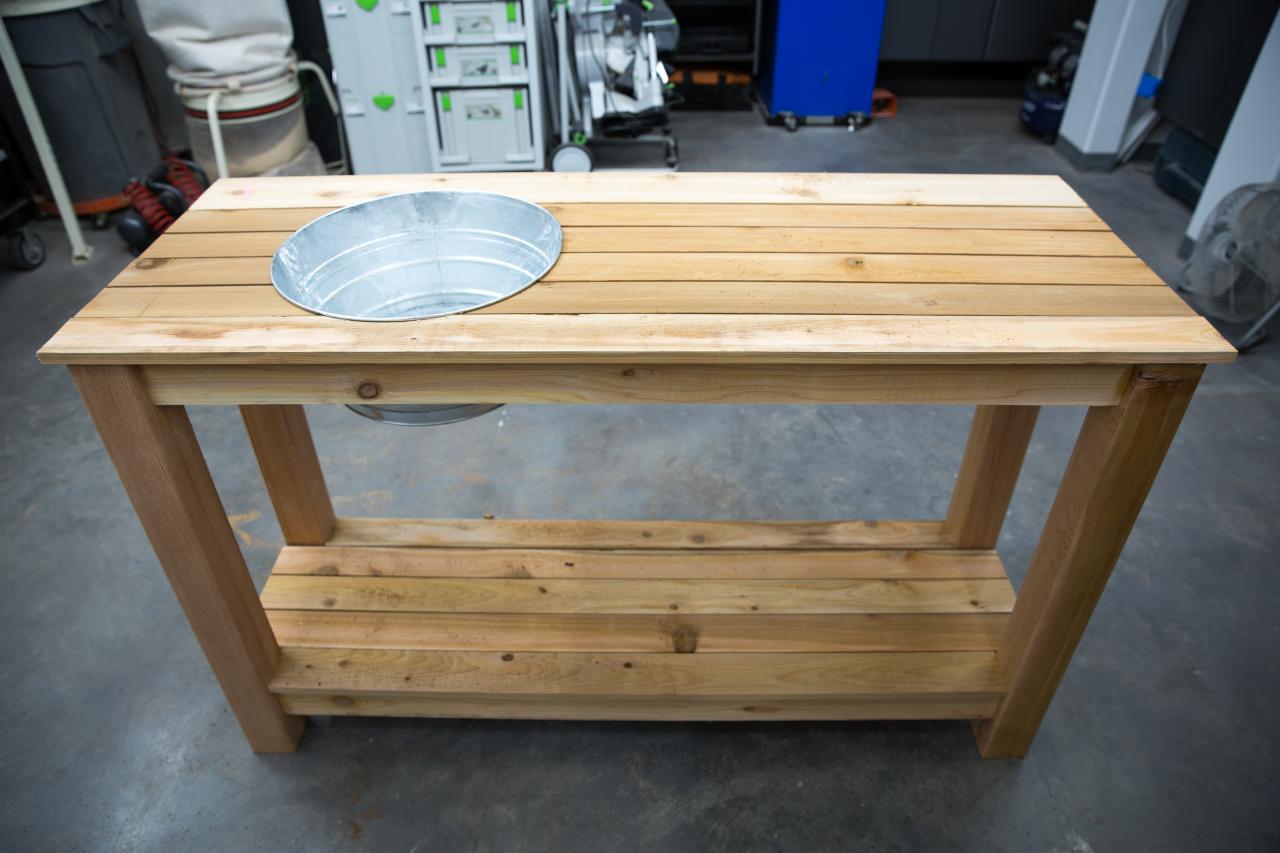
Step 9: Check Sink Placement
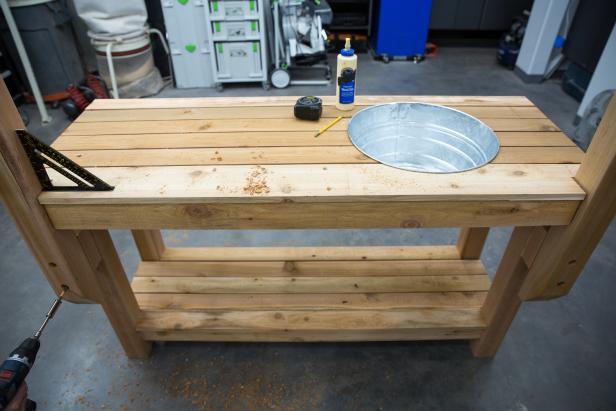
Place galvanized tub sink in place for reference; place five Piece (H)s and one Piece (I) over the top ensuring that the boards overlap the edge of the galvanized tub on all sides. Slats are shown split here to locate sink edges.

Step 10: Trace Sink
Pull the galvanized sink from underneath and place it on top of boards. Center the sink between the cross braces below. Trace the sink onto the countertop boards.

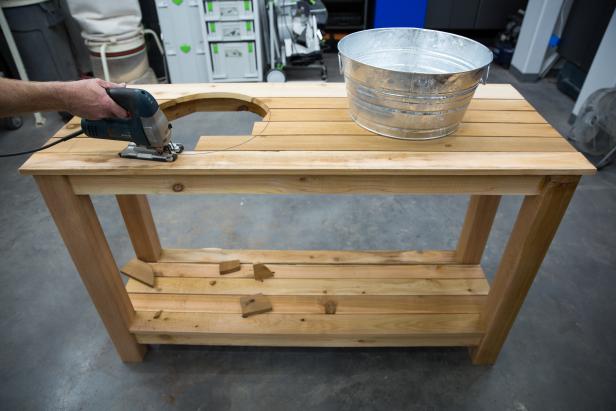
Step 11: Cut Sink Hole
Use a jigsaw to cut a 1/4” inside the traced line of the sink. Cutting inside the circle will allow the rolled edge of the sink to be held up when it is dropped in the hole.

Step 12: Cut Shelf Posts
Cut the (J) and (K) Pieces. Glue and screw them together as shown. Counterbore the screws so that they’ll be below the surface.

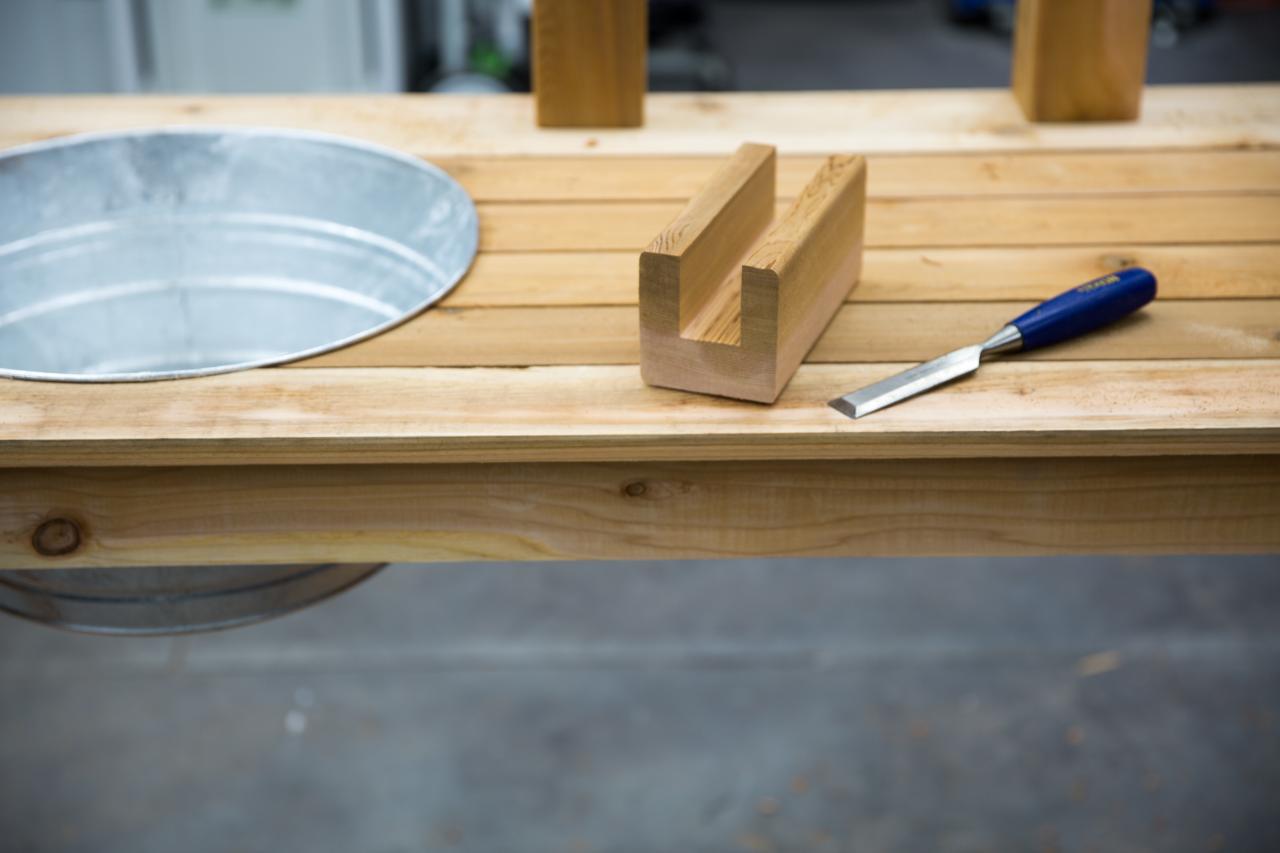
Step 13: Cut Notch in Table Top
Notch out the back corners of the 1x6 countertop boards to allow for clearance of the (J) and (K) assembly. Make sure they will sit flush on the upper frame and leg supports.

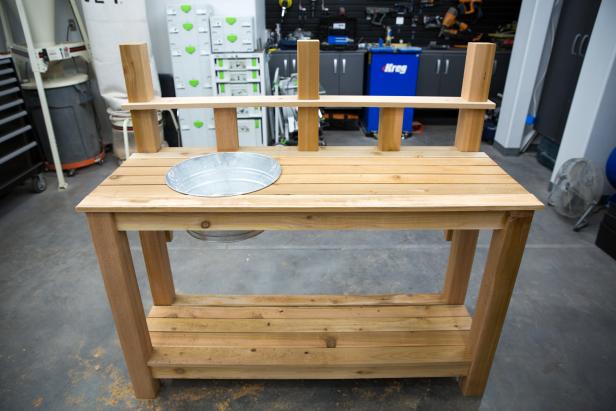
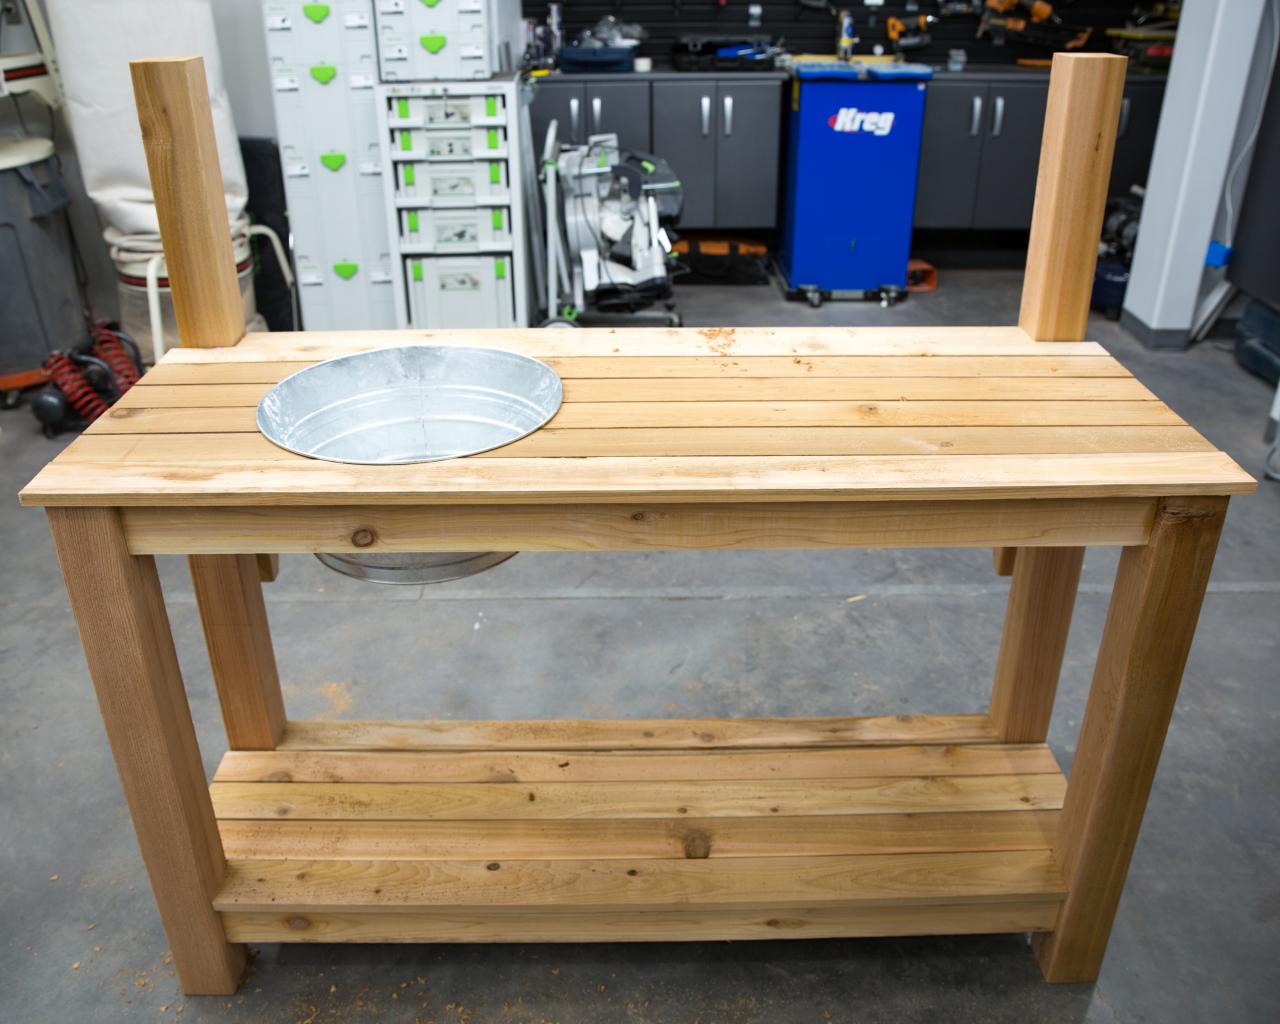
Step 14: Attach Shelf Posts
Counterbore the back supports and attach them to the table assembly with glue and cabinet screws. The 4x4 posts should stick above countertop 18”.


Step 15: Cut Middle Shelf Posts
Cut the (L) and (M) Pieces.

Step 16: Channel for Plumbing
Notch out a center channel on one (M) Piece for water supply clearance.


Step 17: Attach Middle Posts
Glue and screw Piece (L) and both (M) Pieces equally spaced on the countertop in line with the outer posts.

Step 18: Cut Notch on Lower Shelf
Glue and cut pocket holes on Piece (N) to connect to vertical posts or optionally, use a nail gun to attach.
Step 19: Cut Corbels for Top Shelf
Cut three Piece (O)s and attach to the top of posts with glue and nails. Use a band saw or a reciprocating saw to cut the profile.


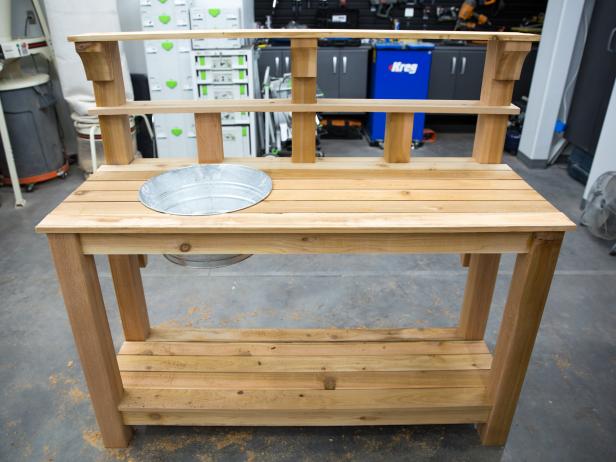
Step 20: Attach Top Shelf Pieces
Cut two Piece (P)s and glue and nail on top of rear shelf supports with a 1/4” gap in between each board.
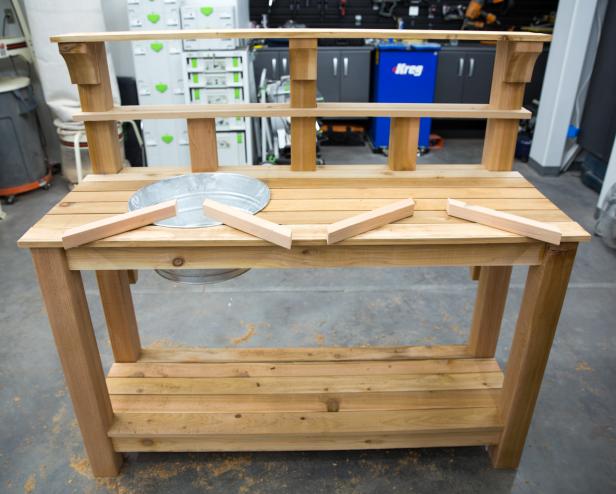
Step 21: Add Decorative Supports
OPTIONAL: Cut four Piece (Q)s and nail into the backsplash. Note: it is best to field measure, trace and then cut these pieces from your build.

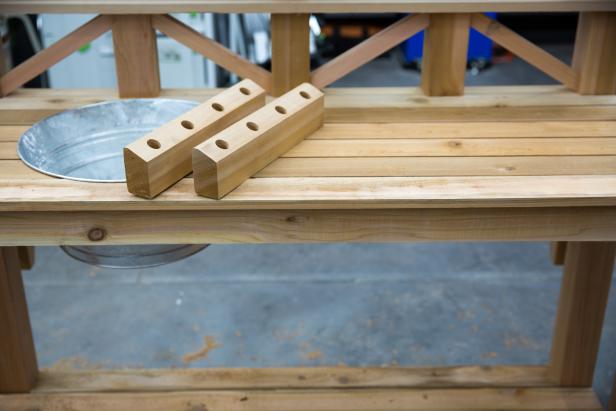
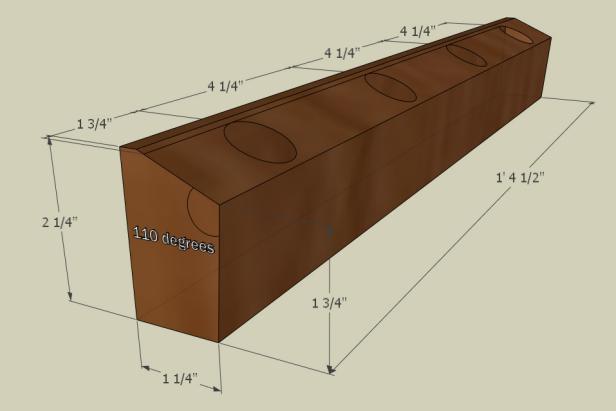
Step 22: Make Supports for Boot + Glove Holder
Cut two Piece (R)s from a 4x4. This is most easily done with a table saw. Drill 1” diameter holes 1” deep as shown.
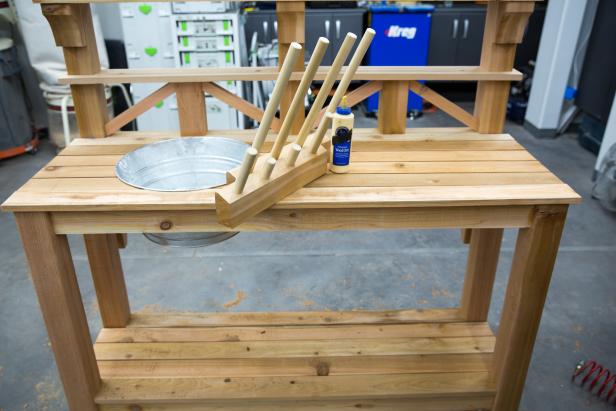
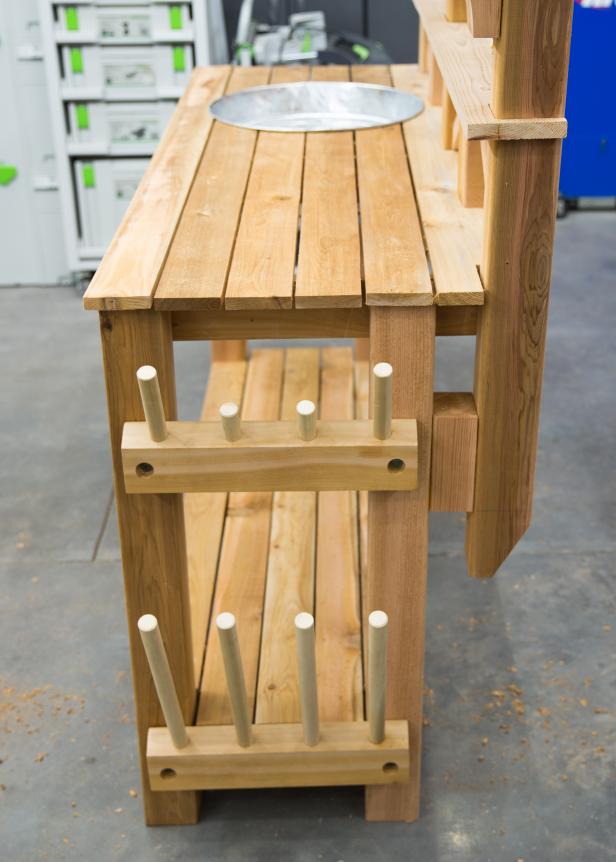
Step 23: Attach Boot + Glove Holder
Cut and glue Pieces (S) and (T) into Piece (R), and glue and screw on the right side of the table at your desired heights.

Step 24: Attach Horizontal Side Piece
Cut, glue and screw Piece (U) on the opposite side of the dowels at your desired height. We added an upcycled metal rake to ours to use as a place to hang hand tools.


Step 25: Add a Faucet
If desired, mount a faucet on a hollowed riser support or directly on the countertop. You may want to add an adapter so you can screw in a garden hose.

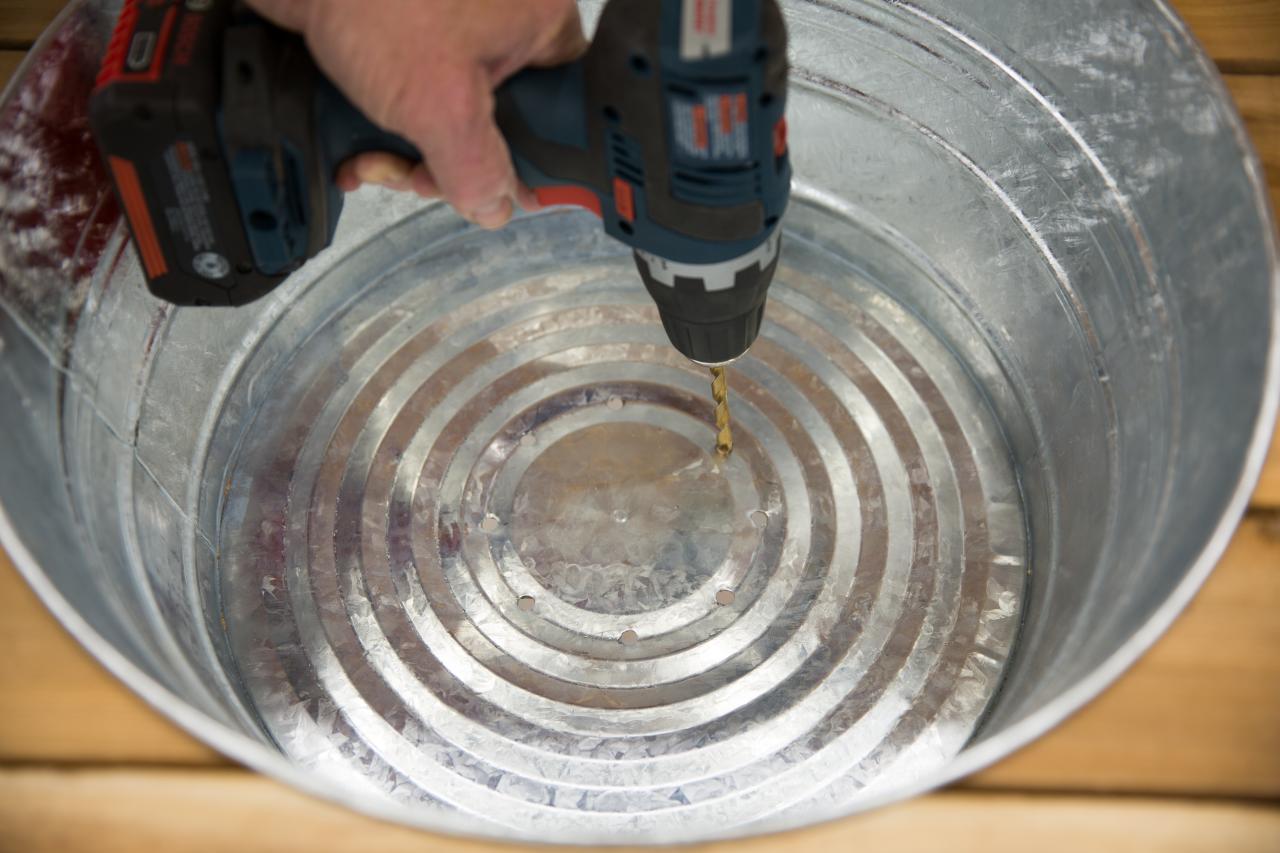
Step 26: Install Drainage in Sink
Mark drain holes in the bottom of the galvanized tub at a smaller diameter than your funnel. Drill holes with a 1/4” drill bit. Use silicon to adhere the funnel to the bottom of the tub, covering the drain holes.


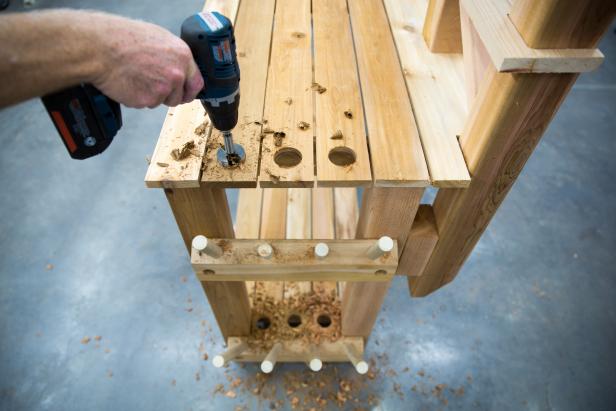
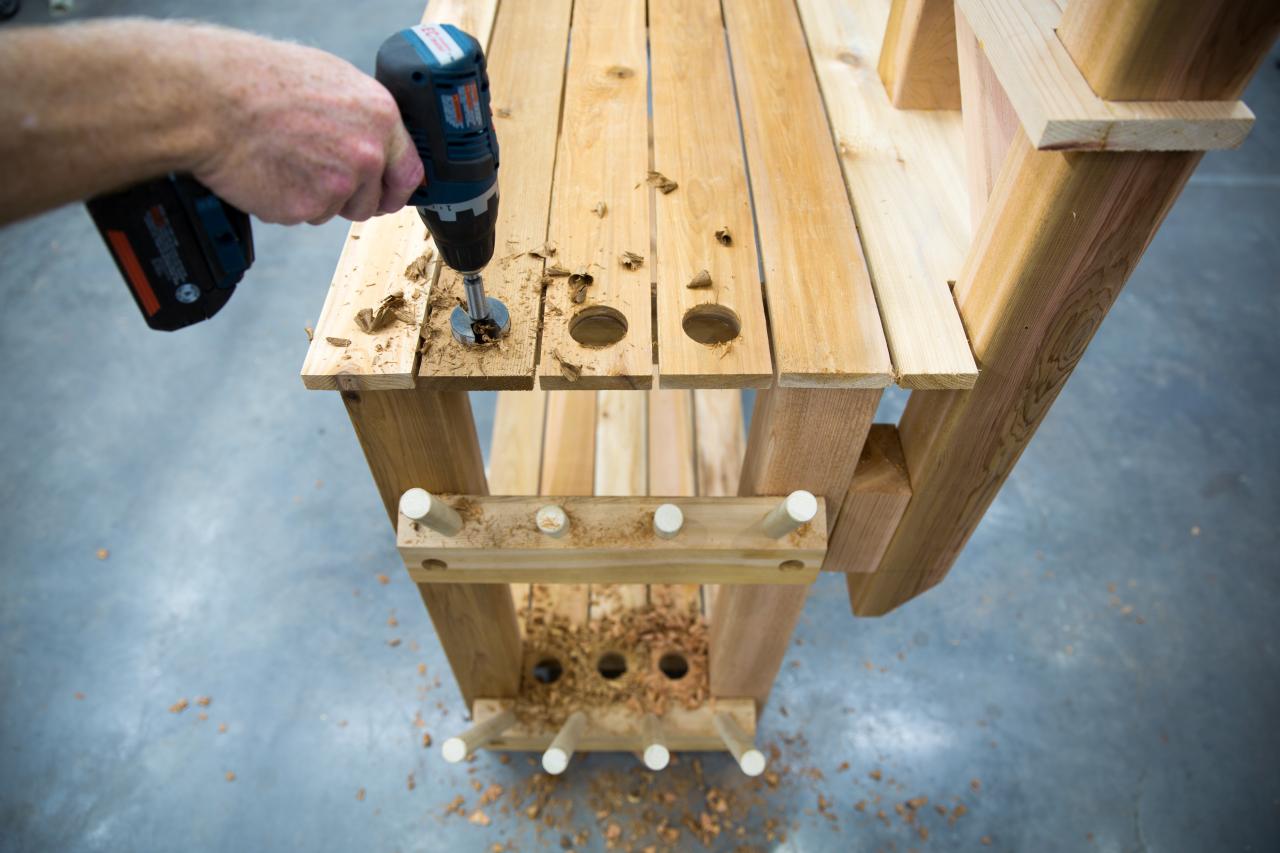
Step 27: Add Tool Storage
Use a forstner bit or hole saw bit to drill concentric holes on the countertop and bottom shelf 1-1/2” in diameter. Ensure you have clearance from the edge of your frame supports. These holes will be used for garden tools like rakes and shovels.
Step 28: Paint or Finish
Sand the unit smooth and finish as desired. This potting can also be used for your next outdoor party. Fill the sink with ice and bottles and cans and lay down some tablecloths to place barware or snacks.


