


How to Make a Candy Corn Pinata for Halloween


Candy Corn Pinata: Beauty 3
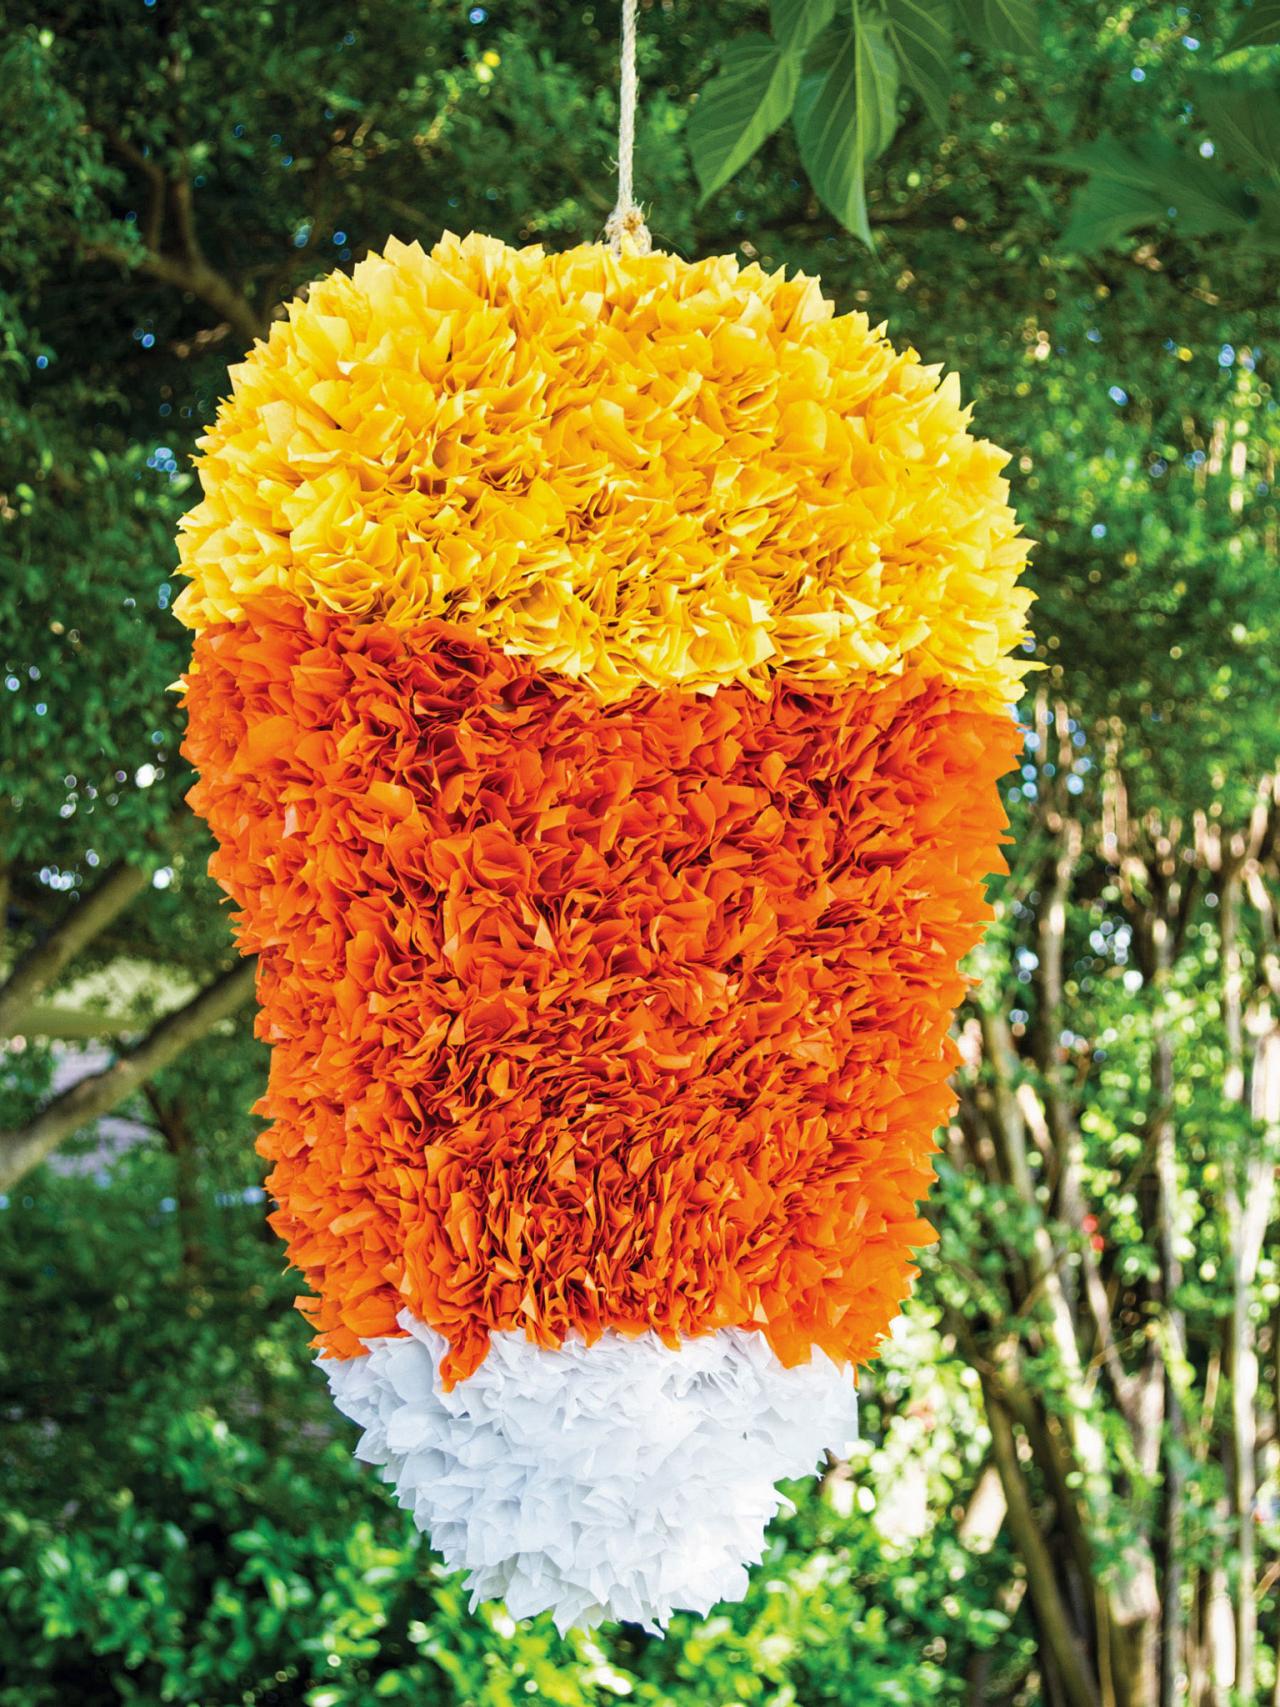
Halloween swings into action with this candy corn piñata. Your party guests will love taking a shot at this treat-filled craft. Because you make it yourself, you get complete control over what goes inside.
Materials Needed:
- 2 pieces of poster board
- scissors
- awl or screwdriver
- painter's or masking tape
- candy and small toys
- flour paste (recipe below)
- newsprint torn into 1" strips
- yellow tissue paper
- orange tissue paper
- white tissue paper
- pencil
- glue
- rope (for hanging)
- zip tie (for hanging)
- Download: Candy Corn Pinata Template 1
- Download: Candy Corn Pinata Template 2
- Download: Candy Corn Pinata Template 3
- Download: Candy Corn Pinata Template 4
Print and Cut Out Templates
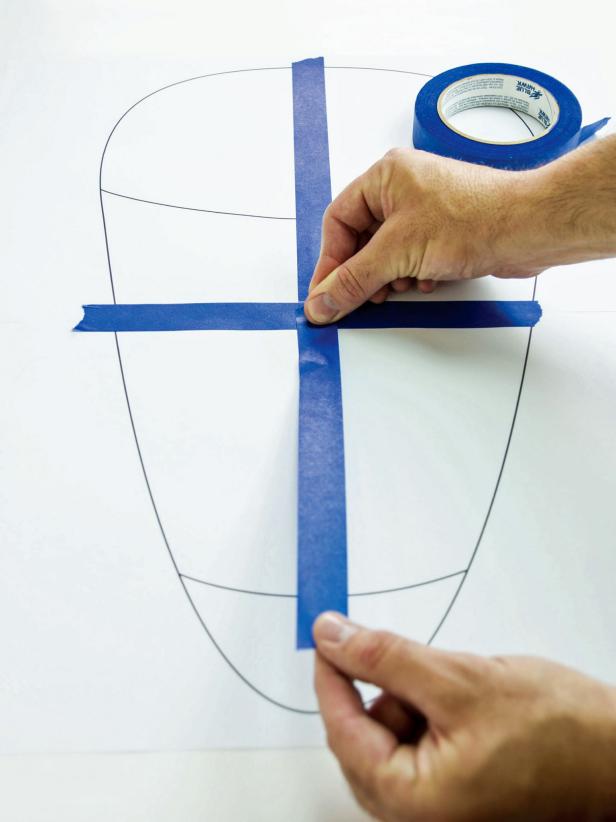
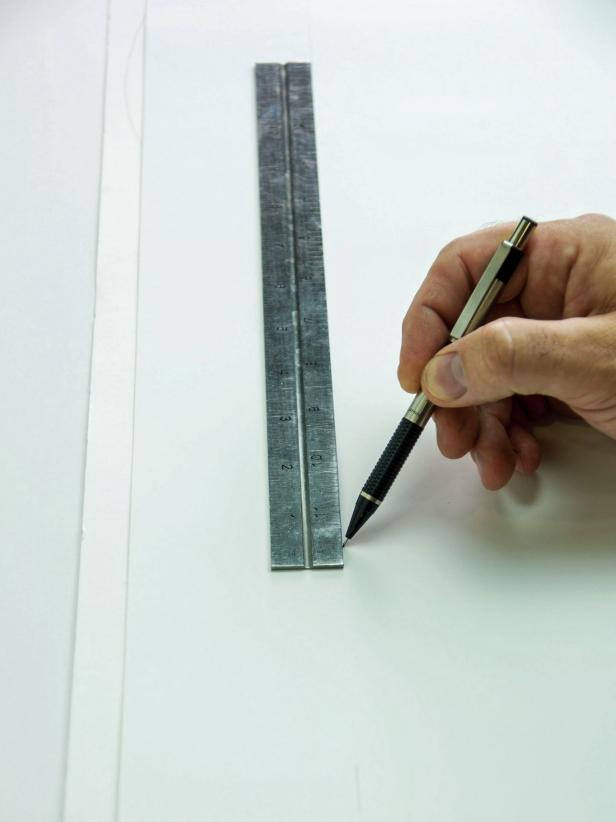
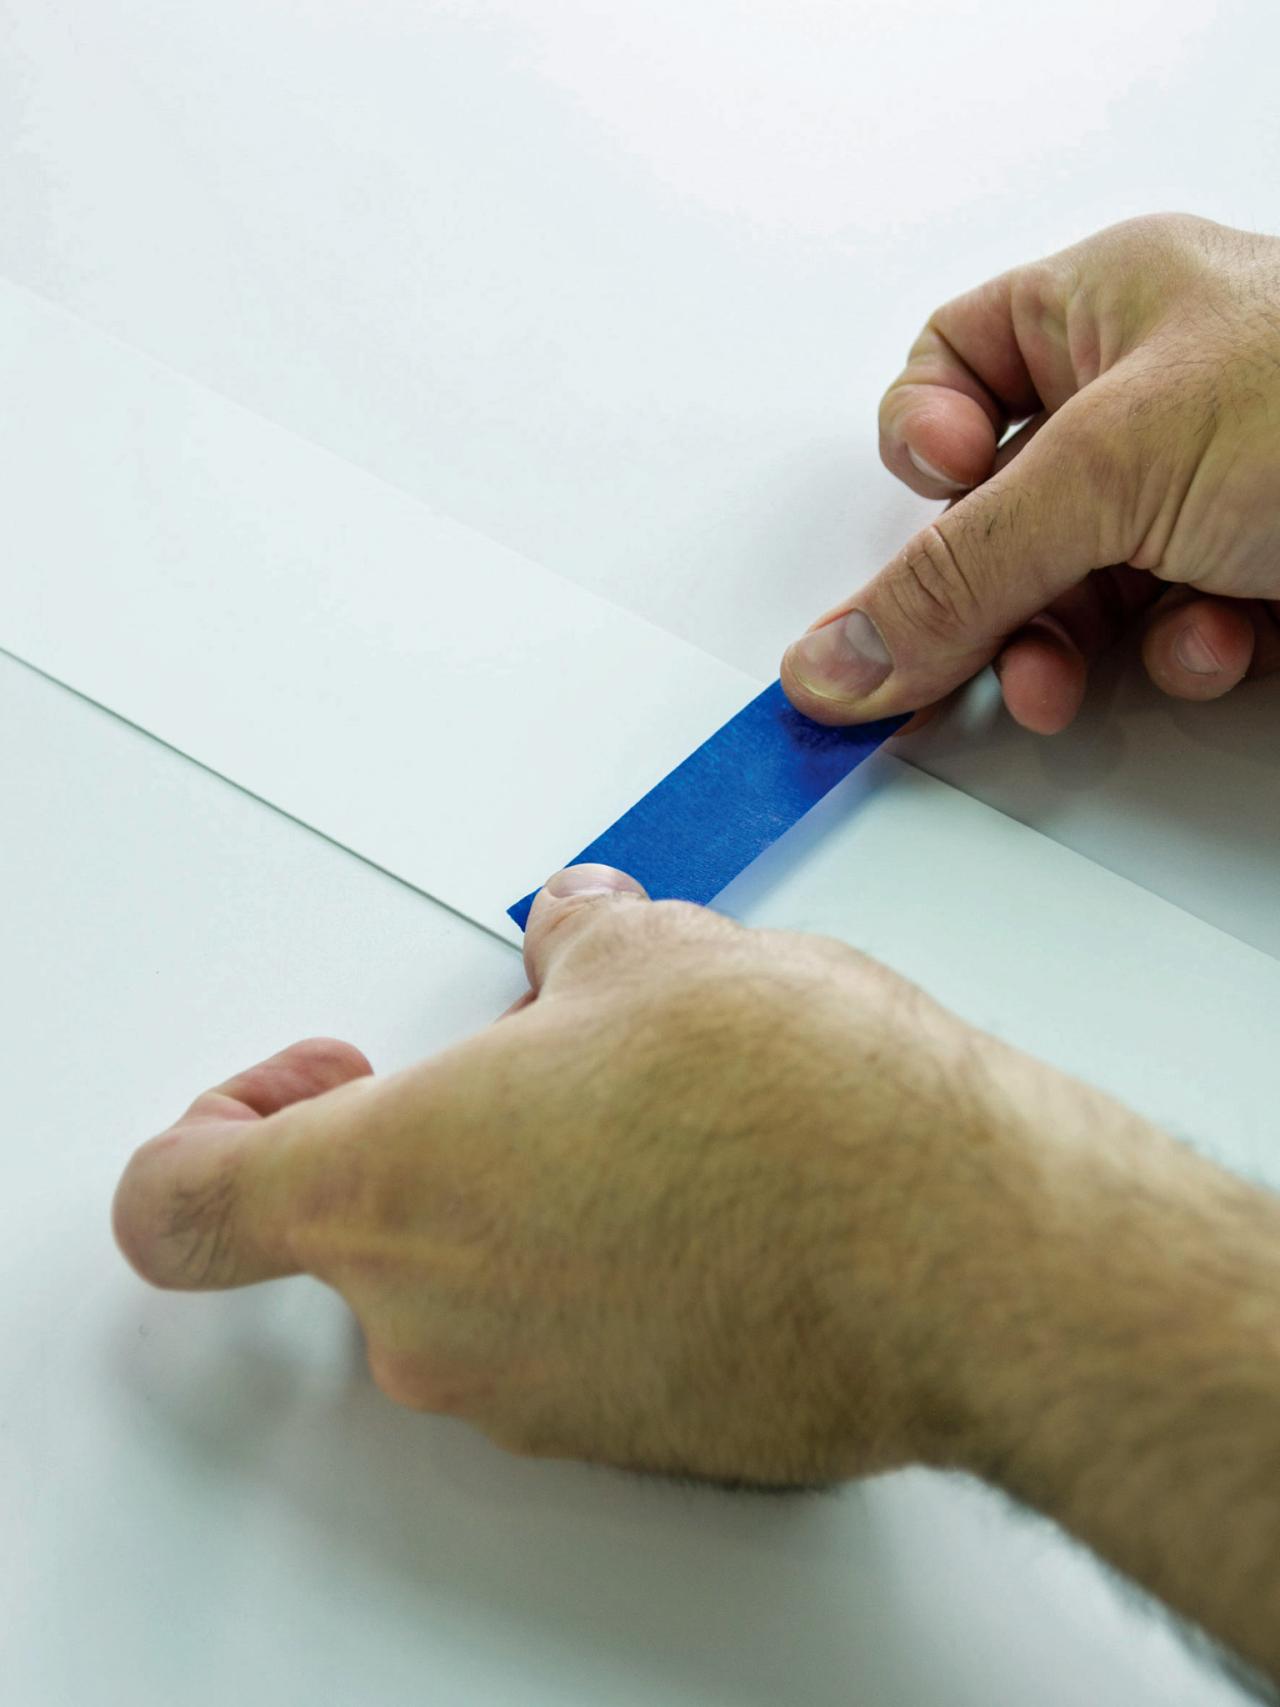
Print 2 sets of templates (8 pages total) and tape them together to make two candy corn shapes. Cut out the shapes and place them both on a sheet of poster board with a few small pieces of tape to hold them in place (Image 1). Trace around the cut-outs and remove templates (Image 2) then cut candy corn shapes from the poster board (Image 3).


Candy Corn Pinata: Step 1
Print two sets of templates (8 pages) and tape them together to make two candy corn shapes. Cut out the shapes and place them both on a sheet of poster board with a few small pieces of tape just to hold them in place.
Candy Corn Pinata: Step 3
Cut candy corn shapes from the poster board. With another sheet of poster board, measure and cut two 3 inch strips that are the length of the poster board. Place the strips end to end and secure them with tape on both sides.
Begin Constructing the Form
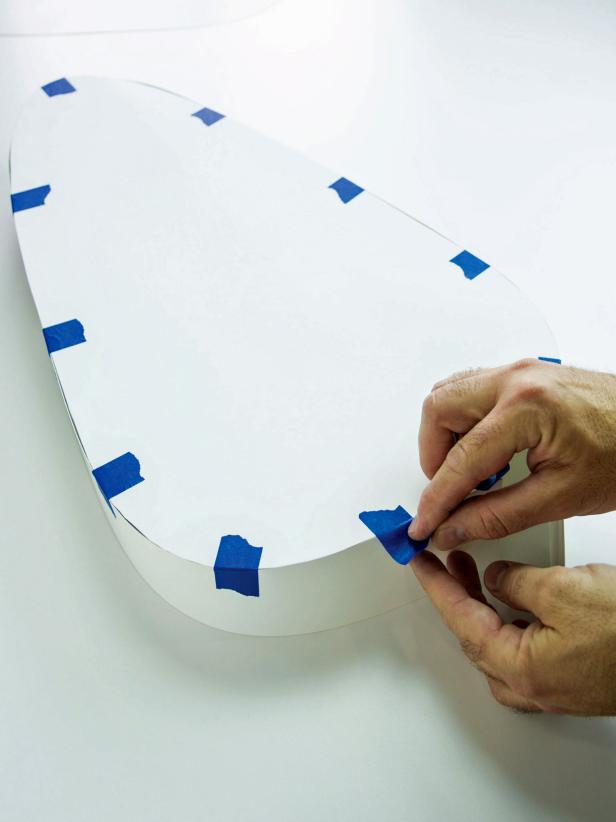
On another sheet of poster board, measure and cut 2 strips that are 3" wide and the length of the poster board (Image 1). Place the strips end-to-end to create one long strip, securing the seam with tape on both sides of the paper (Image 2). Starting with the point of the candy corn, attach the strip to one of the candy corn shapes. Press the strip up against the edge of the shape and apply tape at 2" to 3" intervals (Image 3). Tip: This is only meant to hold the shape in place until the papier mache is addd. Overlap the ends of the strip at the candy corn's top and secure the overlap with tape.

Candy Corn Pinata: Step 4
With another sheet of poster board, measure and cut two 3 inch strips that are the length of the poster board.
Candy Corn Pinata: Step 6
Attach the strip to one of the candy corn shapes starting with the seam at the point of the candy corn. Press the strip up against the edge of the shape and add pieces of tape at 2-3 inch intervals. This is only meant to hold the shape in place until the papier mache is added. Overlap the ends of the strip at the top and secure the overlap seams with tape.
Fill Piñata
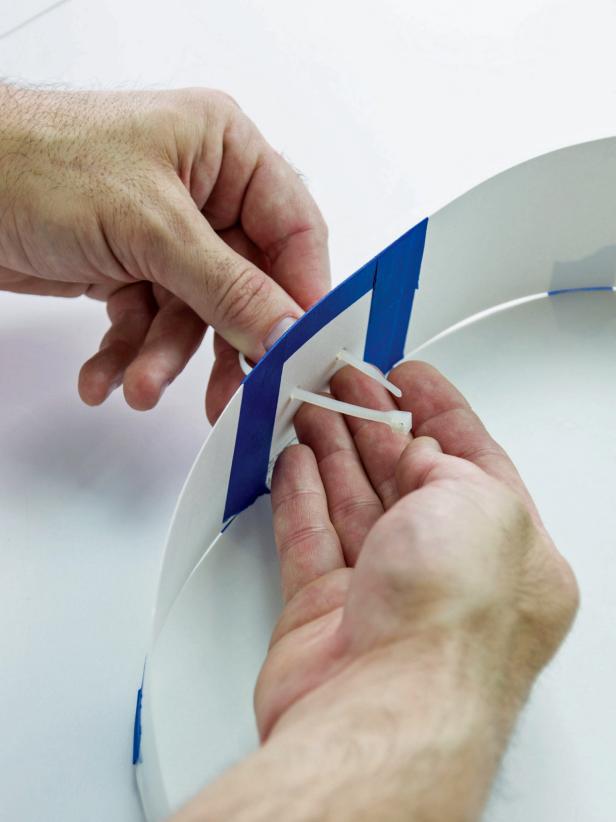
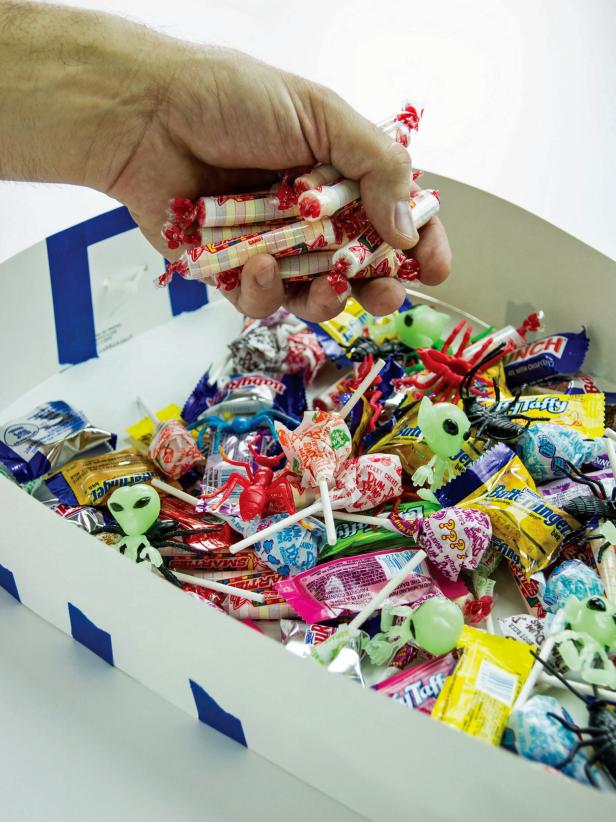
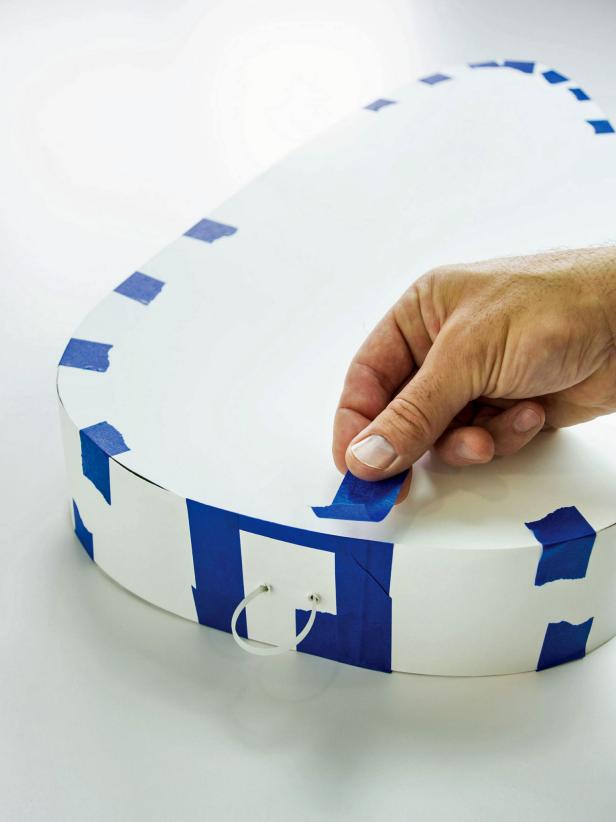
Use an awl or screwdriver to poke 2 small holes in the center of the overlap area (on top of the piñata) about 1-1/2" apart (Image 1). Feed a zip tie through the holes making a loop on the outside for hanging with the closure on the inside or the piñata. Fasten the tie just enough to be secure (Image 2). Next, add all your candy and small party favors to the piñata (Image 3) and tape the other candy corn shape in place, just as you did the bottom (Image 4).

Candy Corn Pinata: Step 7
Use an awl or screwdriver to poke two small holes in the center of the overlap area about 1-1/2” apart.
Candy Corn Pinata: Step 8
Feed a zip tie through the holes making a loop on the outside for hanging with the closure on the inside. Fasten the tie just enough to be secure.
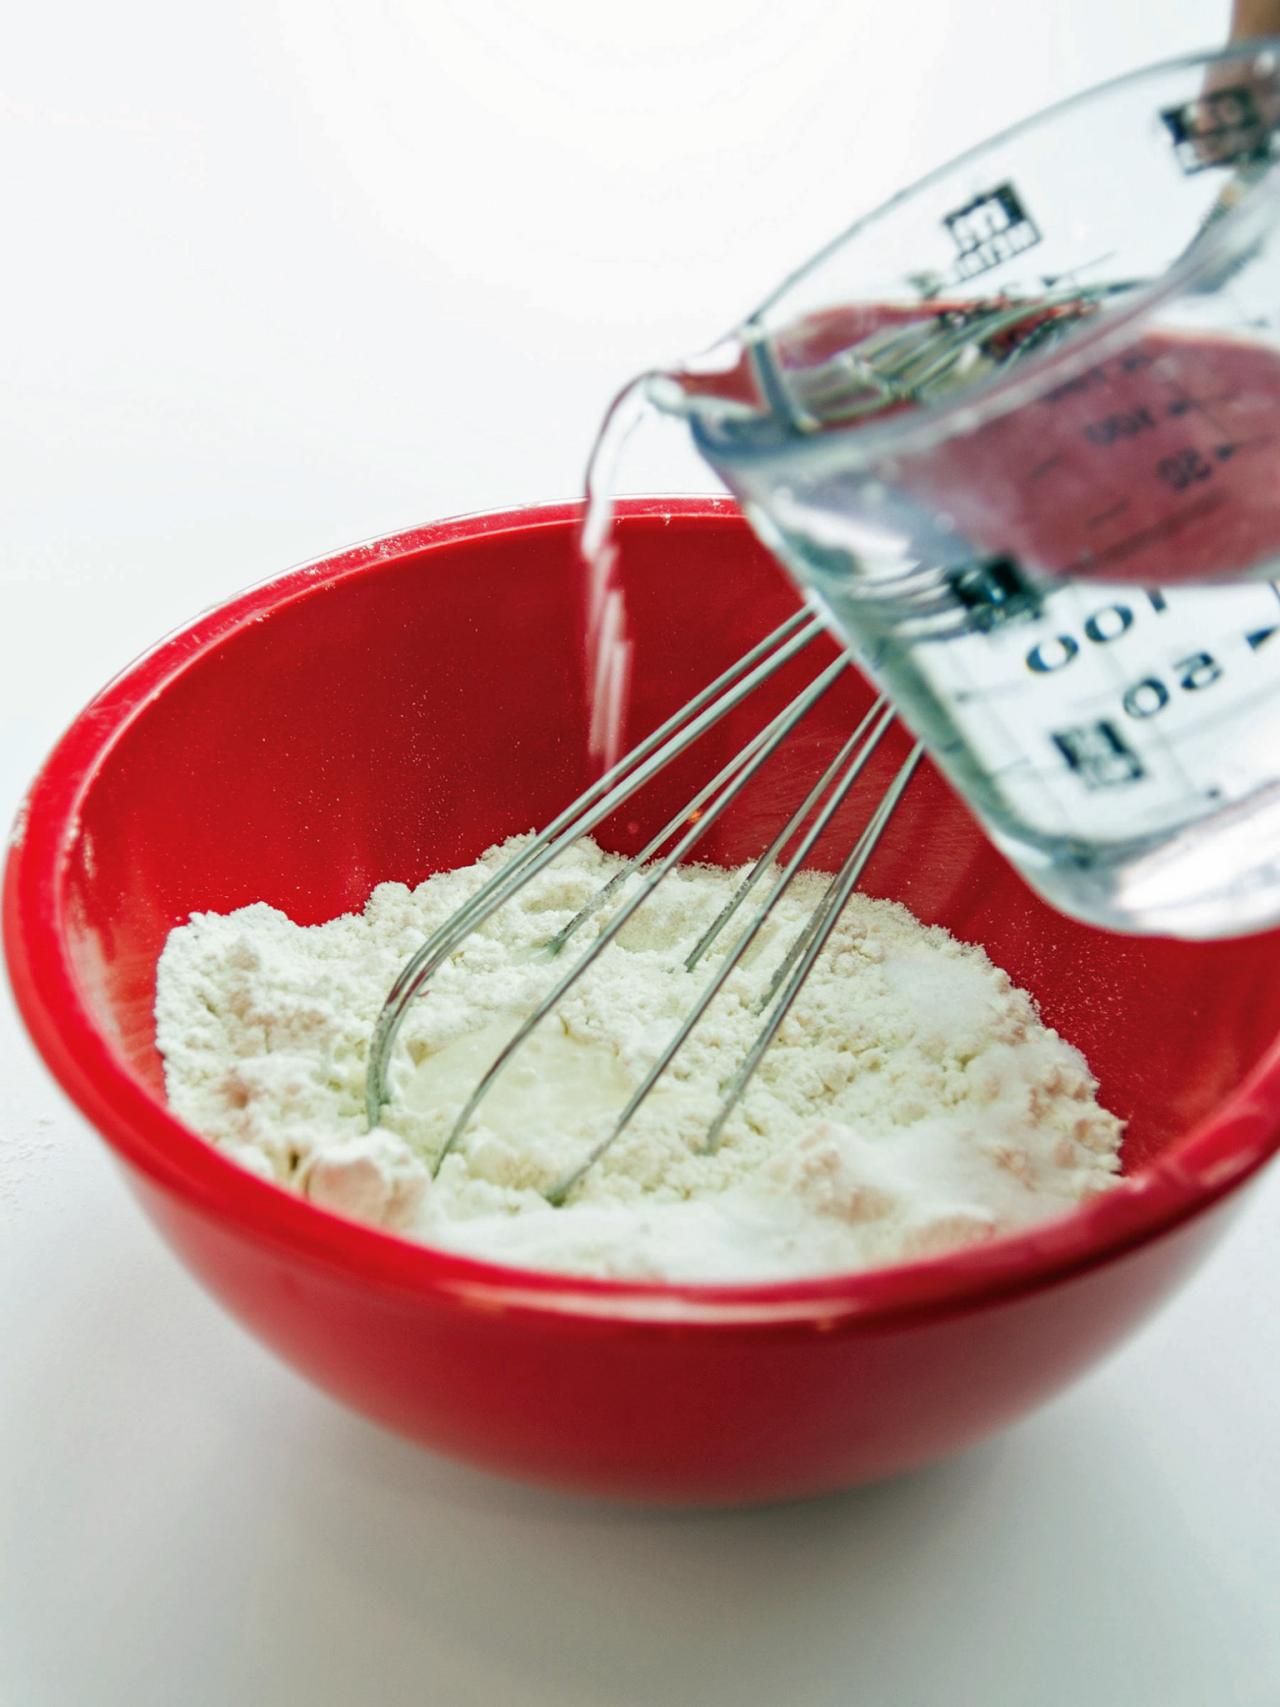
Mix Flour Paste and Add Papier Mache
Make the flour paste by combining 1 cup flour, 1 cup water and 2 tablespoons of salt in a bowl until the mixture is the consistency of thick pancake batter. Dip the torn newsprint strips in the bowl and pull them out, running the strips between two fingers to remove excess paste. Quickly apply the wet strips to the surface of the box, overlapping strips slightly to ensure full coverage. Tip: Apply no more than 2 coats of papier mache — the more secure the edges, the harder it will be for your guests to break the piñata. Once the first side is dry, carefully turn it over and cover the other side. Let dry completely before proceeding.

Candy Corn Pinata: Step 11
Make the flour paste by adding 1 cup flour, 1 cup water and 2 tablespoon salt to a bowl. Mix until smooth and the consistency of thick pancake batter. Place torn strips of newsprint in the bowl and pull them out running them between two fingers pressed together to remove any excess paste. Quickly add the strips to the surface of the box. Overlap each strip just a bit to make sure you have full coverage. Each side can get two coats, but no more. The more secure the edges, the harder it will be for your guests to bust the pinata open. When the first side is dry carefully turn it over and cover the other side. Dry completely before proceeding.
Cut Tissue Paper and Mark Candy Colors
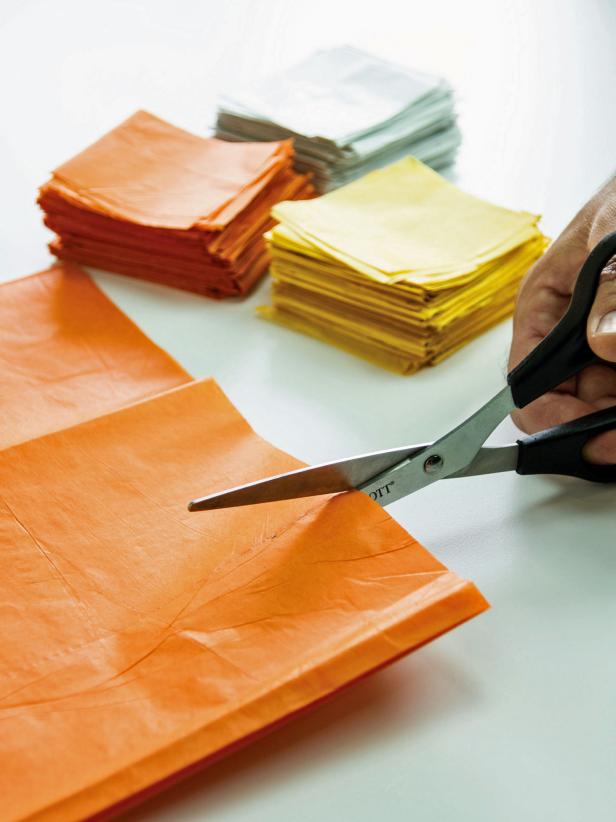
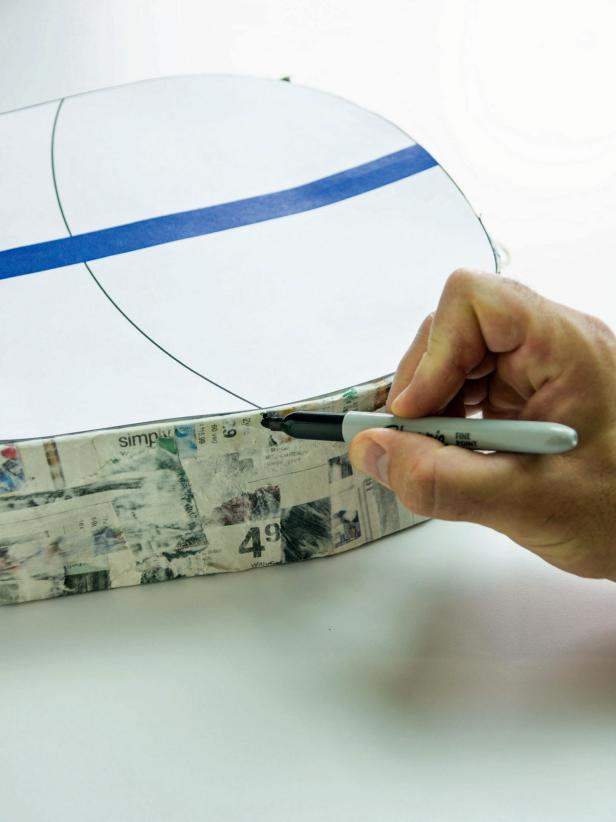
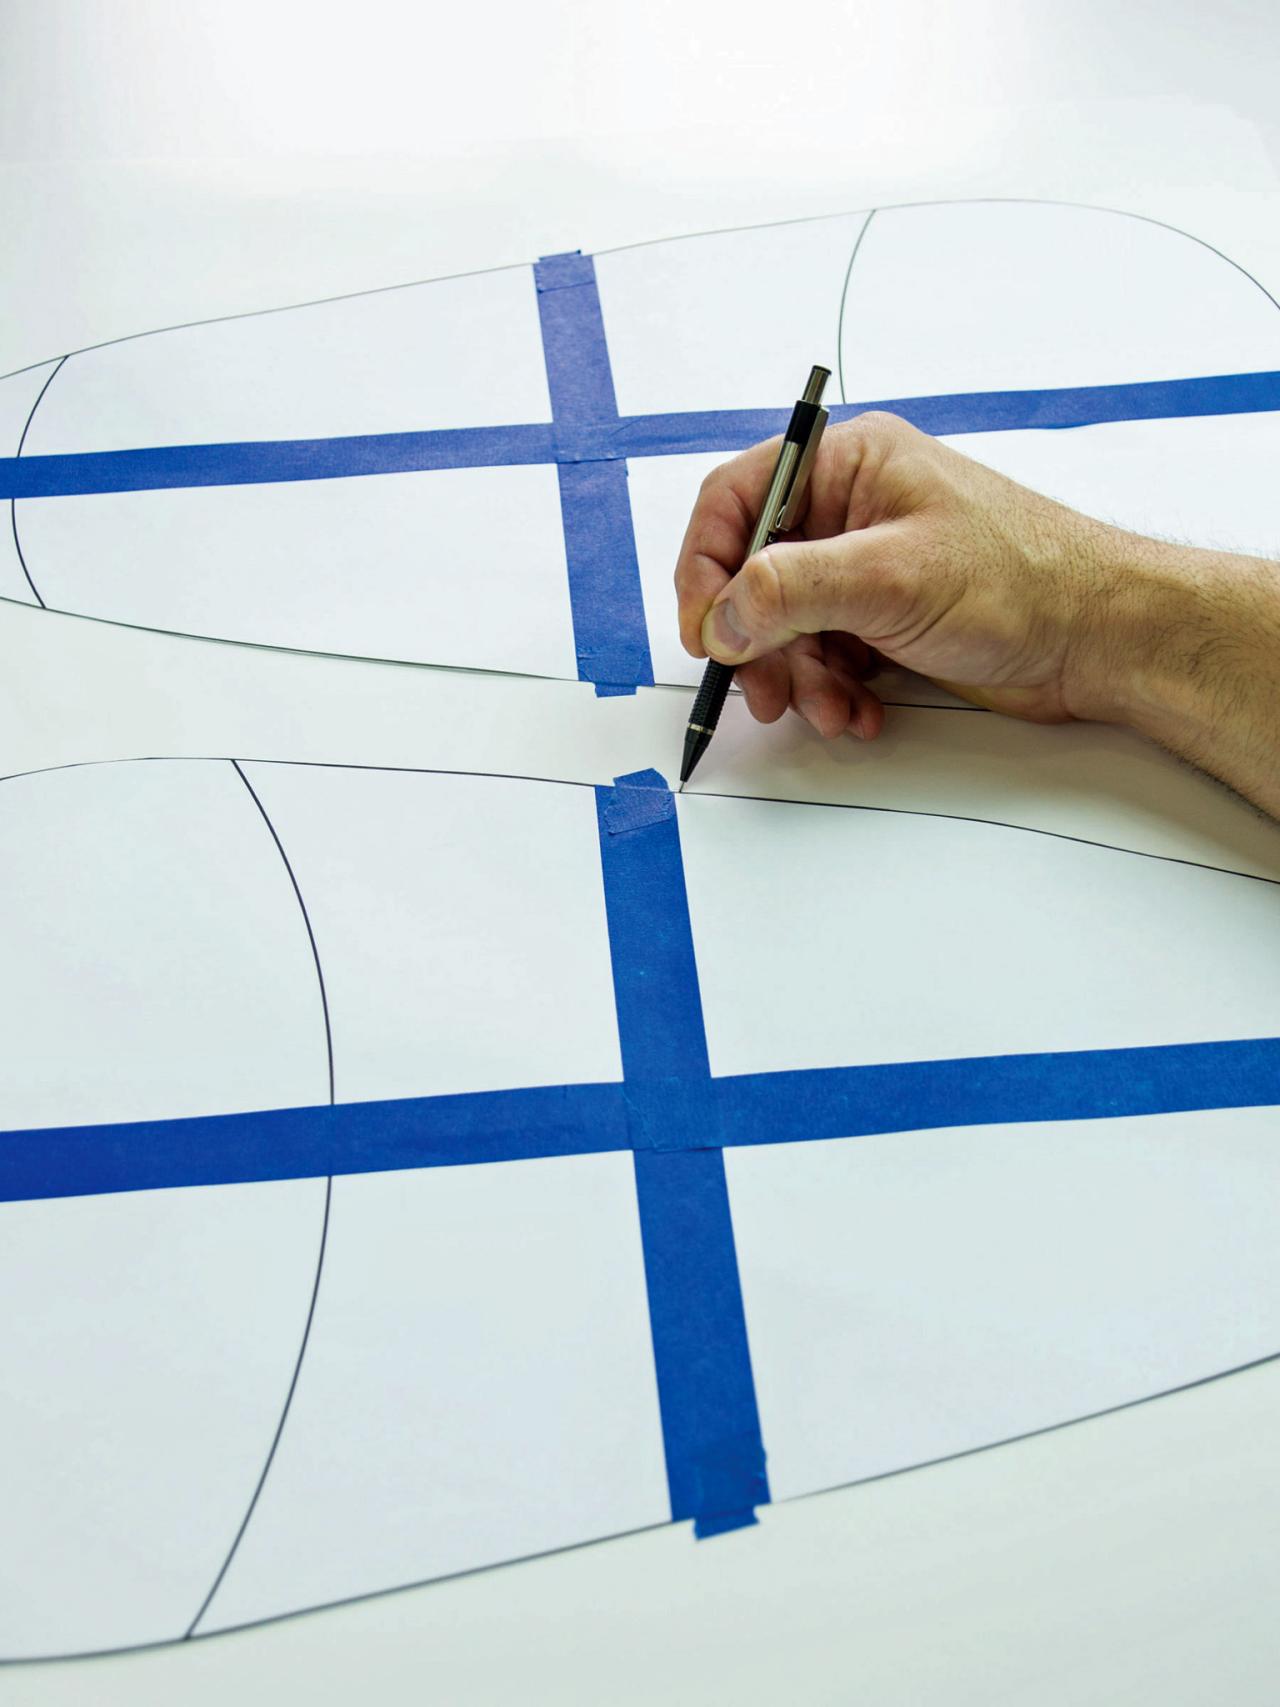
Cut orange, yellow and white tissue paper into 3" squares (Image 1). Using the template as your guide, mark the spots on the sides of the piñata where the colored sections meet. Join the dots with straight lines all the way around the piñata (Image 2).
Candy Corn Pinata: Step 12
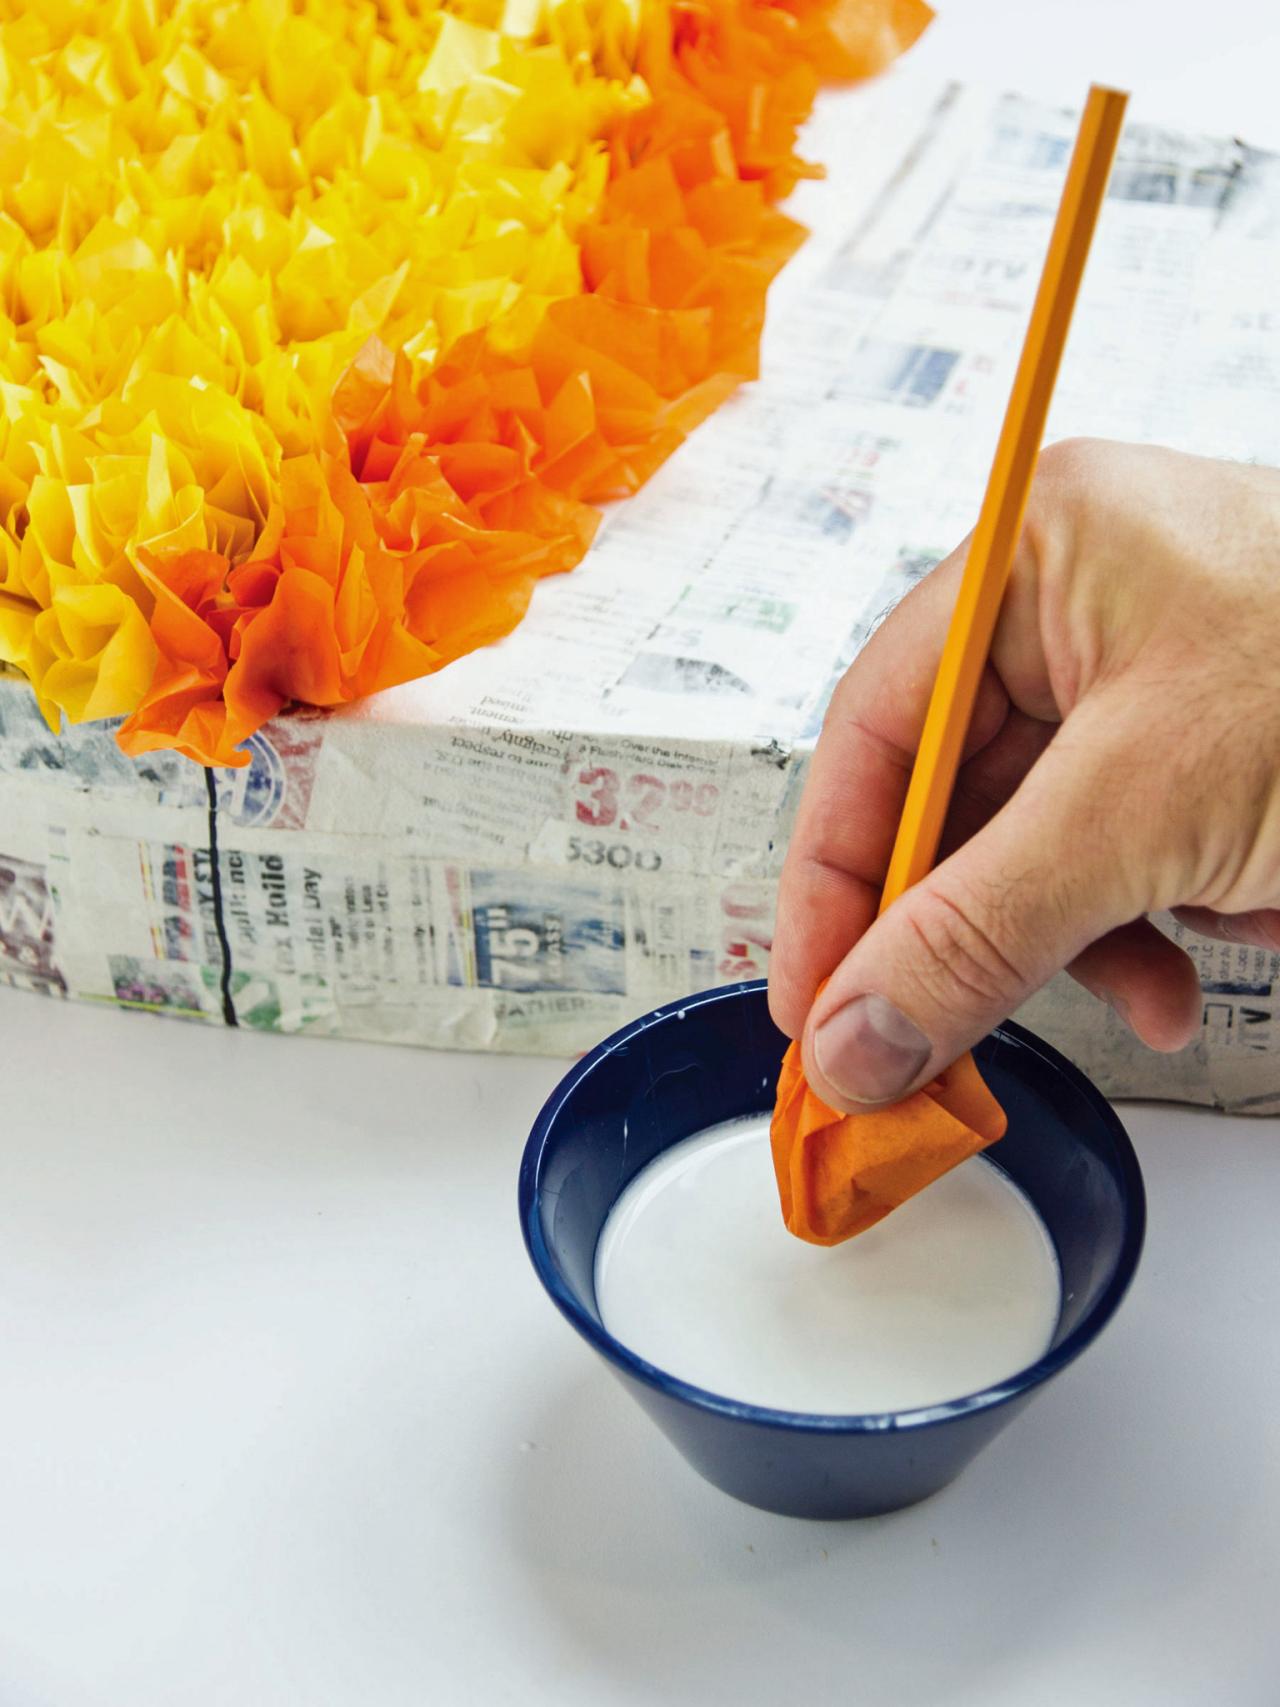
Cut all tissue paper into 3 inch squares. Place about a cup of white school glue in a small bowl.
Candy Corn Pinata: Step 13
Using the template as your guide mark the spots on the sides of the pinata where the colored sections meet. Join the dots with straight lines all the way around the pinata.
Apply the Tissue Paper and Hang
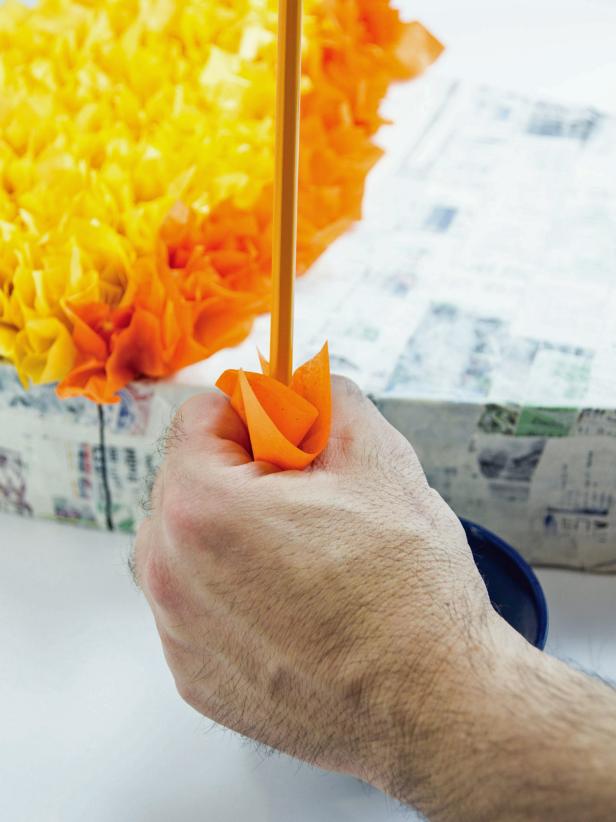
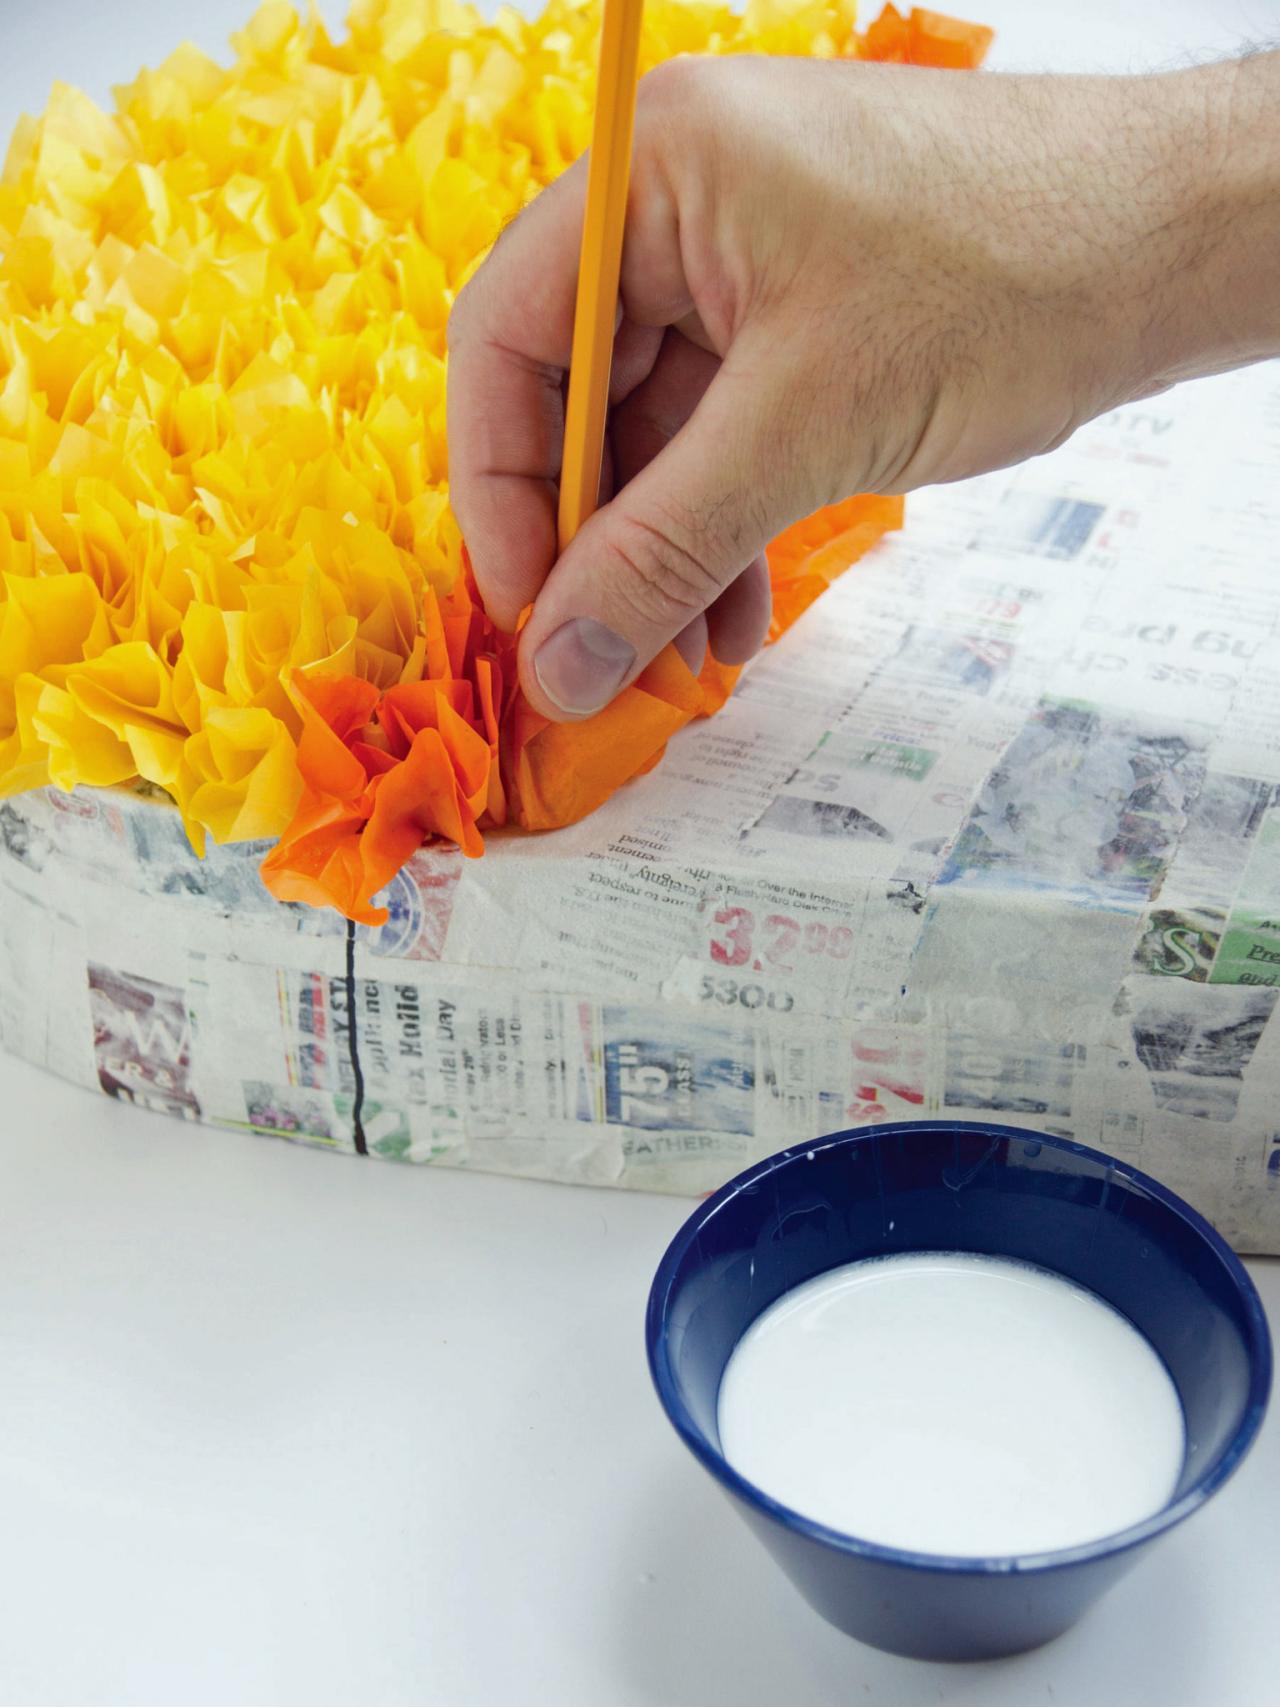
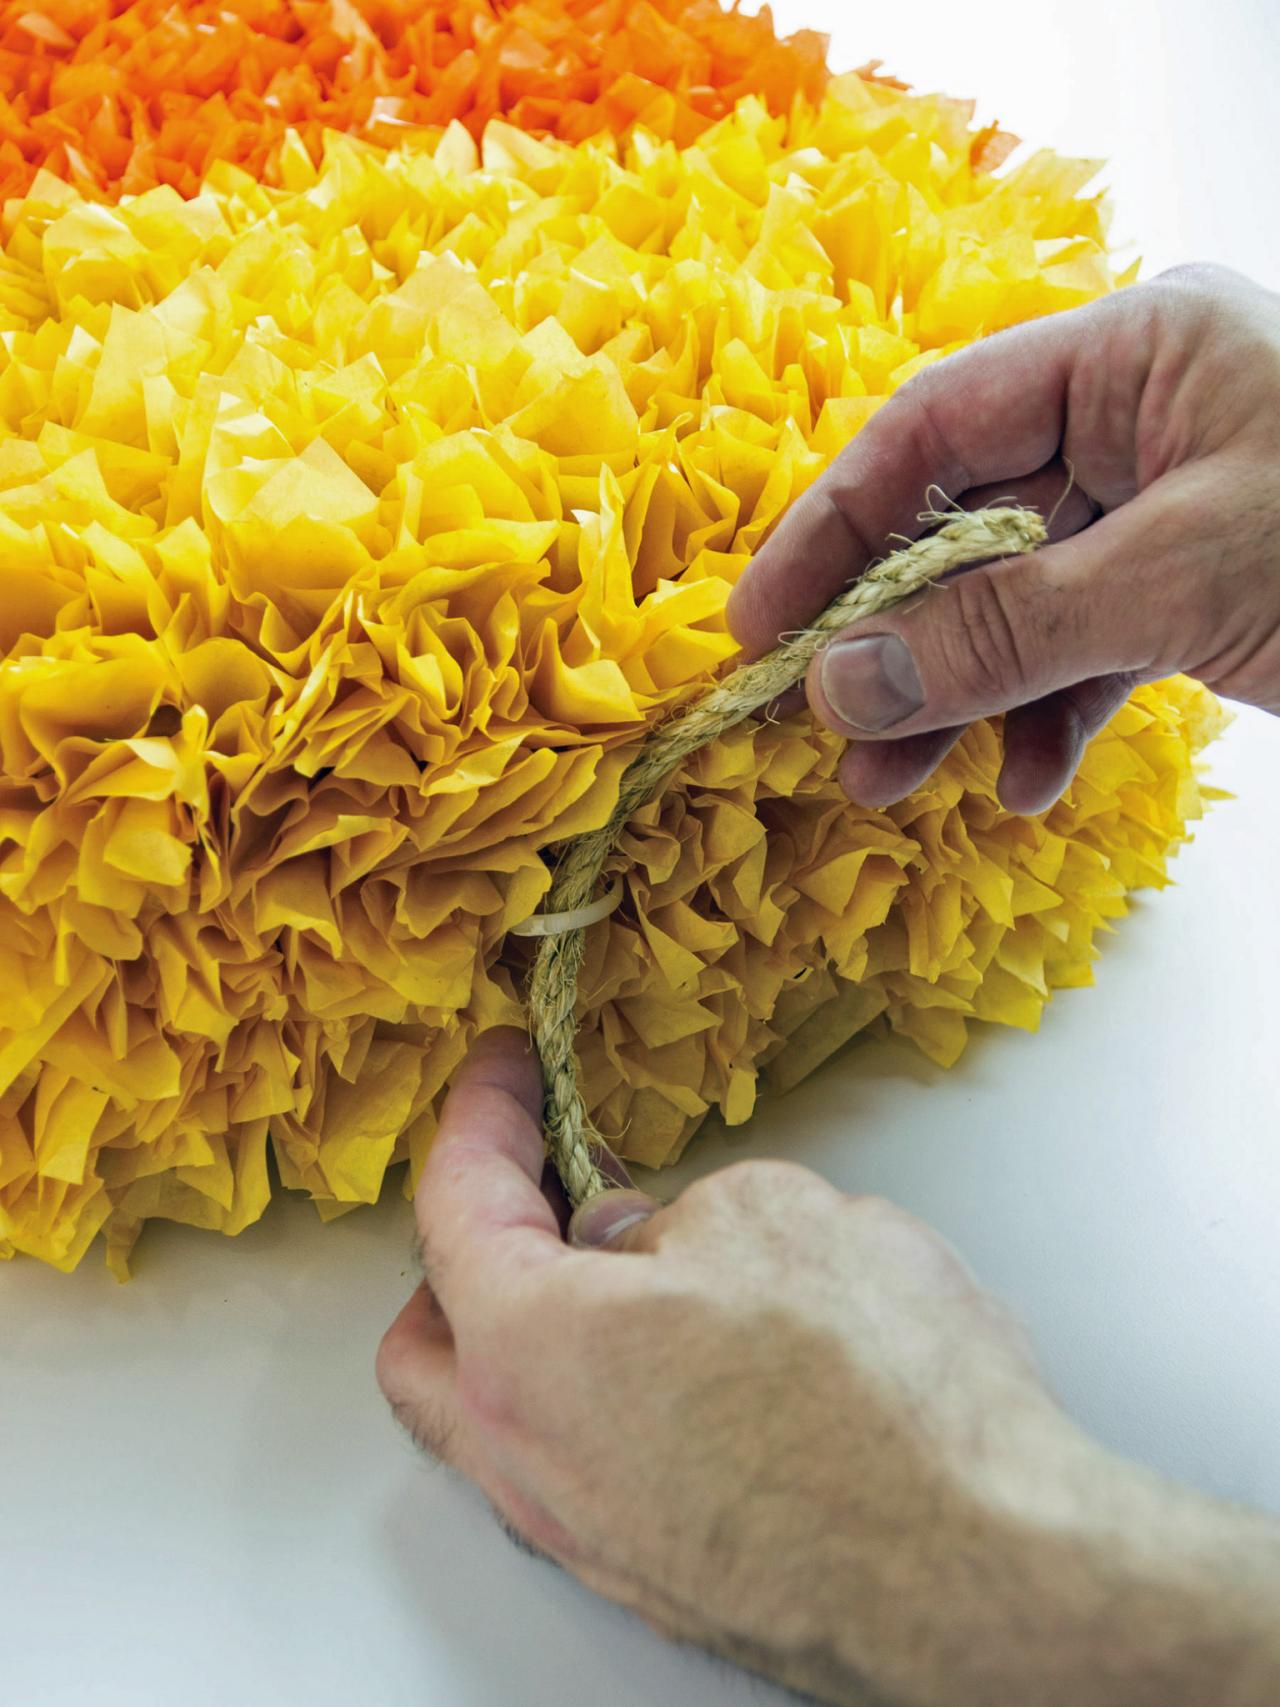
Place about a cup of white school glue in a small bowl. To add tissue to the piñata, make an 'O' with your forefinger and thumb. Lay a tissue square over the 'O' and poke a pencil, eraser-end first, into the hole (Image 1). Holding the tissue paper on the pencil's end, dip the tissue in glue (Image 2). Attach the tissue paper to the piñata about every 3/4" to fill in the sections. Complete the piñata's top and sides (Image 3). Tie a long rope around the zip tie to hang the piñata temporarily so you can add tissue to the back (Image 4). Let the glue dry completely. Hang your finished piñata from a low tree limb (Image 5). Make sure that your piñata isn't too high for small children or too low for eager adults. Everyone deserves a swing at this festive Halloween party favor.


Candy Corn Pinata: Step 14
Fill in each section with the right candy corn color. To add tissue to the pinata make an ‘O’ with your forefinger and thumb. Lay a tissue square over the O and poke a pencil, erase end first, into the hole.
Candy Corn Pinata: Step 16
Add the tissue paper to the piñata about 3/4” apart to fill in the sections. Complete the top and sides.
Candy Corn Pinata: Step 17
Tie a rope to the hanger long enough to hang the piñata in the tree you will be using. Use the rope to hang the piñata temporarily so you can add tissue to the back of the piñata. Let glue dry completely before using.
Candy Corn Pinata: Beauty 2
Halloween swings into action with this candy corn piñata. Your party guests will love taking a shot at this treat-filled craft. Because you make it yourself, you get complete control over what goes inside.


