


Upcycle a 5-Gallon Bucket Into a Fun, Fabric-Covered Planter
A ridiculously easy DIY planter that's also ridiculously cute? Sign us up! This project takes less than an hour and uses five simple materials you probably already have sitting in the garage.

Cassidy Garcia, Styling by Jill Tennant Design

Materials Needed
- plastic 5-gallon bucket
- drill
- 1 yard of fabric
- Mod Podge® Outdoor
- sisal rope
- hot glue gun
Prep Bucket
Remove handle from bucket (Image 1), then clean inside and out with warm water and dish soap. Flip upside down and drill small holes in the bottom-center for drainage (Image 2).

Cassidy Garcia, Styling by Jill Tennant Design

Cassidy Garcia, Styling by Jill Tennant Design
Apply Fabric
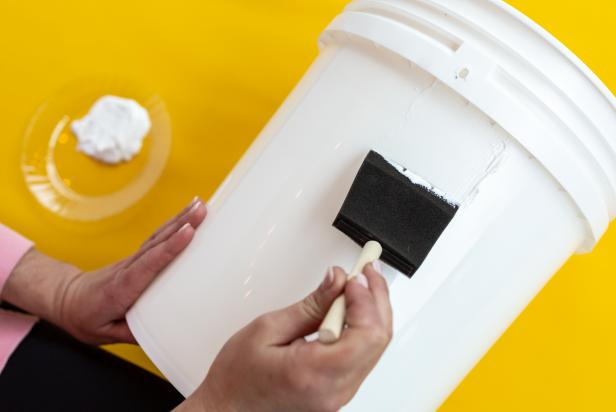
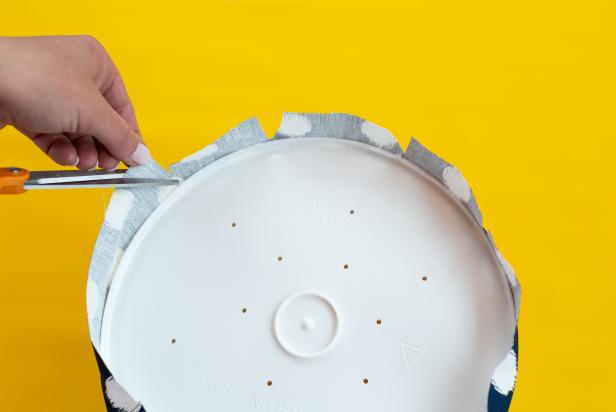
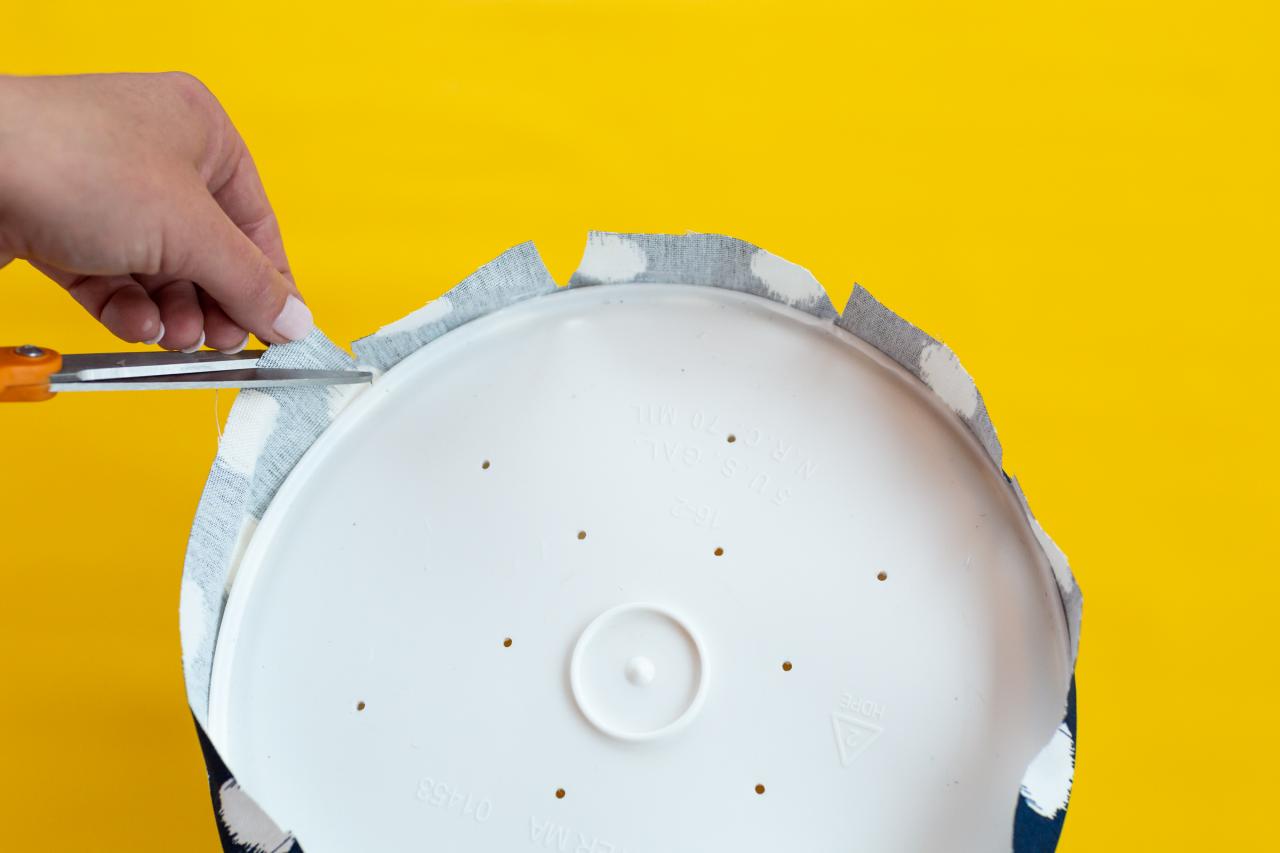
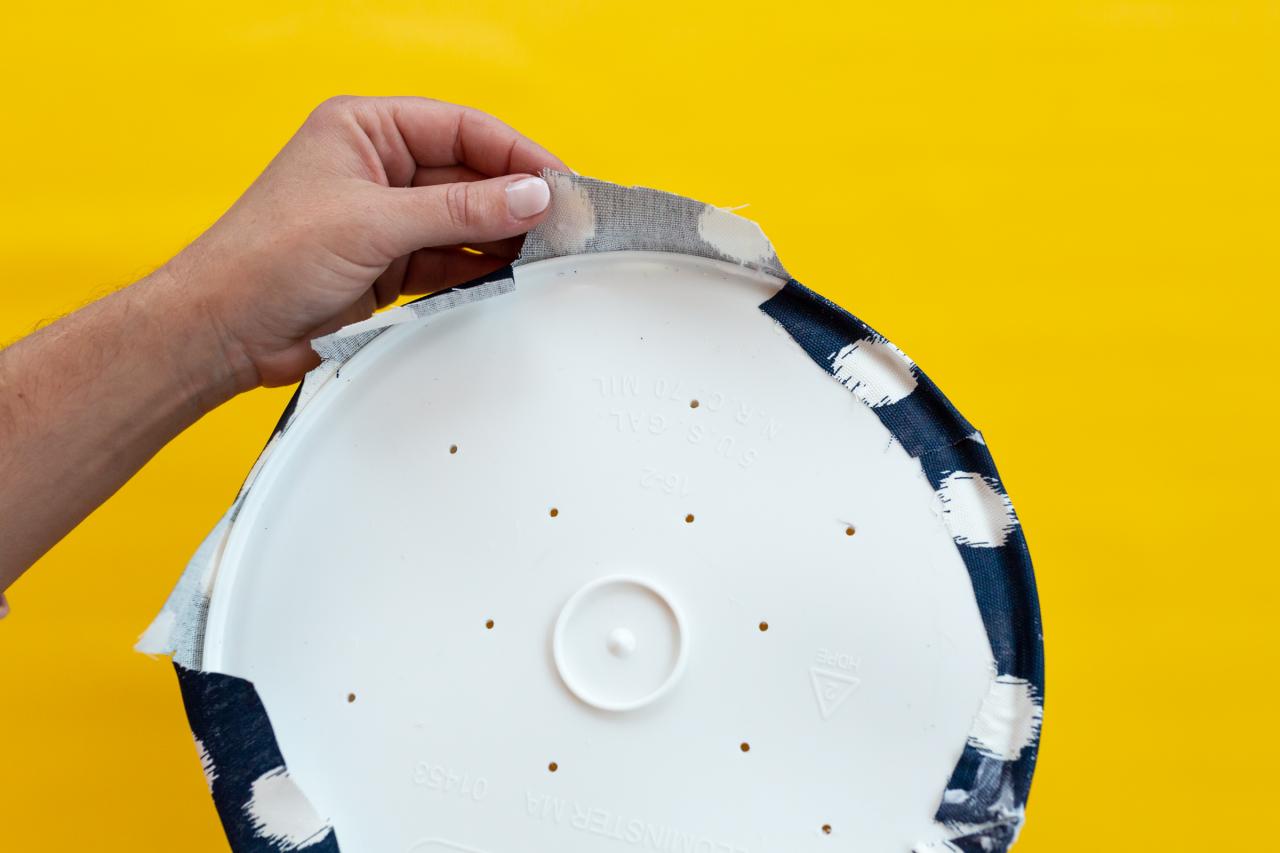
Using a foam brush or small foam roller, apply outdoor Mod Podge just beneath the ridged rim to the bottom of the bucket, working in 4-6 inch sections (Image 1). While the glue is still wet, line up the fabric with the ridged rim and use your hand to smooth the fabric onto the Mod Podge. Continue in sections around the bucket, smoothing fabric onto the Mod Podge as you go (Image 2). Overlap a 1-inch section where the fabric meets, gluing the fabric together with Mod Podge. Flip bucket over and cut small triangles into the overhanging fabric (Image 3). Apply Mod Podge to the bottom of the bucket and pull the fabric snugly, overlapping the triangles to form a neat edge (Image 4). Let dry according to package instructions.
Note: If you plan to use this planter indoors or on a covered porch, you may stop here and proceed to the next step. If you need the planter to be water- and weather-resistant, apply a coat of outdoor Mod Podge to the outside of the fabric and let dry, then add another coat if desired.
Cassidy Garcia, Styling by Jill Tennant Design

Cassidy Garcia, Styling by Jill Tennant Design
Cassidy Garcia, Styling by Jill Tennant Design

Cassidy Garcia, Styling by Jill Tennant Design
Decorate With Rope
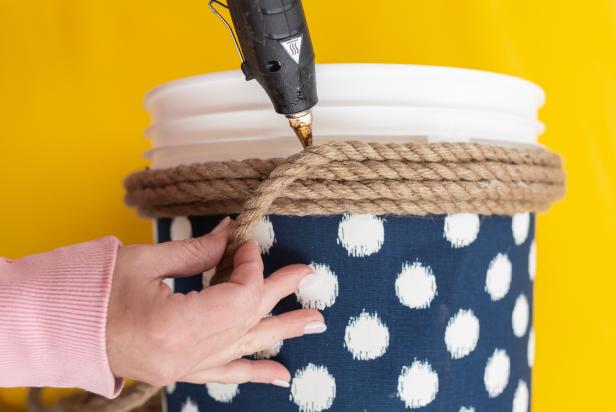
Run a short bead of hot glue just under the ridge of the upper section of the bucket (where the fabric starts), then quickly push sisal rope into the glue, hiding the rough edge of fabric (Images 1 & 2). Continue applying glue and rope in short sections around the upper, ridged part of the bucket (Image 3) until you reach the top. Cut off the remaining rope and neatly glue and tuck the loose end.

Cassidy Garcia, Styling by Jill Tennant Design

Cassidy Garcia, Styling by Jill Tennant Design
Cassidy Garcia, Styling by Jill Tennant Design
Plant & Enjoy
To keep weight down and save on potting soil, fill the bottom half of your bucket with plastic bottles or cut-up pool noodles. Top with potting soil, plant with your favorite shade-loving blooms and enjoy a bright pop of color on your front porch all summer long.

Cassidy Garcia, Styling by Jill Tennant Design
You Might Also Like...

20 Oversized Planters You Can Make From Upcycled Items 22 Photos
Amp up your curb appeal (and save some cash) by transforming your old stuff into eye-catching planters.


