


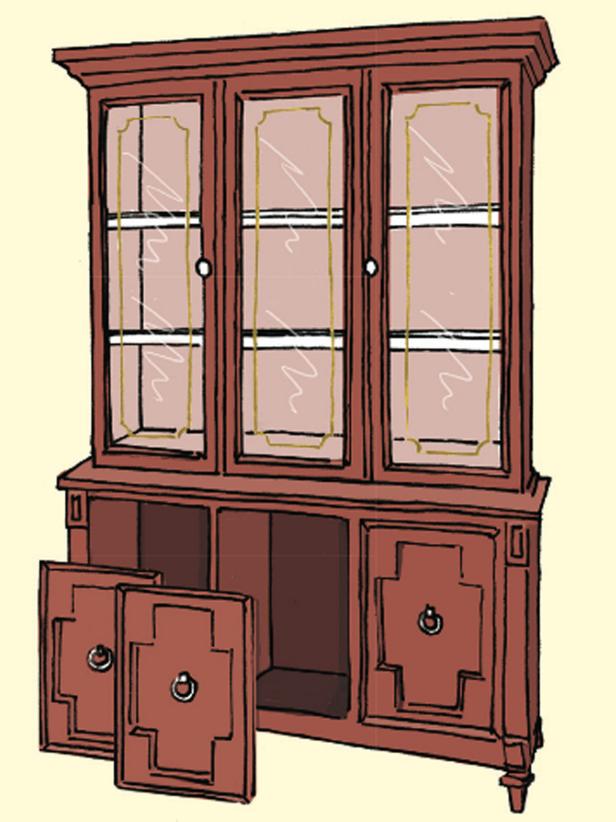
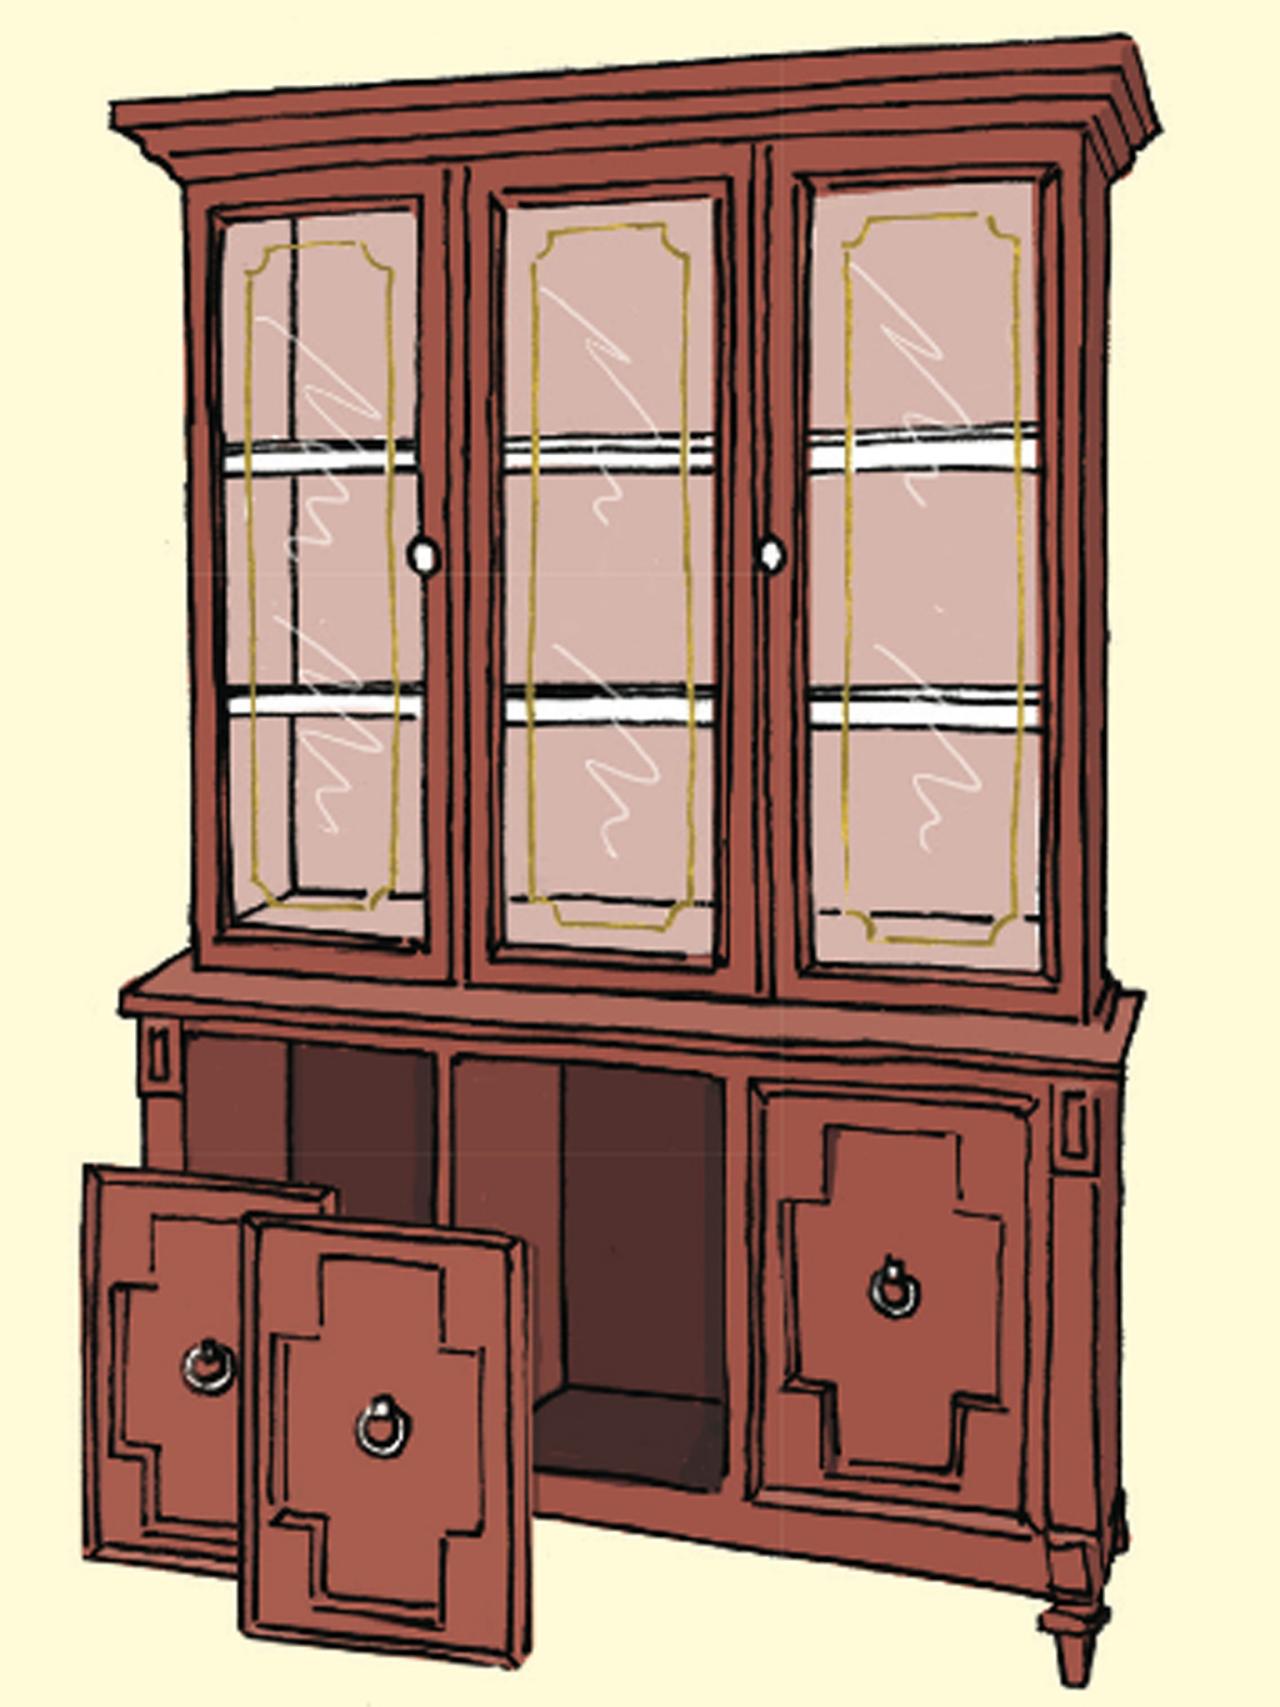
Update a Used China Cabinet
HGTV Magazine looked beyond the red stained wood and the gold trim, and saw that this 1970s china cabinet had the potential to be a stunner. Here’s how you can remake a similar piece of your own.

Materials Needed
- seam roller
- plastic smoothing tool
- white paint and primer
- wallpaper
- wallpaper paste
- painter's tape
- cat's-paw
- coarse sandpaper
- paint roller
- razor blade
- pulls and knobs
- screwdriver
- pencil
- tack cloth
- paintbrush
- sponge
- hammer
- nails
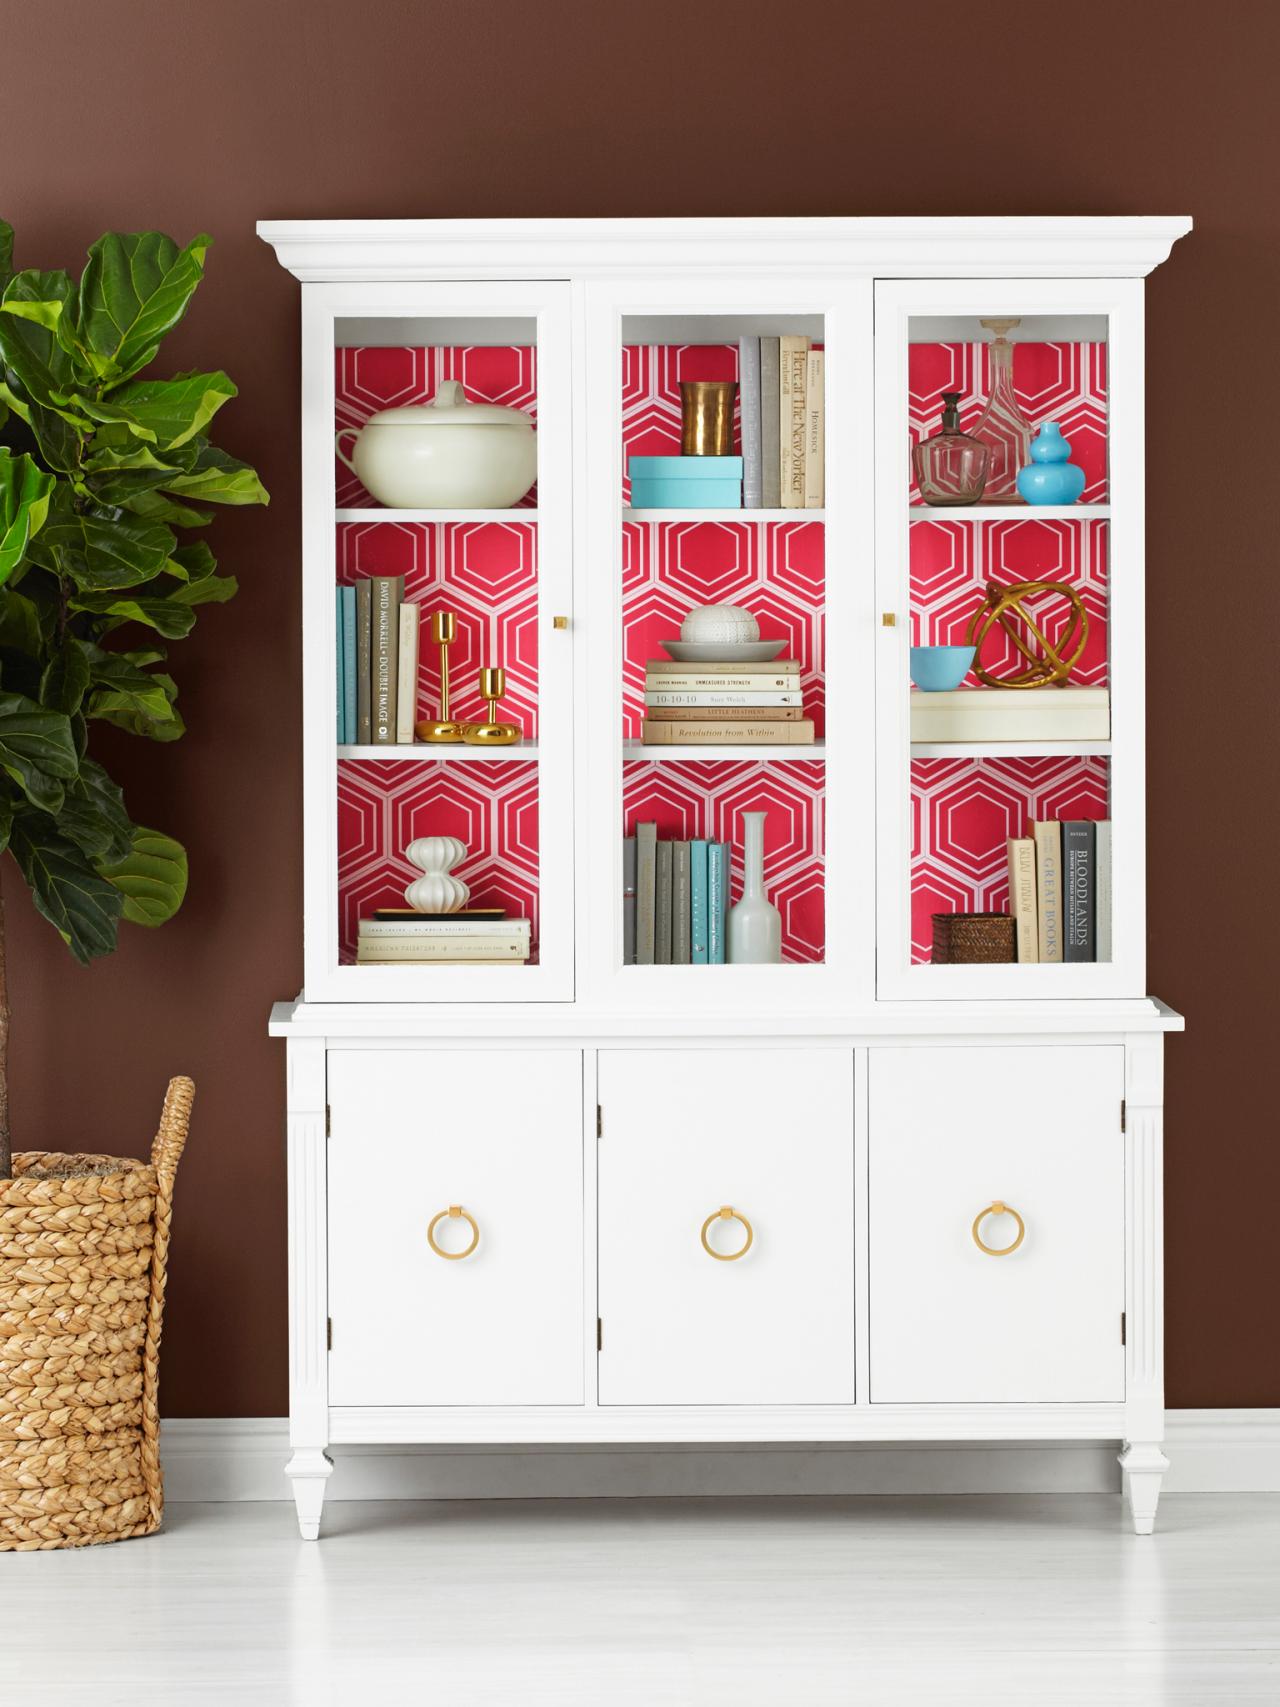
Superchic Storage
Revitalized with crisp white paint, glinting brass hardware, and hot pink honeycomb-pattern wallpaper, the cabinet is now any-room stylish. Vases, hardcovers, and metallic accents make for a fresh take on a living room bookcase. Change up the display and it’ll dazzle in a dining room, an entry, or a bedroom. (Follow directions below.)

China Cabinet Makeover
Wallpaper Amy Bethune Honeysuckle Honeycomb wallpaper, $60 per single roll, spoonflower.com CABINET paint Emerald Interior Acrylic Latex paint and primer in Alabaster by Sherwin-Williams knobs Glinted prism iron and brass knobs in bronze finish, $8 each, anthropologie.com pulls Round 3"-diameter ring pulls in satin brass, $38 each, lahardware.com wall paint Round Barn by Ralph Lauren Paint
Photo by: Lara Robby/Studio D
Lara Robby/Studio D
Step 1
Using a cat’s-paw, pry off the back of the cabinet. Remove the shelves and lower doors (use a pencil to label each door to make rehanging them easier). Unscrew and discard the hardware from the upper and lower doors. If your cabinet has molding on the lower doors, pry it off with a screwdriver and discard it. Using a razor blade, scrape any decals off the glass doors.
Step 2
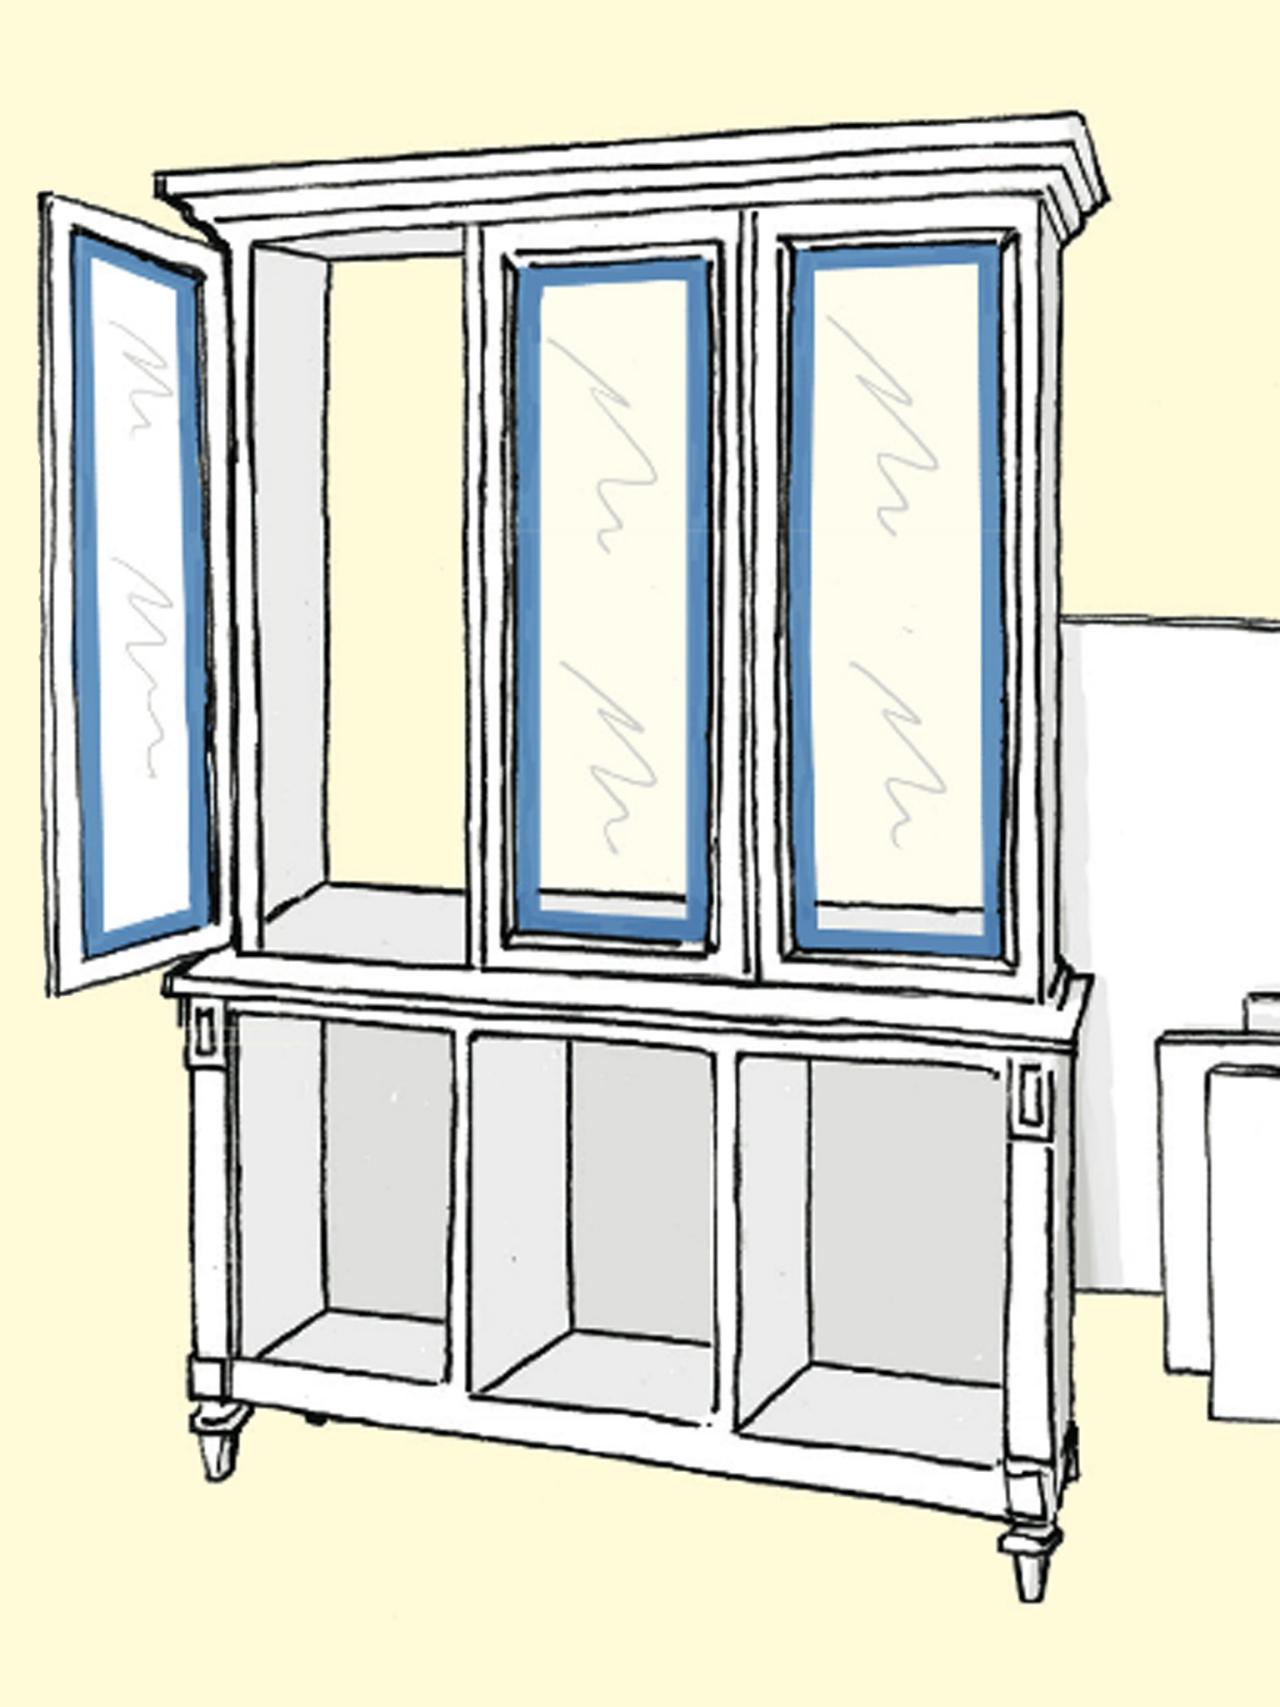
Lightly sand the entire cabinet, including the backboard and shelves. Wipe off dust with a tack cloth. Tape off both sides of the glass on the upper doors, as shown. Using a paintbrush, apply white paint and primer to the entire cabinet, including both sides of the shelves. Remove the painter’s tape while the paint is still wet. Let dry.


Step 3
Using a paint roller, apply wallpaper paste to the wallpaper. Affix the wallpaper to the backboard, starting in the center of the board. Using a plastic smoothing tool, smooth the wallpaper. Repeat until the entire board is covered. Using a seam roller, flatten the seams. Trim off any excess wallpaper. Wipe off stray paste with a damp sponge. Let dry. Tip: Seams should abut, not overlap.
Step 4
Replace the shelves. Attach the new hardware to the upper and the lower doors. Rehang the lower doors. Carefully nail the backboard into place. Tip: If your cabinet’s backboard isn't removable, go to hgtv.com/diy-cabinet for wallpapering instructions.


