


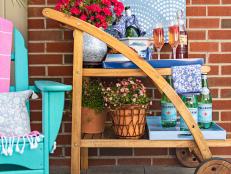
Upcycle an Old Charcoal Grill Into a Chill Patio Bar Cart
In just a few steps, you can turn that dusty, old kettle grill into a stylish way to ice down your favorite summer sips.


Photo by: Sarah Busby; Styling by H. Camille Smith
Sarah Busby; Styling by H. Camille Smith
Materials Needed
- old charcoal grill, preferably with an attached side table and bottom shelf
- oven cleaner
- grease-fighting dish soap
- scrub sponge and/or scrub brush
- water hose
- drop cloth, newspaper or old shipping cardboard to protect work surface
- spray paint in your color of choice for the grill’s kettle
- gold spray paint for the legs
- screwdriver, pliers or any other tools needed for disassembly
- Plexiglas sheet cut to fit bottom shelf’s dimensions
- clear, heavy-duty plastic sheet
- clear, waterproof tape
- optional: clear, silicone sealant for permanent waterproofing
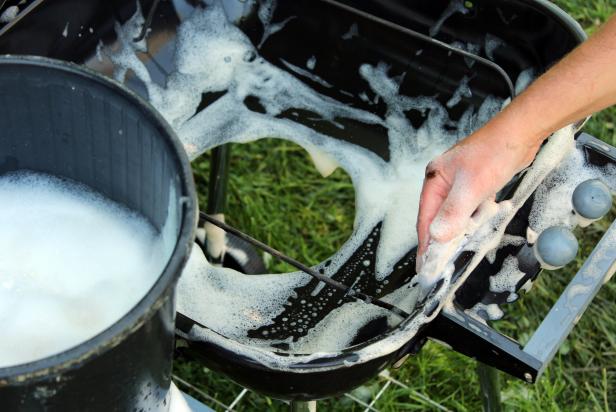
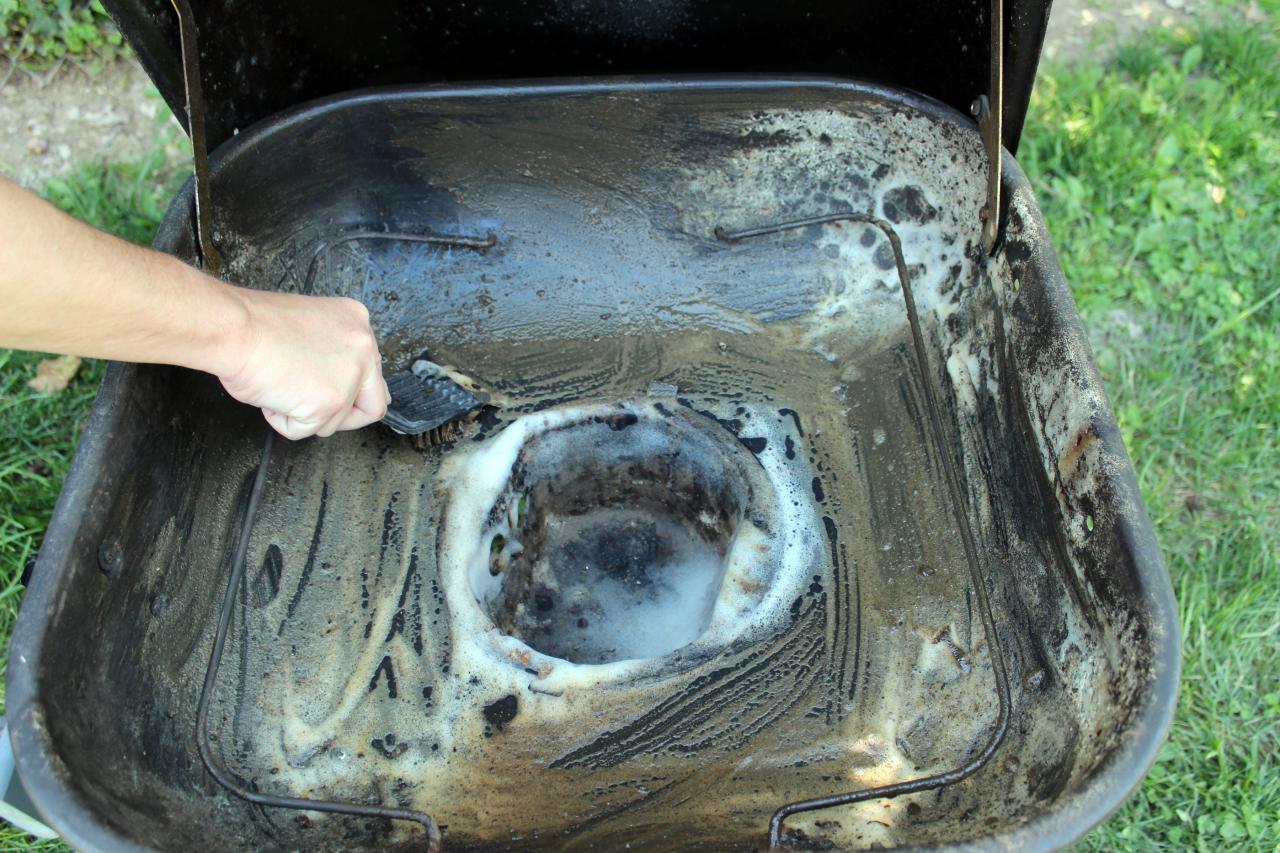
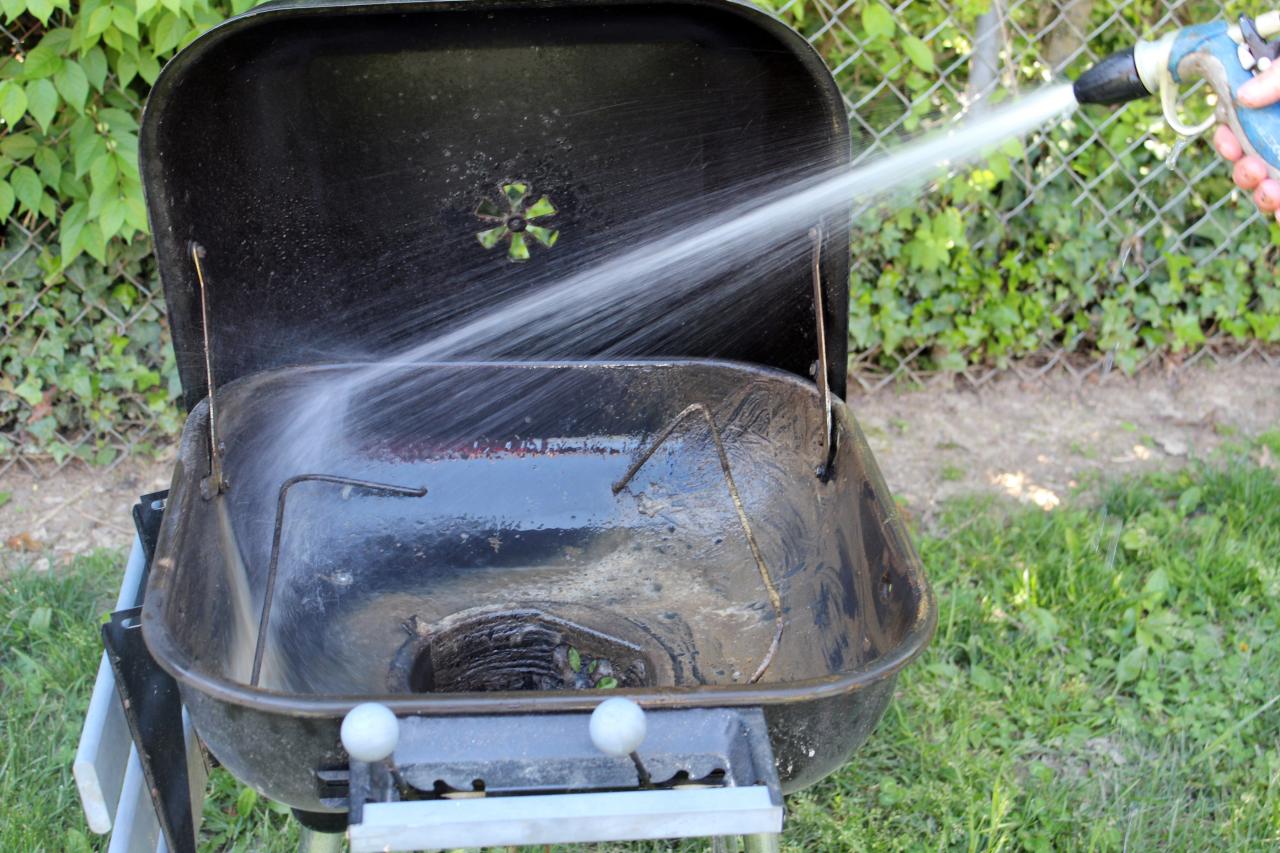
First, Thoroughly Clean Grill
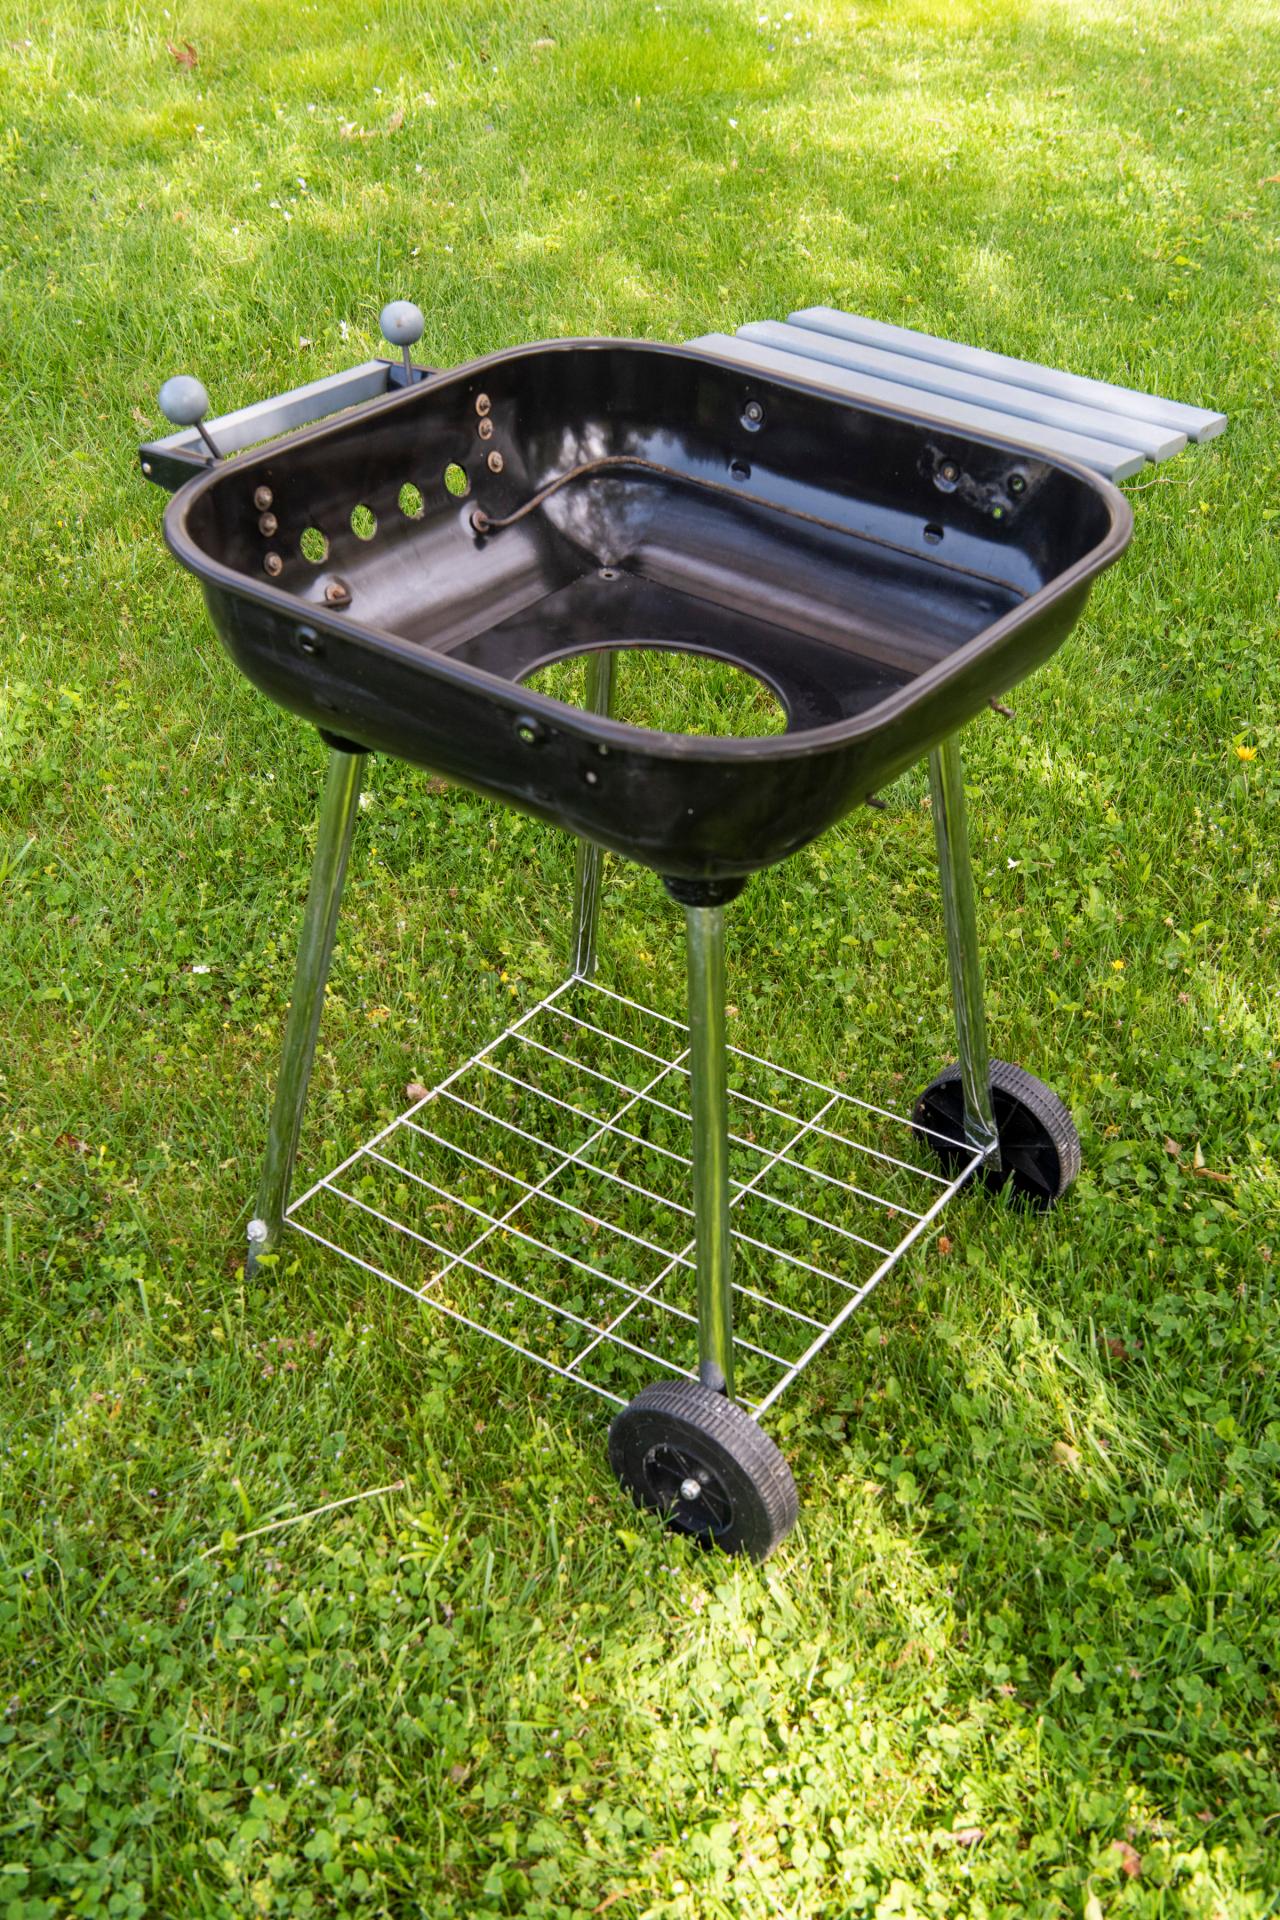
Paint won’t stick to a dirty surface, so the first (and maybe most important step) is to clean all surfaces you plan to paint — both inside and outside. Start by first removing any remaining charcoal, the bottom ash catcher and the grill rack. Position the grill where you can spray it safely with oven cleaner, preferably outdoors and far away from any kids or pets. Thoroughly coat the grill’s kettle, both inside and out, with the oven cleaner and allow it to loosen the baked-on grease, following manufacturer’s recommended time frame. When time has elapsed, give the loosened grime a good scrub with a stiff brush (Image 1), then rinse (Image 2). If any lingering grease or bits of baked-on food remain, clean all surfaces with grease-fighting dish soap and the scrub brush or sponge (Image 3), then rinse clean. Continue cleaning till all metal surfaces, including the grill's legs, are clean and ready for paint. For our project, this required one good cleaning round with the oven cleaner, followed by a good scrub with the grease-fighting dish liquid. Leave the grill in the sun to fully dry — and voila, a sparkling clean grill (Image 4).

H. Camille Smith

H. Camille Smith
H. Camille Smith

Sarah Busby
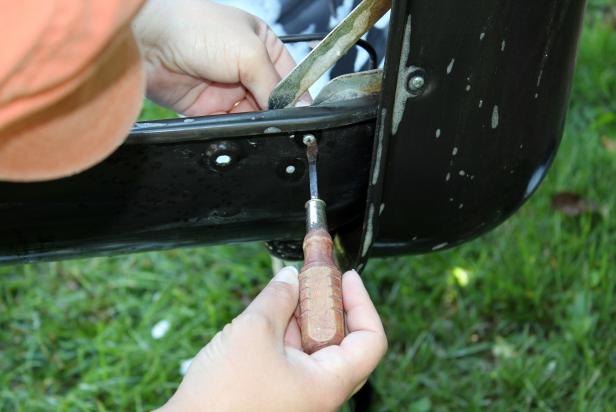
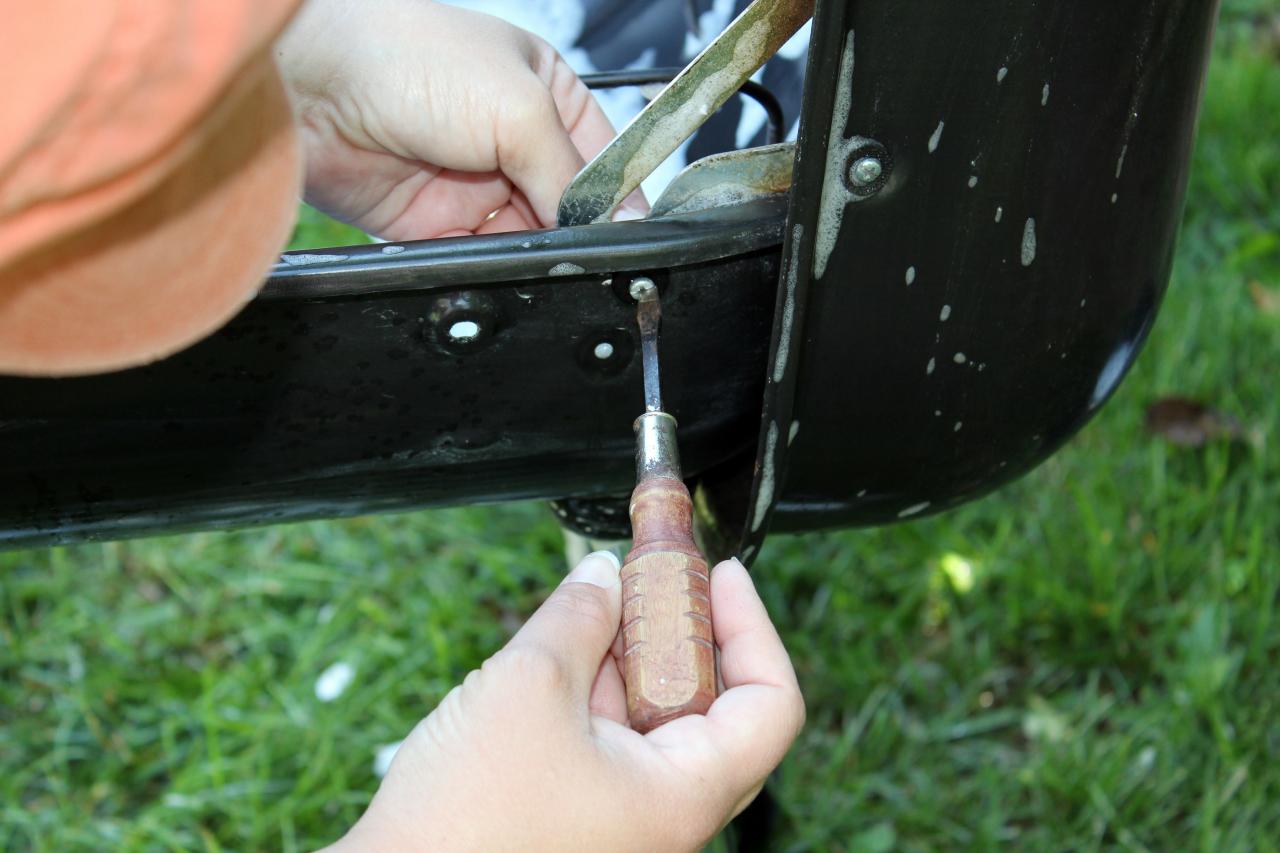
Remove Grill’s Lid
One of the hinges on our old grill was broken so we chose to remove the lid by simply unscrewing the flathead screws that attached it on each side (Image 1). Plus, we preferred the ease of access of an open ice well filled with drinks. If you prefer to leave your grill’s lid attached so you can open and close the bar, skip this step.
H. Camille Smith
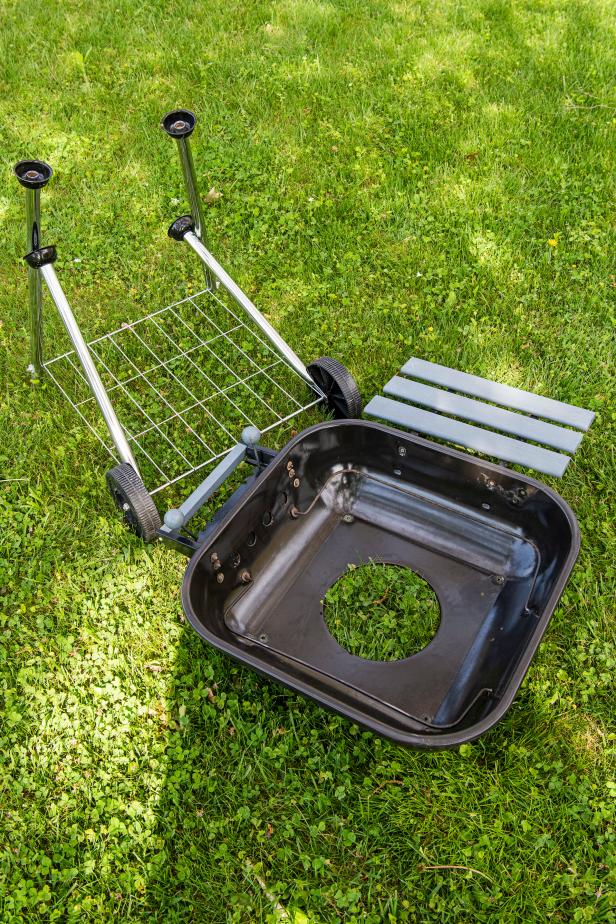
Separate Grill’s Kettle and Legs
To make painting the two areas easier, remove the screws attaching the kettle to the legs. Note: Be sure to place the screws in a safe location so you’ll be able to reattach the two sections later.
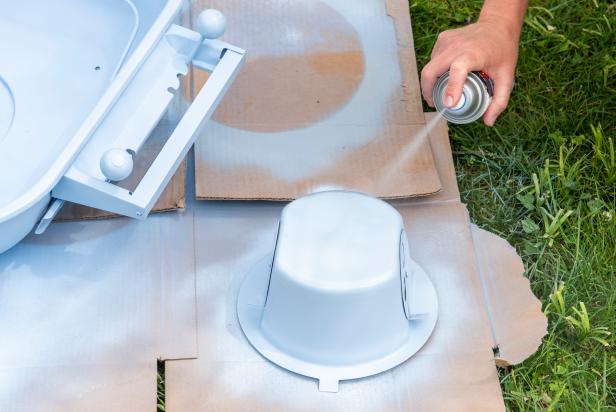
Paint Grill’s Kettle
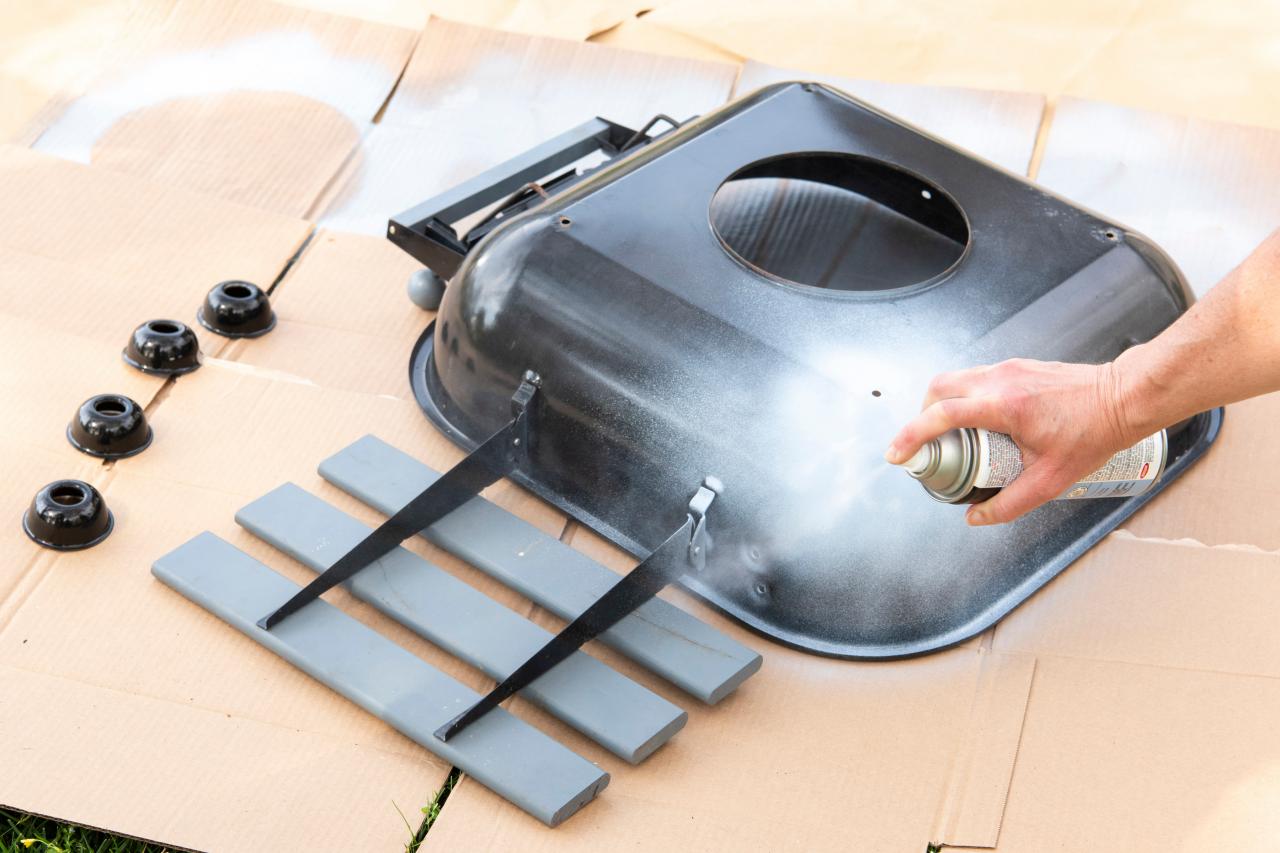
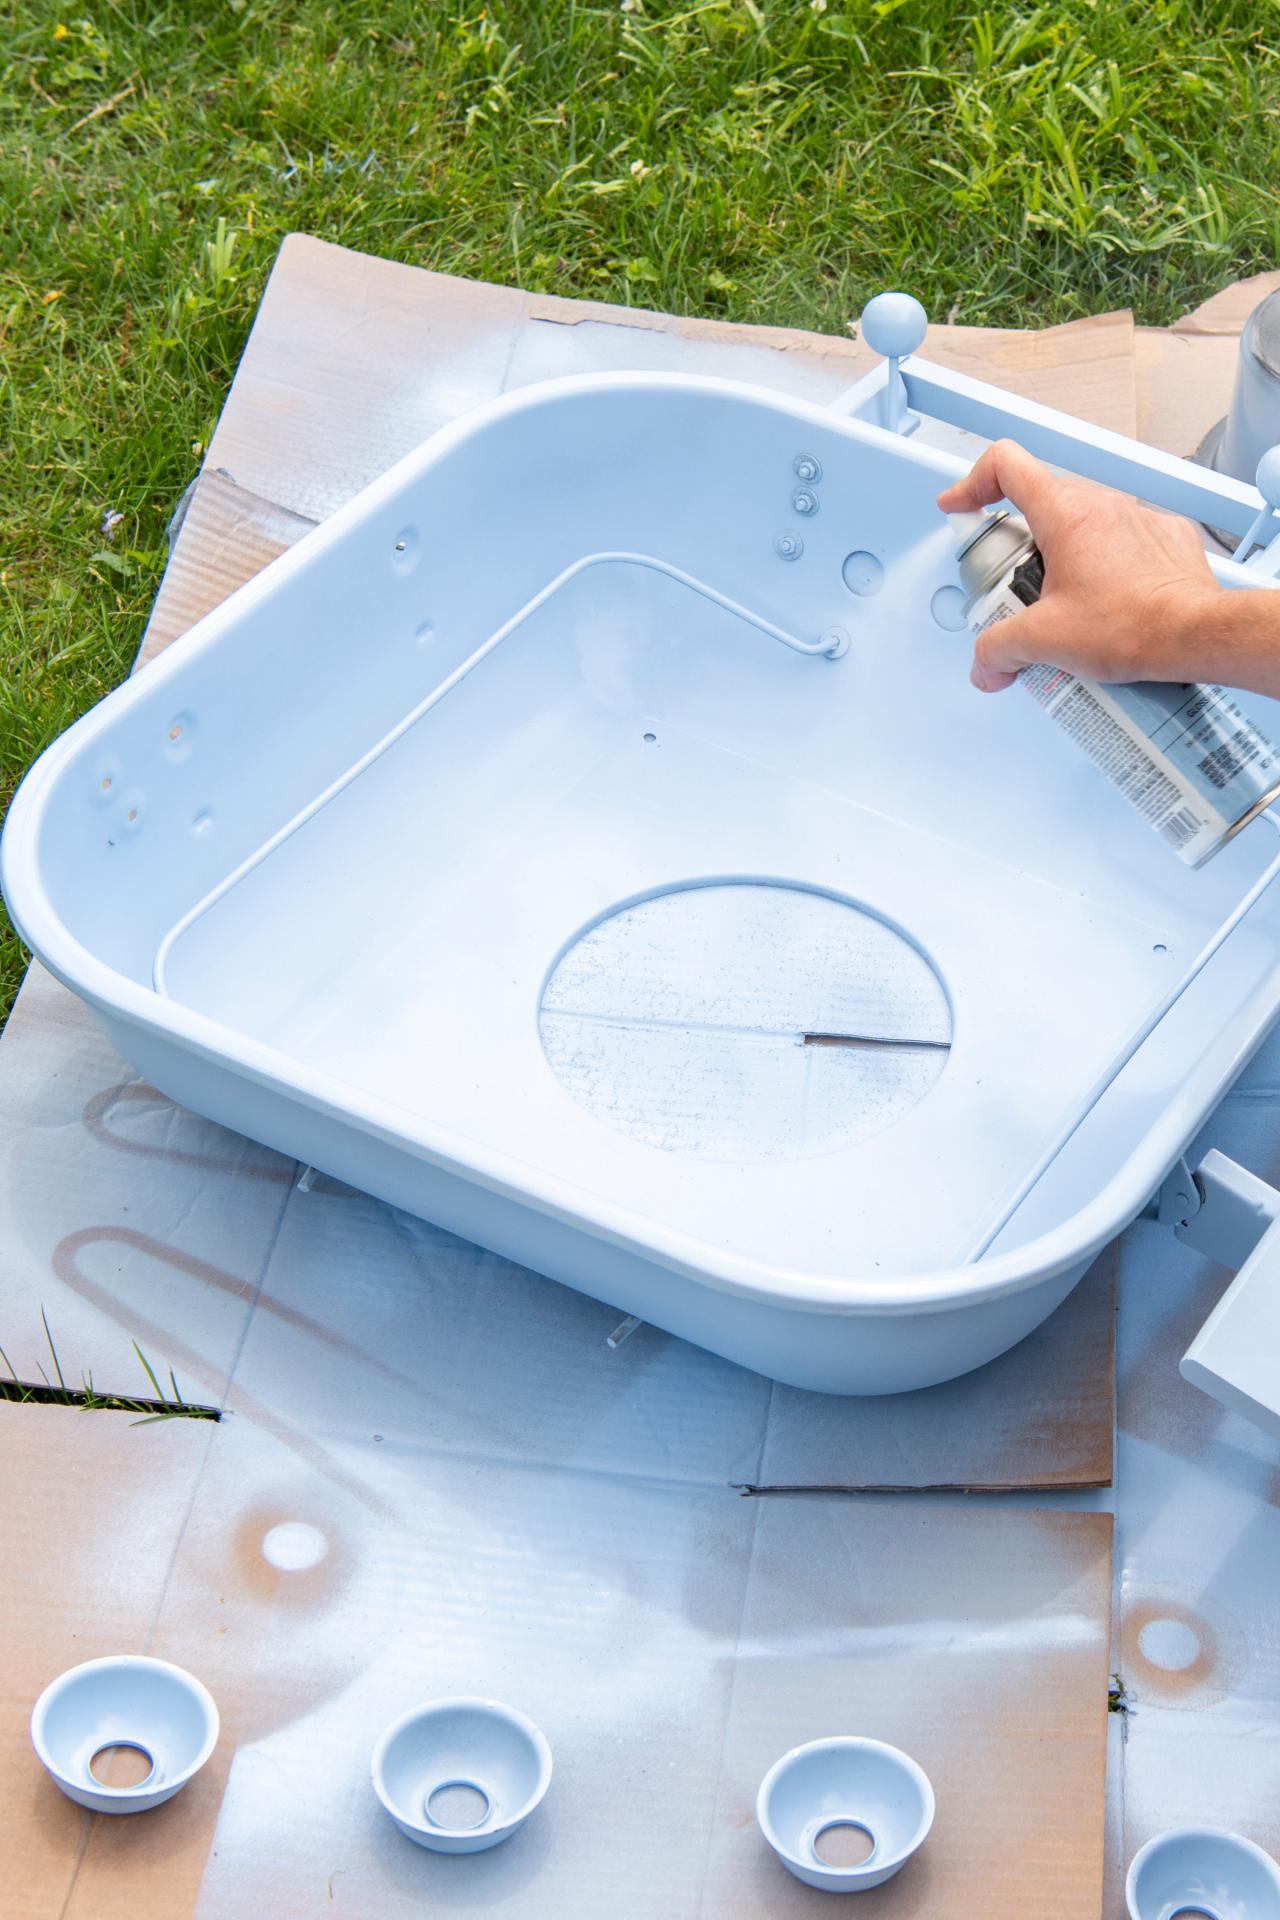
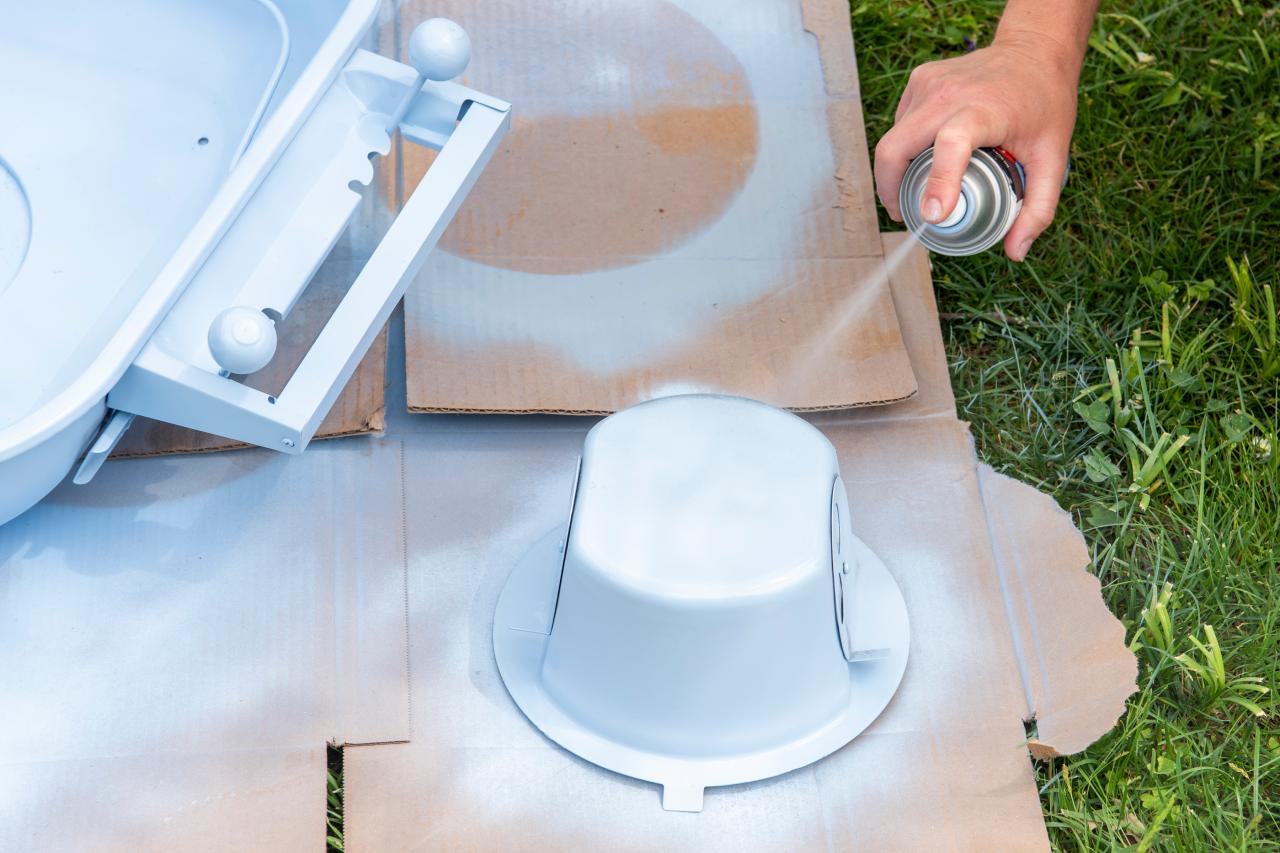
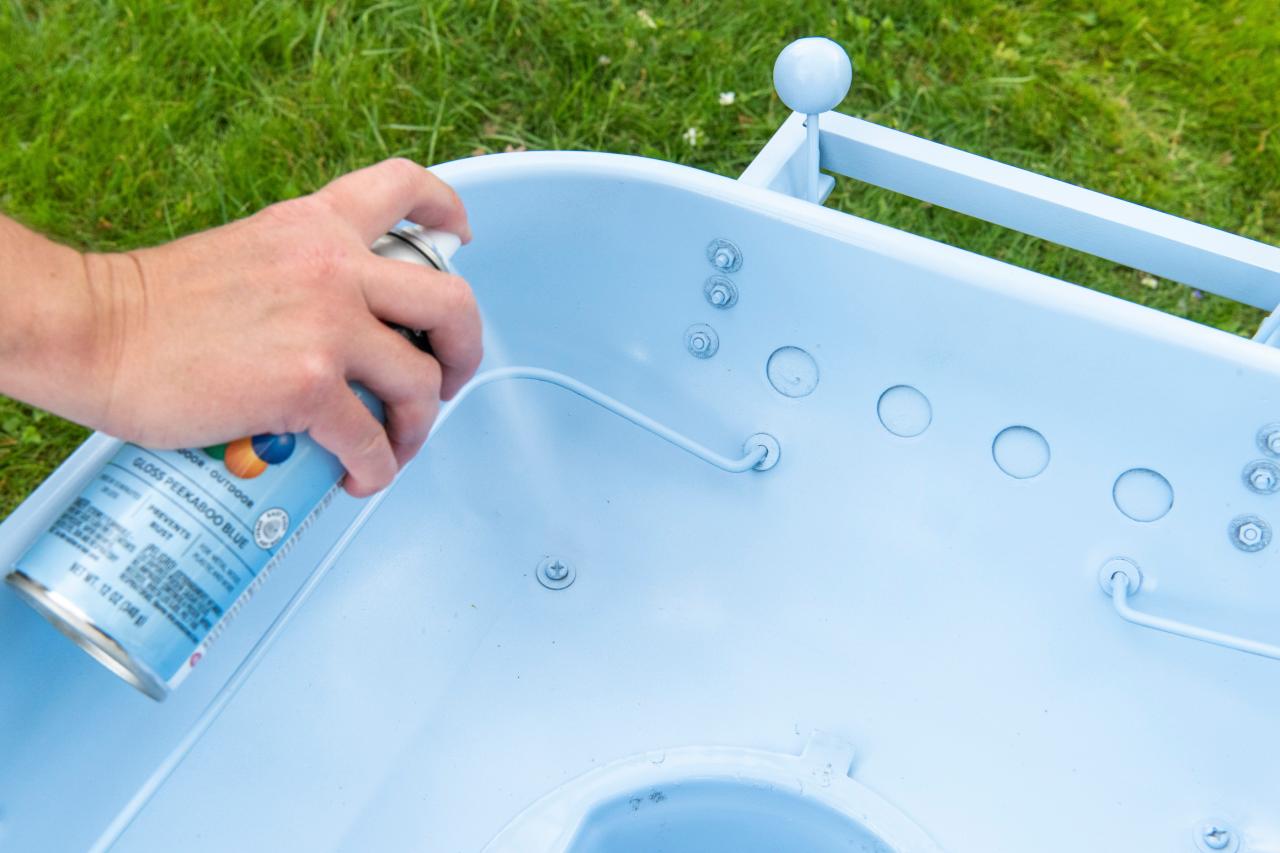
Protect your work surface with a drop cloth, old cardboard or newspaper and place the kettle pieces on top. Starting on the grill's exterior, use long, sweeping motions to coat all sides with spray paint (Image 1). Note: To prevent drips, multiple thin coats are better than one thick coat. Allow paint to thoroughly dry between coats. When the outside is thoroughly painted, flip the kettle over and spray paint the grill's interior (Image 2). Don't forget the ash catcher, give it a solid coat of paint, too (Image 3).

Sarah Busby

Sarah Busby
Sarah Busby
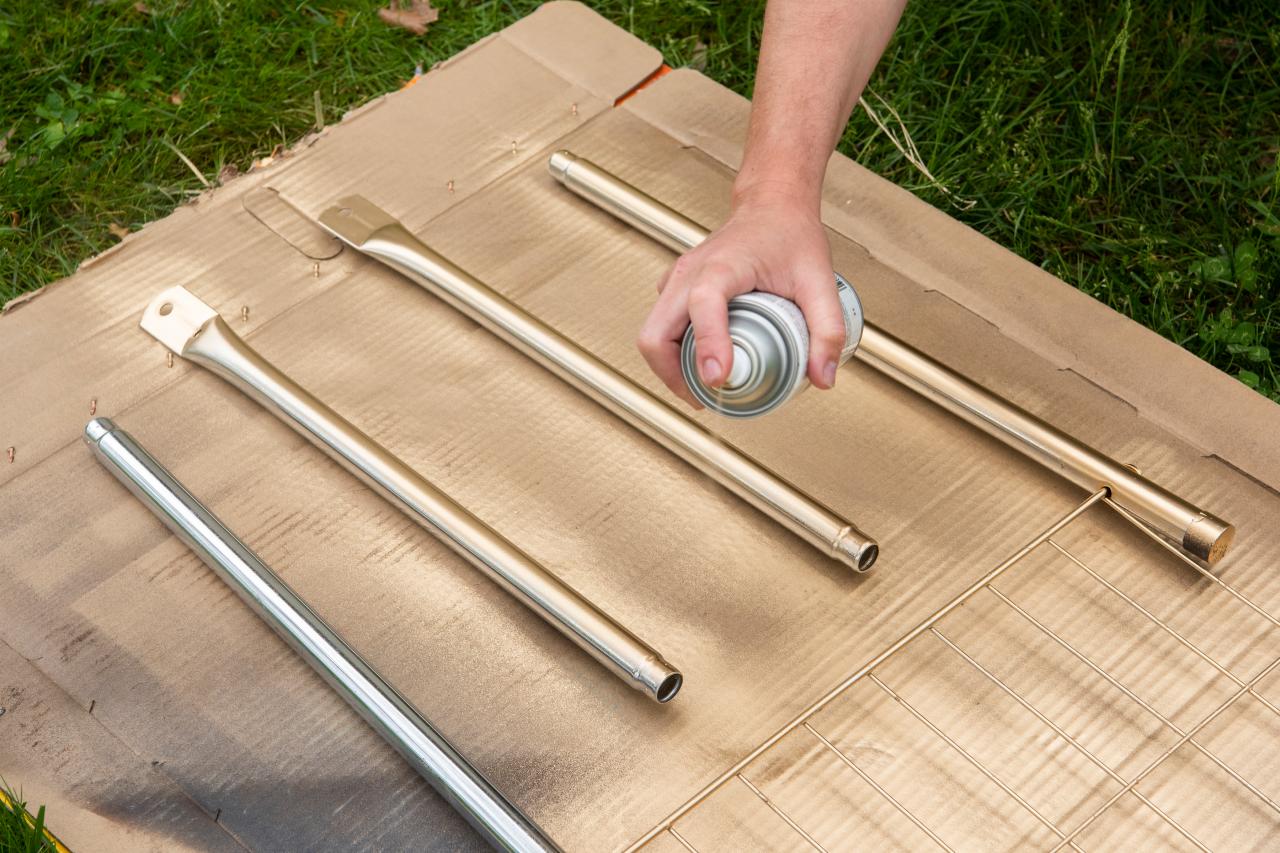
Paint Grill’s Legs + Bottom Rack
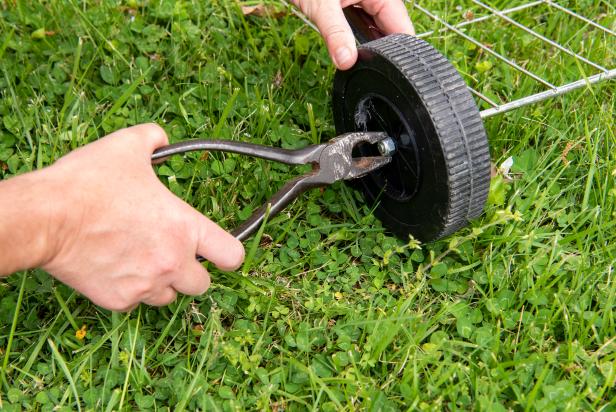
Using pliers, remove the plastic wheels (Image 1). Place grill’s legs and bottom rack on top of your work surface and using long, sweeping motions, coat all sides with gold spray paint (Image 2). Allow paint to dry, then flip the pieces over and give the other side a coat of paint.
Sarah Busby

Sarah Busby
Reassemble Grill + Touch Up Paint
Replace the bottom ash catcher and reattach the wheels to the legs. Using the screws you removed earlier, reattach the grill’s legs to the kettle, then carefully touch up any areas that might need a quick shot of paint, like the newly reinstalled screws.

Sarah Busby
Waterproof Kettle
Due to multiple built-in air vents, plus holes left behind when removing the lid, ice placed into the kettle will leak as it melts. If water dripping from the kettle isn’t a concern, skip this step but if, like us, you want to store items on the bottom shelf, you’ll need to seal the holes. For a quick fix, we lined the kettle with a plastic drop cloth and water-resistant clear tape. Tip: For a more permanent fix, consider caulking all gaps with a clear, silicone sealant and allowing to cure fully before adding ice.

Sarah Busby
Line Bottom Shelf
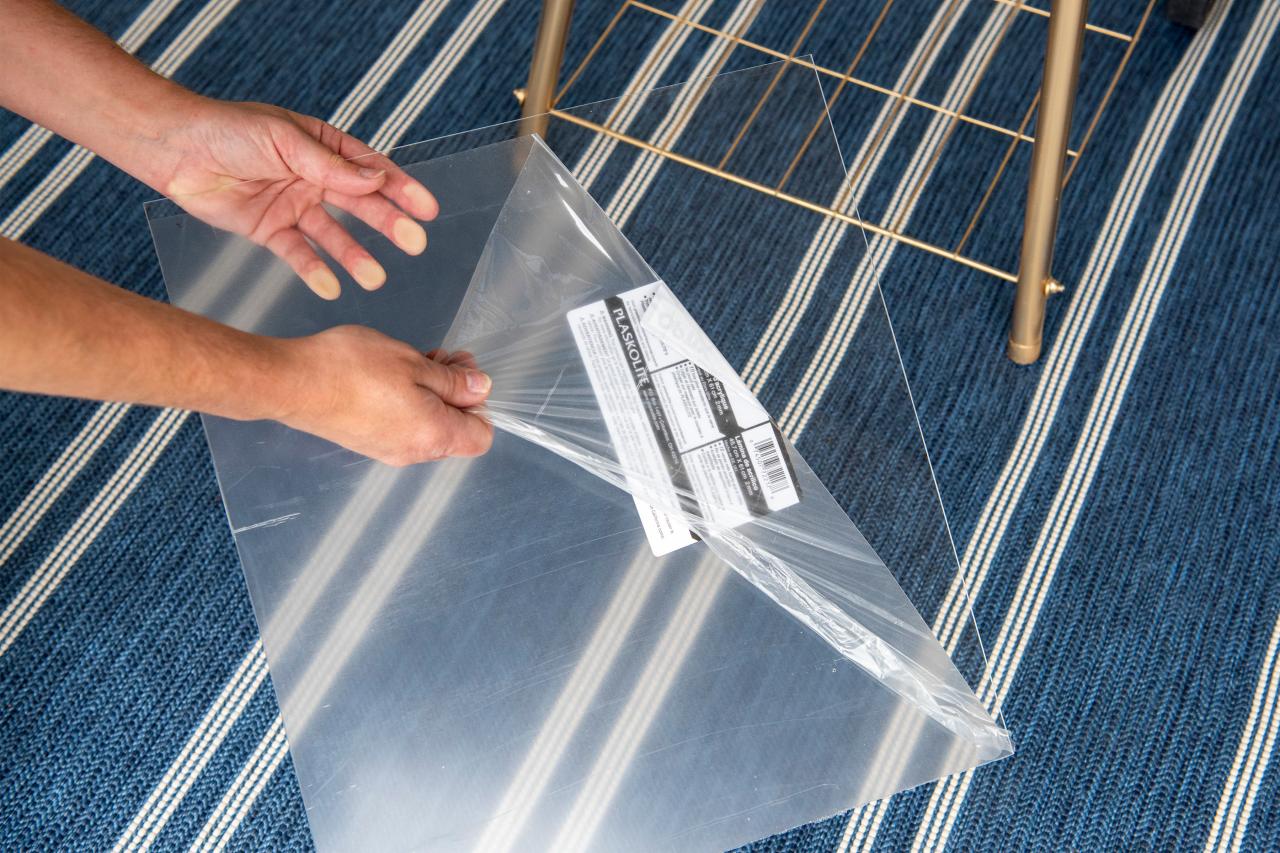
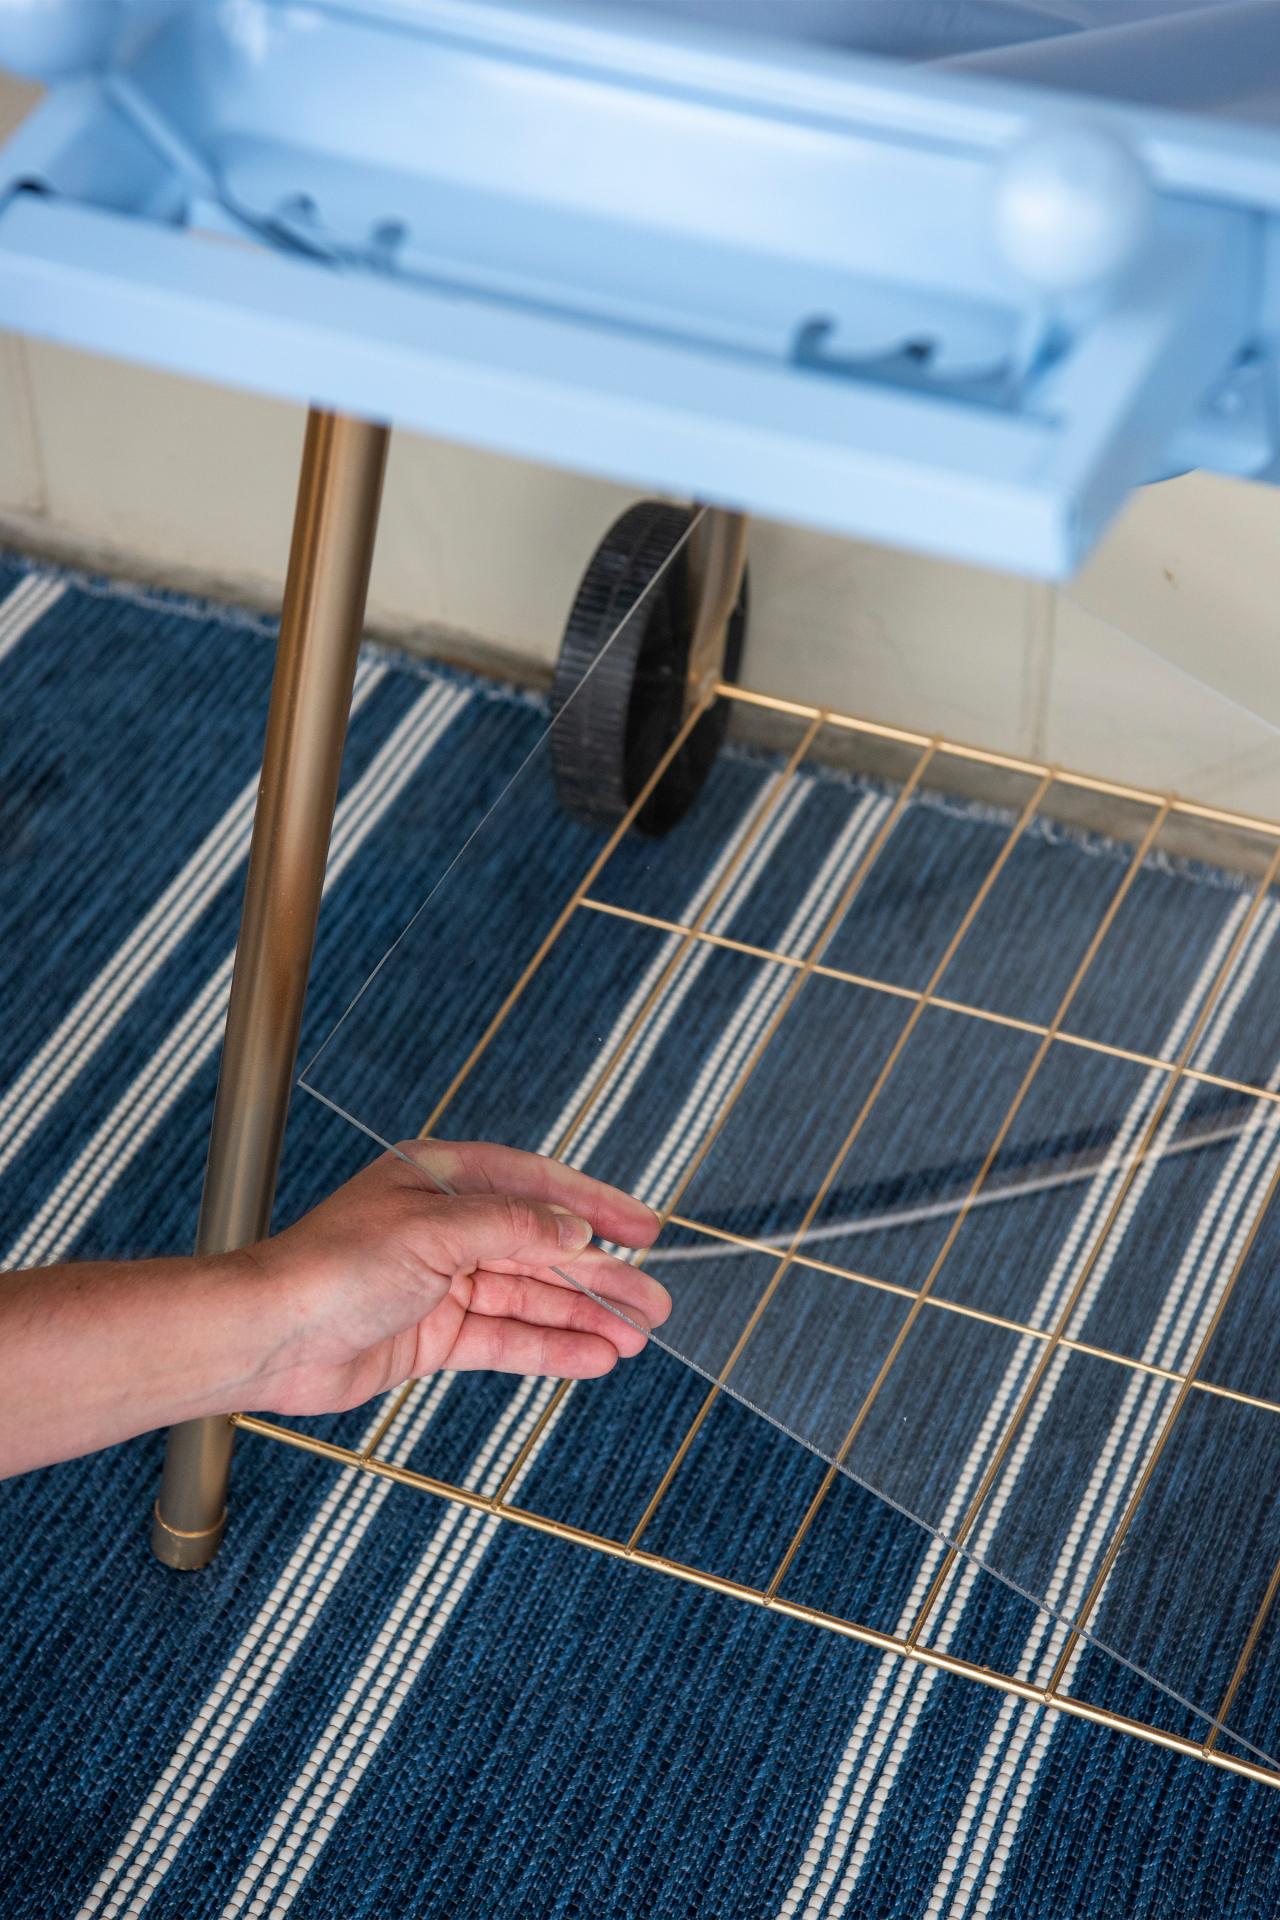
Remove protective plastic from both sides of the Plexiglas piece you had cut at your local hardware store (Image 1), then slide the Plexi piece into position on the bottom shelf to provide a level surface for any items you store there (Image 2).

Sarah Busby

Sarah Busby
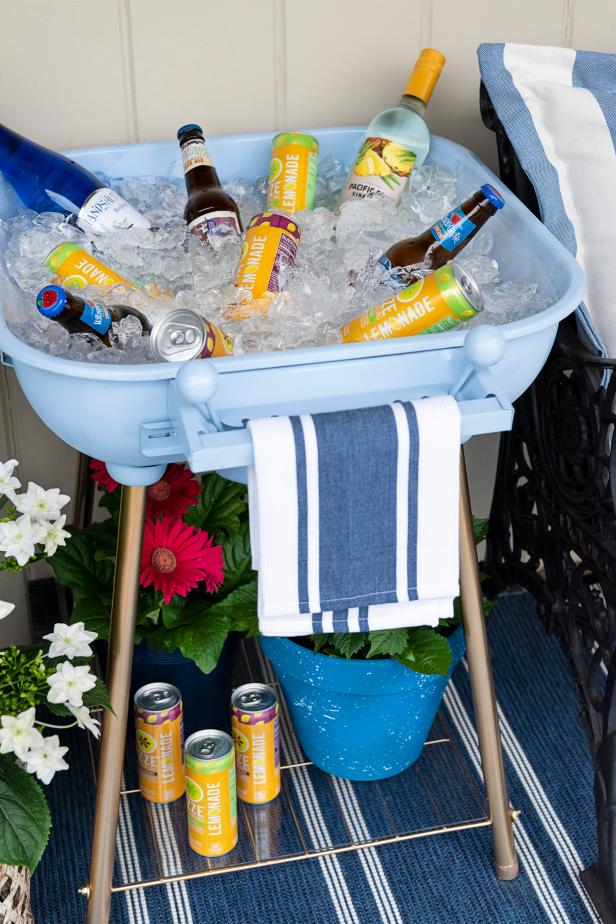
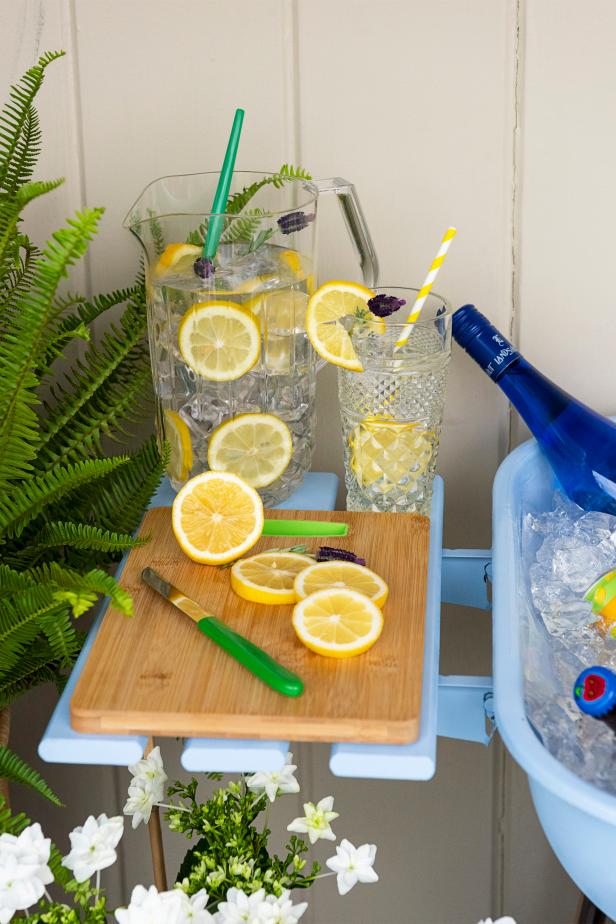
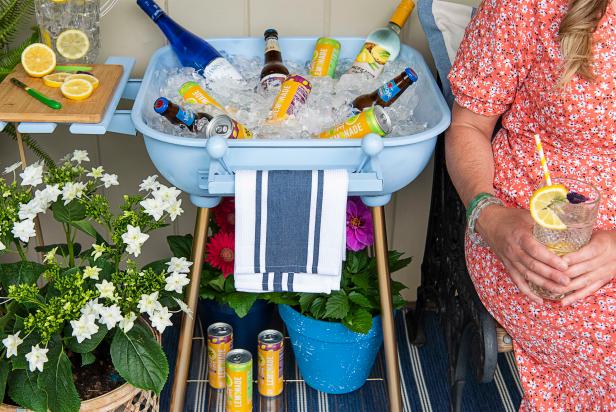
Fill Bar + Enjoy Your Perfectly Styled Sips
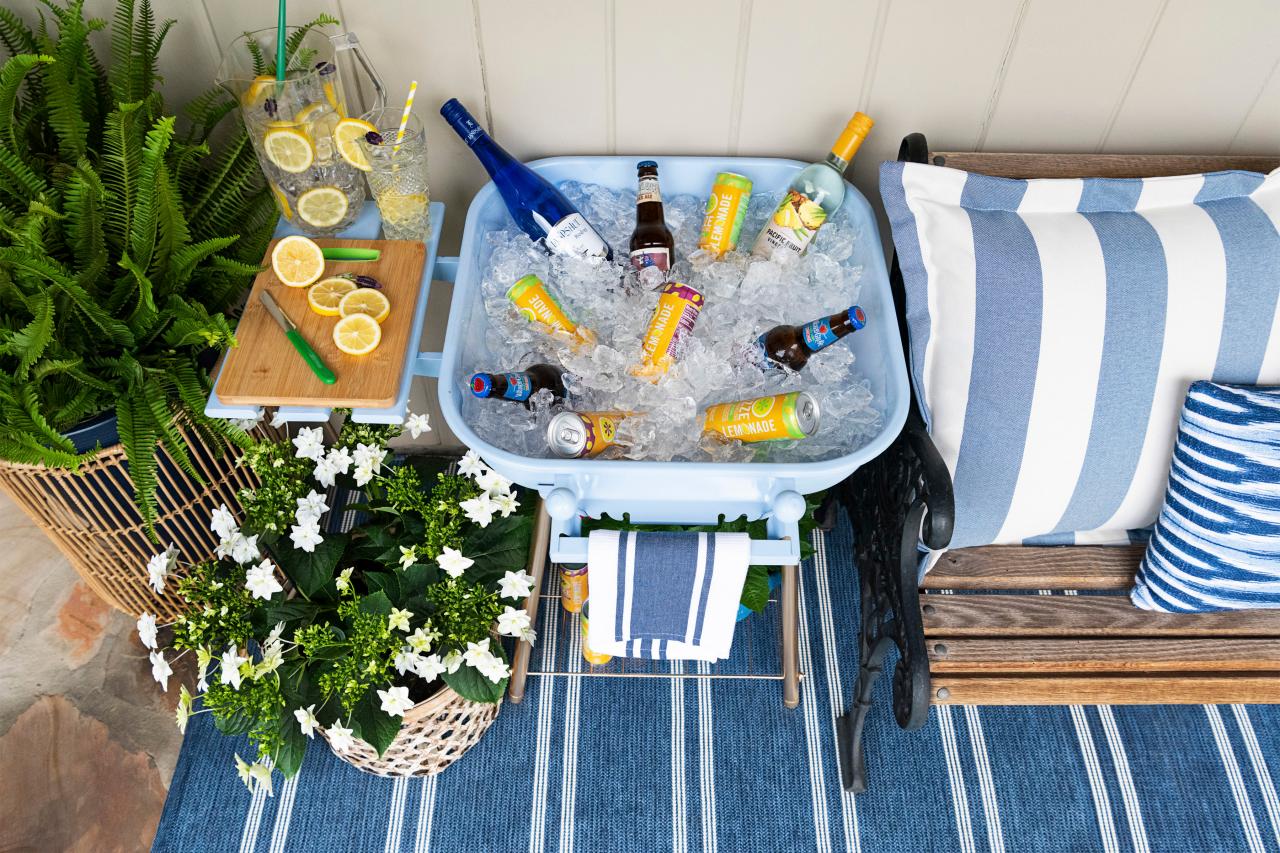
Fill the kettle with ice, then stock it with your favorite boozy (Image 1) and non-alcoholic warm-weather sips (Image 2). Invite friends over and throw a party on the patio (Image 3). Our open tub approach makes it easy for everyone to grab their favorite summer sip (Image 4) while the lined bottom shelf can store extra cans and bottles.
Sarah Busby; Styling by H. Camille Smith
Sarah Busby; Styling by H. Camille Smith
Sarah Busby; Styling by H. Camille Smith

Sarah Busby; Styling by H. Camille Smith
Photo By: Sarah Busby; Styling by H. Camille Smith
Photo By: Sarah Busby; Styling by H. Camille Smith
Photo By: Sarah Busby; Styling by H. Camille Smith
Photo By: Sarah Busby; Styling by H. Camille Smith


