


How to Build a Simple Deck

Materials and Tools:
circular saw
miter saw
reciprocating saw
drill
impact wrench
level and measuring tape
post hole digger and shovel
shims
string line
pressure-treated 2x8x10 lumber
pressure-treated 2x10x10 lumber
pressure-treated 2x8x8 lumber
pressure-treated 4x4x8 lumber
composite decking
2x8 joist hangers and nails
composite decking screws
3/8" lag bolts with washers
3/8" carriage bolts with nuts and washers
bundle furring strips for temp bracing
concrete mix
J-bolt-style post anchors
adjustable post caps
flashing material
Before you begin, check local municipality to find out the required building codes for your area.
It's important to draw up a set of plans that takes all of your uses for the deck into consideration. To determine the amount of materials needed, multiply the length by the width of the deck, taking into account stairways and railings. Take these measurements to a home center, they will help you determine amount of materials and what size boards and posts you'll need based on your specific plans. Always add 10 percent to the final figure for waste.
Steps:
1. Cut away siding if necessary and install flashing to protect the siding on your house. Install it around the entire perimeter where the deck will meet the house. Bend 2 inches of the flashing at a 90-degree angle and cut out for doorways or window frames based on the width of the opening. Flashing must fit under doorway or window frames, The best way to work with flashing is to use tin snips or score it, then cut it. You may have to remove nails to be able to slide the flashing under the siding. Nail into place.
2. Start laying out your materials. Determine the placement of the joists on the ledger board, marking for one every 16 inches on center. It’s best to have the bolts that will attach the ledger to the house centered in between the where the joists will sit. Place a mark 8 inches in from each side of 16-inch marks. Don’t cut the ledger board to length yet, just in case you have to make adjustments.
3. To give the deck adequate support it is best to bolt the ledger through the house. If you have a basement or crawl space, try to attach the ledger all the way through to the inside. Predrill for the bolts from the inside. From the outside, hold the ledger board in place, just underneath the drill holes, measure and mark so the drill holes will line up correctly to sit in between where you marked for the joists. Adjust and cut the ledger board to the correct length. Bolt the ledger board to the house.
4. Mark the foundation with string line, then mark the footing and post locations.
5. Dig the footers. Local building codes require us to dig the holes 12” wide by 36” deep to go below our frost line. Check your local building codes to find out the size of your footings. Mix the concrete and pour into the hole. Allow the concrete to set for one week.
6. Once the concrete is set, secure post anchors and J-bolts to the concrete. Make sure the bolts are level and plumb. Install the posts, also making sure they are level and plumb. Cut the tops of the post to line up level with the bottom of the ledger.
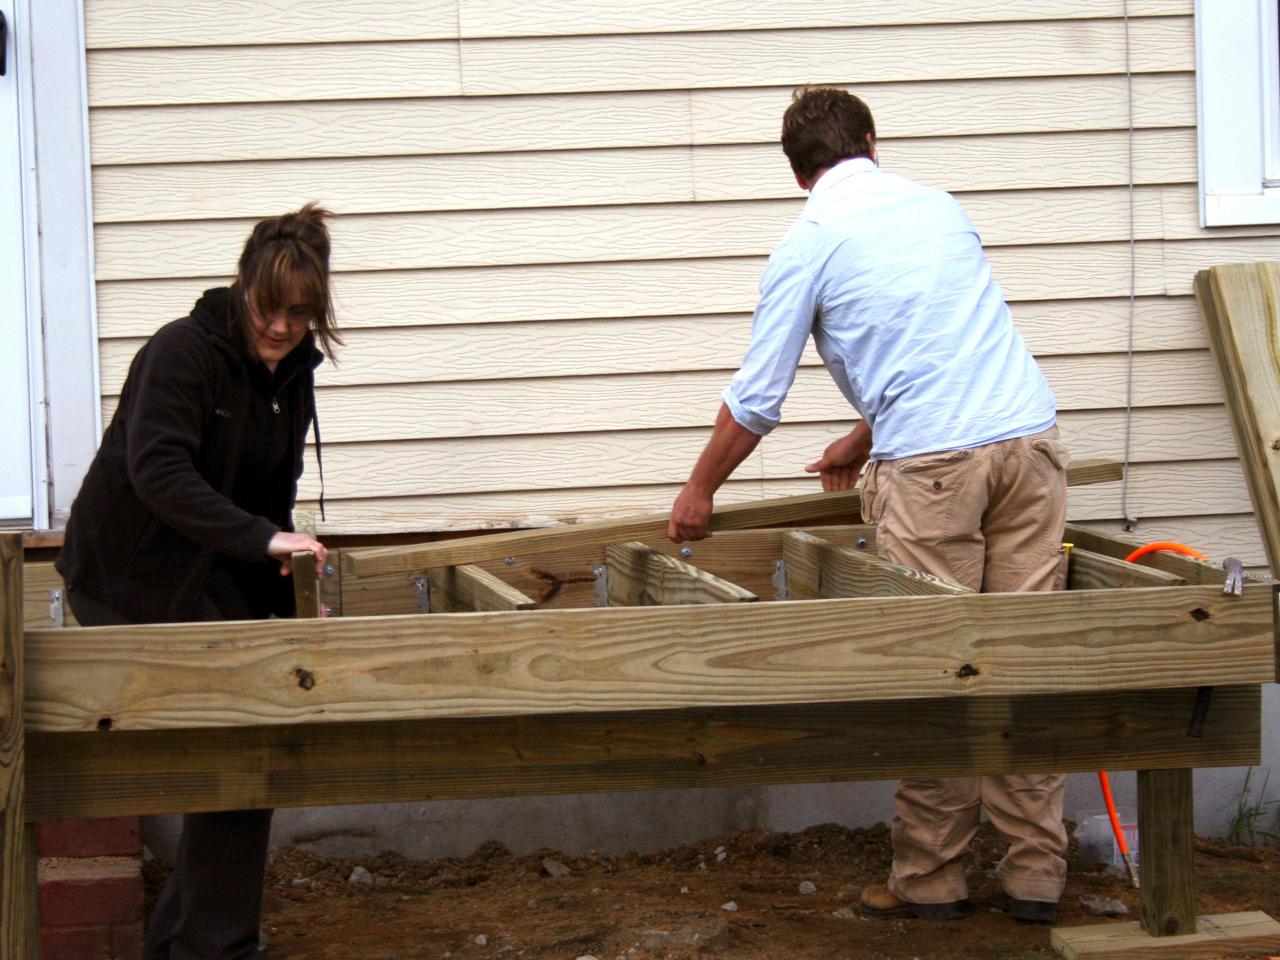
7. To create the beam that will sit on top of the posts, cut a 2x10 to the length of the deck then cut another 2x10 three inches shorter than that length. Lay the two 2x10 together with the longer board overhanging the shorter by 1-1/2" on each side. Nail the boards together so you have a double-thick beam. Attach the adjustable post caps to the tops of the posts. Place the beam on top of the posts and secure.
8. Add side pieces to connect the ledger to the beam. Attach a side-rim joist hanger to the ledger opposite the 1-1/2" notch on the beam that you just made. Screw the side beams to the front beam and to the post, then to the ledger.

9. Install joist hangers on the ledger board and on the inner side of front beam making sure they are sitting directly across from one another and are at the same height.
10. Mark and cut your joists to run from the ledger board to the front beams. Seat the joists into the hangers and fasten with nails. Check your level, square and plumb often. Add any required blocking for stability.

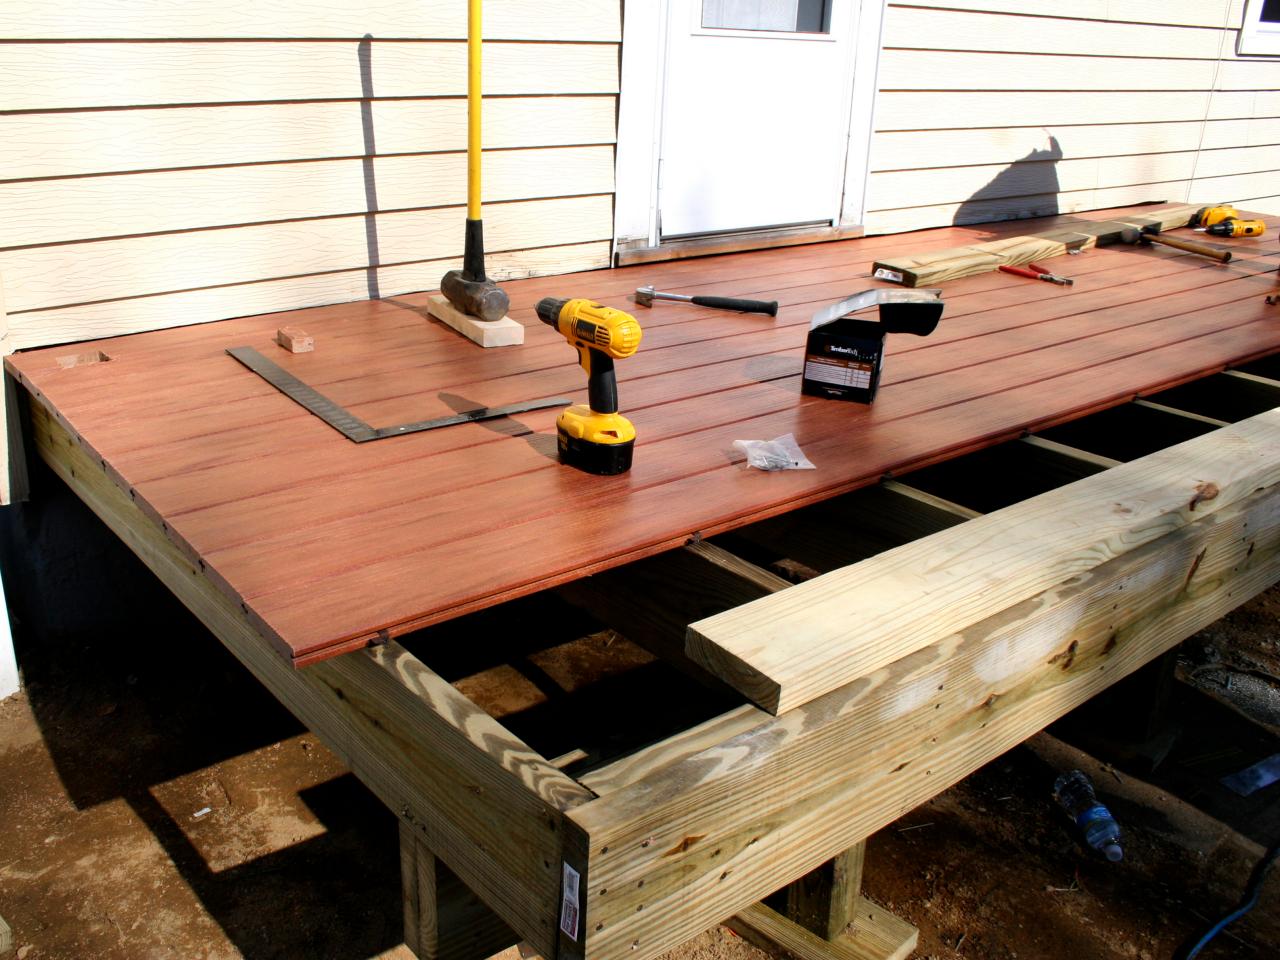
11. Start laying the decking boards. If using composite material, use the manufacturer’s recommended fasteners. If using lumber, remember to keep a gap between boards to allow for expansion and contraction. To keep the gaps uniform, insert a 10-penny nail into the gap, place the next decking board up against it and screw it into place. Insert two screws at every joist.

12. Finish laying the decking boards, running the ends wild. Line up a chalk line with the outer edge of the posts and pop a chalk line marking a 1-1/2" overhang. Repeat on the other side of the deck. Then saw along the chalk line.
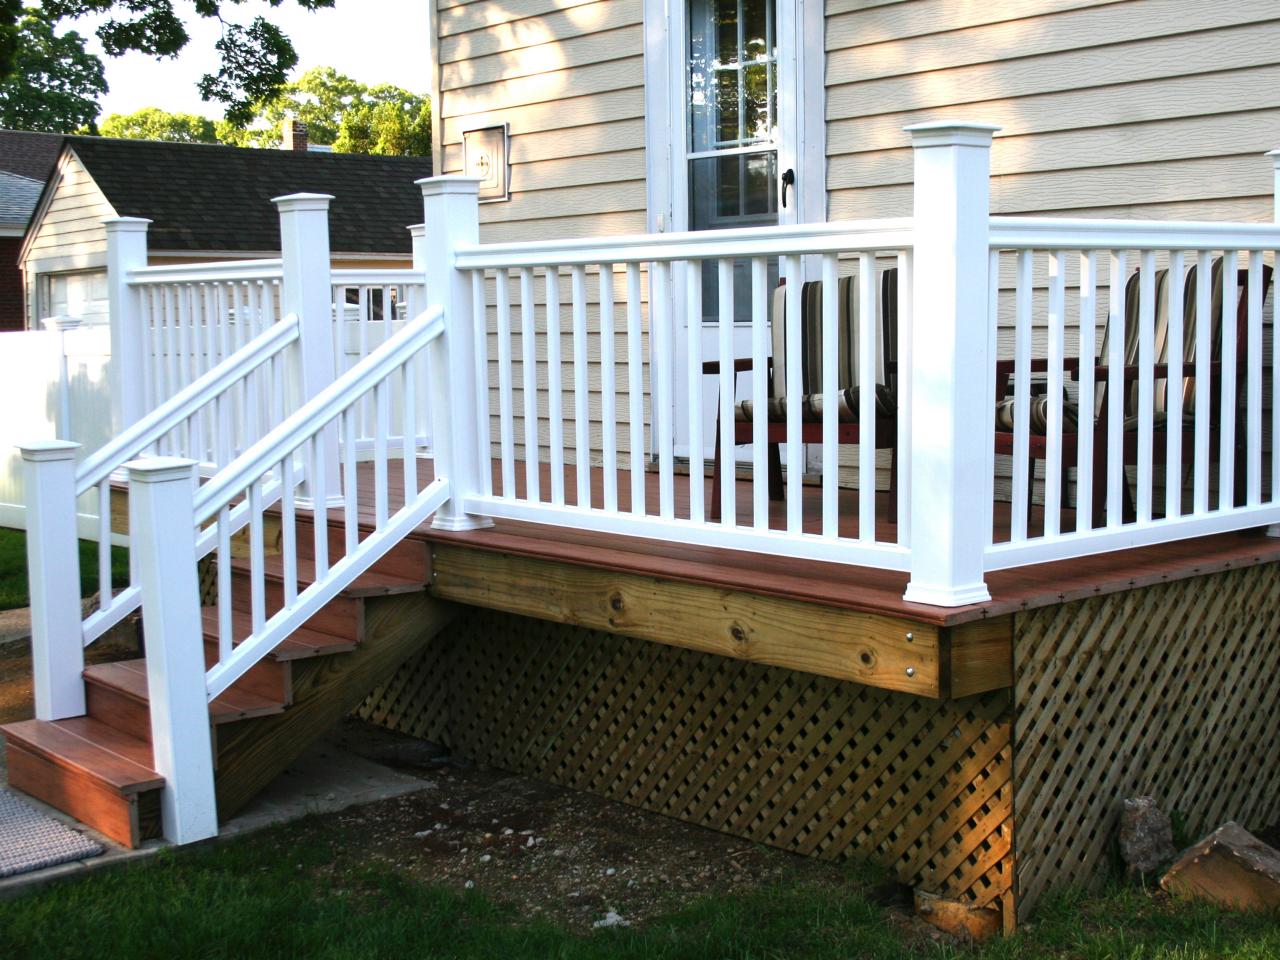
13. For the railing, measure and notch out a support posts that will attach to the side of the deck. Bolt the posts to the outer joists at every corner and at least every 6 feet. Cut the rails to size. Attach the balusters to the top and bottom rails. Insert the rail section in between the posts.


