Deck Building: Materials and Construction Basics
Planning on building a deck? Learn how a deck is constructed from the ground up, literally.

Related To:

Photo By: Topaz Design Group, Inc.
Photo By: Shutterstock
Photo By: Village Properties, a member of Luxury Portfolio International
Photo By: Photographer: Matthew Borkoski
Photo By: Joslyn Amato
Photo By: Kevin Meechan
Photo By: Chuck Collier Schmidt
What You Need to Know Before Building a Deck
A new deck will expand your outdoor living space and increase your home's value. If you're hiring a professional to build it, it's always a good idea to arm yourself with information before you meet with a contractor. You'll also need to do your homework. Decide what you want and do some research to learn the basic components of a deck, know the limitations of your backyard, and get familiar with the cost of materials. That way, you won't wind up with a deck that doesn't fit your needs or, worse, is dangerous.
You’ll want to get at least three estimates for the deck, and don’t just rely on online estimates. Have the contractors come to your house so they can take accurate measurements, and see if there are any obstacles that may affect the layout of your deck. To help the contractor provide you with an accurate estimate, know what you want. The first thing to ask the contractor: Are they licensed and insured?
If you plan on building your deck, be sure to research your local building codes and get a permit if needed. It is usually necessary for a deck over a particular height and square footage. Permits average about $500. You’ll also need to have your city or town building inspector or structural engineer inspect and sign off that the deck is compliant with local building codes — this is known as a certificate of occupancy. Don’t skip the permits or certificate of occupancy; not having these can come back to haunt you if you have an insurance claim or when you sell the home.
Diagram of Deck Construction
Starting from the ground up, your deck will need support framing in the way of concrete footers, support posts, beams, joists, ledger boards and the decking floor. Ground-level decks will still have framing but may be able to be built on blocks instead of posts that are secured to concrete footings. Framing is almost always built with pressure-treated wood even if your deck flooring and railing are made from other materials. Framing costs will vary depending on size, height and how the deck is attached to your home.
Learn More: Budgeting for a Deck
Footers and Posts
Most building codes allow pressure-treated posts rated for ground contact to be installed into foundation holes that are then filled with concrete. Although this method satisfies codes, over time the post is likely to rot and weaken. Many professional deck builders prefer to secure posts to concrete piers with galvanized metal connectors that hold the end of the post above the concrete base and the ground to prevent rot.
Watch the Video: Installing Deck Footings
Beams and Posts
Beams and posts work together to support the weight of the deck. Posts (vertical) determine the height of the deck and, provided they're installed properly, support the beams and give the deck stability. Horizontal beams rest on top of the posts and hold up the joists. The higher a deck is, the more important the beams and posts become. But no matter how high or low to the ground your deck is, you want to be careful, thoughtful and methodical during every step of the deck-building process. On that note, your deck should primarily be assembled with galvanized decking screws rather than nails. "You have a rust element, and they (nails) aren't as strong," says landscape designer Darin Brockelbank, founder of Metro GreenScape, a company in Charlotte, North Carolina. "A lot of times you'll see bubbling in the wood and that nail will start coming out, where a screw has a wider head, and it holds everything in place and minimizes that risk."
Watch the Video: Framing the Deck Perimeter
Ledger Boards
A ledger is a board that attaches the deck to the house. Not all decks are attached to houses, but if yours is, the ledger is a crucial component. If the ledger is not properly installed and pulls loose from the wall, the entire deck could collapse. Siding must be cut away from the house; a ledger should never be installed over any kind of siding. Ledger boards need to be installed with lag bolts, not screws or nails, and they should be bigger or at least the same size as the joists. Again, improper installation of the ledger is the leading cause of deck failures, so make sure yours is properly fastened to the house.
Watch the Video: Installing a Ledger Board
Flashing
A good builder will add flashing to the top of the ledger. "Flashing is something that goes up against the ledger and stops water from going into the home or seeping into the brick and then into the house. A lot of times, when that step is missed, depending on how the rainwater falls on the patio, you can have rotting problems," says landscape designer Darin.
Joist Hangers
Joists are attached to the ledger board using galvanized metal joist hangers and approved fasteners. Building inspectors often cite improper fasteners, such as deck screws and ungalvanized nails, as a leading deck code violation. Also, ledger boards should be bigger or at least the same size as the joists.
Watch the Video: Installing Joists and Decking
Joists
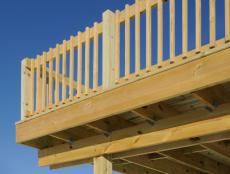
Joists are wooden planks that serve as a foundation for floorboards. They usually run perpendicular to the house and are attached to the ledger board and rest on top of the support beams. Rim joists are the outer joists — they are the rim of the deck. When installing the joists, lay them in place but wait to fasten them until you check for levelness and square by measuring diagonals. Tweak as needed and once you’re satisfied the deck joist frame is square, secure the joists to beams with toenails or galvanized connectors.
Joists should be run 16 inches apart. If you go any wider or your joists span a large area, make sure to install "bridging or blocking" between the joists to help the structural integrity of the deck. Bridging simply means installing smaller pieces of wood perpendicular between the joists. This step is important because it will help reduce bouncing on your deck.
NOTE: When buying joists, check the board for defects: A knot on the underside of a joist won't support weight indefinitely.
Detached Decks
Of course, you can forget the ledger and go with a freestanding deck. Although about "80% of homes have ledgers," says Mel Karlson, senior marketing manager and head of contractor development at Trex. There are some good reasons to build a freestanding deck. For instance, brick homes can have attached decks, but freestanding decks are often a better choice. "If the footing of the brick wall is strong, and the wall itself is a solid width of at least 12 inches reinforced with rebar, then you can connect a ledger directly to the brick with lag bolts to adhere the deck to the brick with no problem," says Darin. "This will effectively support the structure. "We've done numerous decks with brick homes or walls in this manner. However," he cautions, "if home design allows additional posts, that is the preferred method of construction against the brick." Some engineers and builders prefer freestanding decks, built just one inch away from the house, to prevent harm to the exterior of the home. In this case, your deck parts, such as the posts, become even more important as they prevent the deck from wobbling.
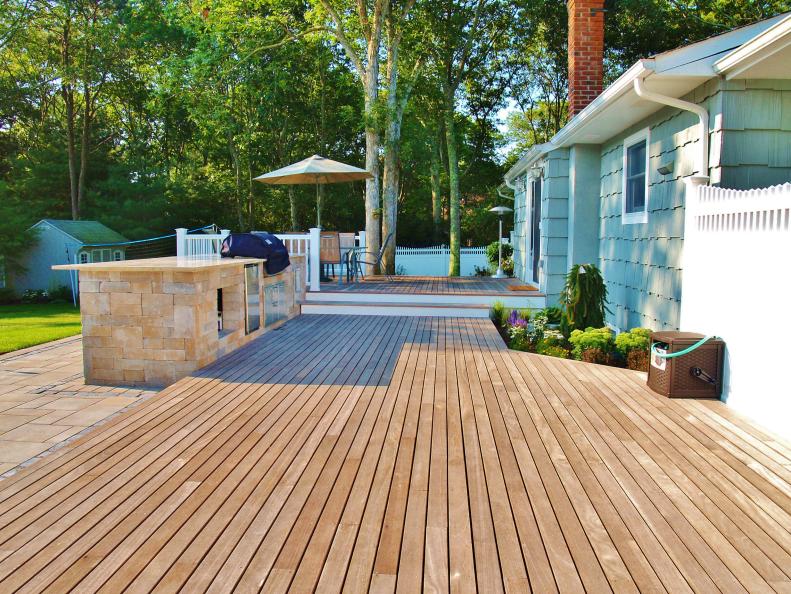
Wood Decking
Pressure-treated wood is generally the least expensive material. If you want a hardwood deck, cedar is the most popular wood species. It is beautiful (red cedar, for instance, ages to a silver color), fragrant and extremely resilient. Cedar does splinter easily but is weather-resistant if stained annually. Redwood and pressure-treated pine are also favorites for their durability and appearance.
If you do go with pressure-treated decking flooring, keep in mind there are two grades of this material. “The higher-grade has no knots and (has) been kiln-dried so it has already shrunk so it can be painted or stained immediately,” according to Michael Berry, a construction specialist with Earthadelic, a landscape design firm located in Knoxville Tennessee. “Lower-grade pressure-treated wood has to acclimate to its space and climate, and you’ll have to wait about six months before you can apply paint or stain.”
Find More Ideas: 39 Lap Pool Design Ideas
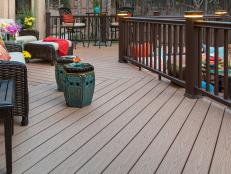
Composite Decking
Composite material, whether recycled plastic, resin, polyester or glass fiber, is generally going to be more costly than lumber. If you're looking for an eco-friendly solution, there is composite decking made from reclaimed and recycled materials, such as waste wood fiber and reclaimed plastics. While it's more expensive than treated lumber, it does not shrink, splinter or fade, and can often has a longer life span.
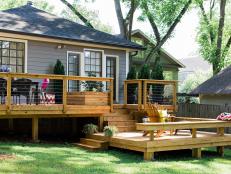
Stairs
Adding a staircase will bump up construction costs. "The average staircase can cost $5,000," says Darin. It's not the stairs themselves that add extra digits, he says. It's the fact that an additional level requires more joists, beams and posts — more of just about everything. And along with additional levels come railings, which can add even more to a deck. Cost should be taken into consideration throughout the deck-building process. A curved deck can be 50% more expensive than a square, boxy-shaped deck, simply because more cutting is required, Darin says.
Watch the Video: Installing Deck Steps
Deck Railing
When it comes to railings, prices run the full spectrum. Starting with pressure-treated wood on the low end and manufactured glass on the high end. The in-between options include composite wood, exotic wood, stainless steel cables and aluminum. Balusters are another component to consider. Wood is the traditional choice, but cable and glass balusters are growing in popularity because they provide unobstructed views. Extras to consider include lighting and trim to camouflage joists, screws and other unsightly hardware.
Find More Ideas: 31 Deck Railing Design Ideas
Location Considerations
Complicating matters is geography, which can be your deck's best friend or most bitter enemy. What's solid, weather-resistant material in Alaska may not be weather-friendly under the baking sun in Arizona. Do your homework when you buy your lumber or material. Your contractor can also make recommendations. And it's just as important to make sure you and your builder are up on building codes and permits.
Find More Ideas: 15 Covered Deck Design Ideas