How to Refurbish a Charcoal Grill
Your charcoal grill takes a beating from the elements and from the ash and grease that build up over time. If your grill (or the one your neighbor threw away) has seen better days, learn how to clean and recondition it so you can get barbecuing again.


Before
Step 1: Start With the Greasy Bits
Remove all of the cooking grates, grease catchers and any other internal
parts that will come out. Give everything a good soaking in hot, soapy dishwater for about 30 minutes and then start scrubbing all the old grease off. If your cooking grates are showing lots of rust, it’s easy enough to replace them. Most home stores carry basic grill parts.

Step 2: Get the Ash Out
Ash accumulation will cause steel to rust at an accelerated rate. Don’t let ash accumulate in your smoker! Scoop out as many of the big pieces of ash as you can into a trash bag. It’s an excellent idea to wear a respirator and gloves when handling grill ash.

Step 3: Use a Shop-Vac to Get It Really Clean
Once you’ve gotten all the big chunks out of your way, follow up with your shop-vac to get the last of the dust and hard-to-reach bits. Do not use a water hose on your grill at any point; you don't want to encourage more rust.

Step 4: Scrape Out the Grease and Charred Flakes
Using a plastic putty knife, start scraping all of the loose bits off the inside of the grill. Try to remove any lumps of grease or anything that comes off easily.

Step 5: Use Steel Wool and Water-Based Cleaner
Using a water-based or citrus-based cleaner and some steel wool, scrub the inside of your grill to get as much rust off as possible. Do not use any solvents or toxic cleaners — remember, you make food in here! You’ll be amazed at how easy it will be to remove rust with a little cleaner and some elbow grease. After you’ve given it your best scrubbing, wipe the inside down with a few paper towels to remove any excess.

Step 6: Remove Handles, Accessories and Hardware
Unbolt any easy-to-remove accessories that are in need of paint, or any hardware that needs to be replaced. Give your accessories a good coat of high-temperature paint, which is made specifically for grills or fireplaces. Most home stores have it in the spray paint section. If you notice any rusted bolts, you can easily replace those with a trip to the home store.

Step 7: Tackle Exterior Rust
The rust on the exterior of a grill is usually the hardest to address. You may be able to remove it with a wire brush or a little sandpaper. If your grill is as rusty as ours was, an angle grinder with a ceramic paint removal disc is the tool of choice. Remember to wear gloves, safety glasses and a respirator when you’re using power tools to remove rust.

Step 8: Apply a Fresh Coat of Paint
Once you’ve addressed the exterior rust, you can apply a fresh coat of paint to the outside of the grill. Make sure to use high-heat paint. Do not paint any of the insides of the grill or any surfaces that come in direct contact with flames. Grill paint is for exterior use only.

Provides high-quality protection, stands up to high temperatures and protects against rust.
Step 9: Reinstall Hardware and Accessories
Once you’ve given your grill a few coats of paint and it’s had time to dry, you can reinstall the accessories. Make sure to replace any hardware that you’ve removed as well. This is also a good time to replace things like the thermometer or to put on a new set of wheels if your grill needs them.

Step 10: Season the Inside
Now that you’ve scrubbed your grill back to the metal surface, you’ll need to season it. Give your grill and all of its internal parts a good wipe with some cooking oil (canola, in our case). Make sure to coat any inner surfaces that you scrubbed clean. You should clean your grill out after every use plus at the end of each season. Thoroughly clean it out once a year.

Step 11: Heat It Up Before Use
Build a strong fire in your grill so that the oil will bond to the inside surfaces and keep the insides from rusting. This also will burn off anything that you might not have wiped out of the inside of the grill. Get it good and hot and let it cool off once before cooking anything. After that, have fun and enjoy the grilling season.
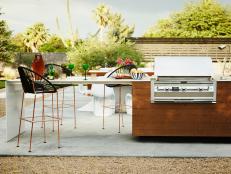
How to Refurbish a Gas Grill
Don't throw away your old gas grill, learn how to make it work and look like new again by replacing the burners, grates and more. Plus, find tips and tricks for removing rust and grease.


