


Turn Old Sweaters Into an Adorable Advent Calendar
Nothing builds up excitement for the holidays more than an Advent calendar, and this cozy, handmade version is packed with loads of treats and charm.

Knitted Advent Calendar
Nothing builds up excitement for the holidays more than an advent calendar and this cozy, handmade version is packed with treats and charm!

Photo by: Flynnside Out Productions
Flynnside Out Productions
Materials Needed
- old adult-sized sweaters
- numbered fonts (1-6)
- numbered fonts (7-9; 0)
- interfacing fabric
- colorful yarn and thread
- tapestry needle
- permanent marker
- scissors
- utility knife
- iron
- small metal clips
- measuring tape
Print and Cut Out Numbers
Print the numbers 1 through 25 in a font that's approximately 2.5" high. Using a craft knife, cut the number out, creating a stencil of each number.

Knitted Goods Advent Calendar - Print and Cut Out Numbers
Print the numbers 1 through 25 out in a fun font that's approximately 2.5 inches high. Using a craft knife cut the number out, creating a stencil of each number.
Photo by: Flynnside Out Productions
Flynnside Out Productions
Draw and Cut Out Mitten Pattern
Using a marker, draw a basic mitten template and cut out. Our mittens are about 5" tall. You can do any shape you like here. We did a mix of mittens and hats.

Draw and Cut Out Mitten Pattern
Using a marker, draw a basic mitten template and cut out. Our mittens are about 5 inches tall. You can do any shape you like here. We did a mix of mittens and hats.
Photo by: Flynnside Out Productions
Flynnside Out Productions
Trace Mittens Onto Sweater
Using a marker, trace around your mitten pattern, leaving a 1/4" allowance along the edges. Be sure to flip the pattern over and trace again so you have a mirror image, too. Cut out two mittens for each day of the month. (You'll join them together later.) Cut the mittens away from the sweater, but keep plenty of fabric along the edges so it doesn't start to unravel as you work on it.

Trace Mittens Onto Sweater
Using a marker trace around your mitten pattern, leaving a ¼ inch allowance along the edges. Be sure to flip the pattern over and trace again so you have a mirror image, too. You'll cut out 2 mittens for each day of the month, then join them together later. Go ahead and cut the mittens away from the sweater but keep plenty of fabric along edges so it doesn't start to unravel as you work on it.
Photo by: Flynnside Out Productions
Flynnside Out Productions
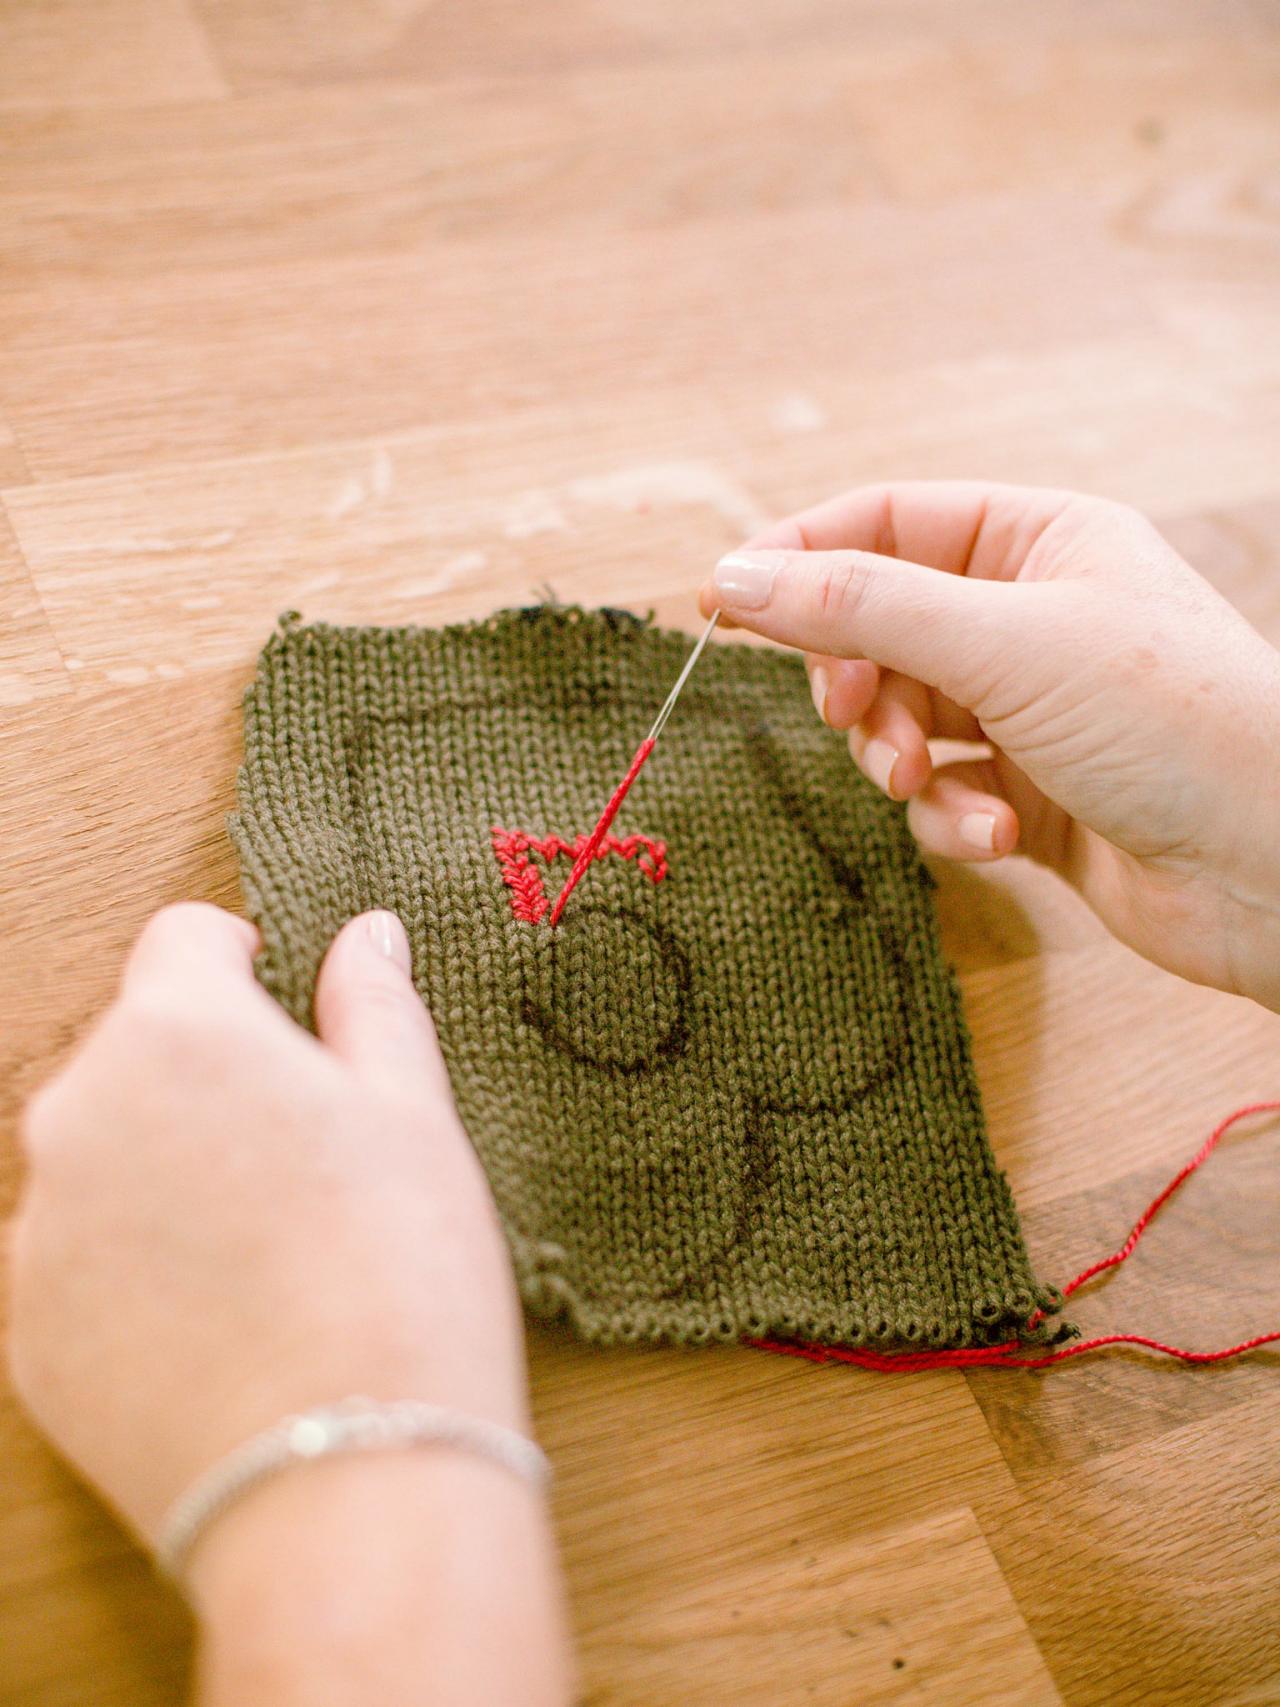
Stencil Numbers Onto Sweater
Once you've cut your stencil, center it on the front of the mitten and fill it in with a dark marker. This will guide your stitching in the next step.

Stencil Numbers Onto Sweater
Once you've cut your stencil, center it on the front of the mitten and fill it in with a dark marker. This will guide your stitching in the next step.
Photo by: Flynnside Out Productions
Flynnside Out Productions
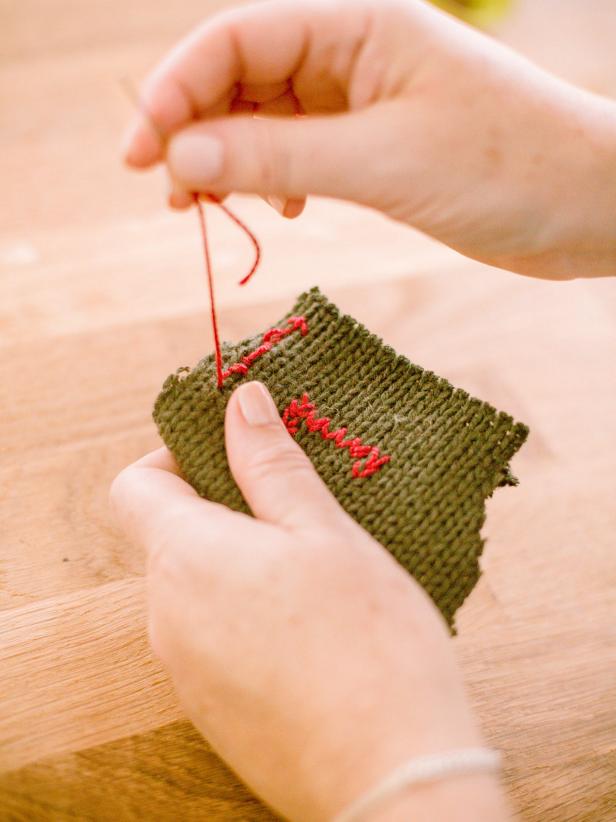
Stitch Over Number
Using a tapestry needle and yarn or colorful thread, fill in the stenciled number, following the knit pattern of the sweater material. There's no hard and fast rule here – if it's a little messy, it only adds to the charm.

Stitch Over Number
Using a tapestry needle and yarn or colorful thread, fill in the stenciled number, following the knit pattern of the sweater material. There's no hard and fast rule here – if it's a little messy, it only adds to the charm.
Photo by: Flynnside Out Productions
Flynnside Out Productions
Cut Out Mittens
Once your numbers have been filled in with a colorful yarn or thread, cut each mitten out along your marker lines.

Cut Out Mittens
Once your numbers have been filled in with a colorful yarn or thread, cut each mitten out along your marker lines.
Photo by: Flynnside Out Productions
Flynnside Out Productions
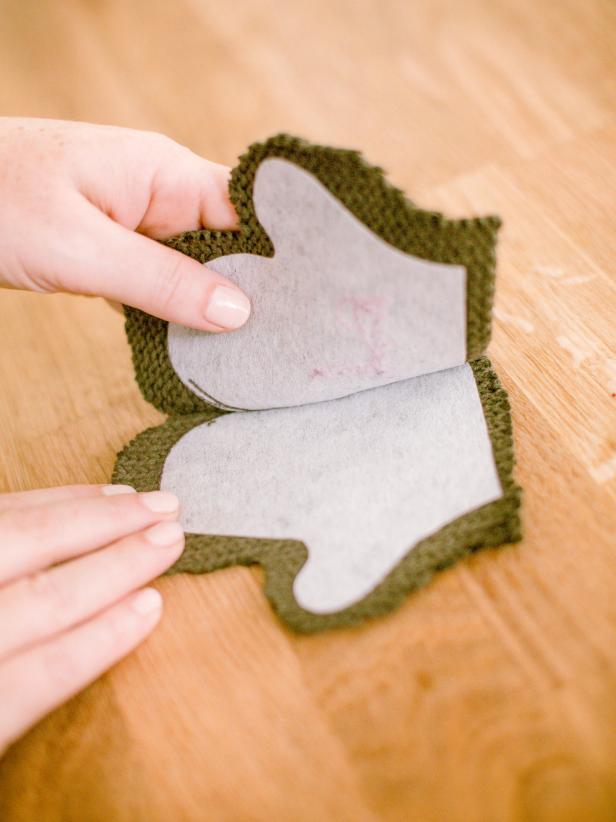
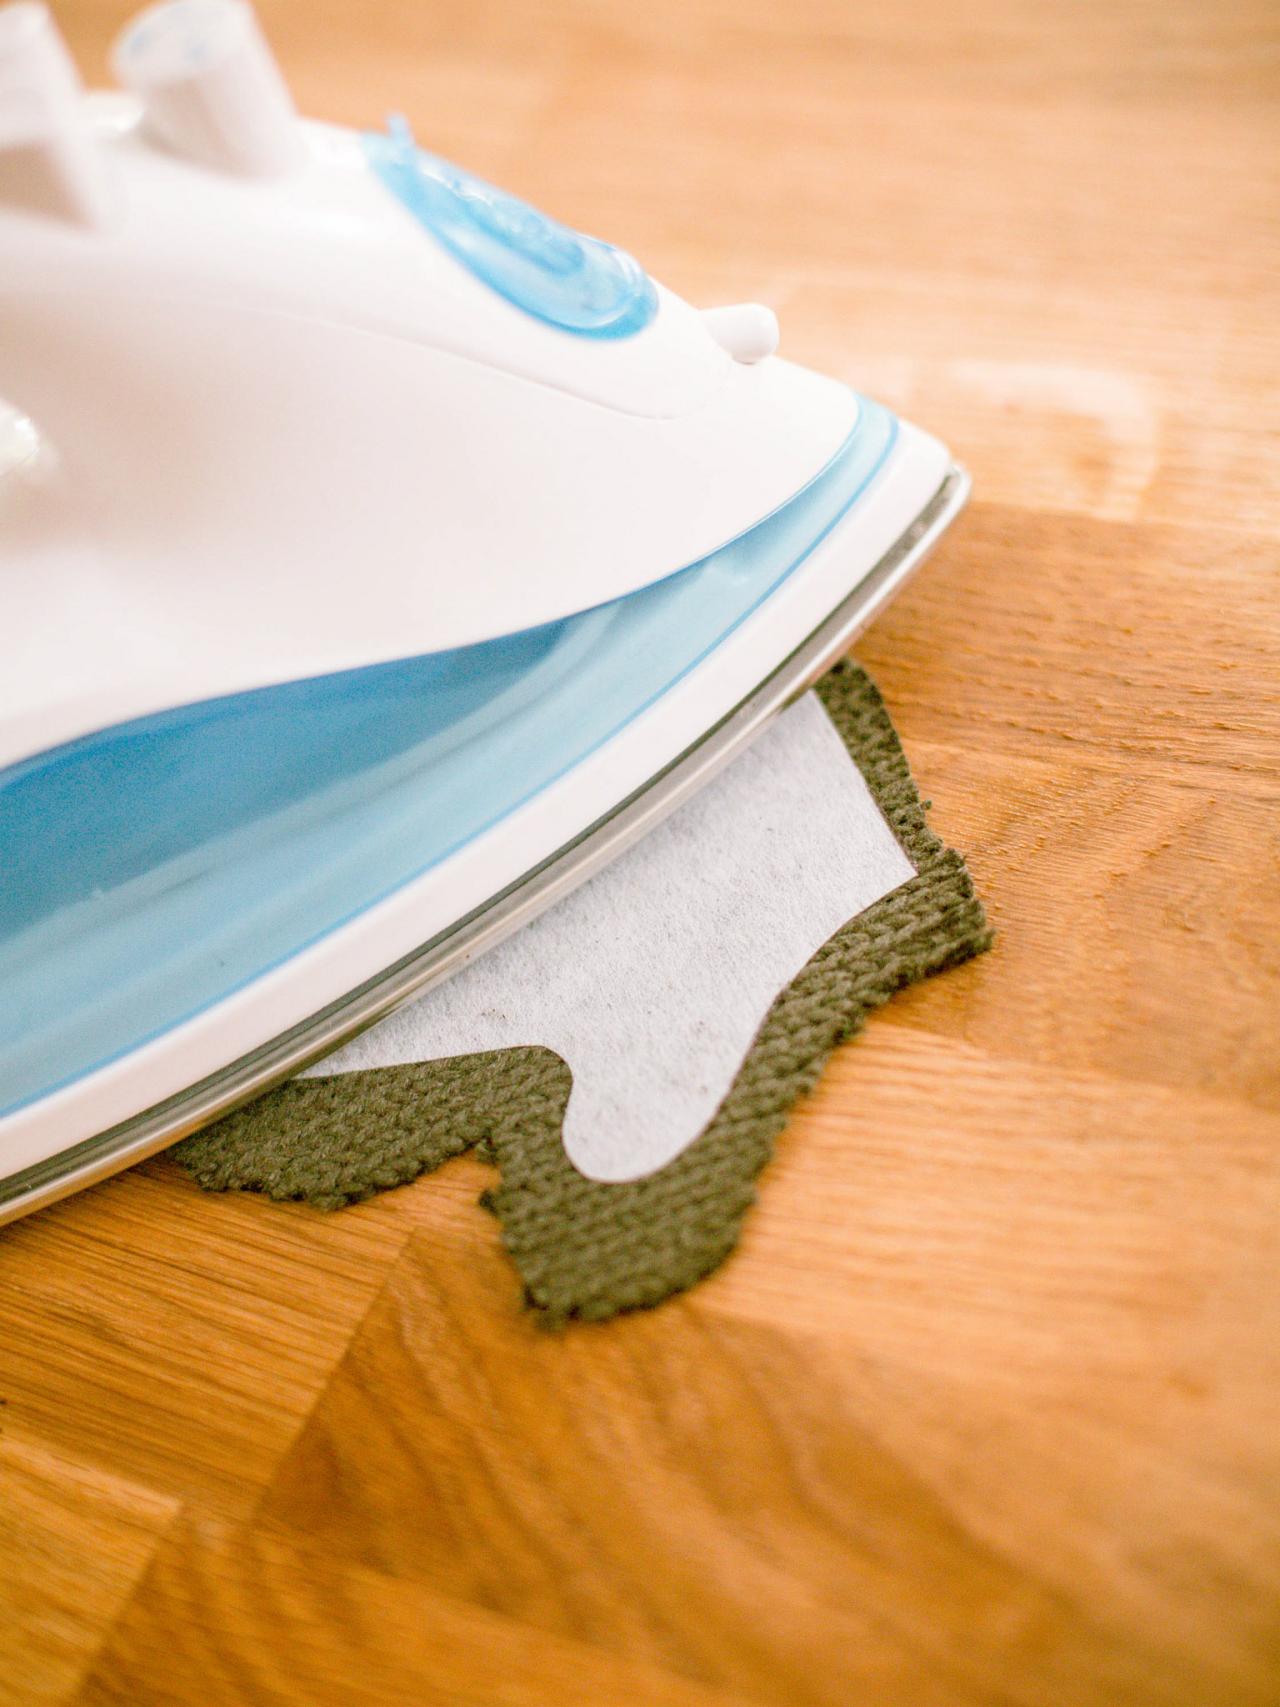
Add Interfacing to Interior
Using the mitten pattern as a guide, trace onto the interface fabric, then cut out to the exact size (Image 1). Do this for each side of the mitten's interior, as you did when you originally traced the mitten shapes onto the sweater. Use the heat of an iron to fuse the interfacing to the sweater material (Image 2).


Assemble Mitten
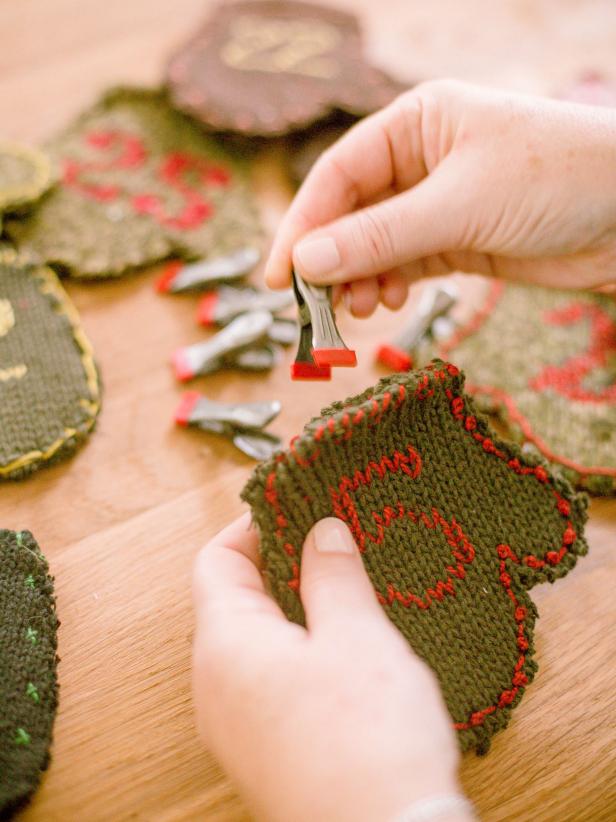
Once the interfacing is attached, place the two sides of the mitten together (Image 1). Using a blanket stitch, join the pieces together to create a pocket for treats, leaving the top of the mitten open for inserting treats (Image 2). Next, add a clip to the top for hanging (Image 3). You can apply this method to different shapes, so feel free to get creative as you brainstorm your own advent calendar!
Display
Display your mini mittens in an empty frame or across a chalkboard for a perfect seasonal display.

Knitted Mitten Advent Calendar
Nothing builds up excitement for the holidays more than an advent calendar and this cozy, handmade version is packed with treats and charm!
Photo by: Flynnside Out Productions
Flynnside Out Productions


