


Craft Up This Easy DIY Paintbrush Garland
Freshen up your everyday decor with this colorful paintbrush garland. For a fun twist on traditional holiday decor, dress up your paintbrushes in red and green.

DIY Paint Brush Garland
Freshen up your holiday decor with this colorful paint brush garland.

Photo by: Flynnside Out Productions
Flynnside Out Productions
Materials Needed
- 1" diameter jute rope
- 1 roll jute twine
- green paint in various shades
- red paint in various shades
- flat chip paintbrushes (varied sizes)
- masking tape
- utility scissors
- 2 extra large self-adhesive hooks
Install Hooks
Install each self-adhesive hook a few inches above and outside the door opening so that the garland will lay nicely against the trim. Be sure to
select a large enough hook to handle the size of the rope and the weight of the finished garland.

Step 1: Install Hooks
Install each self-adhesive hook a few inches above and outside the door opening so that the garland will lay nicely against the trim. Self-adhesive hooks will be easy to remove and wonât harm your paint finish. Be sure to select a large enough hook to handle the size of the rope and the weight of the finished garland.
Photo by: Flynnside Out Productions
Flynnside Out Productions
Measure and Cut Rope
Keep in mind, the rope will swag across the top of the door, hang down each side and puddle a bit on the floor. Measure and cut the rope to the appropriate length.

Step 2: Measure & Cut Rope
Keep in mind, the rope will swag across the top of the door, hang down each side and puddle a bit on the floor. Measure and cut rope to the appropriate length with utility scissors.
Photo by: Flynnside Out Productions
Flynnside Out Productions
Test Run
Do a test run by temporarily hanging the unpainted brushes along the door frame using masking tape. This is an easy way to determine how many brushes you will ultimately need for your garland.

Step 3: Test Run
Do a test run by temporarily hanging the unpainted brushes along the door frame using masking tape. This is an easy way to determine how many brushes you will ultimately need for your garland.
Photo by: Flynnside Out Productions
Flynnside Out Productions
Paint Brushes
Once you know how many chip brushes you’ll need, set up a painting station with your six paint colors, three shades of red and three shades of green. Make sure to paint various size brushes each shade of green and red, so there’s a somewhat equal distribution of color and brush size across your garland.

Step 4: Paint Chip Brushes
Once you know how many chip brushes youâll need, set up a painting station with your 6 paint sample pots, 3 shades of red and 3 shades of green. Make sure to paint various size brushes each shade of green and red, so thereâs a somewhat equal distribution of color and brush size across your garland.
Photo by: Flynnside Out Productions
Flynnside Out Productions
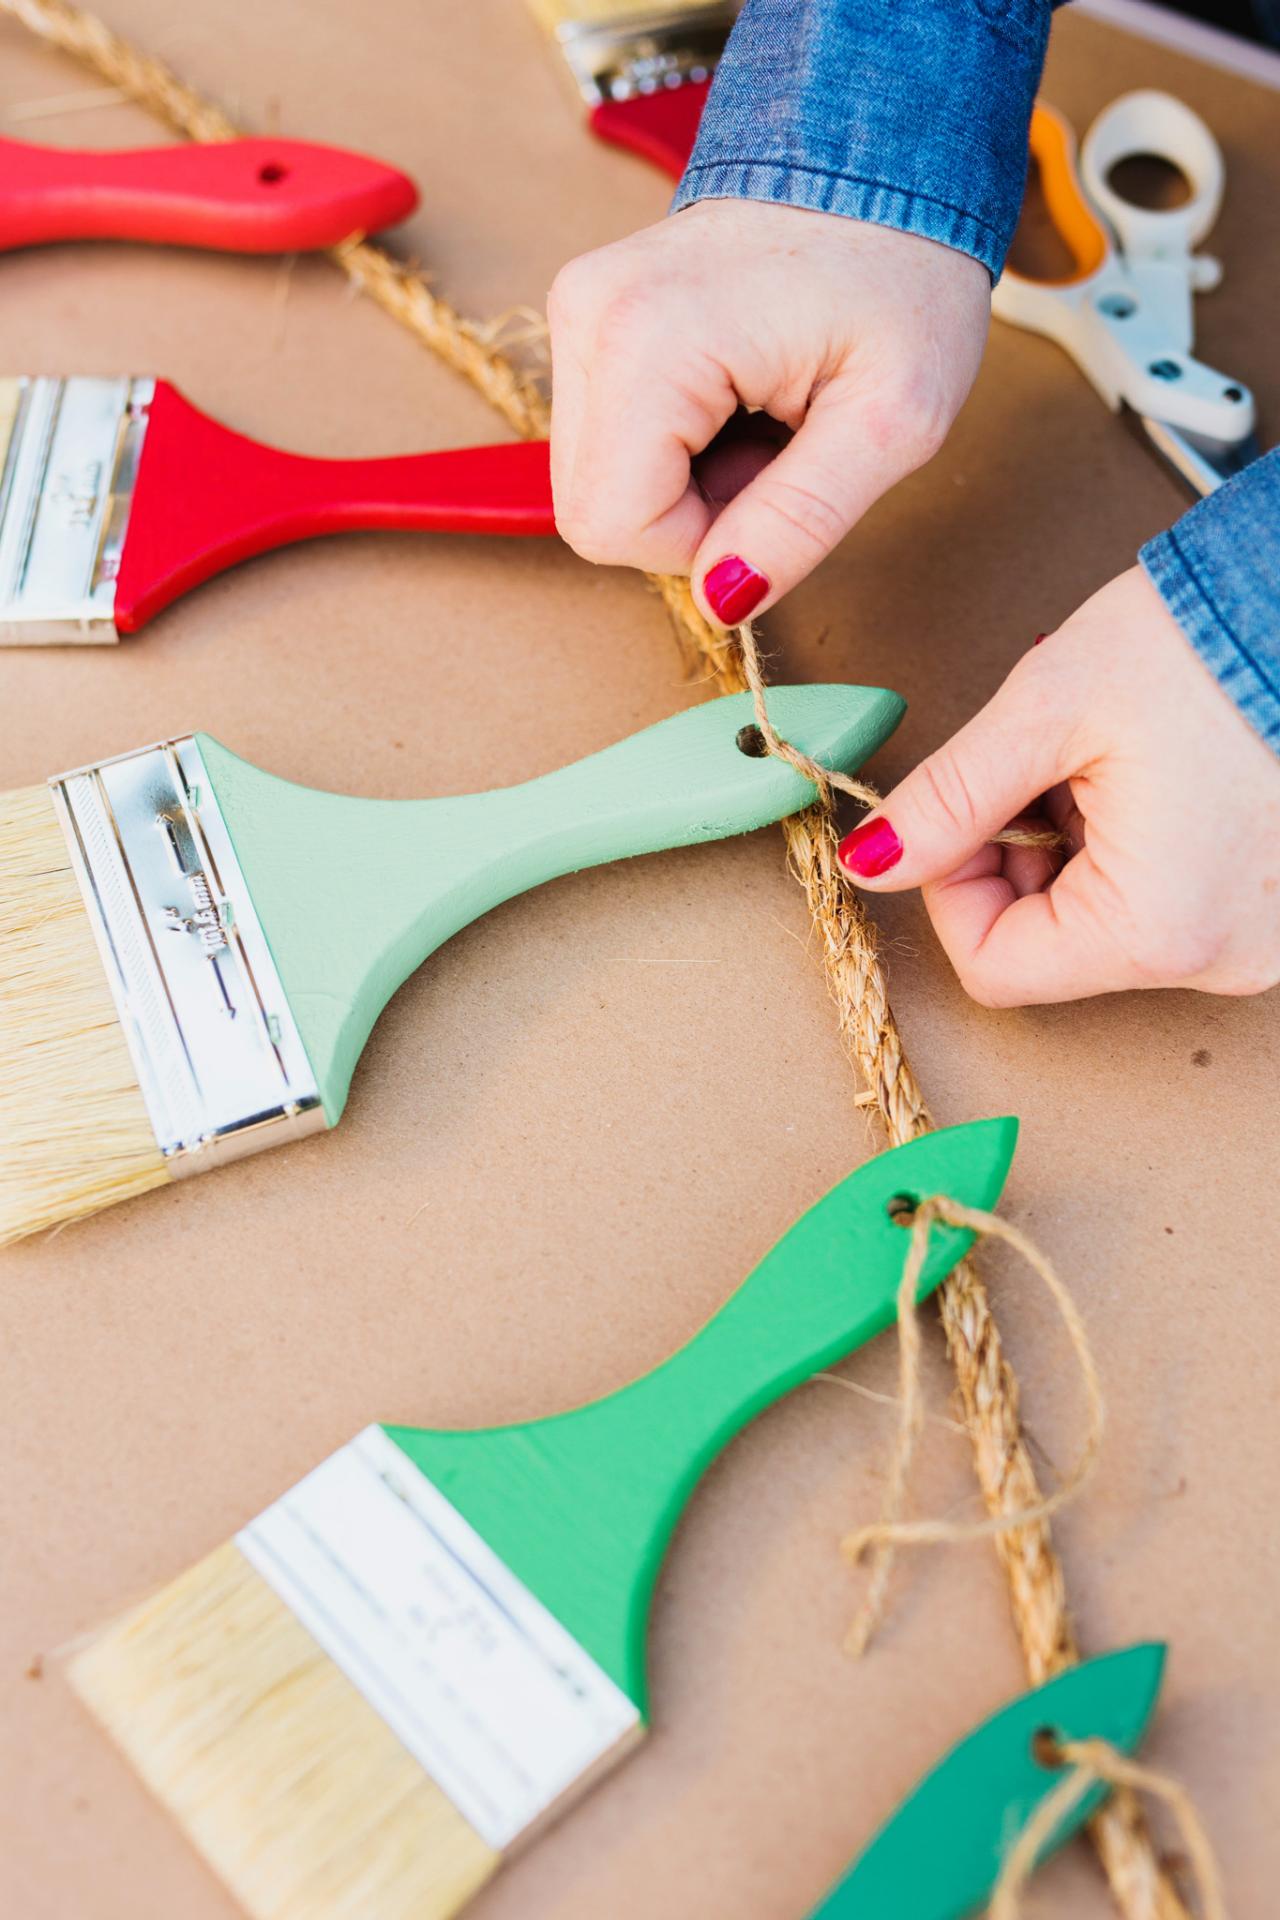
Attach Brushes
Once the painted brushes are dry, thread a 6-inch piece of twine through the handle and tie to the rope. Alternate between red brushes and green brushes for a clean, uncluttered look.

Step 5: Attach Painted Brushes to Rope
Once the painted brushes are dry, thread a 6 inch piece of twine through the handle and tie to the rope. Alternate between red brushes and green brushes for a clean, uncluttered look. Once all the brushes are tied onto the rope, re-hang rope on the hooks above the door.
Photo by: Flynnside Out Productions
Flynnside Out Productions
Finish
Once all the brushes are tied onto the rope, re-hang the rope on the hooks above the door. Display your art-inspired garland all year long or just for the season.

DIY Paint Brush Garland
Freshen up your holiday decor with this colorful paint brush garland.
Photo by: Flynnside Out Productions
Flynnside Out Productions


