


Upcycle Cardboard Into a Custom Desk Drawer Organizer
With a little creativity, you can turn leftover shipping boxes and vinyl shelf liner into a custom organizer to tame desk drawer clutter once and for all.

Sam Henderson

Materials Needed
- cardboard shipping boxes
- ruler/tape measure
- pencil
- utility knife
- permanent marker
- hot glue gun and glue sticks
- self-adhesive vinyl or shelf liner
Create the Base
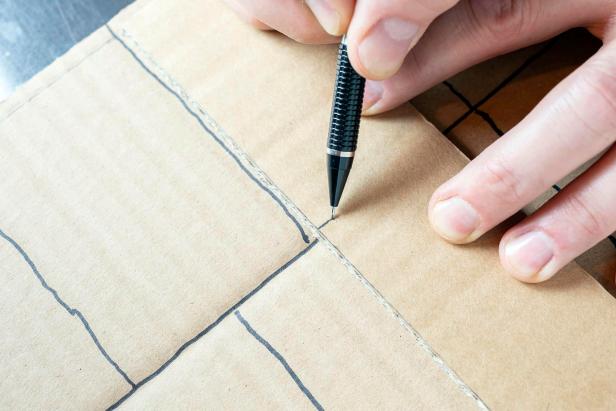
Measure the drawer for the organizer: length, width and height (Image 1). Tip: Use double-thick corrugated cardboard for the project for sturdier construction (Image 2). Cut a base for the organizer from one piece of cardboard using the length and width measurements. Tip: Use a craft knife and a straight edge, such as a metal ruler or yardstick for clean cuts (Image 3). To determine placement, lay the items that will go in the drawer on the piece of cardboard with some space between them. Draw lines between the items with a marker to identify the dividers that will need to be created (Image 4).

Sam Henderson

Sam Henderson

Sam Henderson

Sam Henderson
Cut the Divider Pieces
Cut several strips of cardboard using the height measurement of the drawer less 3/4 inch for clearance. You'll need enough strips for the both the organizer's frame and several dividers. Tip: The corrugation should run vertically when the strips are stood up on their edge. Start by measuring the frame. Hold a strip on the base at one side with the end of the strip in a corner. Mark the strip at the opposite end (Image 1). Cut the strip at the mark minus the thickness of the cardboard. Use the cut piece as a template to make another strip for the opposite side of the frame. Repeat this process for the front and back of the frame.
For the dividers, place a strip on a line you have drawn with one end at the beginning of the line all the way to the edge of the frame. Mark the strip at the end of the line and at any of the intersections of other lines (Image 2). Cut the piece at the mark indicating the end of the line. Label the cut strip and the base with letters or numbers to remember where the pieces go for assembly (Image 3).

Sam Henderson
Sam Henderson

Sam Henderson
Build the Frame
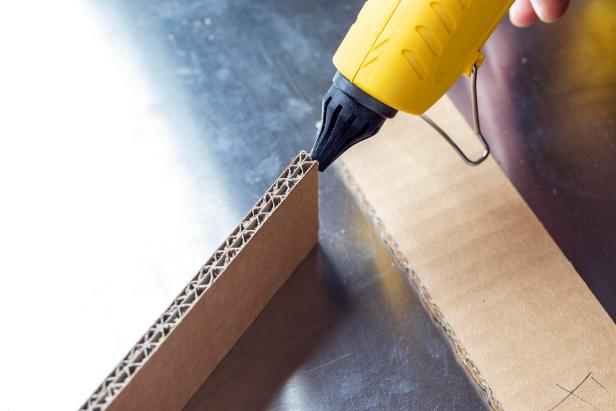
Lay the frame pieces on a flat surface. Add hot glue to the right end of the back strip. Press the flat side of the end of the strip for the right side of the frame into the glue (Image 1). Add hot glue to the other open end of the right side and press the flat side of the end of the front strip into the glue. Continue in this way for the other two sides. Place the finished frame on the base. Using a piece of scrap cardboard, butt it against the inside of the frame at each of the intersections with lines drawn on the base. The scrap cardboard should be centered on the line. Use a pencil to mark the frame on both sides of the scrap cardboard (Image 2).
Sam Henderson

Sam Henderson
Cut the Notches
Cut a strip of cardboard that is half as wide as the height of the frame and about 1 foot long. Use this strip to mark the frame and the dividers all along their middles (Image 1). Use a craft knife to cut notches from the frame using the marks you made. The notches should go from the bottom of the frame to half of the height of the frame. Then cut notches in the dividers at the marks you made earlier (Image 2). Determine the thickness by centering a scrap piece of cardboard on the line you made and drawing a line on the divider on both sides of the scrap piece. Pre-assemble pieces by connecting them at the notches to determine where you will need to cut notches for the ends. Mark the ends where notches must be made and cut them, including where the dividers intersect with the frame (Image 3).

Sam Henderson

Sam Henderson

Sam Henderson
Cover the Pieces
Disassemble the pieces. Cut strips of self-adhesive vinyl wide enough to cover the front, back and top of the dividers and frame. Cover both the frame and each divider with vinyl (Image 1). Use a sticky note to label the pieces as you go. Cut out the notches and trim away any excess vinyl at the bottom (Image 2). Assemble the pieces again using the base as a guide. Then cover the base in vinyl.

Sam Henderson

Sam Henderson
Assemble the Pieces
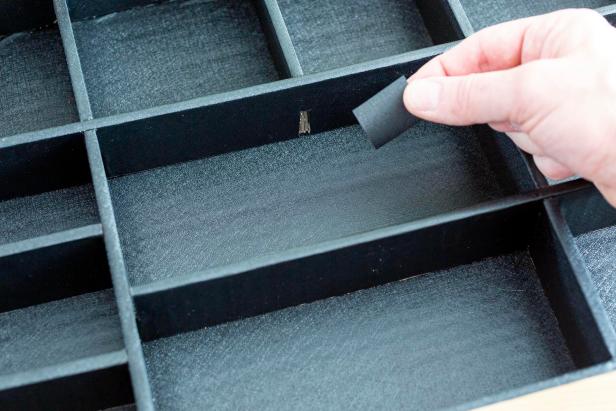
Turn the frame upside-down on a flat surface. Turn the assembled dividers upside-down and place them in the frame. Add hot glue around the bottom edge of the frame quickly (Image 1), then press the base firmly to the frame. Turn the organizer over. Cut small pieces of vinyl to cover any open notches (Image 2).

Sam Henderson
Sam Henderson
Get Organized
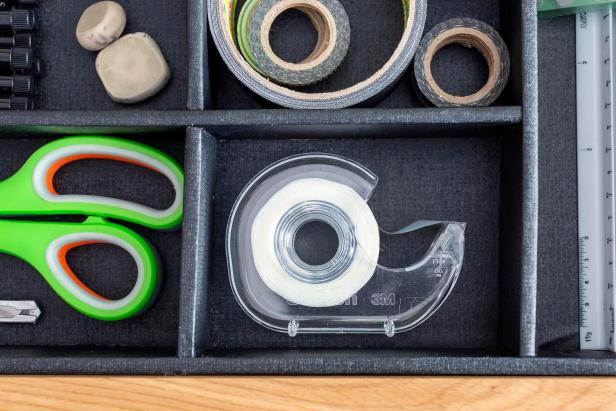
Place the organizer in the desk drawer and fill with office supplies. This method of creating a custom drawer organizer would also be great for organizing makeup in a bathroom or culinary gear in a kitchen.

Sam Henderson

Sam Henderson
Sam Henderson


