


What to Know Before Installing Laminate Flooring
Believe it or not, you really can get the luxurious look of hardwood, tile and stone flooring without the hefty price tag. How do you do it? Laminate. But before you start, here's what you need to know to get the job done right.


When you think of laminate, images of dated, peeling floors may come to mind. But trust us. Today’s laminate has come a long way and is an inexpensive and stylish alternative to its pricier competitors. But before you dive in, read our tips to ensure your DIY flooring job has a smooth finish.
Consider Your Space
Floating laminate flooring can be installed in nearly any room, with a few exceptions. Because the inner core of the material is made with wood or fiberboard that is susceptible to moisture damage, installations in any room with a floor drain or sump pump should be avoided. This also applies to bathrooms and laundry rooms; however, kitchen installation is more feasible. Laminate is a great option over existing flooring, and can cover a wide variety of materials with minimal damage to the surface below it. When installing laminate over existing flooring in a kitchen, measure to make sure appliances will fit into their original positions after the added thickness of the new layer of flooring. If not, you may have to tear out the old flooring before installing the new.
Prep the Surface
Begin by removing the shoe molding and baseboards. Then, make sure the floor is clean and level — installing over an uneven floor can lead to soft, spongy areas and may contribute to seams opening up and further damage to the laminate. Tolerances are usually 1/4 inch to 3/8 inch measured over 10 feet. High spots on wood floors should be sanded down. Alternately, you can pad low spots with pieces of 30-pound felt. Low spots on concrete slabs should be filled with leveling compound.
Measure the Room
To determine the total square footage of flooring you’ll need, multiply the length of the room by its width, then add 10 percent for waste and mistakes. Remember to leave a gap of about 1/4 inch to 3/8 inch around the perimeter of the room to allow for the flooring to expand with changes in humidity. That gap will be covered when you reinstall the baseboards and shoe molding.
Acclimate the Flooring
Bring all the packages of flooring into the room at least 48 hours before installation to allow the planks to acclimate to the room’s humidity. Open the packages and distribute the loose planks around the room in short piles. Use this time to inspect any planks for damage.
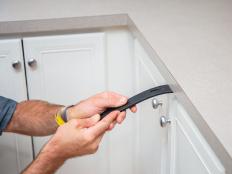
Prep Door Frames
To avoid custom-cutting your planks at each door jamb, cut the bottom of the jambs to allow the flooring to slide underneath the trim. You can cut the pieces using a jamb saw, an oscillating multitool or a pull saw, by resting the saw blade on top of a piece of scrap flooring to make sure you have a straight, even cut at the correct height.
If you follow these tips, your laminate flooring installation should go smoothly and last for years to come!

How to Install Laminate Flooring
Ready to get started? Follow our step-by-step guide for installing laminate flooring.


