How to Install Shiplap
Bring instant farmhouse charm to your home by adding DIY plywood shiplap to a wall or ceiling.

Jalynn Baker
Turn-of-the-century homes were built using planks of wood that were milled on site, and slight imperfections left cracks between the boards. Many home stores offer prefabricated shiplap boards to mimic this look, but you can also make your own for half the price using plywood sheets and spacers.

Materials Needed
- 1/4” sanded plywood
- 9” foam roller
- trim brush
- paint
- paint tray
- tape measure
- speed square
- pencil
- stud finder
- caulk gun
- caulk
- compressor and hose
- finish nailer
- 2” finish nails
- 4’ level
- chop saw or circular saw
- table saw (and a helper for using it)
- jigsaw
- nickel
- safety glasses
- screwdriver
- small washers
- stepladder
Measure the Area
Measure the height and width of the wall you want to cover. Plywood comes in 8’ by 4’ sheets. Determine how many sheets of plywood you’ll need to cover your wall; it’s best to buy too much rather than too little. For a wall that is 8’ high and 11’ long, you’d probably want to purchase five pieces. This may leave you with one extra sheet of plywood. Leave it to the side, without painting it, and you can either use it or return it if you don't need it.

Jalynn Baker
Paint the Plywood
You normally wouldn't start a project by painting, but in this scenario, it’s much easier to paint your plywood shiplap before cutting it. You’ll only need to paint one side of the wood; allow it to fully dry before cutting. Remember to leave that final sheet of plywood unpainted. You may need it, but if you don’t, you won’t be able to return it if you’ve painted it.

Jalynn Baker
Cut Shiplap Strips
It’s up to you to determine how wide you want your shiplap “boards” to be; somewhere between 5” and 6” is pretty common. Using the same width for all your boards will make this job much easier. Tip: A table saw blade is 1/8” wide. If you cut your plywood into 5-7/8” strips, you’ll use the entire sheet without any waste. Set your table saw to the desired width and don’t forget your safety glasses. Large sheets of plywood are dangerous to cut by yourself on a table saw; get a friend to help hold the plywood as you move it through the saw.

Jalynn Baker
Cut Boards to Length
There are two things you’ll want to consider before installing your boards: You want to create as little waste as possible while also ensuring that the pattern of your boards is not too repetitive. You don’t want one seam running the entire length of the wall. Use a stud finder to locate each 2x4 stud in the wall (Image 1) and mark their locations using a pencil and a 4' level (Image 2). The studs should be about 16" apart. Cut your boards to lengths that match the location of each stud (Images 3 and 4). Be sure to use your leftover pieces as often as possible to reduce waste. You can create whatever pattern you choose, as long as the seam where two boards meet isn’t resting on top of the previous row’s seam.

Jalynn Baker

Jalynn Baker

Jalynn Baker

Jalynn Baker
Install Boards on the Wall
Now that you’ve located the studs and made your cuts, you’re ready to cover the wall. Starting at the floor will make spacing your boards easier. Place your first board along the edge of the floor and make sure it’s level (Image 1). Use a finish nailer to attach the board to the wall at the location of each stud (Image 2). Use a nickel as a spacer between every board in a run and between each run (Images 3 and 4). Periodically make sure your boards are level. Since you’ve made all your cuts in advance, this process should go rather quickly.

Jalynn Baker

Jalynn Baker

Jalynn Baker

Jalynn Baker
Cut Around Obstacles
At the very least, you'll have a few electrical outlets in your wall to contend with. Use a screwdriver to remove each outlet cover. When you put up a run of shiplap and encounter an electrical box, place the board over the box and use a pencil to trace its outline onto the board. You don’t have to be exact. Use a jigsaw to cut along the outline. Any uneven cuts can be concealed with the outlet cover once you’re finished. You may need to make other adjustments or cuts to accommodate for windows, doors or trim. You can always use caulk to cover up any small mistakes.

Jalynn Baker
Touch Up and Finish
Once you’ve installed all your shiplap boards, you'll have some finishing touches to add. Since you painted your plywood before cutting it, the edges will be unpainted. Use caulk to cover up any unwanted holes (Image 1). Allow the caulk to dry and then use a trim brush to paint the raw edges of your shiplap boards and cover up any smudges or dried caulk as needed (Image 2).

Jalynn Baker

Jalynn Baker
Replace Outlet Covers
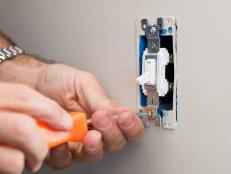
If you removed your outlet and switch covers before installing your shiplap, you have one more step. Because the shiplap is 1/4” thick, you'll need to bring your outlets and switches out 1/4". This can be easily accomplished using some small washers. Safety first! Turn off the power to the room at the breaker. Use a screwdriver to detach the outlet from the box and place one or two washers on the small bolt before reattaching the outlet (Image 1). This will ensure your outlet is even with your wall and outlet cover. Do the same for any switches. Attach the covers to the outlets and switches and turn your power back on (Image 2).

Jalynn Baker

Jalynn Baker
BEFORE

AFTER


