


How to Replace a Faucet
Replacing a faucet that's outdated or always dripping is a relatively easy DIY project.

Jalynn Baker
Materials Needed
- new faucet
- bucket
- towels
- basin wrench
- plumber’s tape
- adjustable wrench
- replacement water supply lines
- silicone caulk (optional)
Safety First
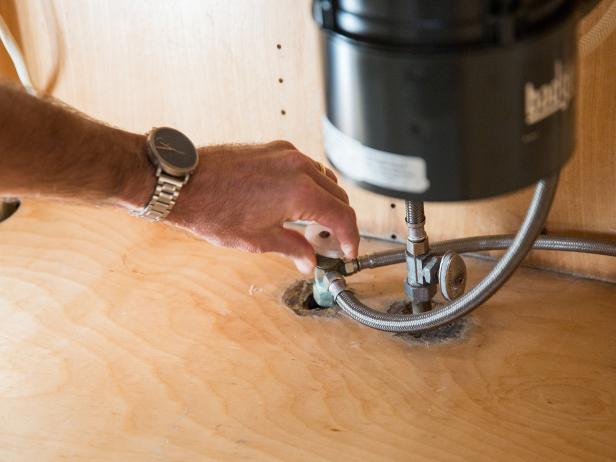
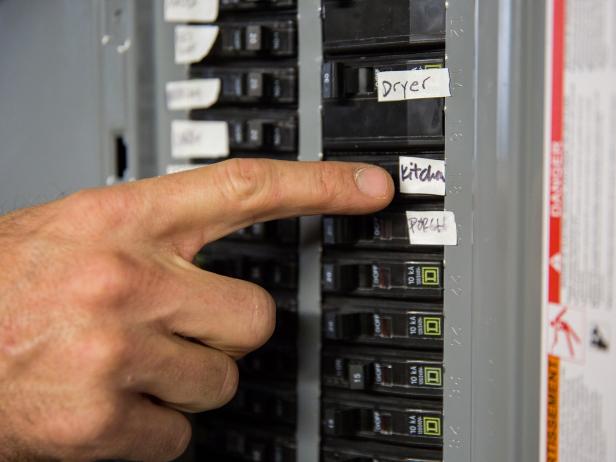
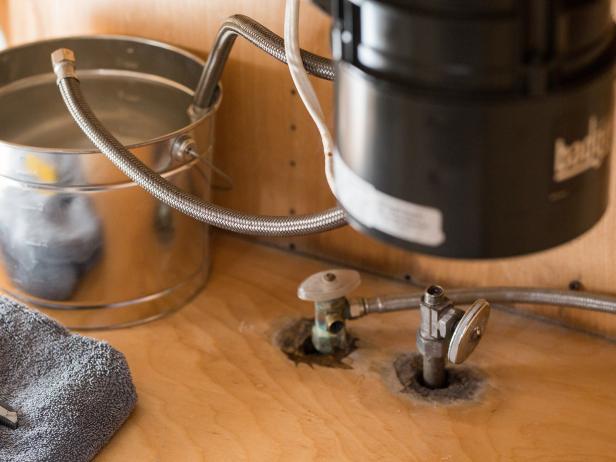
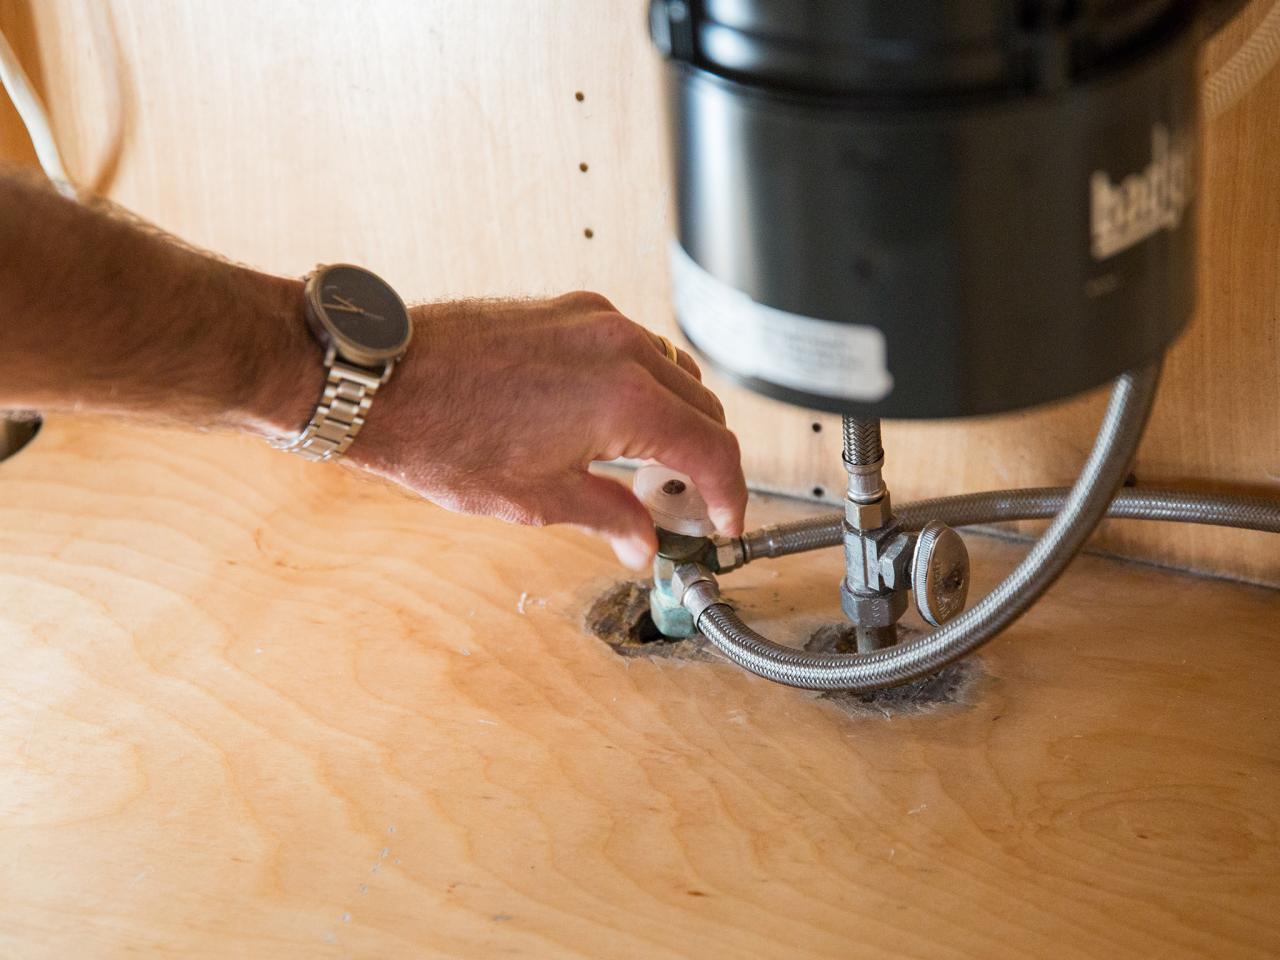
Before starting any plumbing project, shut the water off at the source. In this case, you can simply turn off both the hot and cold water at the valves under your sink (Image 1). There may still be some water stuck in the lines attached to the faucet, so it’s a good idea to have an old towel and a small bucket handy. If you have a disposal, you’ll want to disconnect power to it at the source. Switch off the breaker to the disposal to ensure your safety while working under the sink (Image 2).
Jalynn Baker
Jalynn Baker
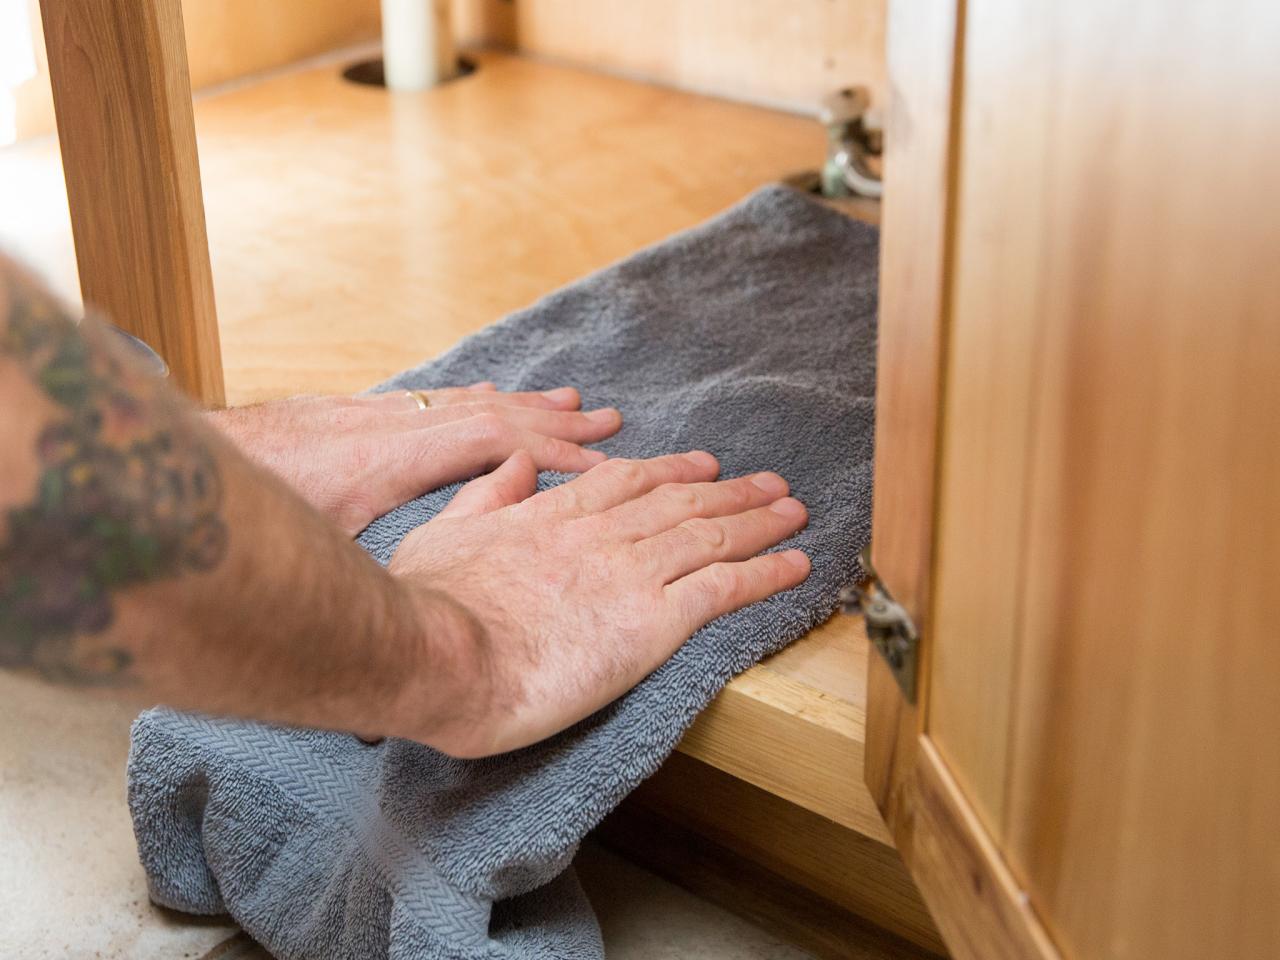
Comfort Second
Working on a faucet requires lying on your back under the sink. Remove everything from under your sink to give yourself plenty of room. You may want to place a towel or two on the bottom edge of the cabinet opening to provide some padding for your back.

Jalynn Baker
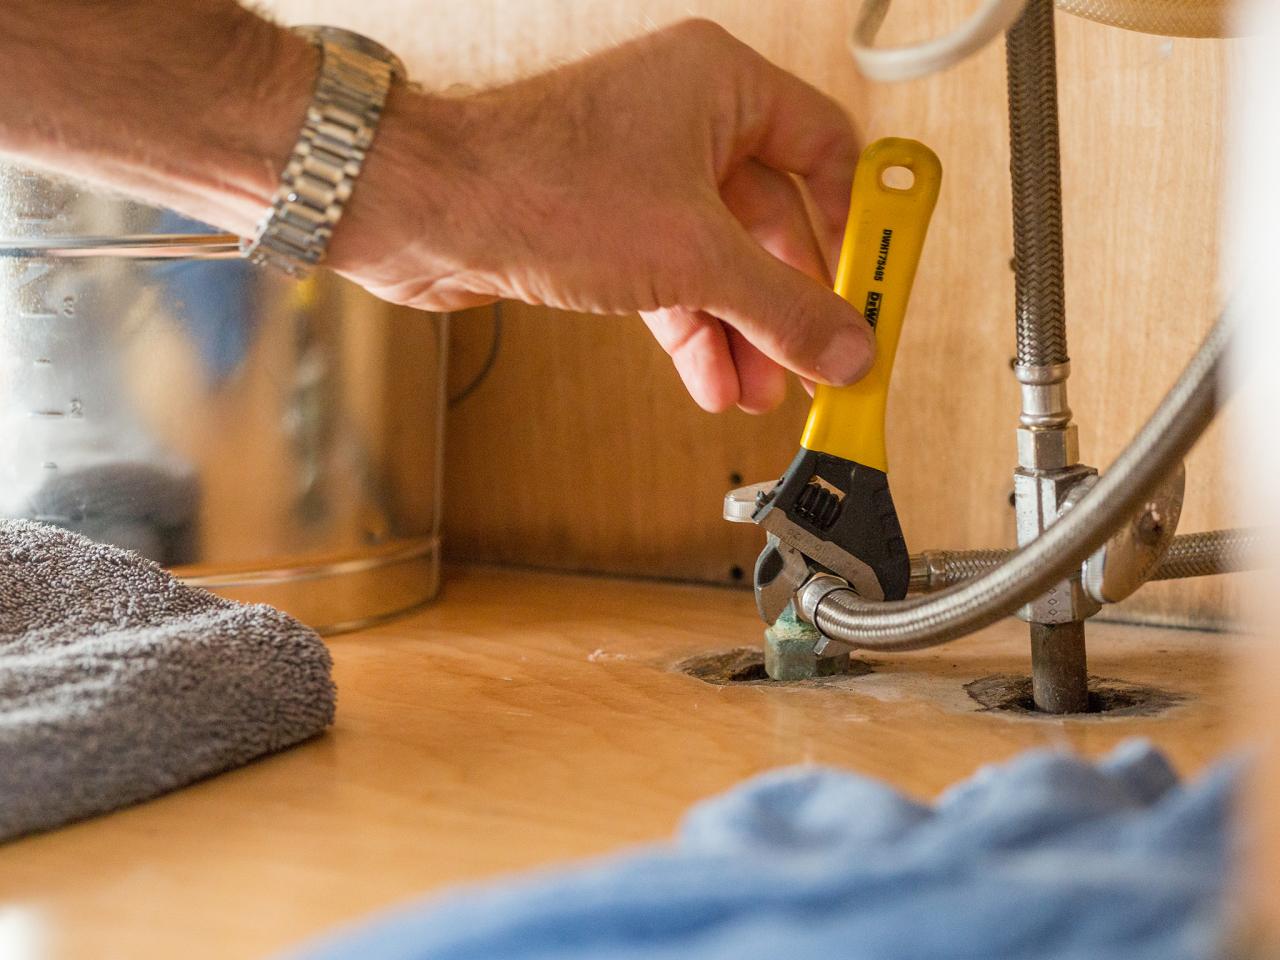
Detach Water Supply Lines
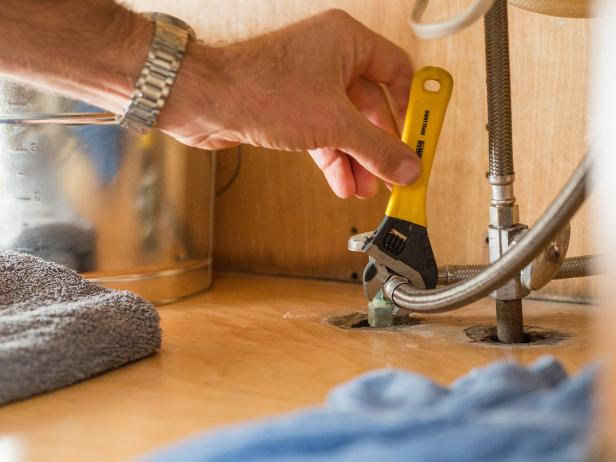
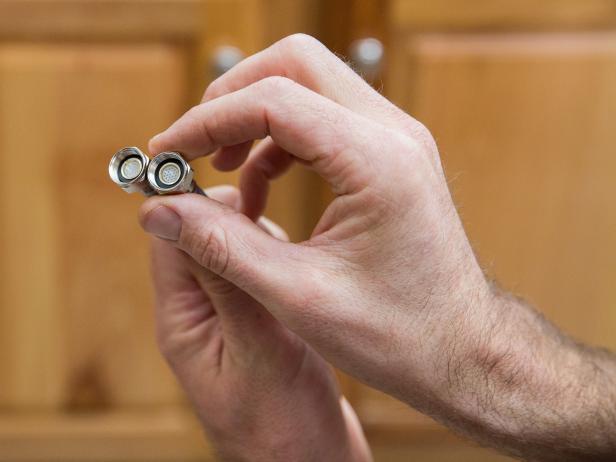
First, use an adjustable wrench to detach each of the water supply lines near the shut-off valves (Image 1). It’s much easier to detach water supply lines near the shut-off valves and replace them than to try to keep them and disconnect them near the faucet assembly. Supply lines are relatively inexpensive, so you might as well replace them while replacing your faucet. Remember, there might be some water left in the lines. Once each water line is detached, simply point it down into your bucket to drain it (Image 2).
Jalynn Baker
Jalynn Baker
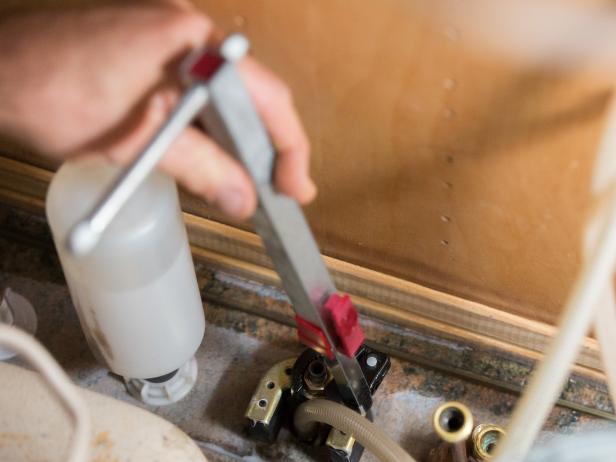
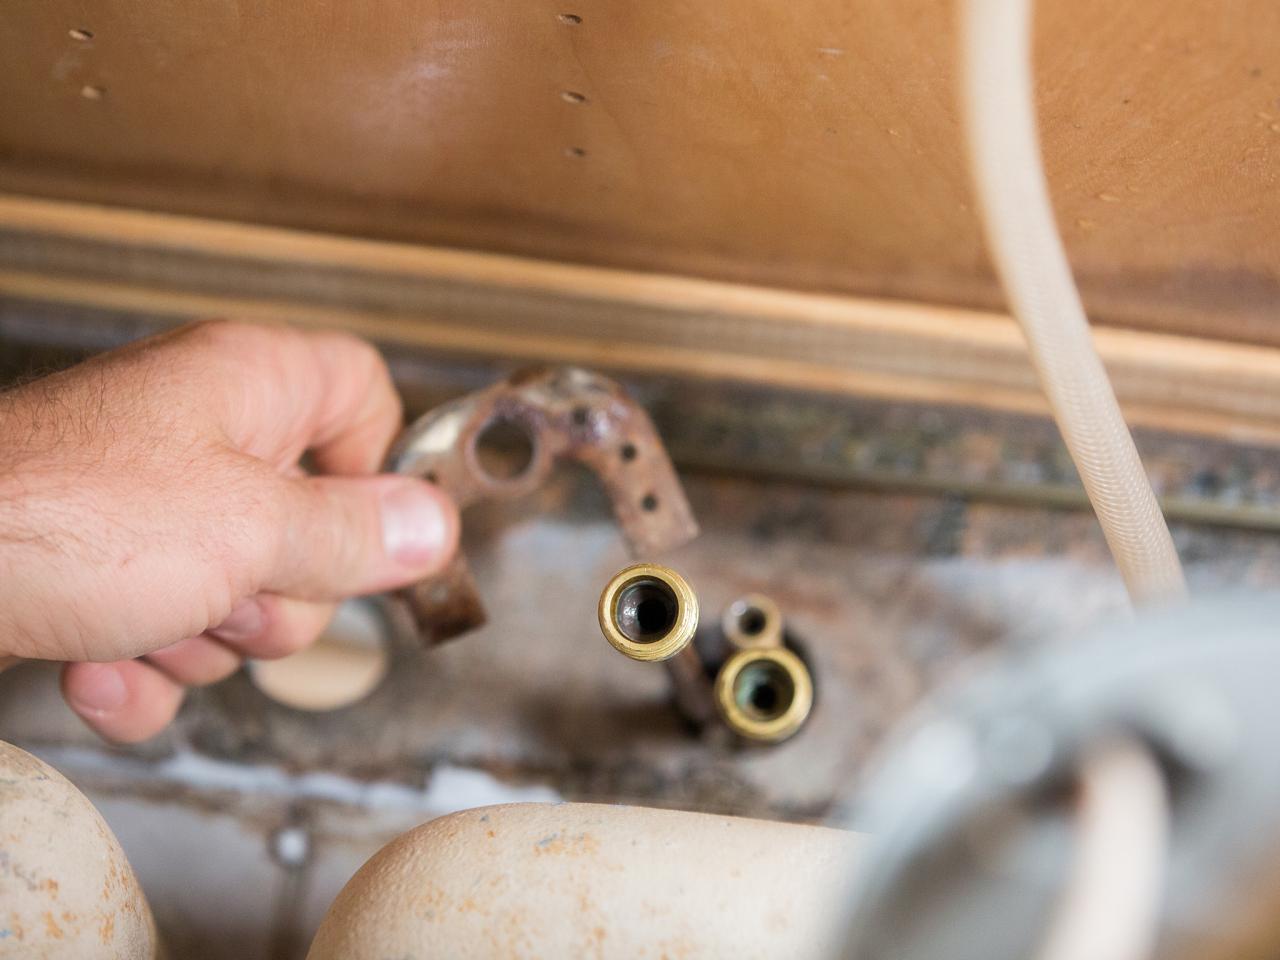
Detach Hardware
A basin wrench with a telescoping handle and spring-loaded grip is a handy tool used by plumbers. The basin wrench is designed to reach into small spaces and grab onto hardware. It’ll take some getting used to, but it’s much easier than trying to reach your arms into the tight sink spaces and turn a traditional wrench or pliers.
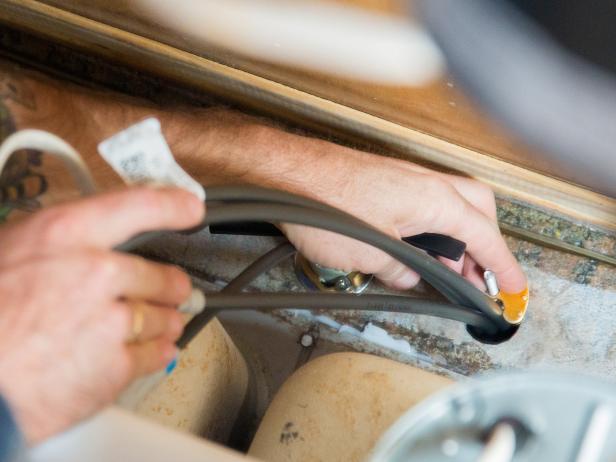
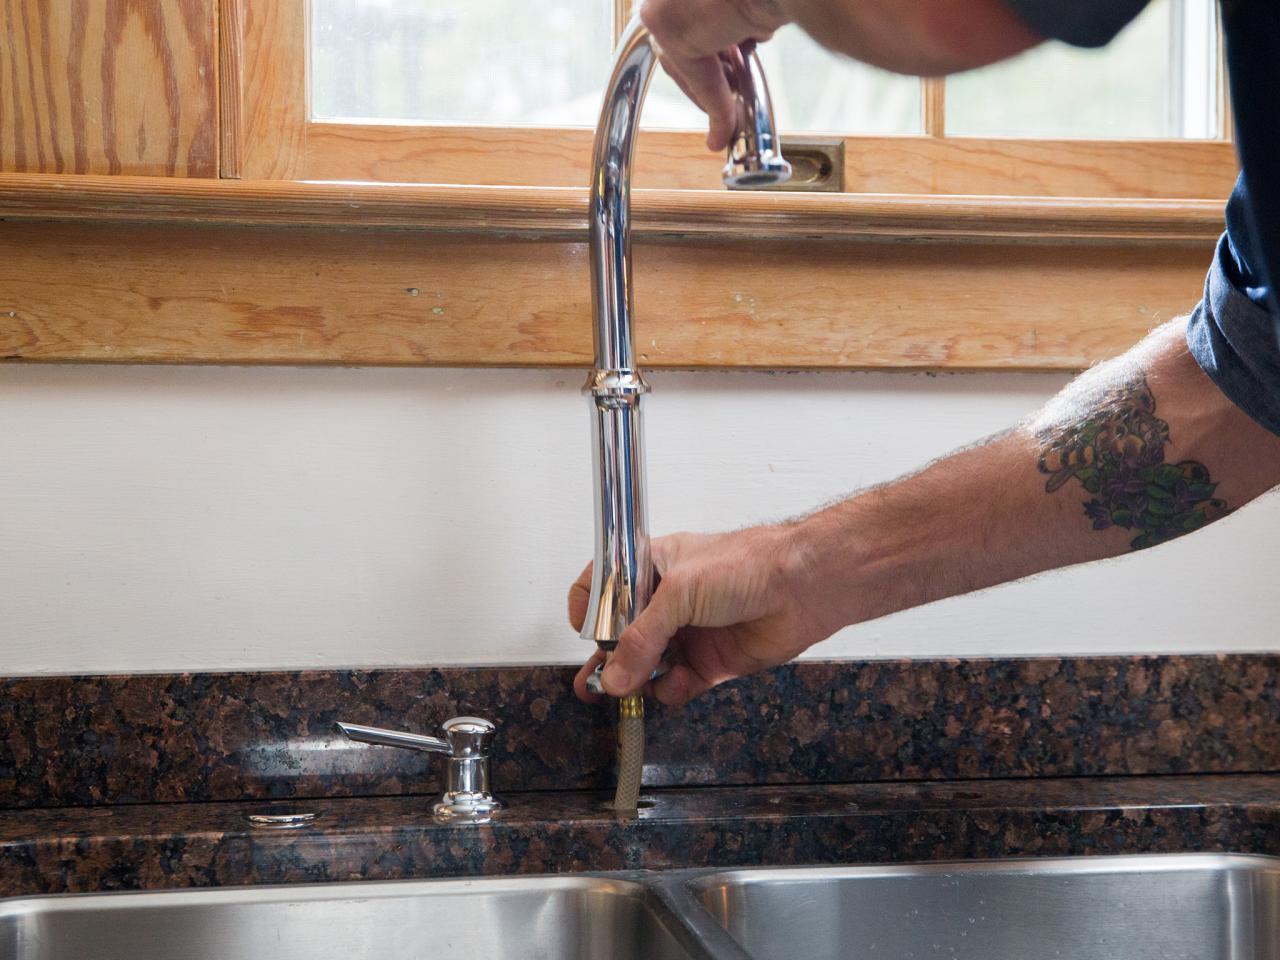
Your faucet and handles are held in place using metal or plastic nuts. It should be possible to loosen each of the nuts using your hand, or if they’re hard to reach, you can use your basin wrench (Image 1). Unscrew the mounting nuts from the threaded ends of the faucet and handles (Image 2). At this point, you should be able to remove your faucet from the sink and counter (Image 3).
Jalynn Baker

Jalynn Baker
Jalynn Baker
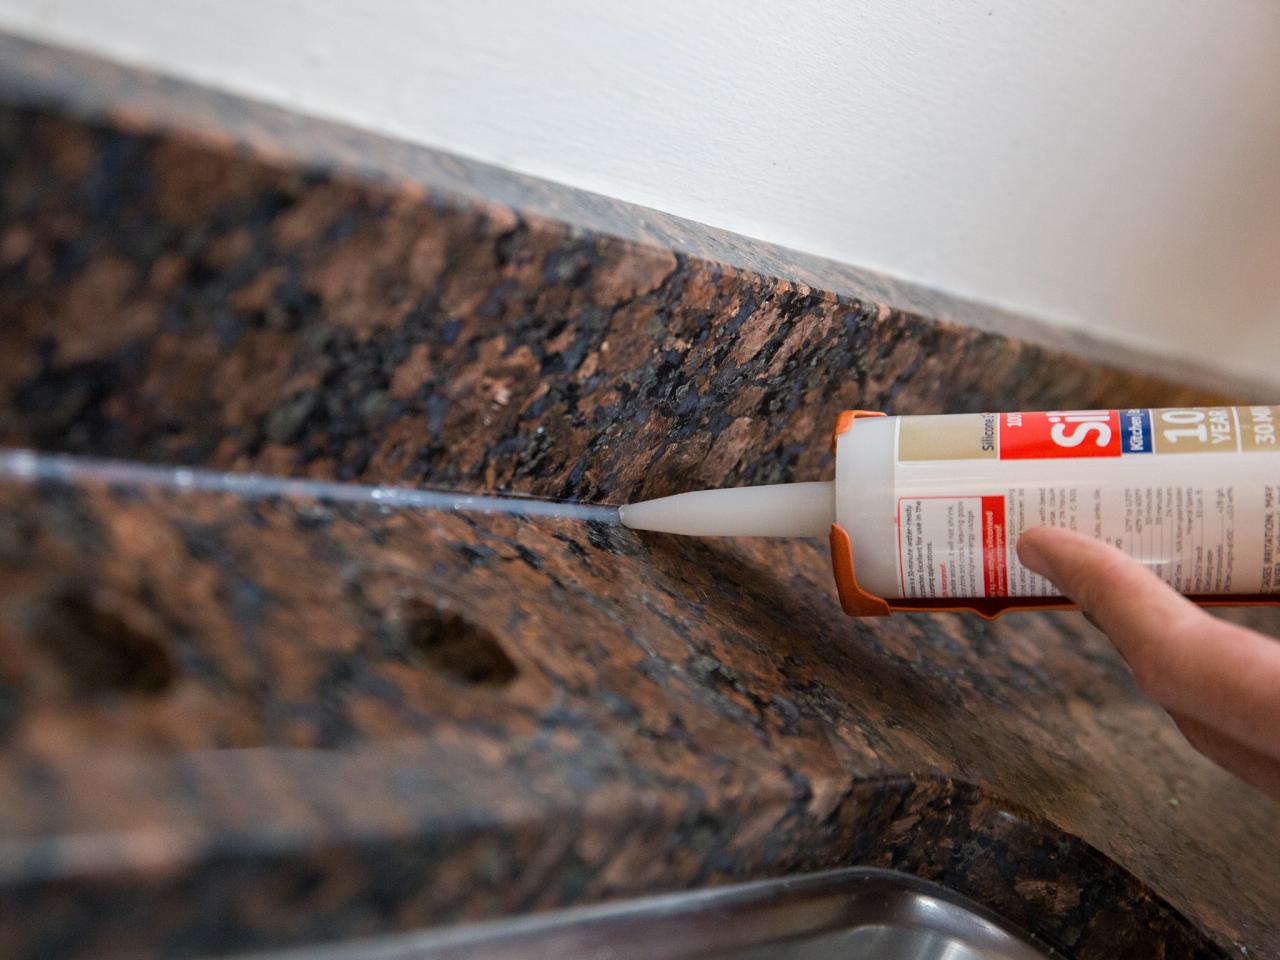
Apply Caulk (Optional)
While the space is clear, it may be a good time to recaulk the area around your sink. Using clear silicone caulk, run a thin bead around your sink basin and/or along your backsplash. Use a wet finger as a trowel to smooth the bead down.

Jalynn Baker
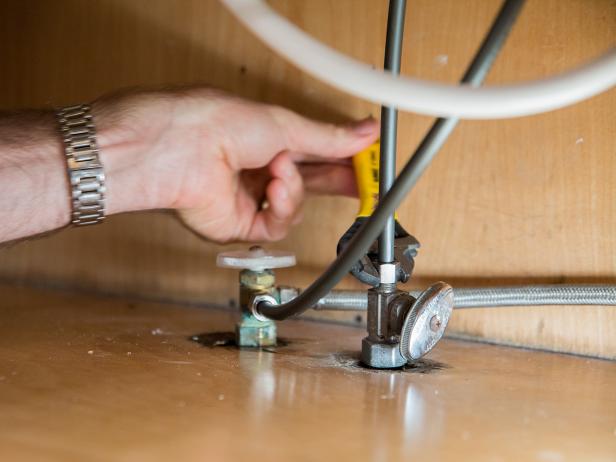
Attach New Supply Lines
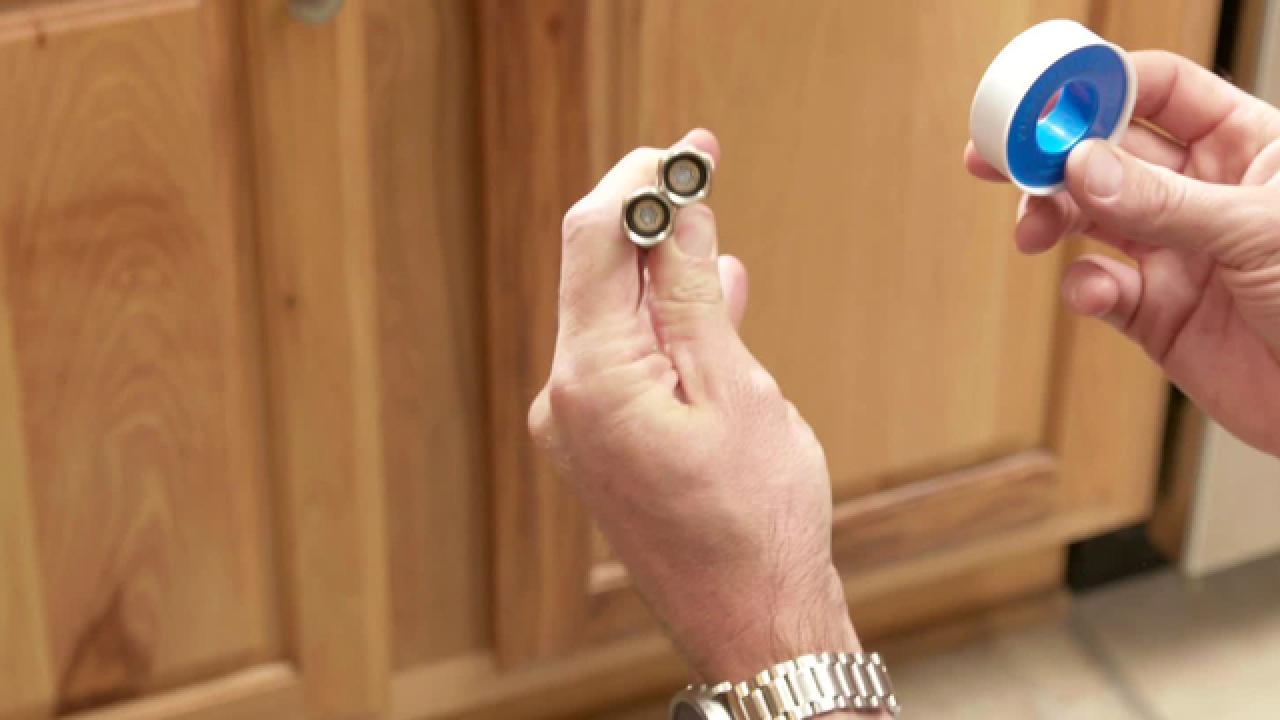
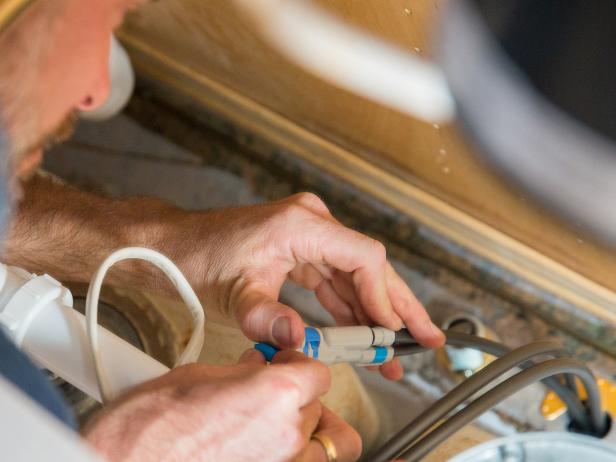
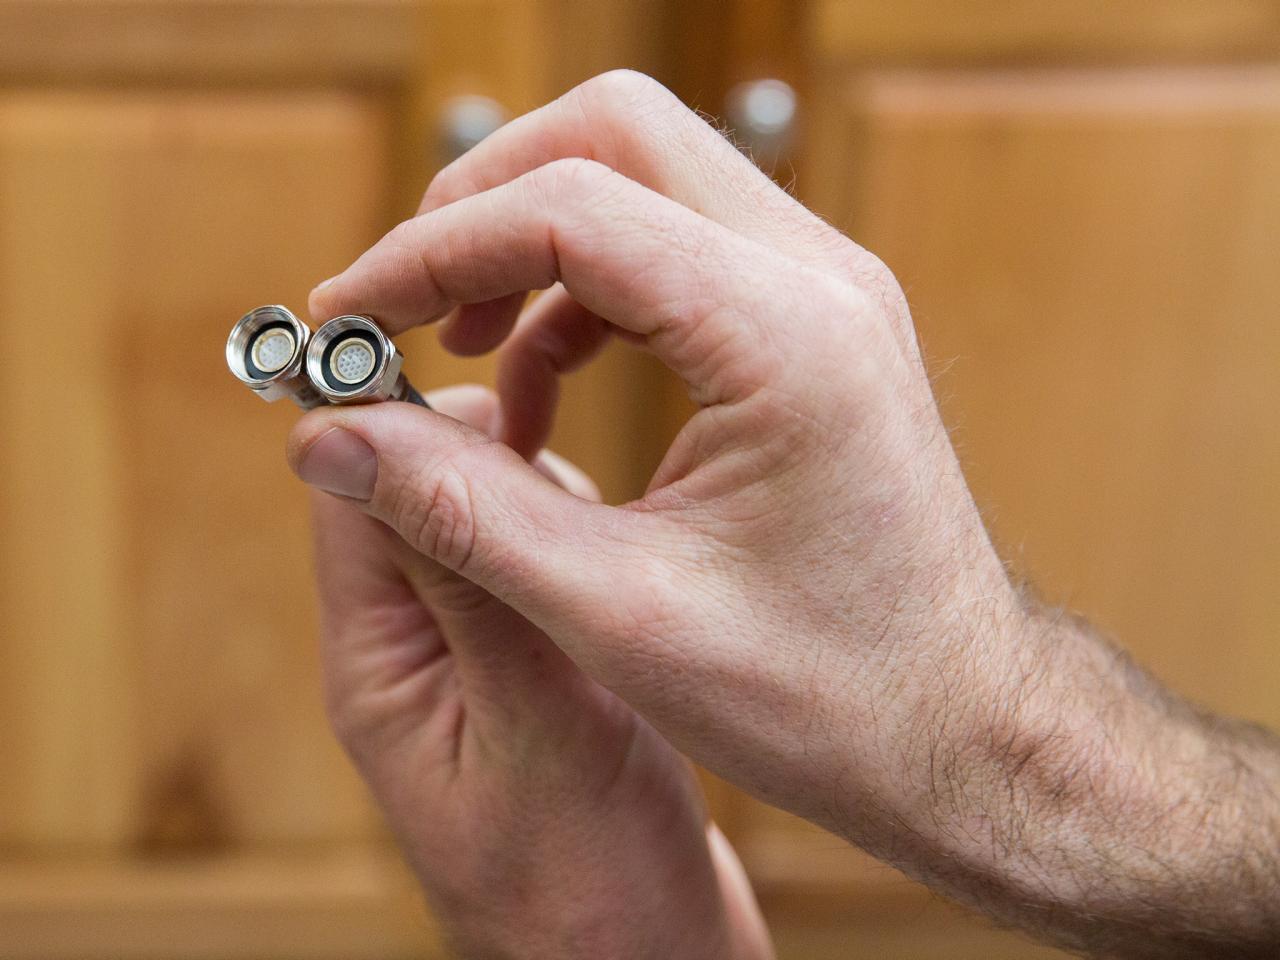
Wrap plumber’s tape clockwise around your new faucet connections. Hand tighten the supply lines to the faucet connections and then continue to tighten using an adjustable wrench. Once each supply line is connected, you’re ready to lower your faucet assembly down into the counter. You’ll follow the same steps to attach the supply lines to the house water and shut-off valves. Wrap the connection clockwise with plumber’s tape and tighten the connection using an adjustable wrench (Image 1). Note: If your new supply lines come with compression fittings, you won’t need to use plumber’s tape (Image 2).
Jalynn Baker
Jalynn Baker
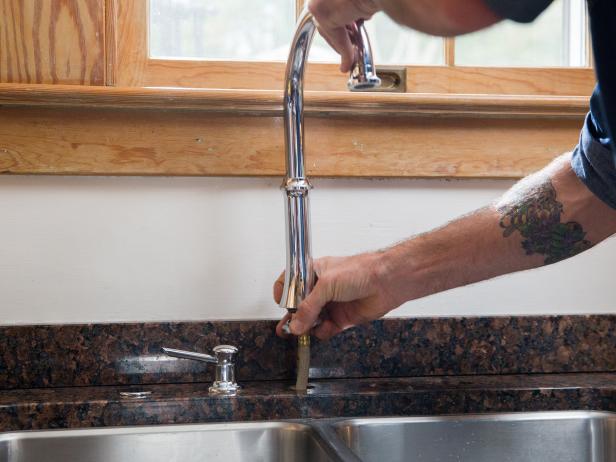
Secure the Faucet
Finally, secure the faucet into place using the mounting nuts provided (Image 1) and connect the handles (Image 2). Remember that you can use a basin wrench to work in those tight spaces. Make sure the nuts are fully tightened. This will keep the connection watertight and stop any splashes above from dripping down below.
Jalynn Baker
Jalynn Baker
Test the Faucet
Once all your connections are tight, you should be ready to test your water. With the faucet open, slowly turn the water back on at the source. Watch for a few minutes to make sure there are no leaks. If you notice a leak from the supply lines, you may need to apply more plumber’s tape and retighten them.

Jalynn Baker


