


Superior Drywall Finishing
Executing a smooth finish will lead to quality results.
Just like judging a book by its cover, many homeowners judge the quality of their new home by the quality of the interior finish. During a walkthrough, if homeowners see places where the drywall finish is rough, uneven, or showing nail pops, the defects can plant seeds of doubt in their minds.
Here's how to ensure a smooth, even drywall finish every time.
- During the framing stage, inspect the home for any bowed or twisted studs, protruding nails or screws, and joist hangers or tie downs that aren't flush with the framing.
- Thoroughly check the plumbing and HVAC systems for any leaks. Over time, even the smallest leak can lead to deterioration within wall cavities and eventually become noticeable within the living space. Water issues within the walls can also lead to mold growth.
- Install all electrical, plumbing, and HVAC components so the drywall can be fastened flush to the framing surfaces. Slight bows or waves in the finished sheet will be readily noticeable by the homeowner and could require extensive (and expensive) repairs to correct.
- Check to make sure that wall cavities are free of over-packed insulation. Too much insulation can create a bulge in the drywall.
Once the drywall has been installed, the tape and mud applications are critical areas to inspect for quality.
- Make sure all corner beads are straight and flush against the drywall. If corner beads aren't hung correctly, they can create wavy corners, nail pops, and clumsy and visible seams in the drywall.
- Make sure all joints are covered with tape, especially corner joints, such as the areas where the ceiling meets the walls. Joints that aren't taped properly can produce visible cracks that are much harder to repair after the final coats and paint have been applied. Large expanses of painted drywall, such as ceilings, make even minor flaws stand out.
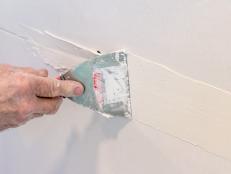
- Carefully check the second coat of joint compound or mud to make sure that no fastener heads are visible through the smooth surface. Mud should be applied over all joints, as well as inside corners and corner beading. The tape shouldn't be visible through the mud.
- After the third coat of mud has dried, carefully inspect it to make sure the drywall contractors didn't miss any spots. Remember to check obscure locations, such as inside closets, along stairwells, and in the basement. All edges should be smooth and feathered out to meet the paper face of the drywall.
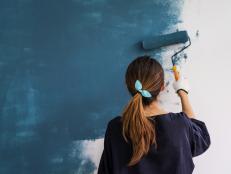
- Sand carefully before the prime coat of paint is applied. Make sure that every joint, inside corner, fastener, and corner bead is sanded smoothly. Careful sanding will greatly improve the appearance of the surface after painting is complete.
Next Up

How to Remove Drywall Anchors
Wall anchors can be tricky to get out of a wall. Follow these tips to reduce damage and repair unsightly holes.

How to Repair Drywall
A well-placed piece of art may be the quickest way to disguise a hole in your wall. But for a professional fix, follow our tips on how to patch a hole in drywall.

The Right Type of Paint for Every Type of Project (Plus, How to Prep for That Paint)
You can’t use the same paint on all surfaces. Learn the best type of paint for common household materials such as brick, tile, porcelain, concrete, fiberglass, fabric and more.
Spackle vs. Joint Compound: What's the Difference?
Wait a second — spackle and joint compound aren't the same thing? Though they seem similar, spackle and joint compound serve completely different purposes. Find out which one is right for your project.

How to Find Studs in a Wall Without Using a Stud Finder
Finding wall studs without a stud finder doesn't have to be a guessing game. If you're hanging something heavy on the wall, follow these best practices and pinpoint a stud with ease.

How to Paint With Wall Stencils
For an inexpensive alternative to wallpaper — and a creative wall-treatment that adds visual interest and a touch of whimsy — check out this simple how-to for applying a paint pattern using wall stencils.
Top 10 Ways to Paint Like a Pro
For a professional-looking paint job, do what the experts do.

How to Install a Board and Batten Accent Wall
This simple tutorial will teach you how to install traditional board and batten wood paneling, plus tips for installing wallpaper above it.

How to Install a Wood-Slat Feature Wall
Transform an ordinary wall into a distinctive design feature using this simple and inexpensive slat-wall technique that adds depth, warmth and visual interest to an interior space.

How To Install Picture Frame Molding
As a wall treatment, picture-frame molding is a simple way to give an elegant, classic look to an ordinary space — as well an ideal way to highlight framed art.


