Update a Discarded Painting

This painting got kicked to the curb, but that doesn’t mean it’s hopeless! A few creative moves from the crafty expects at HGTV Magazine turned this sad painting around.
artwork by the trash

Update a Discarded Painting

Don't throw away that ugly artwork just yet

Photo by: David A. Land

David A. Land

By: Jodi Kahn and Nissa Botthoff

Related To:

Materials Needed

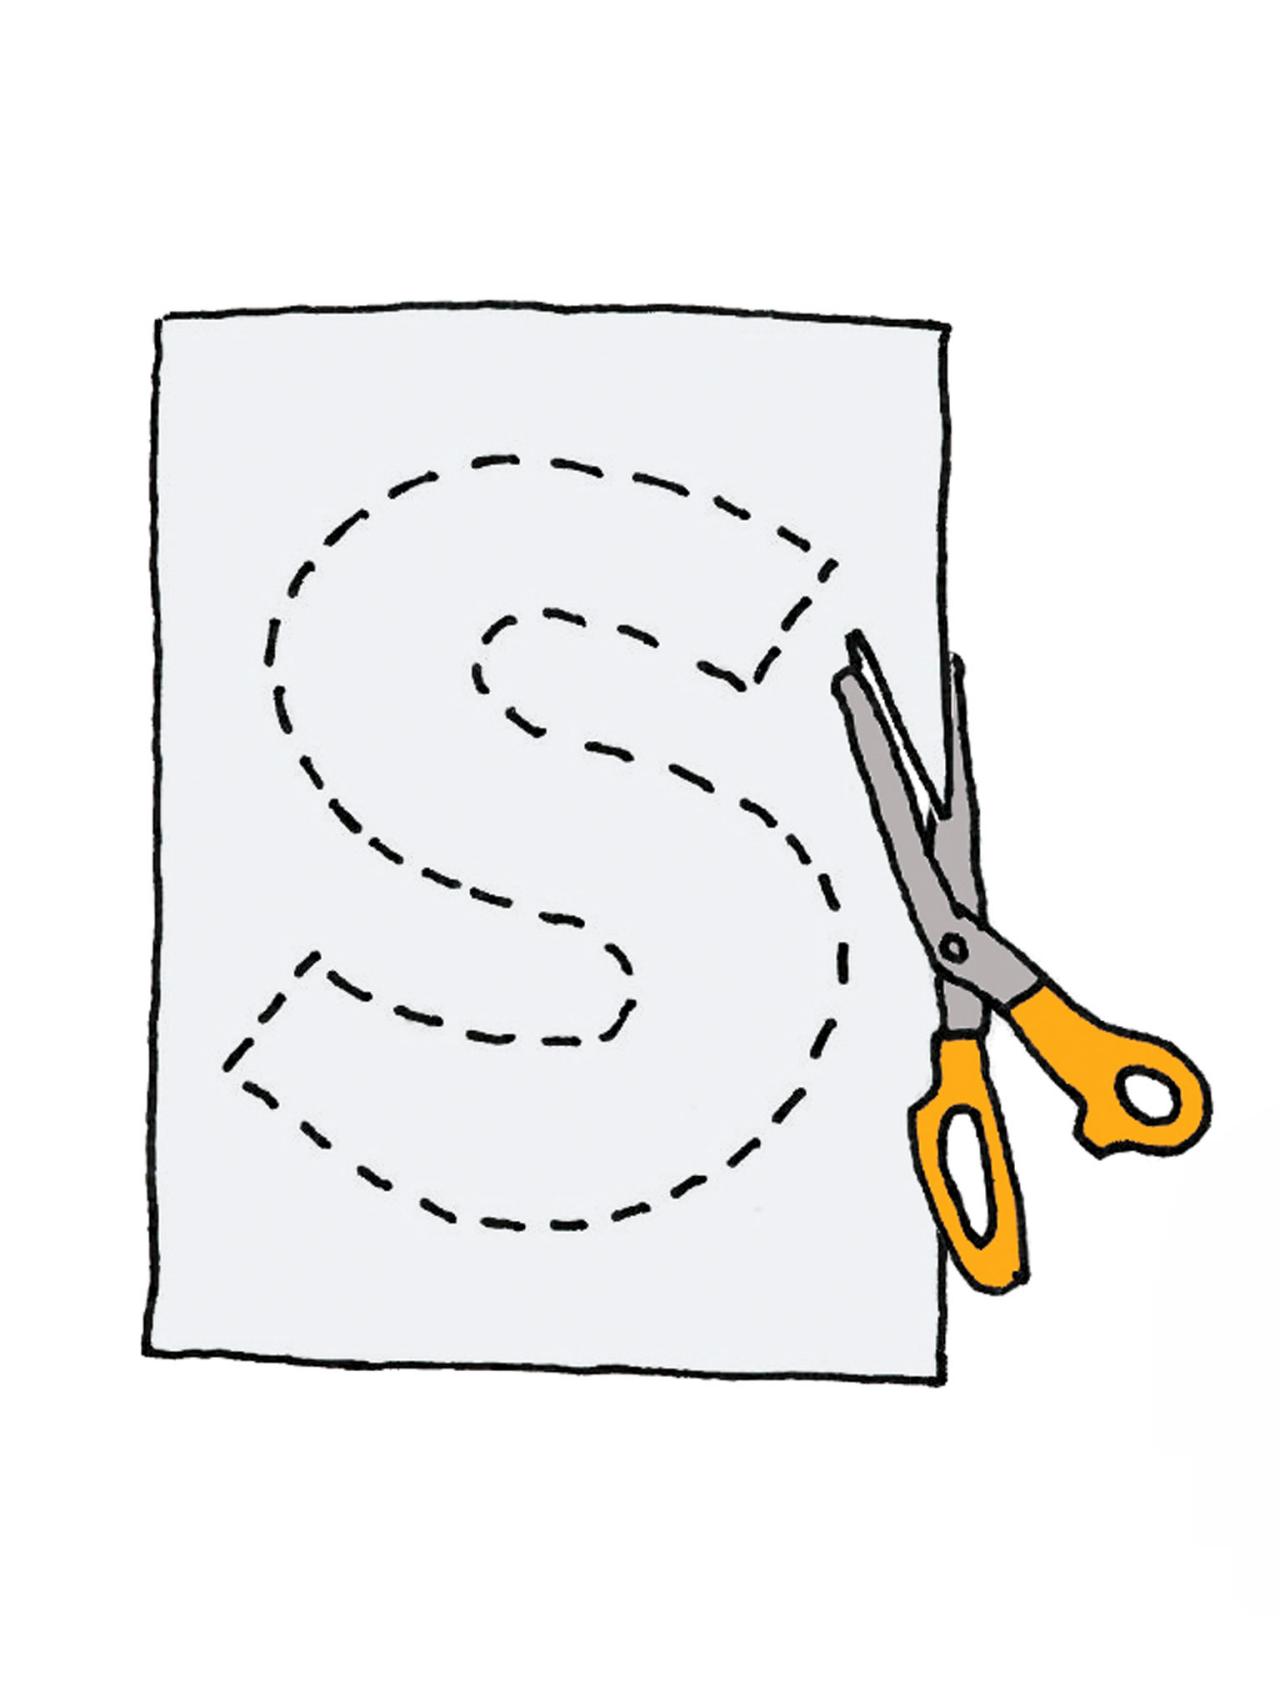
  • 8 ½” x 11” sheets of label paper
  • scissors
  • painter’s tape
  • 3”- wide paint roller
  • white acrylic crafts paint

New Attitude for the Entryway

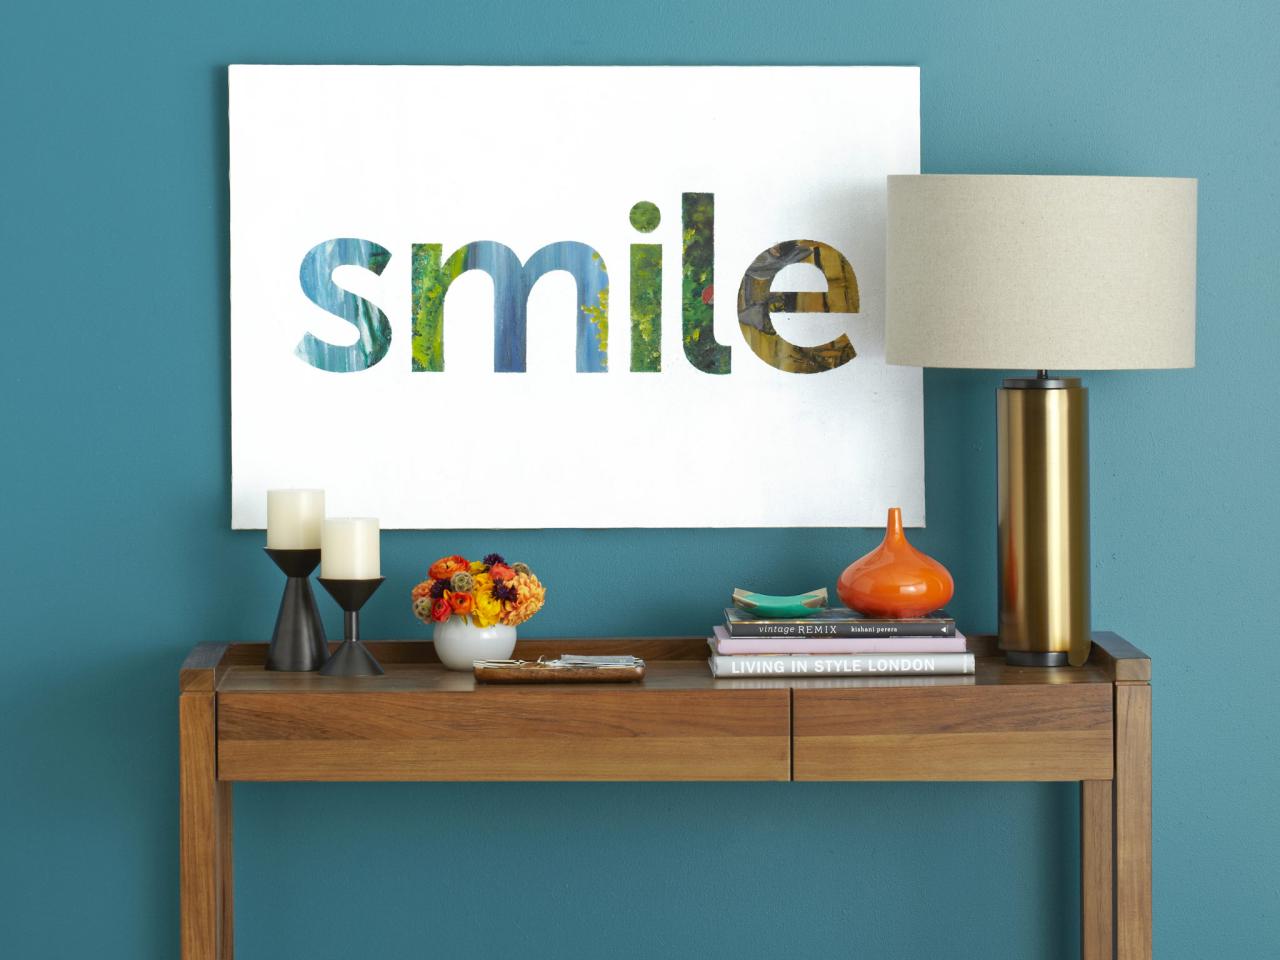
Popped out of its frame, turned horizontally, and painted white—except for reverse stenciled letters that spell smile—the upcycled artwork anchors this space. A lean teak console pairs well with the scale of the painting—it’s 24 inches by 36 inches—and the Adriatic blue on the walls picks up the landscape’s water and sky hues. Adding a little glam: a brass-finished lamp with a linen drum shade.

upcycled painting with letters

Upcyled old Painting

Learn how to customize a discarded painting from HGTV Magazine

Photo by: Lara Robby/Studio D

Lara Robby/Studio D

Step 1

Go to hgtv.com/sticker-letters to download the letter templates. (The entire alphabet is available, so you can spell out any word you want.) Reduce or enlarge the letters to fit the size of your artwork. Print the letters onto 8 1/2" x 11" sheets of label paper and cut them out.

cut out sticker letters

How to Update Art

Step 1

Photo by: Cara Rearick

Cara Rearick

Step 2

Remove the frame, then wipe any dirt off the painting with a cloth. Decide where you’d like to put the letters, then stick a strip of painter’s tape below as a guide to keep them straight. Stick on the letters, pressing down the edges so the paint doesn’t bleed underneath. Remove the tape.

diy art

Upcyling an Old Painting

Step 2

Photo by: Cara Rearick

Cara Rearick

Step 3

Using the roller, cover the entire painting, including the sides, in a single thick coat (we used Martha Stewart Crafts acrylic paint).

DIY art

Upcycle an Old Painting

Step 3

Photo by: Cara Rearick

Cara Rearick

Step 4

Carefully peel off the stickers while the paint is still slightly wet, using tweezers if necessary. Let it dry completely, then hang.

DIY art

Update an Old Painting

Step 4

Photo by: Cara Rearick

Cara Rearick

Next Up

How to "Dye" a Pillow Cover With a Marker

Following the instructions below to create this fun DIY project from HGTV Magazine.

Add Pattern to Makeup Bags With Sharpies

Following the instructions below to create this fun DIY project from HGTV Magazine.

Stencil a Tray With Sharpies

Following the instructions below to create this fun DIY project from HGTV Magazine.

How to Make a Personalized Wall Photo Mural

This printable wall mural makes a bold statement without the need for paint or wallpaper, perfect for apartments and dorm rooms where temporary decor is a must.

How to Hang Pictures

Follow these tips for how to hang pictures on a wall, where to hang them and how to group them together.

How To Use Tea and Cinnamon to Age Artwork for Halloween

Brew some tea, snag this free, printable Halloween art and make your own aged wall art in minutes.

DIY Stockings From HGTV Stars

HGTV hosts shared their ideas for made-from-scratch stockings with HGTV Magazine.

3 Totally Unique Ways to Make (and Wear) a Corsage

Whether you're headed to prom or dressing up for your best friend's wedding, ditch the basic wrist corsage and pretty-up your ensemble with a gorgeous, DIY flower-decked necklace, ring or trendy arm cuff.

How to Make & Hang a Simple Outdoor Swing

Add a heavy dose of charm to your pergola or porch with this DIY wood-and-rope swinging seat.

Make a Large Flower Arrangement

Learn how to make a large flower arrangement using one bouquet of grocery store flowers and foraged greenery from your backyard.

What's New in Handmade

Follow Us Everywhere

Join the party! Don't miss HGTV in your favorite social media feeds.