


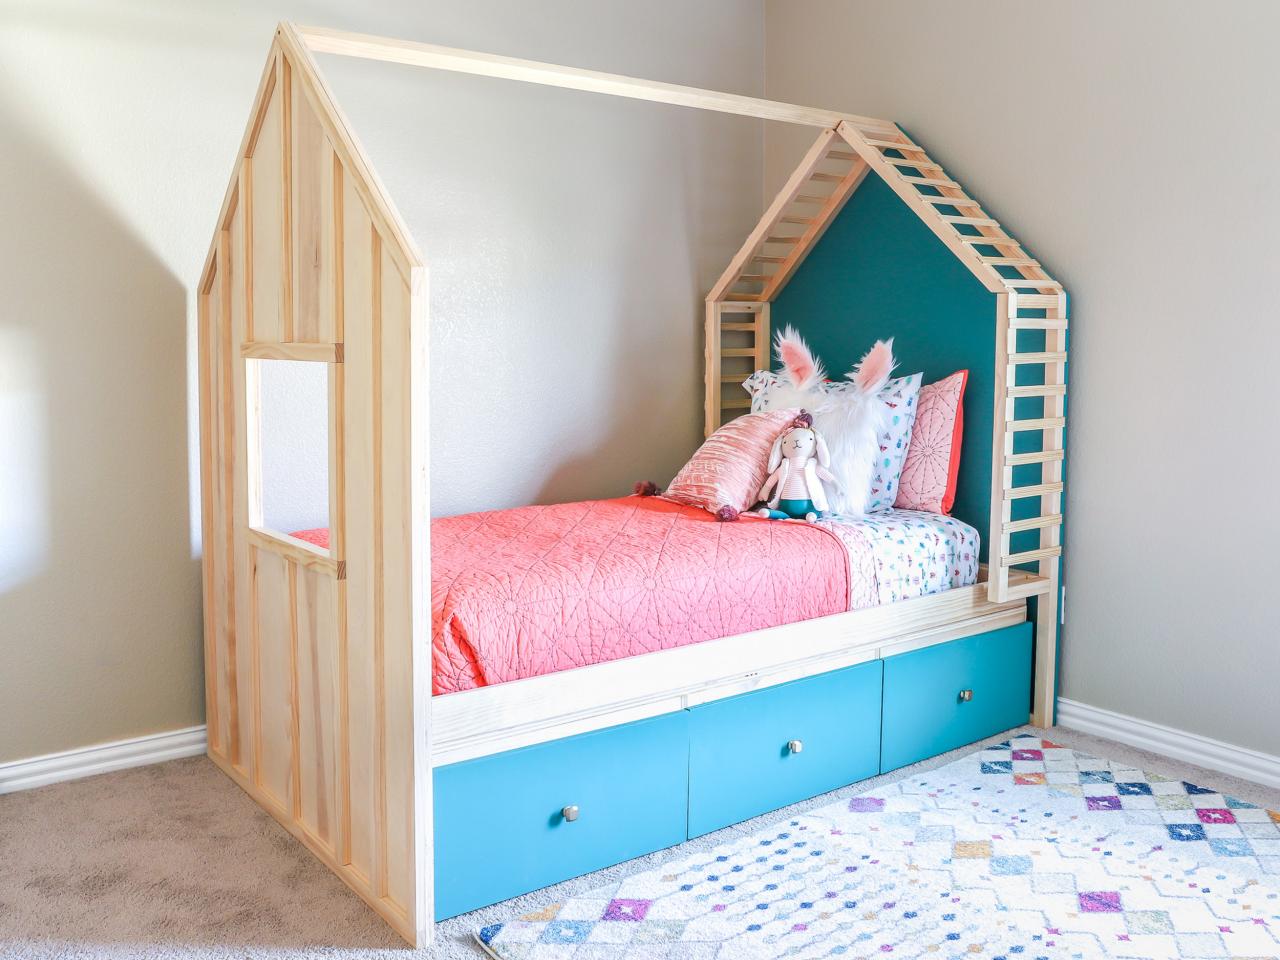
How to Make a House-Shaped Kid's Bed With Storage
Bedtime stories are especially magical in this DIY house bed for kids, and the oversized drawers offer functional storage. Your little ones won't mind putting their toys away or drifting off to sleep in this adorable bed!

Jen Woodhouse
Materials
- (4) 4' x 8' sheet of 3/4" thick plywood
- (6) 2x2 x 8' boards
- (8) 1x2 x 8' boards
- (4) 8' lattice
- (12) 2" rigid casters
- (3) drawer knobs
- 2" wood screws
- 2-1/2" and 1-1/4" pocket screws
- 2" and 1-1/4" brad nails
- wood glue
- wood filler
Tools
- tape measure
- pencil
- carpenter’s square
- cordless drill/driver
- compound miter saw
- circular saw
- pocket hole jig
- jigsaw
- brad nailer or hammer
- safety glasses
- hearing protection
- dust mask
For specific dimensions and 3D diagrams, download the PDF building plans at Spruc'd.
Cut the Plywood and Construct the Platform Base
Measure, mark and cut plywood pieces to size with a table saw or circular saw. Using a pocket hole jig, drill 3/4" pocket holes into the plywood and construct the base with 1-1/4" pocket screws and wood glue.

Jen Woodhouse
Attach 1x2 boards with 1-1/4" pocket screws and wood glue to square up the carcass.

Jen Woodhouse
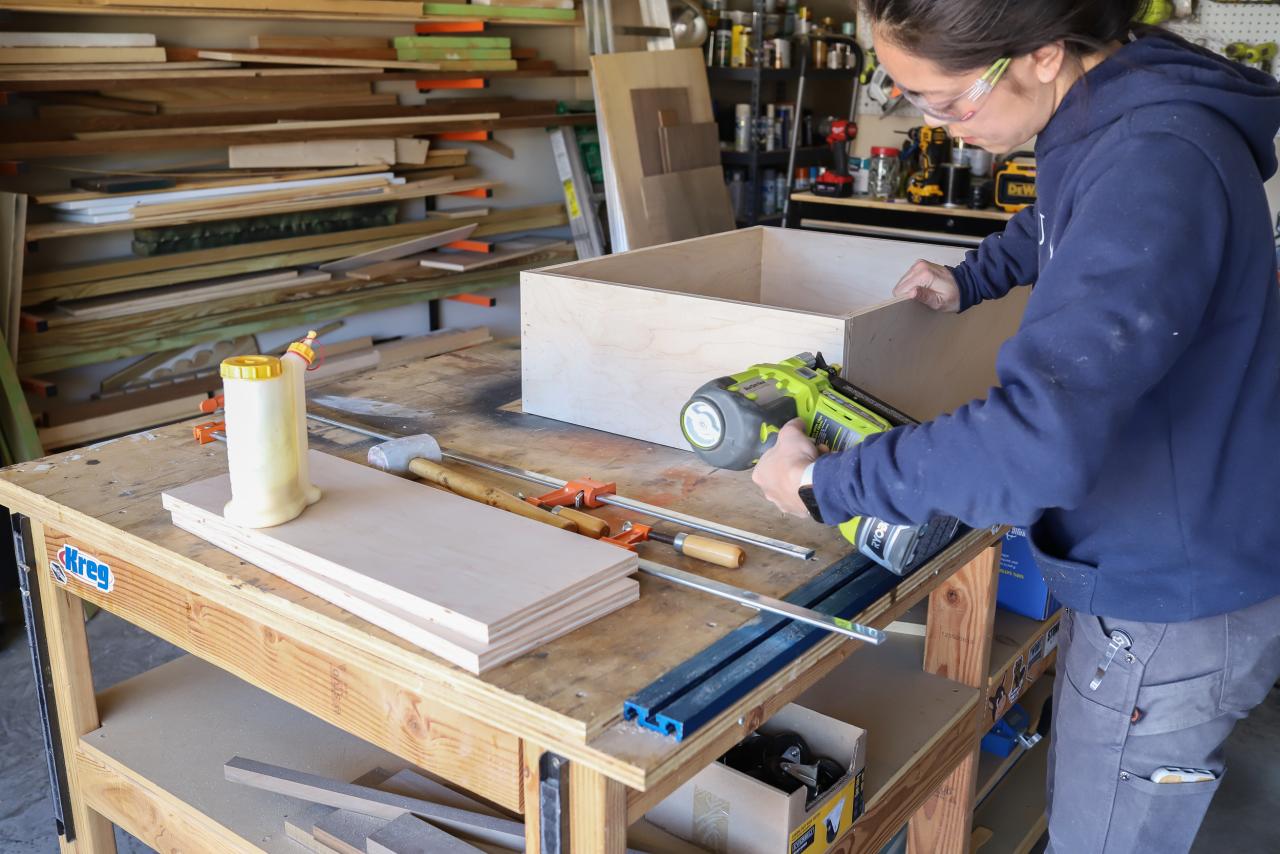
Build the Drawers
Construct the drawer boxes with 1-1/4" brad nails and wood glue. Whenever you use brad nails, be sure to use wood glue to strengthen the joint.

Jen Woodhouse

Jen Woodhouse
We built three drawers for this bed, but there is space for six.

Jen Woodhouse
Test for fit before completing the drawer boxes. Once you ensure the drawer boxes fit into the platform bed, attach the bottom to the drawer with 1-1/4" brad nails and wood glue.

Jen Woodhouse
These drawers will roll on rigid casters instead of slide on drawer glides. This choice not only makes it easier to pull the drawers in and out, but rigid casters are often half the cost of full-extension drawer slides. Screw the casters onto the bottom of the drawers.

Jen Woodhouse
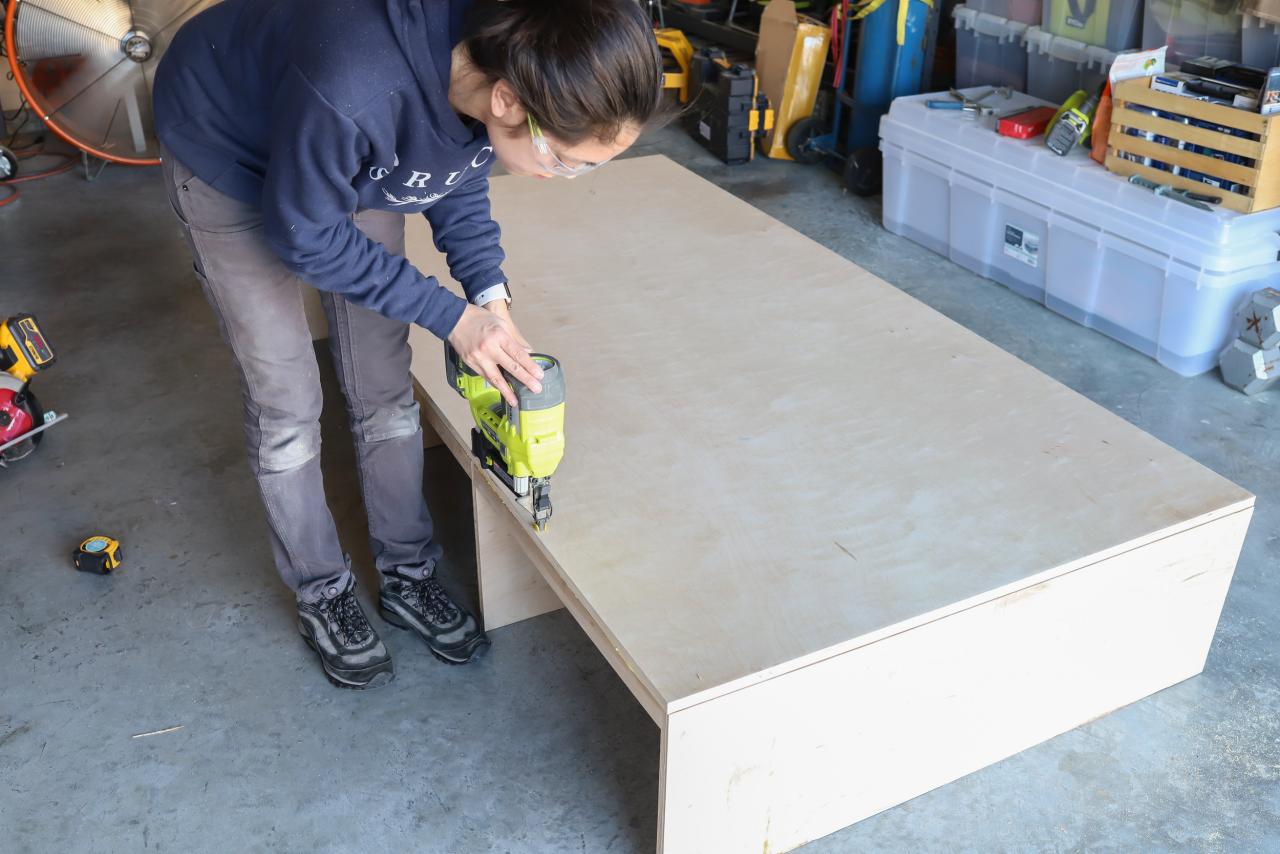
Measure, mark and cut plywood platform to size and attach it to the carcass with 1-1/4" brad nails and wood glue.

Jen Woodhouse
Make the House Headboard and Footboard
Measure, mark and cut both the 3/4" plywood headboard and footboard in the shape of a house. Using a jigsaw, cut a window in the footboard.
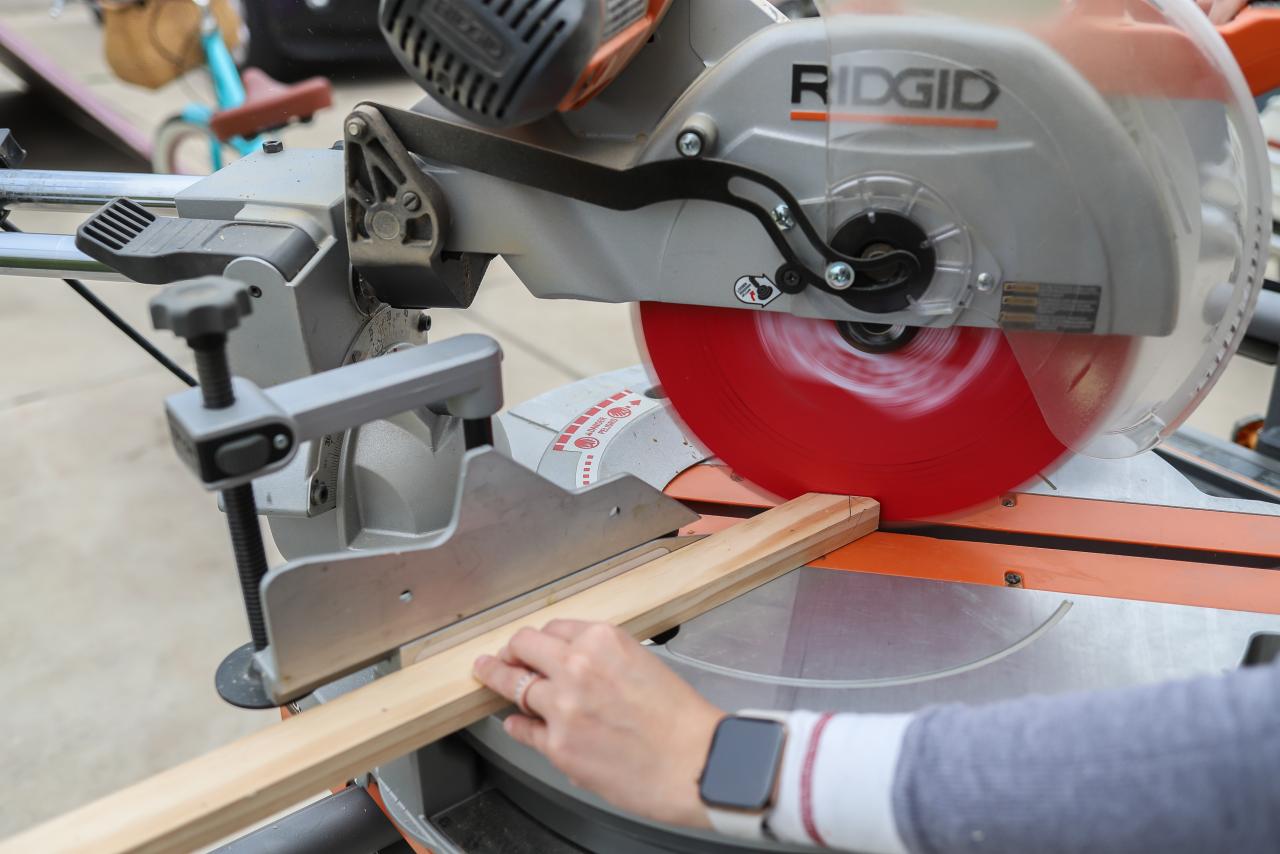
Measure, mark and cut 1x2 trim to length. It's best to hold the pieces in place and cut to fit for the tightest joints, especially for the angled pieces. Attach the trim with 1-1/4" brad nails and wood glue.

Jen Woodhouse

Jen Woodhouse
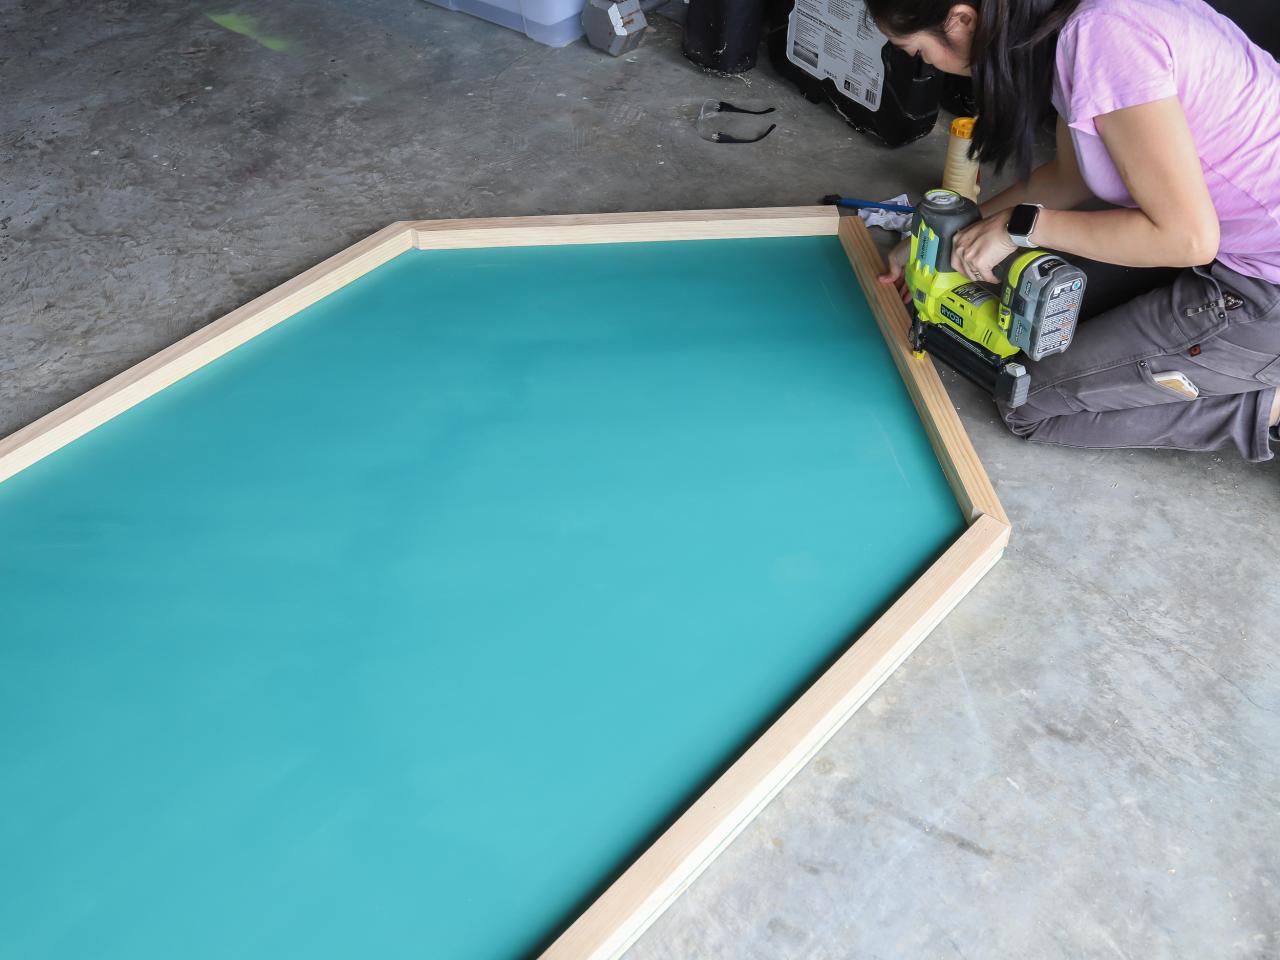
Paint the Headboard
Sand and paint the headboard. We used latex wall paint in the color Bubble Turquoise by Behr in a satin sheen.

Jen Woodhouse
Add 2x2 Frame to the Headboard
Measure, mark and cut 2x2 boards to length and attach them to the headboard temporarily with a few 2" brad nails and wood glue. These nails are simply acting as clamps until they are reinforced with screws.

Jen Woodhouse
Flip the headboard over, pre-drill pilot holes and screw 2" wood screws to attach the 2x2 boards to the plywood headboard.

Jen Woodhouse
Drill 1-1/2" pocket holes into the 2x2 "arms" and attach with 2-1/2" pocket screws and wood glue.

Jen Woodhouse
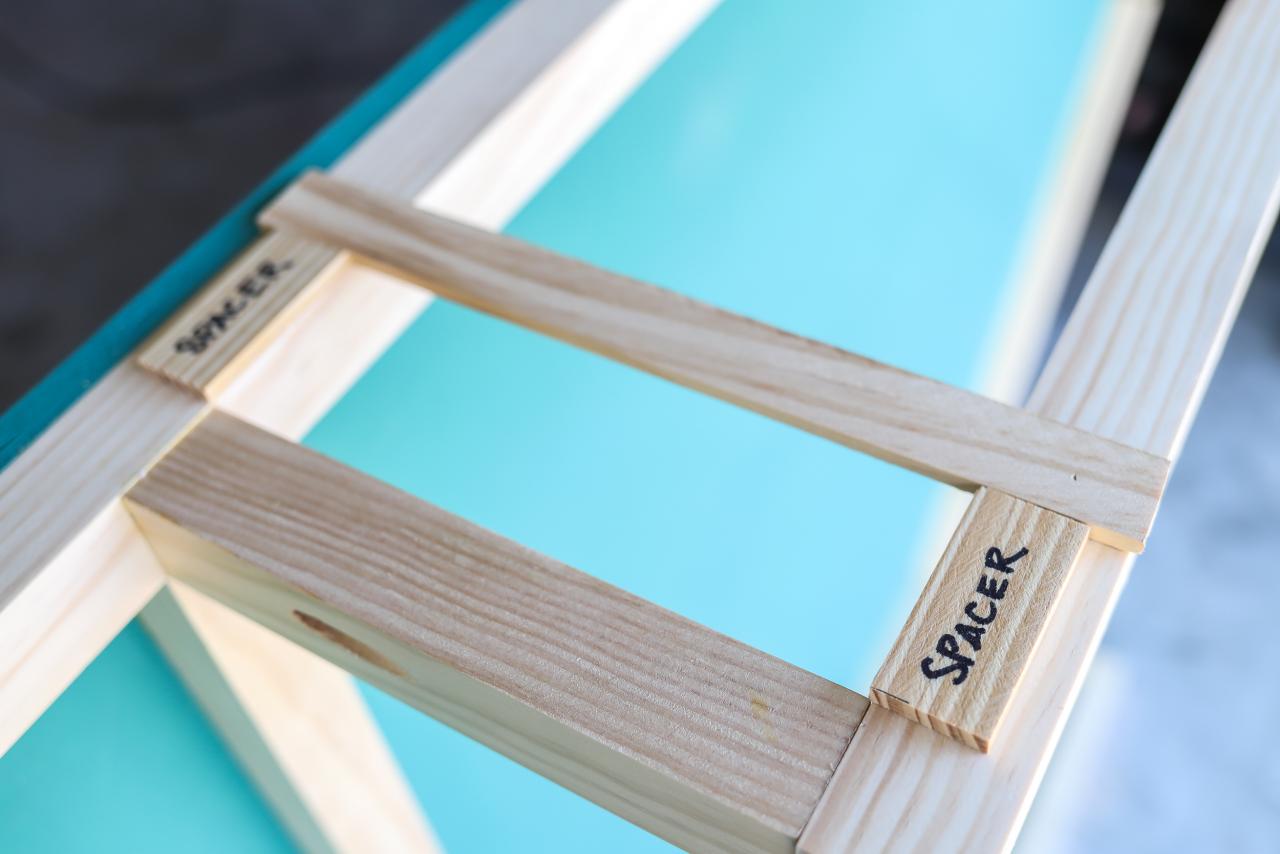
Add the Lattice to the Headboard
Cut a couple of scrap pieces of wood to act as spacers to space the lattice evenly as you attach them to the headboard. Attach the lattice with pin nails and wood glue.

Jen Woodhouse

Jen Woodhouse
Install Drawer Pulls
Find the center of the drawer face and pre-drill a pilot hole for the drawer knob. Attach the drawer face to the drawer box by driving screws from inside, then screw on the drawer knob.

Jen Woodhouse
Assemble the Bed
Place the platform bed and drawers into the bedroom, then attach the headboard and footboard to the platform with wood screws. Measure, mark and cut the 2x2 ridge to length and attach it with 2" wood screws.
Add a twin size mattress and adorable bedding to complete the look!

Jen Woodhouse


