


Burlap Bubble Wreath

Materials Needed:
- 10" foam wreath (available at craft supply or dollar stores)
- 1 1/4 to 1 1/2 yards burlap (or any fabric you choose)
- pins with large heads
- scissors
Cut Fabric
1. Cut your fabric into 4" x 4" squares by first making 4" strips, then cutting each strip into 4" squares. The squares don't need to be measured and cut precisely if you don't want to take the time, but they should all be cut pretty close to the same size.
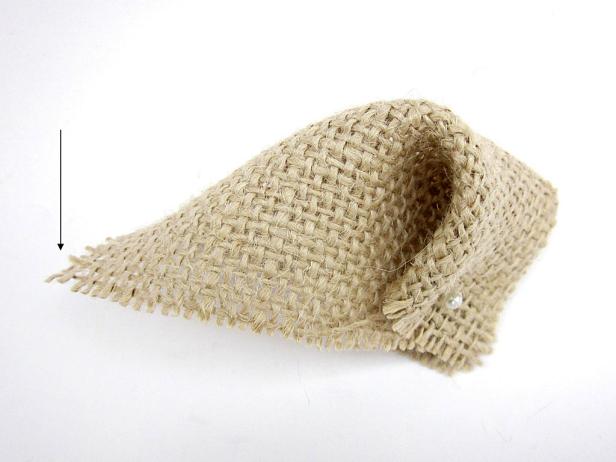
2. Fold the square in half to form a triangle. Take the right-hand corner (pinch one layer of the fabric on the very tip) and bring it to the front. Line up the corners.
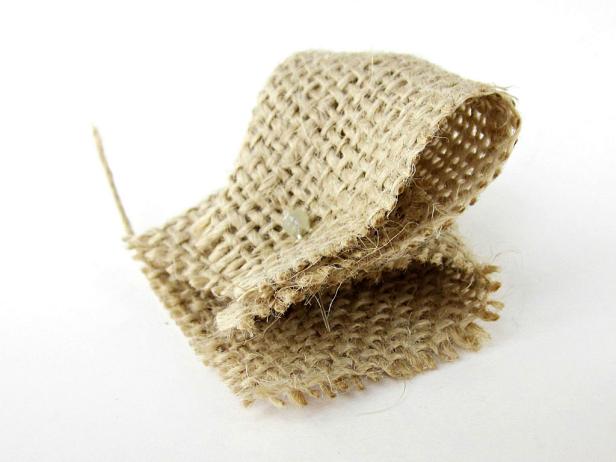
3. Take the left-hand corner (pinch one layer of fabric on the very tip) and take it to the back. Line up the corners.
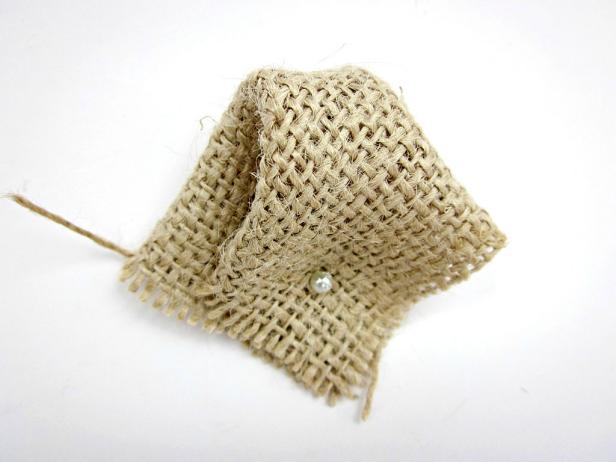
4. All four corners should be lined up at the bottom. It should look like a bubble now.
5. Pin through all four layers of fabric.

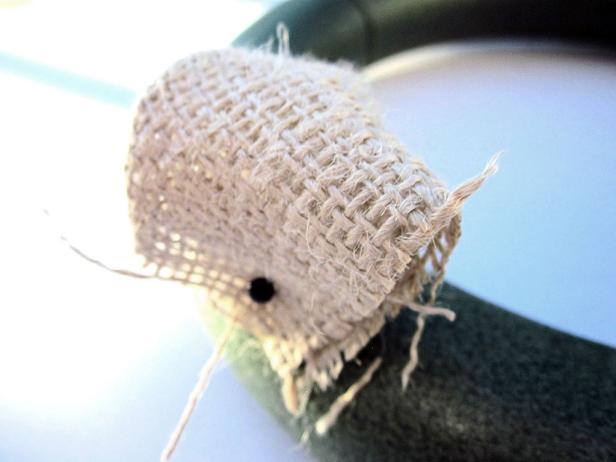
Attach Bubbles
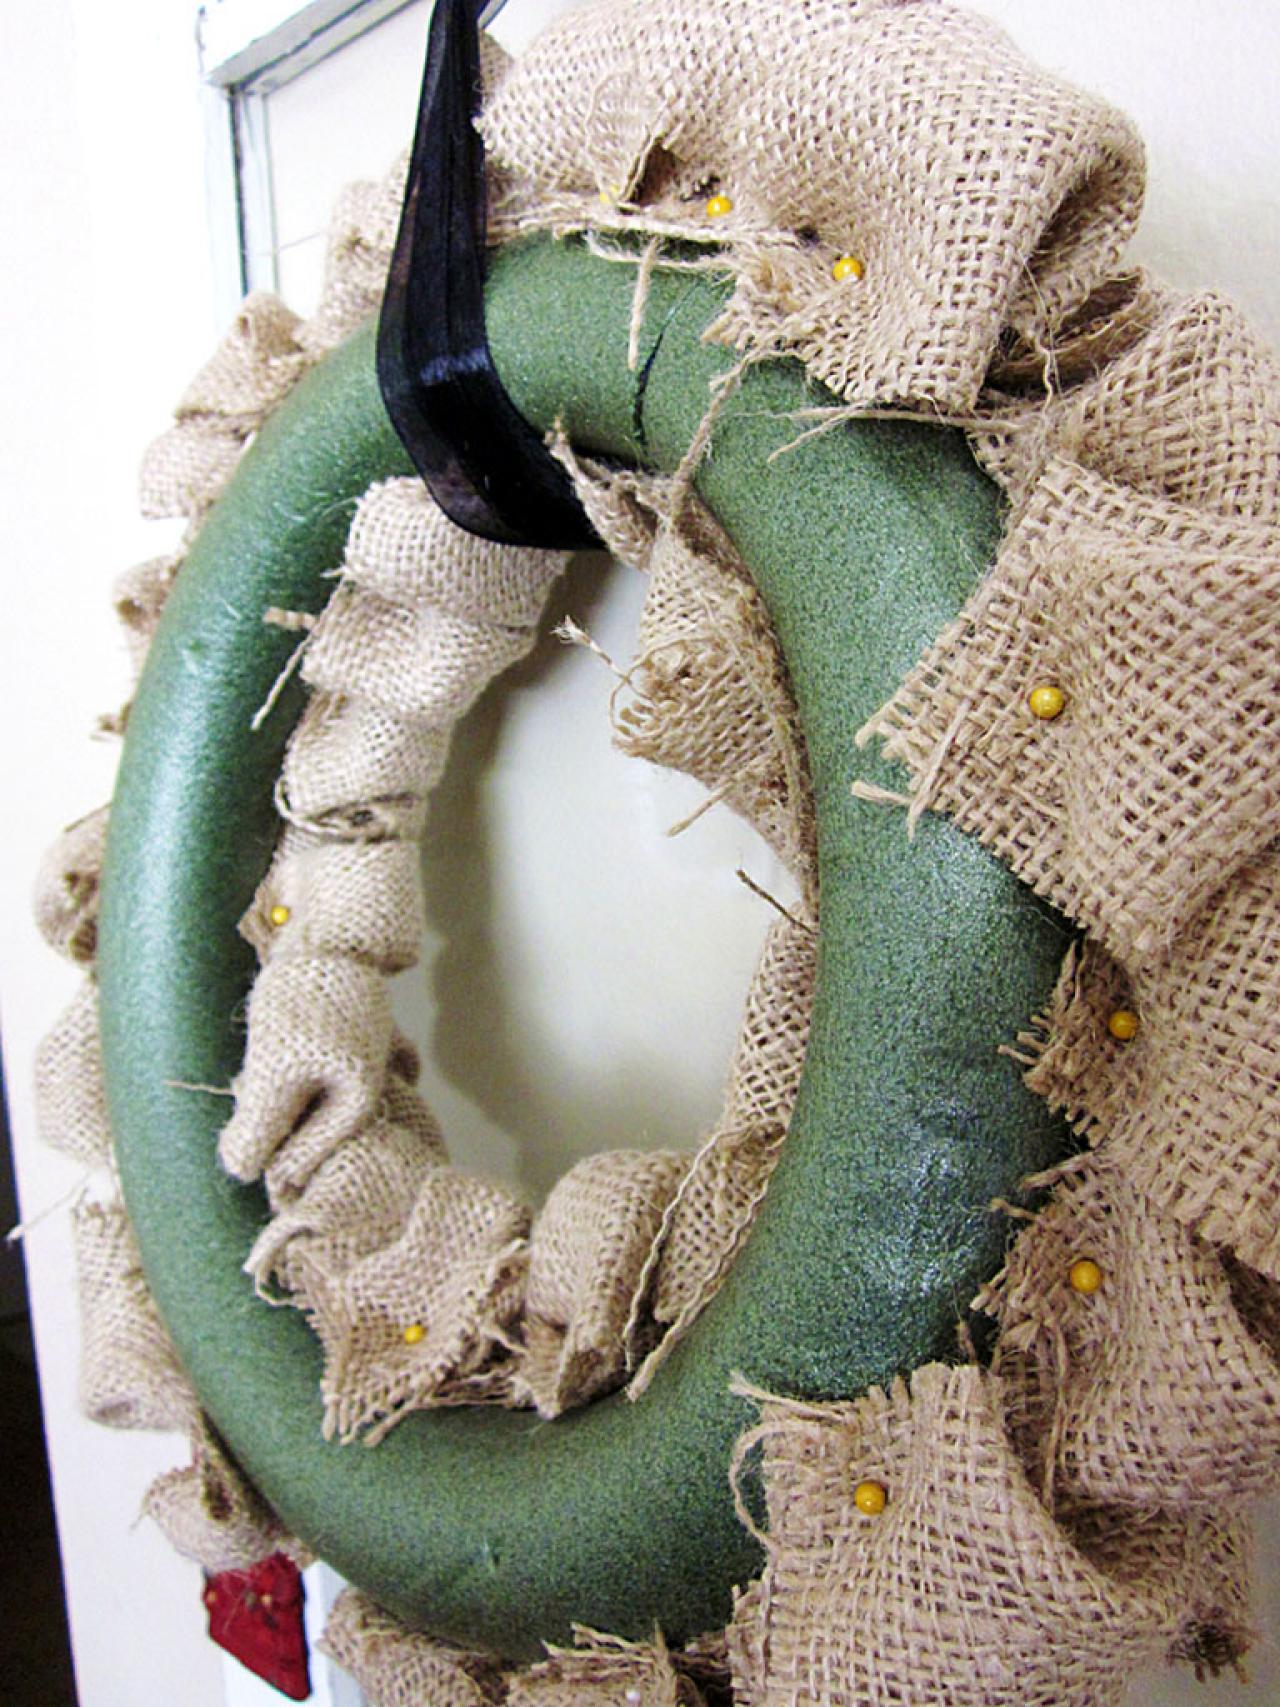
Pin the "bubbles" to the wreath. Pin one bubble on and then place the next one close to it so that it hides the pin on the one that you just added. The bubbles should be just close enough so you don't see any of the foam wreath or the pins.

Add Bubbles All the Way Around
You'll want to bring the bubbles around the edge just far enough so when the wreath is against the glass/wall the green doesn't show from the side.

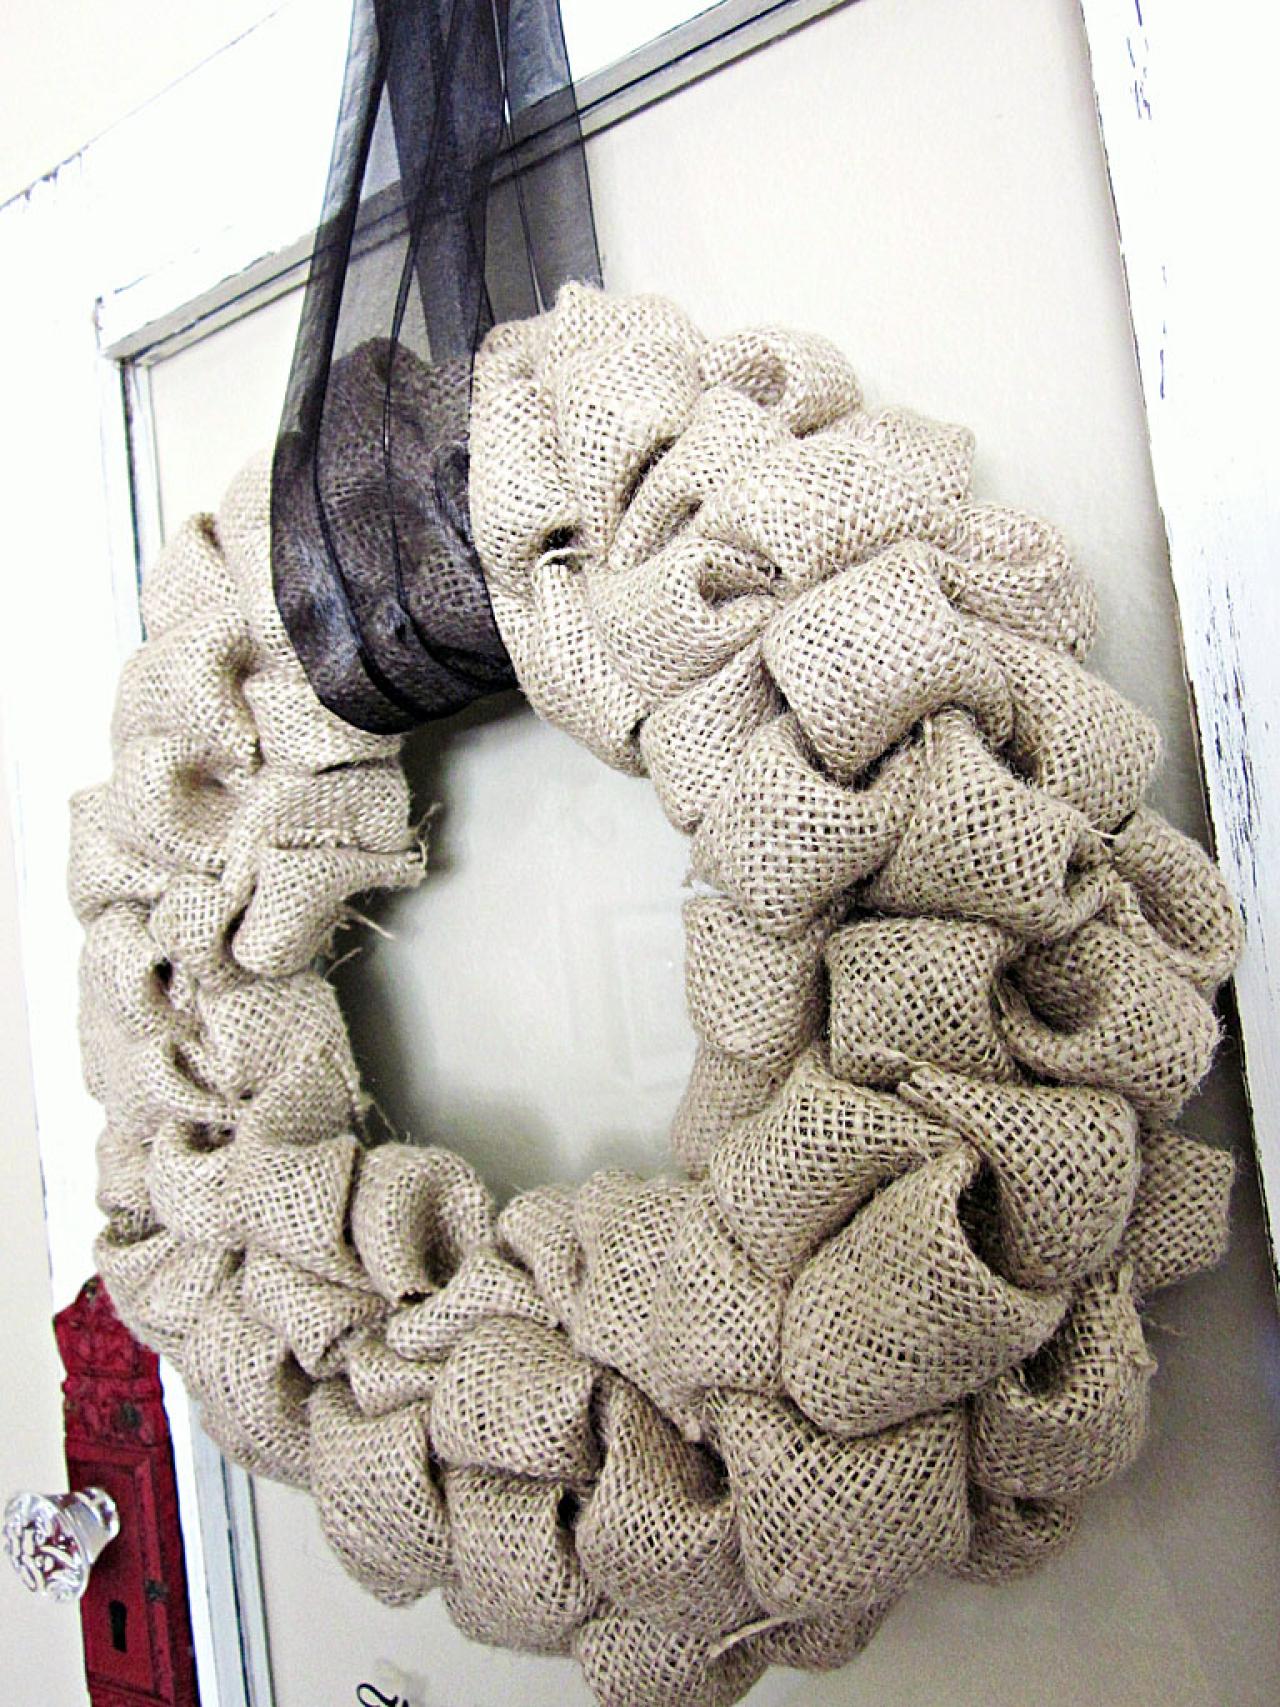
Finish and Hang
This wreath took 90 burlap squares to complete. Tie a length of thick ribbon or fabric around the top for easy hanging.


