Light the Night With a Rustic Candle Centerpiece
Bring some winter enchantment indoors with a centerpiece that will not only impress holiday guests, but also beautifully deck the table all season long.
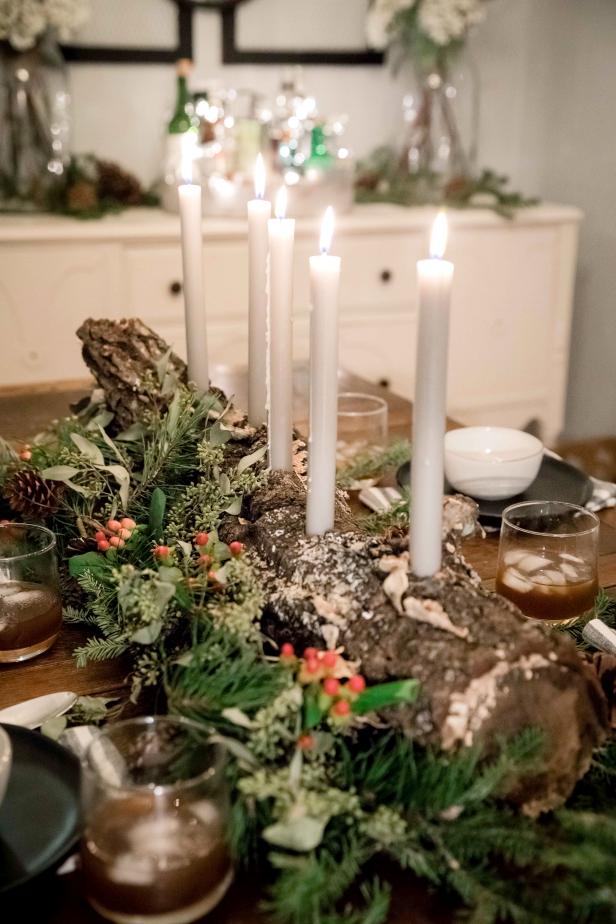
Nothing says holiday cheer quite like the warm glow of a candle. Capture that cozy charm with a show-stopping log centerpiece that will easily transform your holiday table.
Kamron & Ellie Sanders
Materials Needed
- log
- measuring tape
- chalk marker
- drill
- spade bit
- drill bit
- small brad nails
- needle-nose pliers
- taper candles
- hot glue gun + glue (optional)
Choose a Log
When selecting your log, find a piece that not only fits the table well, but also possesses character. The more moss, lichen and mushrooms, the better! And although good color and texture are desirable, it is more important for this project that you find a log with a level side. The log itself will be the base for the centerpiece, so be sure that it will be able to support itself with no possibility of rolling.
Prep Log

Kamron & Ellie Sanders
Remove any loose bark or dirt from the log. Be sure to clean with care and not brush away any bark or eye-catching texture. Once the necessary cleaning is complete, set your log on a flat surface to determine which side will serve as the top.
Mark Holes

Kamron & Ellie Sanders

Kamron & Ellie Sanders
With the log resting on a flat surface, measure the length of your log to determine the number and spacing of your candles. For the centerpiece that we created, the length was approximately 30 inches; therefore, we determined that we would use five taper candles total, separating them approximately five inches apart. Our measurement also accounted for space on each end to ensure the candles would not sit on the edges of the log. Mark where you want to drill with a white chalk marker.
Drill Holes

Kamron & Ellie Sanders

Kamron & Ellie Sanders

Kamron & Ellie Sanders

Kamron & Ellie Sanders
Measure the width of your candles to determine the spade bit size you will need. The spade bit should be slightly wider than the base of the candle so it can easily slide into the hole and sit securely. Drill until the spade bit is completely submerged (approximately one and a half inches). Next, select a drill bit that is roughly the size of the brad nail’s head, and drill a one-inch deep hole in the center of each spade-bit hole.
Secure Candles

Kamron & Ellie Sanders

Kamron & Ellie Sanders

Kamron & Ellie Sanders

Kamron & Ellie Sanders
Place the brad nails head first in the small holes you’ve drilled. Using a pair of needle-nose pliers, firmly push each nail until secure. If you find that the brad nails are not sturdy, add a dot of hot glue before inserting the nail. Slowly slide the candle onto the brad nail and into the hole. Be careful not to force the candle in too quickly as it may force pieces of the candle apart.
Safety Tip: Rather than allowing candles to burn all the way to the log, we recommend replacing candles once they burn down to approximately four inches long.
Display
Kamron & Ellie Sanders
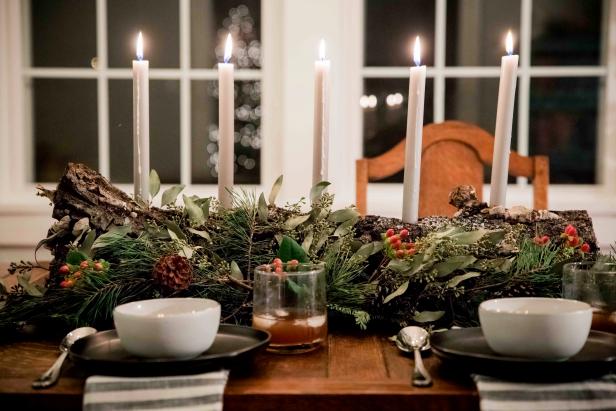
Now to add some polish! Add evergreen boughs and seasonal berries to make your stunning centerpiece really shine. And when you're ready to transition to spring, simply trade out the evergreen boughs for fresh eucalyptus or other seasonal greenery.


